The neighborhood block party was in four hours and I’d completely forgotten I signed up for dessert. Everyone else would be bringing elaborate things—I spotted a three-tiered cake, something that looked like a French patisserie situation, and what I’m pretty sure was a homemade pie with a lattice crust. I had a carton of strawberries that were maybe a day past their prime, some heavy cream I’d bought for coffee, and a package of store-bought sponge cake cups sitting in my pantry. Not exactly competition material.
But here’s the thing about panic-baking: sometimes it forces you to get creative. I mean, I couldn’t exactly show up empty-handed. So I chopped those strawberries, tossed them with a little sugar, whipped the cream until it was soft and pillowy, and layered everything into those little cake cups. I didn’t even have time to think about presentation—I just threw them in a basket and ran out the door.
You know that feeling when you bring something simple to a party and you’re half-embarrassed about it? That was me. Until I saw people reaching for the second cup. And the third. Someone actually asked me for the recipe before the grill was even lit. Honestly, I was more surprised than anyone. The strawberry shortcake cups won the unofficial dessert competition that day, and I didn’t even try. That’s the thing about this recipe—it doesn’t need to try. It’s just good, honest dessert that lets the ingredients do the talking. And I’ve been making them ever since.
Why You’ll Love This Recipe
Let me tell you why these individual strawberry shortcake cups have become my go-to dessert for just about everything. I’ve tested this recipe at family dinners, birthday parties, and even a casual book club meeting, and it never disappoints.
- Quick & Easy: These come together in under 15 minutes. No baking required, no complicated techniques. Perfect for when you need dessert now.
- Simple Ingredients: You probably have everything in your kitchen already. Strawberries, cream, sugar, and something to layer them in. That’s it.
- Perfect for Entertaining: Individual servings mean no slicing, no serving utensils, no mess. Just grab and go. Great for potlucks, barbecues, or dinner parties.
- Crowd-Pleaser: I’ve served these to kids, adults, picky eaters, and dessert snobs. Everyone loves them. The combination of sweet strawberries, fluffy cream, and tender cake is universally appealing.
- Unbelievably Delicious: There’s something about the texture contrast—the juicy berries, the airy cream, the soft cake—that makes these feel way more special than they are.
What sets this recipe apart is the simplicity. I’m not doing anything fancy here. No complicated macerating techniques, no homemade cake from scratch. It’s about letting good ingredients shine and assembling them in a way that feels thoughtful. The strawberries get a quick toss with sugar to draw out their juices, the cream gets whipped to soft peaks, and everything gets layered in a cute little cup. That’s it. But somehow, the combination is magical.
This is the kind of dessert that makes you close your eyes after the first bite. It’s comfort food at its finest—simple, satisfying, and completely stress-free. Perfect for impressing guests without breaking a sweat.
What Ingredients You Will Need
This recipe uses simple, everyday ingredients to create something truly special. No fancy grocery trips required—you likely have most of these in your kitchen already.
- Fresh strawberries (1 pound / 450g), hulled and sliced—look for bright red, fragrant berries for the best flavor. I prefer local strawberries when they’re in season, but supermarket berries work fine too.
- Granulated sugar (3 tablespoons / 36g), divided—some for macerating the strawberries, some for sweetening the cream. You can adjust based on the sweetness of your berries.
- Heavy cream (1 cup / 240ml)—cold from the fridge. This whips up into soft, pillowy clouds. I recommend using heavy cream with at least 36% milk fat for the best texture.
- Vanilla extract (1 teaspoon / 5ml)—adds warmth and depth to the whipped cream. Pure vanilla extract is best, but imitation works in a pinch.
- Sponge cake cups (6 to 8 cups)—store-bought or homemade. You can find these in the bakery section of most grocery stores. They’re the perfect little vessels for this dessert.
- Optional garnish: Mint leaves for a pop of color, or a light dusting of powdered sugar for extra prettiness.
Ingredient Tips:
- For the best texture, make sure your heavy cream is very cold. I like to pop my bowl and beaters in the freezer for 10 minutes before whipping.
- If strawberries aren’t in season, you can use frozen strawberries that have been thawed and drained. Just reduce the sugar slightly since frozen berries tend to be sweeter.
- For a dairy-free version, use full-fat coconut cream instead of heavy cream. Chill the can overnight, scoop out the solid cream, and whip as usual.
Equipment Needed
The beauty of this recipe is that you don’t need much. Here’s what you’ll need:
- Mixing bowls: One medium bowl for the strawberries, one large bowl for the cream. Any size will work.
- Electric mixer: Hand mixer or stand mixer with whisk attachment. You can whip cream by hand with a whisk, but it takes some elbow grease. I’ve done it both ways—the mixer is definitely easier.
- Sharp knife and cutting board: For hulling and slicing the strawberries. A paring knife works great.
- Measuring cups and spoons: For accurate measurements. I know, I know, eyeballing is fine too. But for consistent results, measuring helps.
- Serving cups or glasses: Small dessert cups, mason jars, wine glasses, or even tumblers. Anything that lets you see the layers works beautifully.
If you don’t have an electric mixer, you can whip the cream by hand. It’ll take about 5-8 minutes of vigorous whisking, but it’s totally doable. Think of it as a mini arm workout!
Preparation Method
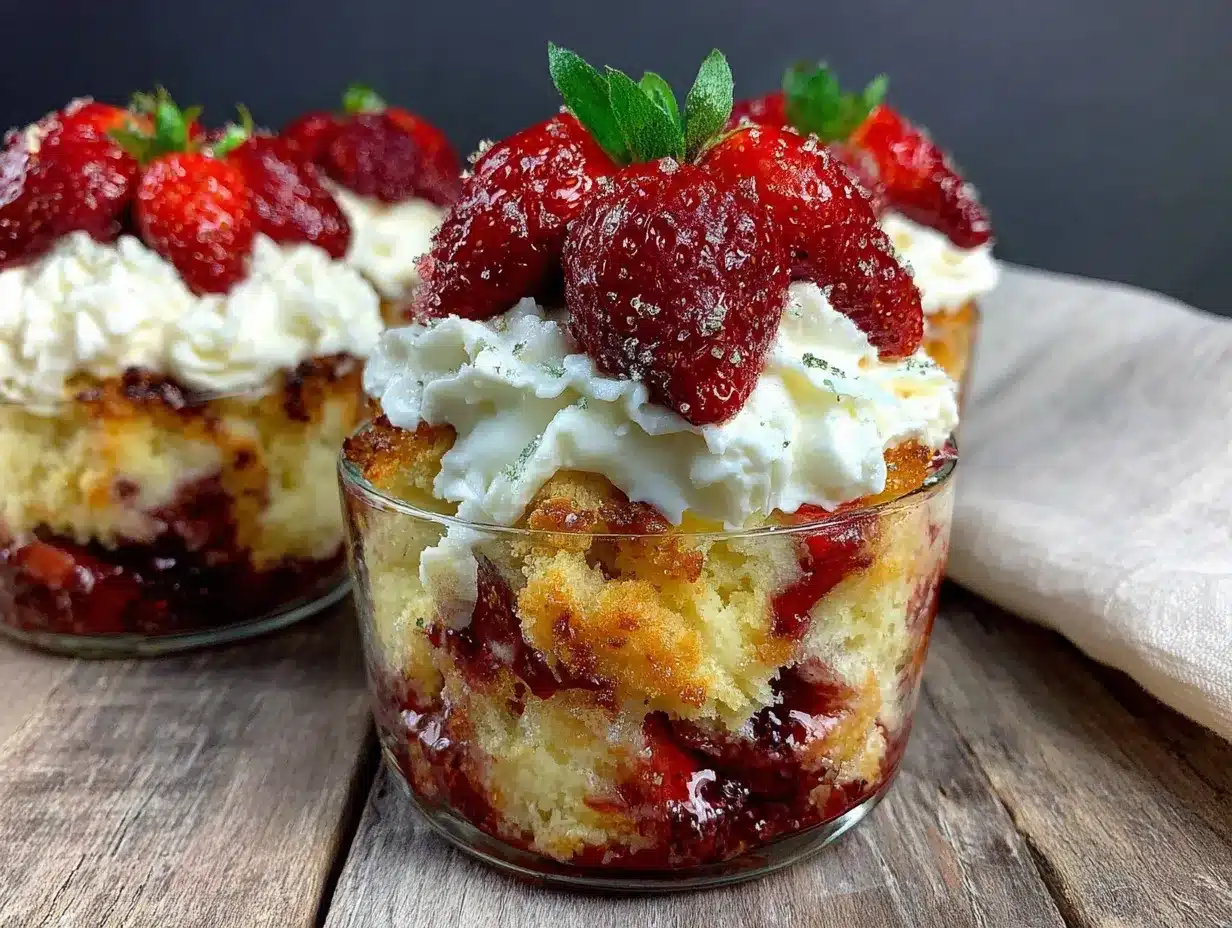
- Prep the strawberries. Wash and dry your strawberries thoroughly. Remove the green tops (this is called hulling) and slice them into thin pieces, about ¼ inch thick. You want them bite-sized but not too small—they should hold their shape a little.
- Macerate the berries. Place the sliced strawberries in a medium bowl. Add 2 tablespoons of granulated sugar and gently toss everything together with a spoon. Let them sit for 10-15 minutes. You’ll notice they start releasing their juices, creating a beautiful syrupy liquid. This is the magic part—the sugar draws out the natural sweetness and creates that gorgeous strawberry sauce.
- Whip the cream. While the strawberries are macerating, pour the cold heavy cream into a large mixing bowl. Add the remaining 1 tablespoon of sugar and the vanilla extract. Using an electric mixer on medium-high speed, whip the cream until soft peaks form. This takes about 2-3 minutes. You’re looking for cream that holds its shape but is still soft and billowy—not stiff or buttery. Pro tip: Stop whipping when the cream looks like soft clouds. If you go too far, you’ll end up with butter!
- Prepare the cake cups. If you’re using store-bought sponge cake cups, you can use them as-is. If you’re feeling fancy, you can toast them lightly in a 350°F oven for 3-4 minutes for a slightly crisper texture. I’ve done this before and it adds a nice little crunch, but it’s totally optional.
- Layer everything together. Now for the fun part. Take your serving cups and start layering. Spoon a small amount of the macerated strawberries (with some of that lovely juice) into the bottom of each cup. Add a spoonful of whipped cream. Crumble or place a piece of sponge cake on top. Repeat the layers: strawberries, cream, cake. End with a final dollop of whipped cream on top.
- Garnish and serve. Top each cup with a strawberry slice or two, a sprig of mint if you have it, and maybe a light dusting of powdered sugar. Serve immediately, or refrigerate for up to 30 minutes before serving.
Sensory Cues: At each step, pay attention to what you see and smell. The strawberries should look glossy and juicy after macerating, with a deep red syrup pooling at the bottom of the bowl. The whipped cream should be thick enough to hold a soft peak when you lift the beater—it should droop slightly but not collapse. The layers in the cup should be visible through the glass, creating a beautiful striped effect.
Cooking Tips & Techniques
I’ve made these strawberry shortcake cups more times than I can count, and I’ve learned a few things along the way. Here are my best tips:
- Don’t overwhip the cream. This is the most common mistake. Once you see soft peaks forming, stop. If you keep going, the cream will turn grainy and eventually become butter. Trust me, I’ve made that mistake during a holiday dinner and had to start over. Not fun.
- Let the strawberries sit. The macerating step is crucial. Don’t skip it or rush it. Those 10-15 minutes allow the sugar to work its magic, creating a natural syrup that makes the dessert so much more flavorful. I once made these in a hurry and skipped the maceration—the result was noticeably less delicious.
- Use cold cream and a cold bowl. Cold cream whips better and holds its shape longer. I like to chill my mixing bowl and beaters in the freezer for 10 minutes before starting. This is especially helpful on warm days.
- Layer strategically. Start with strawberries at the bottom so the juice soaks into the cake above it. End with cream on top for a beautiful presentation. If you’re making these ahead, keep the components separate and assemble just before serving to prevent sogginess.
- Adjust sweetness to taste. If your strawberries are very sweet, reduce the sugar. If they’re a bit tart, add an extra tablespoon. Taste as you go—you’re the boss of your dessert.
Variations & Adaptations
One of the best things about this recipe is how adaptable it is. Here are some variations I’ve tried and loved:
- Berry Mix: Swap half the strawberries for blueberries, raspberries, or sliced peaches. Mixed berry shortcake is absolutely divine. I made this for a summer brunch once and it was a hit.
- Chocolate Version: Add a layer of chocolate pudding or chocolate shavings between the cream and cake. You can also use chocolate sponge cake cups if you can find them. My kids love this version.
- Lemon Twist: Add a teaspoon of lemon zest to the whipped cream and a squeeze of lemon juice to the macerating strawberries. The brightness of lemon pairs beautifully with the sweet berries.
- Dairy-Free Option: Use full-fat coconut cream (chilled and whipped) instead of heavy cream. It whips up beautifully and has a subtle coconut flavor that works well with strawberries.
- Gluten-Free Adaptation: Use gluten-free sponge cake cups or crumbled gluten-free pound cake. You can also use gluten-free vanilla wafers or shortbread cookies as a substitute.
- Boozy Adult Version: Add a splash of Grand Marnier or limoncello to the macerating strawberries. The alcohol adds a lovely depth of flavor. Just a tablespoon or two will do.
Serving & Storage Suggestions
These strawberry shortcake cups are best served immediately after assembling, while the cake is still slightly firm and the cream is fluffy. Serve them chilled or at room temperature—both are delicious.
Presentation Ideas:
- Serve in clear glass cups or mason jars to show off the beautiful layers.
- Garnish with a whole strawberry perched on top of the cream.
- Add a sprig of fresh mint for a pop of green color.
- Dust with powdered sugar just before serving for a snowy effect.
Storage:
- If you have leftovers (unlikely!), cover each cup with plastic wrap and refrigerate for up to 24 hours. The cake will soften slightly, but it’s still delicious.
- For best results, store the components separately: keep the macerated strawberries in one container, the whipped cream in another, and the cake cups in a sealed bag. Assemble just before serving.
- I don’t recommend freezing assembled cups—the texture won’t be the same. However, you can freeze the whipped cream (in a sealed container) for up to a month and thaw it in the refrigerator before using.
Flavor Development: The strawberries continue to release their juices over time, so if you assemble the cups a few hours ahead, the cake will be wonderfully soaked with strawberry syrup. Some people actually prefer it this way! Just don’t wait more than 6 hours, or the cake might get too mushy.
Nutritional Information & Benefits
Per serving (based on 6 servings, using standard ingredients):
- Calories: Approximately 280-320
- Fat: 18g (mostly from the heavy cream)
- Carbohydrates: 32g
- Sugar: 22g (naturally occurring and added)
- Protein: 3g
- Fiber: 2g
Health Benefits:
- Strawberries are packed with vitamin C and antioxidants. They’re great for your immune system and skin health.
- Heavy cream provides calcium and vitamin A, though it’s best enjoyed in moderation.
- This dessert is naturally vegetarian and can be made gluten-free and dairy-free with simple substitutions.
Dietary Considerations:
- Contains dairy (heavy cream) and gluten (sponge cake cups).
- Can be made dairy-free using coconut cream.
- Can be made gluten-free using gluten-free cake cups or cookies.
- Not suitable for vegan diets unless you use a plant-based cream alternative.
FAQs
Can I make these strawberry shortcake cups ahead of time?
Yes, but with a caveat. You can assemble them up to 2-3 hours ahead and refrigerate. The cake will absorb some of the strawberry juice, which many people love. For the freshest texture, I recommend assembling no more than 30 minutes before serving.
Can I use frozen strawberries?
Absolutely. Thaw them first and drain any excess liquid. You might need to reduce the sugar slightly since frozen berries are often sweeter than fresh. The texture will be a bit softer, but the flavor is still fantastic.
What can I use instead of sponge cake cups?
So many options! Pound cake cubes, angel food cake pieces, vanilla wafers, shortbread cookies, graham crackers, or even crumbled vanilla cupcakes all work beautifully. Use whatever you have on hand.
How do I make whipped cream without a mixer?
You can whip cream by hand using a whisk and a large bowl. Make sure the cream is very cold. Whisk vigorously in a circular motion for about 5-8 minutes until soft peaks form. It’s a great arm workout! You can also use a jar with a tight lid and shake it—it takes about 3-4 minutes of shaking.
Can I use store-bought whipped topping instead?
You can, but I really recommend making fresh whipped cream. The flavor and texture are so much better. Store-bought whipped topping tends to be sweeter and has a slightly artificial taste. Fresh whipped cream takes just 2 minutes and makes a huge difference.
Conclusion
These easy individual strawberry shortcake cups have become my secret weapon for entertaining. They’re proof that you don’t need complicated techniques or fancy ingredients to create something truly memorable. Sometimes the simplest things are the most impressive—and this recipe is living proof.
I love that this dessert is adaptable to any occasion, any season, and any dietary need. You can dress it up for a dinner party or keep it casual for a backyard barbecue. It works for kids’ parties, holiday gatherings, or just a Tuesday night treat. And honestly? It never gets old.
I encourage you to make these your own. Try different berries, add a splash of your favorite liqueur, or experiment with different cake bases. The possibilities are endless, and that’s what makes cooking so fun.
Have you tried these strawberry shortcake cups? I’d love to hear how they turned out! Drop a comment below and let me know what variations you tried. And if you loved them, share this recipe with a friend who needs a little dessert inspiration. Happy cooking, friends!
Pin This Recipe!
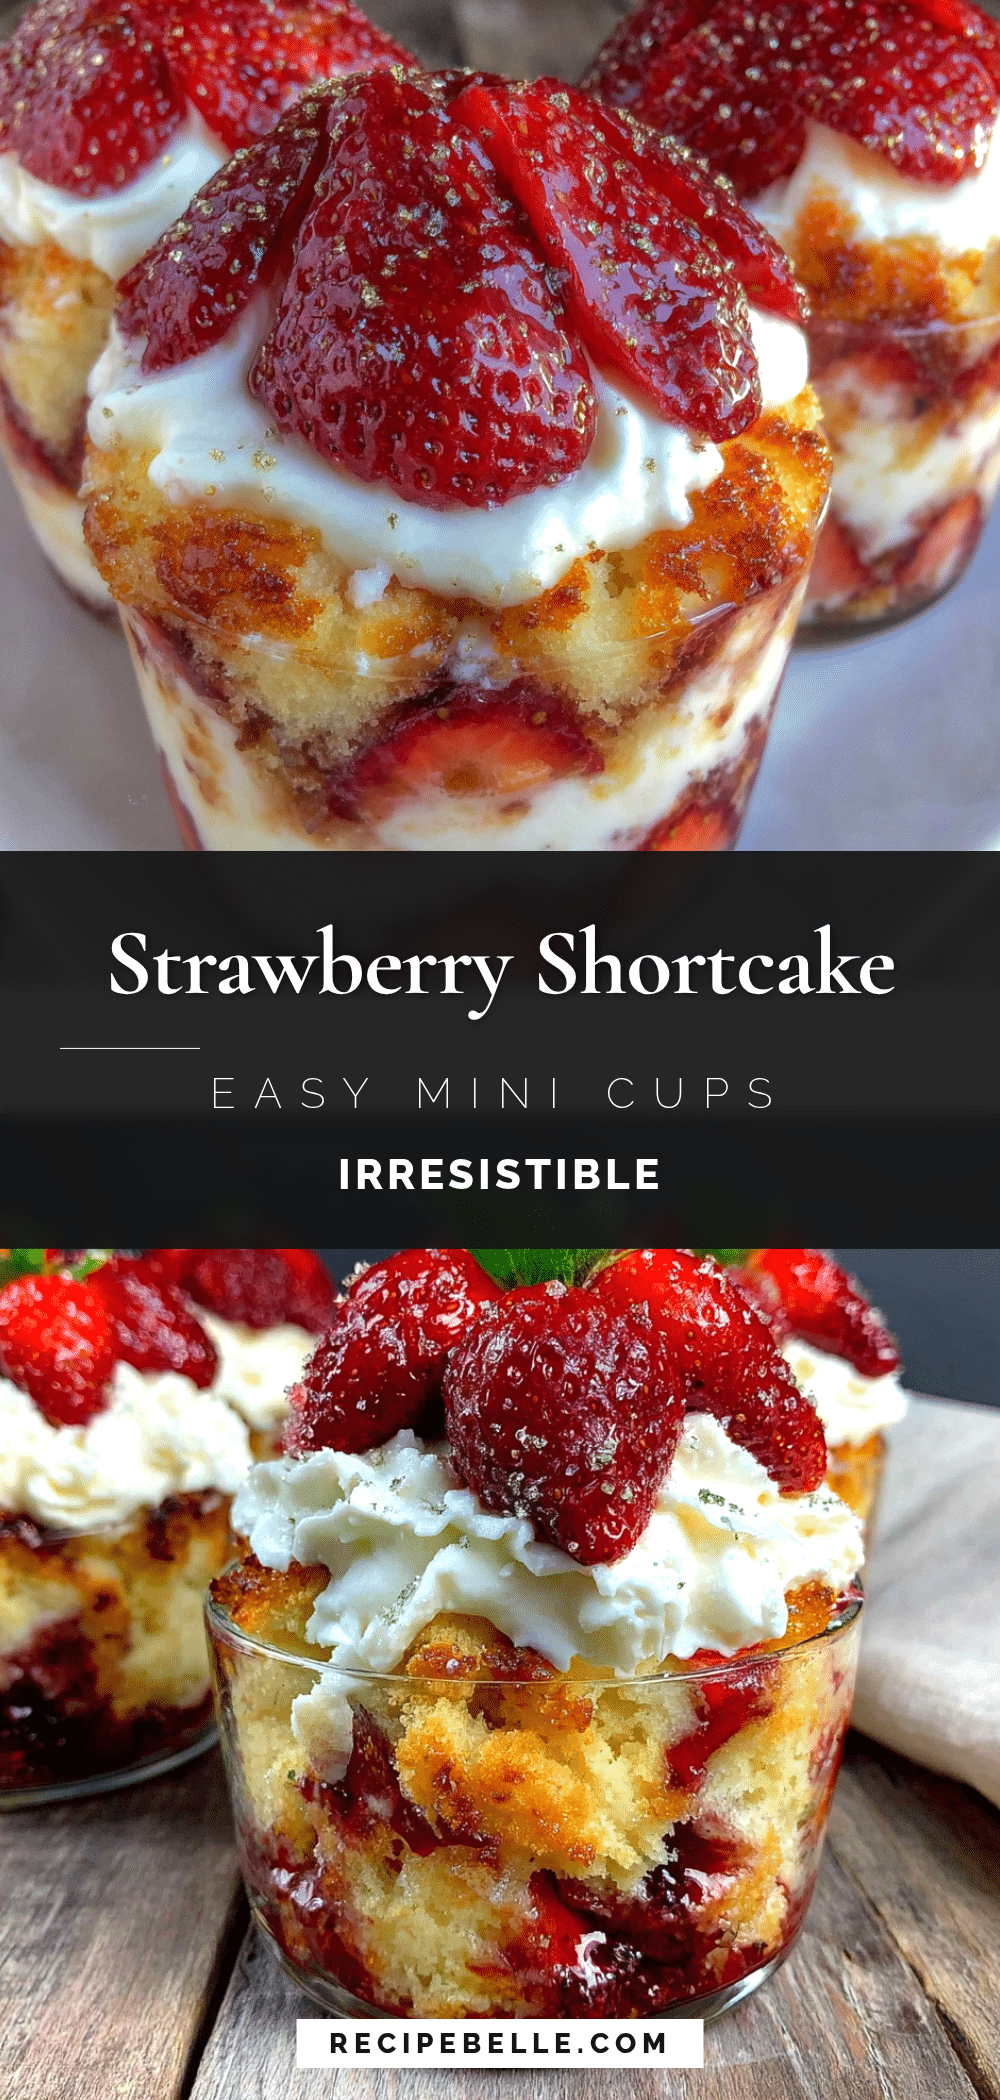
Easy Individual Strawberry Shortcake Cups
These quick and easy individual strawberry shortcake cups come together in under 15 minutes with simple ingredients. Perfect for entertaining, they feature layers of macerated strawberries, fluffy whipped cream, and tender sponge cake cups.
- Prep Time: 15 minutes
- Cook Time: 0 minutes
- Total Time: 15 minutes
- Yield: 6 servings 1x
- Category: Dessert
- Cuisine: American
Ingredients
- 1 pound (450g) fresh strawberries, hulled and sliced
- 3 tablespoons (36g) granulated sugar, divided
- 1 cup (240ml) heavy cream, cold
- 1 teaspoon (5ml) vanilla extract
- 6 to 8 sponge cake cups (store-bought or homemade)
- Optional: mint leaves for garnish, powdered sugar for dusting
Instructions
- Wash and dry strawberries. Hull and slice into thin pieces (about ¼ inch thick).
- Place sliced strawberries in a medium bowl. Add 2 tablespoons of granulated sugar and gently toss. Let sit for 10-15 minutes to macerate.
- While strawberries macerate, pour cold heavy cream into a large mixing bowl. Add remaining 1 tablespoon sugar and vanilla extract.
- Using an electric mixer on medium-high speed, whip cream until soft peaks form (about 2-3 minutes).
- If desired, lightly toast sponge cake cups in a 350°F oven for 3-4 minutes for a crisper texture.
- Layer in serving cups: spoon macerated strawberries (with juice) into bottom, add a spoonful of whipped cream, crumble or place a piece of sponge cake on top. Repeat layers, ending with a dollop of whipped cream.
- Garnish with a strawberry slice, mint sprig, or powdered sugar. Serve immediately or refrigerate up to 30 minutes.
Notes
For best results, use cold heavy cream and a chilled bowl. Do not overwhip cream—stop at soft peaks. Macerating strawberries is crucial for flavor; do not skip. Assemble just before serving for freshest texture. Can be made dairy-free with coconut cream and gluten-free with gluten-free cake cups.
Nutrition
- Serving Size: 1 cup
- Calories: 300
- Sugar: 22
- Sodium: 50
- Fat: 18
- Saturated Fat: 11
- Carbohydrates: 32
- Fiber: 2
- Protein: 3
Keywords: strawberry shortcake, individual desserts, no-bake dessert, easy dessert, summer dessert, strawberry recipe



