I was supposed to be making a fancy Halloween charcuterie board. You know, the kind with the creepy cheese fingers and the eyeball olives that everyone pins but nobody actually eats. I had the crescent rolls thawing, the prosciutto ready to be rolled into little roses, and a plan that was way too ambitious for a Tuesday night. Then my kid walked in from school, took one look at my spread of ingredients, and said, “Where are the hot dogs?” I mean, honestly. He wasn’t wrong. Halloween for kids is about one thing, and it isn’t prosciutto roses.
So I abandoned my Pinterest-worthy board, grabbed a package of hot dogs from the fridge, and started wrapping them in strips of that thawed crescent dough. The first one looked like a lumpy, sad little cocoon. The second one I wrapped too tight, and the dough ripped. But by the third one, something clicked. I left a little gap for the “face,” added two tiny mustard dots for eyes, and suddenly—there it was. A mummy. A ridiculous, delicious, perfect-for-Halloween mummy. The kids went absolutely wild. I mean, they were running around the kitchen holding these things like trophies.
That night, I made three batches. The first batch disappeared before the second one was even in the oven. And here’s the thing—these Easy Mummy Hot Dog Bites are not fancy. They are not complicated. They are not going to win any culinary awards, and that is exactly why they are perfect. They are the kind of recipe that saves your Halloween when the store-bought costume doesn’t fit and the pumpkin carving turns into a disaster. Maybe you’ve been there, standing in your kitchen at 5 PM with a hungry crowd and no plan. These little guys are the answer.
Why You’ll Love This Recipe
Let me tell you why these Easy Mummy Hot Dog Bites have become my non-negotiable Halloween tradition. I have tested this recipe more times than I care to admit—through burnt edges, undercooked dough, and one memorable incident where I forgot the mustard dots entirely and served a batch of blind mummies. Each failure taught me something, and this version is the result of all that trial and error.
- Quick & Easy: From fridge to table in under 20 minutes. No marinating, no resting, no complicated techniques. This is the recipe you make when you have exactly zero time to spare.
- Simple Ingredients: You need four things. Hot dogs, crescent roll dough, mustard, and maybe some ketchup for dipping. That is it. No specialty grocery store trips required.
- Perfect for Halloween Parties: These are the first thing to disappear at every gathering. Kids grab them by the handful, and adults pretend they are just eating one while sneaking three more.
- Crowd-Pleaser: I have served these to picky toddlers, skeptical teenagers, and grown adults who swore they were “too old for fun food.” Every single person came back for seconds.
- Unbelievably Fun: There is something deeply satisfying about looking at a tray of mummy hot dogs. It makes you feel like a Halloween hero, even if you just threw them together in a panic.
What makes this recipe different from every other mummy dog out there? It is the wrapping technique. Most recipes tell you to wrap the dough around the hot dog in a single strip, which leaves you with a sad, uneven mummy. My method uses thinner strips and a specific overlapping pattern that gives you a perfect, uniform wrap every time. No gaps, no doughy lumps, just a crisp, golden mummy that looks like it took way more effort than it actually did.
This is the kind of recipe that makes you close your eyes after the first bite. Not because it is gourmet—it is a hot dog wrapped in dough, let’s be real. But because it tastes like childhood. Like Halloween nights and paper plates and the kind of simple joy that we all need a little more of.
What Ingredients You Will Need
This recipe uses the simplest ingredients to create something that feels way more special than it has any right to be. Here is everything you need, along with a few notes from my many, many trials.
For the Mummy Hot Dog Bites
- 1 package (8 count) hot dogs – I prefer beef hot dogs for flavor, but any variety works. Turkey, chicken, or plant-based options all perform well here. Just make sure they are standard size, not the jumbo ones. Jumbo hot dogs create mummies that look more like King Kong than a cute little bandaged guy. (Personal note: I have had the best results with Hebrew National or Oscar Mayer—they hold their shape without splitting.)
- 1 can (8 ounces) refrigerated crescent roll dough – This is your mummy wrapping. Pillsbury is my go-to because it is consistent and easy to work with. You can also use puff pastry sheets for a flakier texture, but crescent dough gives that soft, slightly buttery bite that kids love. (Tip: Look for the sheets version if you can find it—it saves you from having to press the perforations together.)
- Mustard for the eyes – Yellow mustard is the classic choice because it gives you those bright, creepy yellow eyes. I have tried Dijon, and it works fine, but the color is less dramatic. For a milder flavor, use mayonnaise or even cream cheese. For a spooky red-eyed version, use ketchup or sriracha. (My favorite hack: Use a toothpick to apply the mustard dots. It gives you way more control than squeezing directly from the bottle.)
- Ketchup or marinara sauce for dipping – This is optional but highly recommended. Kids love ketchup, and adults appreciate a little marinara. I have also served these with ranch dressing and honey mustard, both of which were hits.
Ingredient Selection Tips
When it comes to hot dogs, look for ones that are uniform in size. This helps with even cooking and consistent wrapping. If you are using a plant-based hot dog, check the cooking instructions—some brands require a different temperature or cook time. I learned this the hard way when I served a batch of vegan mummies that were somehow both burnt and undercooked. Not my finest moment.
For the crescent dough, make sure it is fully thawed but still cold. If the dough gets too warm, it becomes sticky and impossible to cut into clean strips. Work quickly, and if the dough starts to feel tacky, pop it back in the fridge for five minutes.
Equipment Needed
You do not need much for this recipe, which is part of its charm. Here is what you will need:
- Baking sheet – A standard half-sheet pan works perfectly. Line it with parchment paper for easy cleanup. I have made these on foil-lined sheets too, and they work fine, but the bottoms get slightly darker.
- Sharp knife or pizza cutter – You need something sharp to cut the crescent dough into strips. A pizza cutter is my preferred tool because it glides through the dough without dragging. A sharp chef’s knife works too. Do not use a dull knife—it will squish the dough and ruin the layers.
- Toothpicks – These are optional but helpful for applying the mustard eyes. You can also use the tip of a knife or a squeeze bottle if you have steady hands.
- Small bowl for dipping – Not strictly necessary, but serving these with a little dish of ketchup or marinara makes them feel more like a real appetizer and less like a snack you threw together in a panic.
- Cooling rack – If you want the bottoms to stay crispy, transfer the baked mummies to a cooling rack as soon as they come out of the oven. Leaving them on the hot baking sheet can make the bottoms soggy.
Budget-Friendly Options
If you do not have a pizza cutter, a butter knife works in a pinch. If you do not have parchment paper, you can grease the baking sheet lightly with cooking spray. And if you do not have a cooling rack, just transfer the mummies to a plate—they might not be quite as crispy, but they will still be delicious.
Preparation Method
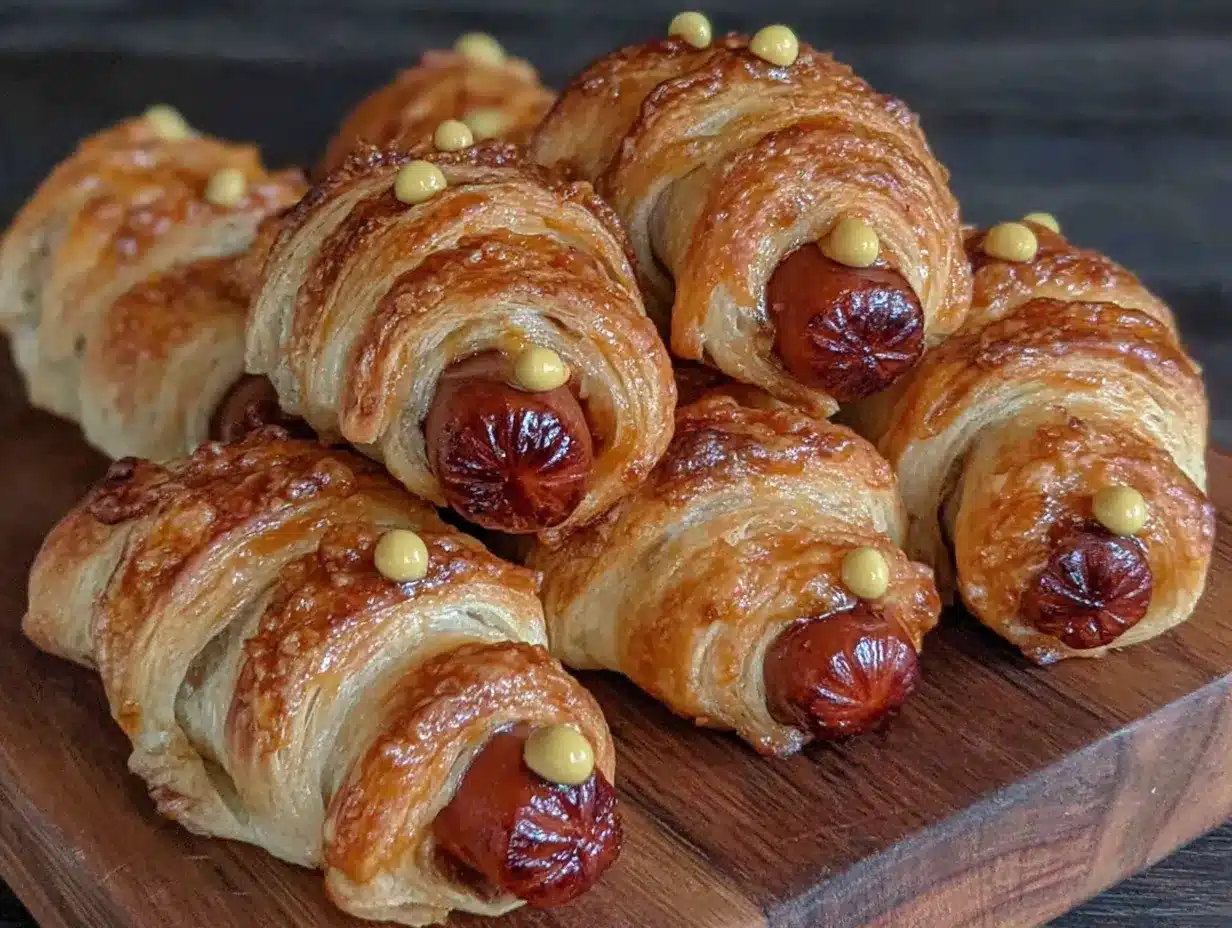
Alright, let us get to the fun part. Here is exactly how to make these Easy Mummy Hot Dog Bites, step by step. I have included every little detail I have learned from making these dozens of times, so you can skip the mistakes and go straight to the victory lap.
- Preheat your oven to 375°F (190°C). Line a baking sheet with parchment paper and set it aside. Getting the oven hot before you start is key—you want these to bake immediately after assembly, not sit around while the dough gets warm and sticky.
- Unroll the crescent dough onto a clean cutting board. If you are using the perforated crescent roll sheets, press the seams together gently with your fingers to create one solid sheet of dough. If you are using the sheet version, you are already ahead of the game. (Personal tip: Lightly dust your cutting board with flour to prevent sticking. I forgot to do this once and spent ten minutes peeling dough off the board.)
- Cut the dough into thin strips. Using a sharp knife or pizza cutter, slice the dough lengthwise into strips that are about 1/4 inch wide. You should get 8 to 10 strips per sheet. Do not worry if they are not perfectly uniform—mummies are supposed to look a little messy. (Sensory cue: The dough should feel cool and slightly firm. If it feels warm or sticky, refrigerate it for 5 minutes before cutting.)
- Prepare the hot dogs. If your hot dogs are longer than the dough strips, cut them in half crosswise. You want each piece to be about 3 to 4 inches long. Pat the hot dogs dry with a paper towel—this helps the dough stick better and prevents slipping during wrapping. (I learned this after watching a mummy unwrap itself in the oven. Tragic.)
- Wrap the mummies. Take one strip of dough and wrap it around a hot dog piece, starting at one end and working your way to the other. Leave a small gap in the middle for the face—about 1/2 inch of exposed hot dog. Overlap the dough slightly as you wrap to create that bandaged mummy look. Press the end of the dough gently to seal it. Repeat with the remaining hot dogs and dough strips. (Troubleshooting: If the dough is too long, trim the excess. If it is too short, just start a new strip where the last one ended. The overlap will hide the seam.)
- Place the wrapped mummies on the prepared baking sheet. Arrange them about 1 inch apart. They will puff up slightly during baking, so give them some breathing room. (Warning: Do not crowd the pan. I made this mistake once and ended up with mummies that were fused together like some kind of Halloween horror show.)
- Bake for 10 to 12 minutes, or until the dough is golden brown and the hot dogs are heated through. Keep an eye on them during the last few minutes. You want the dough to be golden, not dark brown. (Sensory cue: Your kitchen will start to smell like buttery crescent rolls and savory hot dogs. This is the smell of victory.)
- Remove from the oven and let cool for 2 minutes. This is important—if you add the mustard eyes while the mummies are too hot, the mustard will melt and run. Nobody wants a crying mummy. (Personal anecdote: The first time I made these, I was so excited that I added the eyes immediately. They looked like sad, blurry little ghosts. Learn from my impatience.)
- Add the mustard eyes. Dip a toothpick into yellow mustard and dot two small eyes onto the exposed hot dog section. You can also use a squeeze bottle if you have steady hands. For a spookier look, make the eyes slightly uneven or add a tiny dot for a pupil. (Pro tip: If you mess up, just wipe the mustard off with a damp paper towel and try again. The hot dog will be slightly stained, but nobody will notice after the first bite.)
- Serve immediately with ketchup or marinara sauce for dipping. These are best enjoyed warm, right out of the oven. If you are serving them at a party, keep them warm in a low oven (200°F) for up to 30 minutes.
Cooking Tips & Techniques
Over the years, I have made every mistake you can imagine with these mummy hot dogs. Here is what I have learned so you do not have to repeat my failures.
The Dough Temperature Trap
Room temperature dough is the enemy of clean strips. If your dough gets too warm, it becomes sticky and stretches weirdly. Keep the dough refrigerated until you are ready to cut it, and work quickly. If the dough starts to fight you, put it back in the fridge for five minutes. Trust me on this—I once wrestled with a warm sheet of dough for ten minutes before giving up and making hot dog tacos instead. They were fine, but they were not mummies.
The Tight Wrap Mistake
Do not wrap the dough too tightly around the hot dog. The dough expands as it bakes, and if it is wrapped too tight, it will either tear or squeeze the hot dog into an unrecognizable blob. You want a snug but gentle wrap, like a hug from a friend, not a boa constrictor.
The Even Baking Secret
If your oven has hot spots (and most do), rotate the baking sheet halfway through the cooking time. This ensures all the mummies bake evenly. I learned this after serving a tray where the ones on the left were perfectly golden and the ones on the right were pale and doughy. It was a split-personality mummy situation that nobody enjoyed.
The Mustard Timing Trick
Add the mustard eyes after baking, not before. If you add them before, the mustard will bake into weird brown spots that look nothing like eyes. You want bright, yellow eyes that pop against the golden dough. Patience is key here—let the mummies cool for those two minutes, then add the eyes.
The Batch Cooking Strategy
These mummies disappear fast, so I always make at least two batches. You can prep the wrapped mummies ahead of time and keep them in the fridge for up to 4 hours before baking. Just cover them loosely with plastic wrap and pop them in the oven when you are ready. This is a lifesaver for parties.
Variations & Adaptations
One of the best things about this recipe is how easy it is to adapt. Here are some variations I have tried and loved.
Spicy Mummy Bites
Brush the hot dogs with sriracha or chili sauce before wrapping them in dough. The heat cuts through the buttery crescent roll perfectly. I made these for a Halloween party last year, and they were gone before the regular ones. For the eyes, use a mix of mustard and sriracha for a fiery orange glow.
Cheesy Mummies
Cut a slit lengthwise in each hot dog and stuff it with a strip of cheddar or mozzarella cheese before wrapping. The cheese melts into a gooey center that is absolutely irresistible. Just be careful—the cheese gets extremely hot. Let them cool for an extra minute before serving.
Vegetarian Mummies
Use plant-based hot dogs or even cheese sticks for a vegetarian version. The cheese sticks create a stretchy, melty center that is honestly better than the original. I have also used vegan sausages with great results. Just adjust the baking time if the plant-based hot dogs are thinner or thicker than standard ones.
Gluten-Free Mummies
Use gluten-free crescent dough or puff pastry. The texture will be slightly different—a bit crumblier—but the taste is still fantastic. I have also used gluten-free biscuit dough cut into strips, which worked surprisingly well.
Breakfast Mummies
Swap the hot dogs for breakfast sausage links and serve them with maple syrup for dipping. This is my secret weapon for Halloween morning before school. The kids go crazy for them, and they are way more fun than a bowl of cereal.
Serving & Storage Suggestions
These mummy hot dog bites are best served warm, right after the mustard eyes are added. The contrast between the warm, flaky dough and the cool yellow mustard is part of the magic.
Serving Ideas
Arrange the mummies on a platter with a bowl of ketchup or marinara sauce in the center. For a spooky presentation, arrange them in a circle around a small pumpkin or a bowl of “witches’ brew” punch. I once served them on a black platter with fake spider webs underneath, and the kids thought it was the coolest thing ever.
What to Serve With Them
These pair beautifully with other Halloween snacks like spooky Halloween popcorn mix for a salty-sweet combo, or a bowl of creamy pumpkin soup for a more substantial meal. For a drink, apple cider or a Halloween-themed punch is perfect.
Storage Instructions
Store leftover mummies in an airtight container in the refrigerator for up to 3 days. The dough will soften slightly, but they are still delicious. To reheat, place them on a baking sheet in a 350°F oven for 5 to 7 minutes, or until warmed through. The microwave works in a pinch, but the dough will be soft rather than crispy.
Freezer Instructions
You can freeze the baked mummies (without the mustard eyes) for up to 2 months. Place them on a baking sheet in a single layer and freeze until solid, then transfer to a freezer bag. To serve, reheat directly from frozen in a 375°F oven for 10 to 12 minutes, then add the mustard eyes. The texture is almost as good as fresh.
Flavor Development Note
Honestly, these are best fresh. The dough loses its crispness after a day, and the hot dog texture changes slightly. But if you have leftovers, they are still a solid snack. I have been known to eat them cold straight from the fridge at midnight, and I am not ashamed.
Nutritional Information & Benefits
Let us be real—these are not health food. They are fun Halloween snacks that happen to be made with actual food. But here is the breakdown if you are curious.
Estimated Nutritional Values (per mummy bite)
| Nutrient | Amount |
|---|---|
| Calories | 180 |
| Total Fat | 12g |
| Saturated Fat | 4g |
| Carbohydrates | 14g |
| Protein | 6g |
| Sodium | 520mg |
Health Highlights
Hot dogs are a source of protein, and crescent dough provides carbohydrates for quick energy. If you use turkey or chicken hot dogs, you can reduce the fat content significantly. For a lower-sodium option, look for reduced-sodium hot dogs.
Dietary Considerations
This recipe is not gluten-free unless you use gluten-free dough. It contains dairy from the crescent roll dough (butter), but you can find dairy-free crescent dough options. For a lower-carb version, use cheese sticks wrapped in deli meat instead of dough. It is a different recipe entirely, but it scratches the same itch.
My Wellness Perspective
Look, I am not here to tell you that hot dogs are a superfood. They are not. But Halloween is one night a year, and these mummy bites bring so much joy that I think they are worth the indulgence. Pair them with some veggies or fruit on the side, and you have a balanced enough snack. Life is about balance, right?
Conclusion
These Easy Mummy Hot Dog Bites have become a staple in my Halloween rotation for a reason. They are simple enough to throw together on a busy weeknight, fun enough to impress at a party, and delicious enough that nobody cares how easy they are. Every time I make them, I remember that night I abandoned my fancy charcuterie board and discovered something way better.
Here is what I want you to take away from this: Do not overthink Halloween food. It does not have to be complicated or Instagram-perfect. It just has to be fun. These mummy bites are fun. They are the kind of recipe that makes kids laugh and adults smile and everyone forgets about the stress of costumes and decorations for a few minutes.
I would love to hear how these turn out for you. Did you add cheese? Did you make them spicy? Did your kids try to name every mummy before eating it? Drop a comment below and let me know. And if you have a favorite Halloween recipe, share that too—I am always looking for new ideas to add to my collection.
Happy Halloween, friends. Go make some mummies.
Frequently Asked Questions
Can I make these mummy hot dog bites ahead of time?
Yes! You can wrap the hot dogs in dough up to 4 hours ahead and keep them in the fridge. Just bake them right before serving for the best texture. If you need to prep further ahead, bake them first, then reheat in a 375°F oven for 5 to 7 minutes.
What can I use instead of crescent roll dough?
Puff pastry works beautifully for a flakier texture. You can also use refrigerated biscuit dough, rolled out thin and cut into strips. For a low-carb option, use thin slices of deli meat like turkey or ham to wrap the hot dogs.
How do I keep the dough from unwrapping during baking?
Make sure you press the end of the dough strip gently to seal it. Placing the seam-side down on the baking sheet also helps. If you are still having trouble, you can secure the end with a toothpick (just remember to remove it before serving).
Can I use a different type of sausage?
Absolutely. Smoked sausage, kielbasa, or even breakfast sausage links all work great. Just adjust the baking time if the sausages are thicker or thinner than standard hot dogs. Mini sausages or cocktail wieners are perfect for bite-sized mummies.
What dipping sauces go best with these mummy bites?
Ketchup is the classic choice, but marinara sauce, ranch dressing, honey mustard, or even cheese sauce are all fantastic. For a spooky twist, serve them with “blood” (marinara) or “green slime” (guacamole or ranch with green food coloring).
Pin This Recipe!
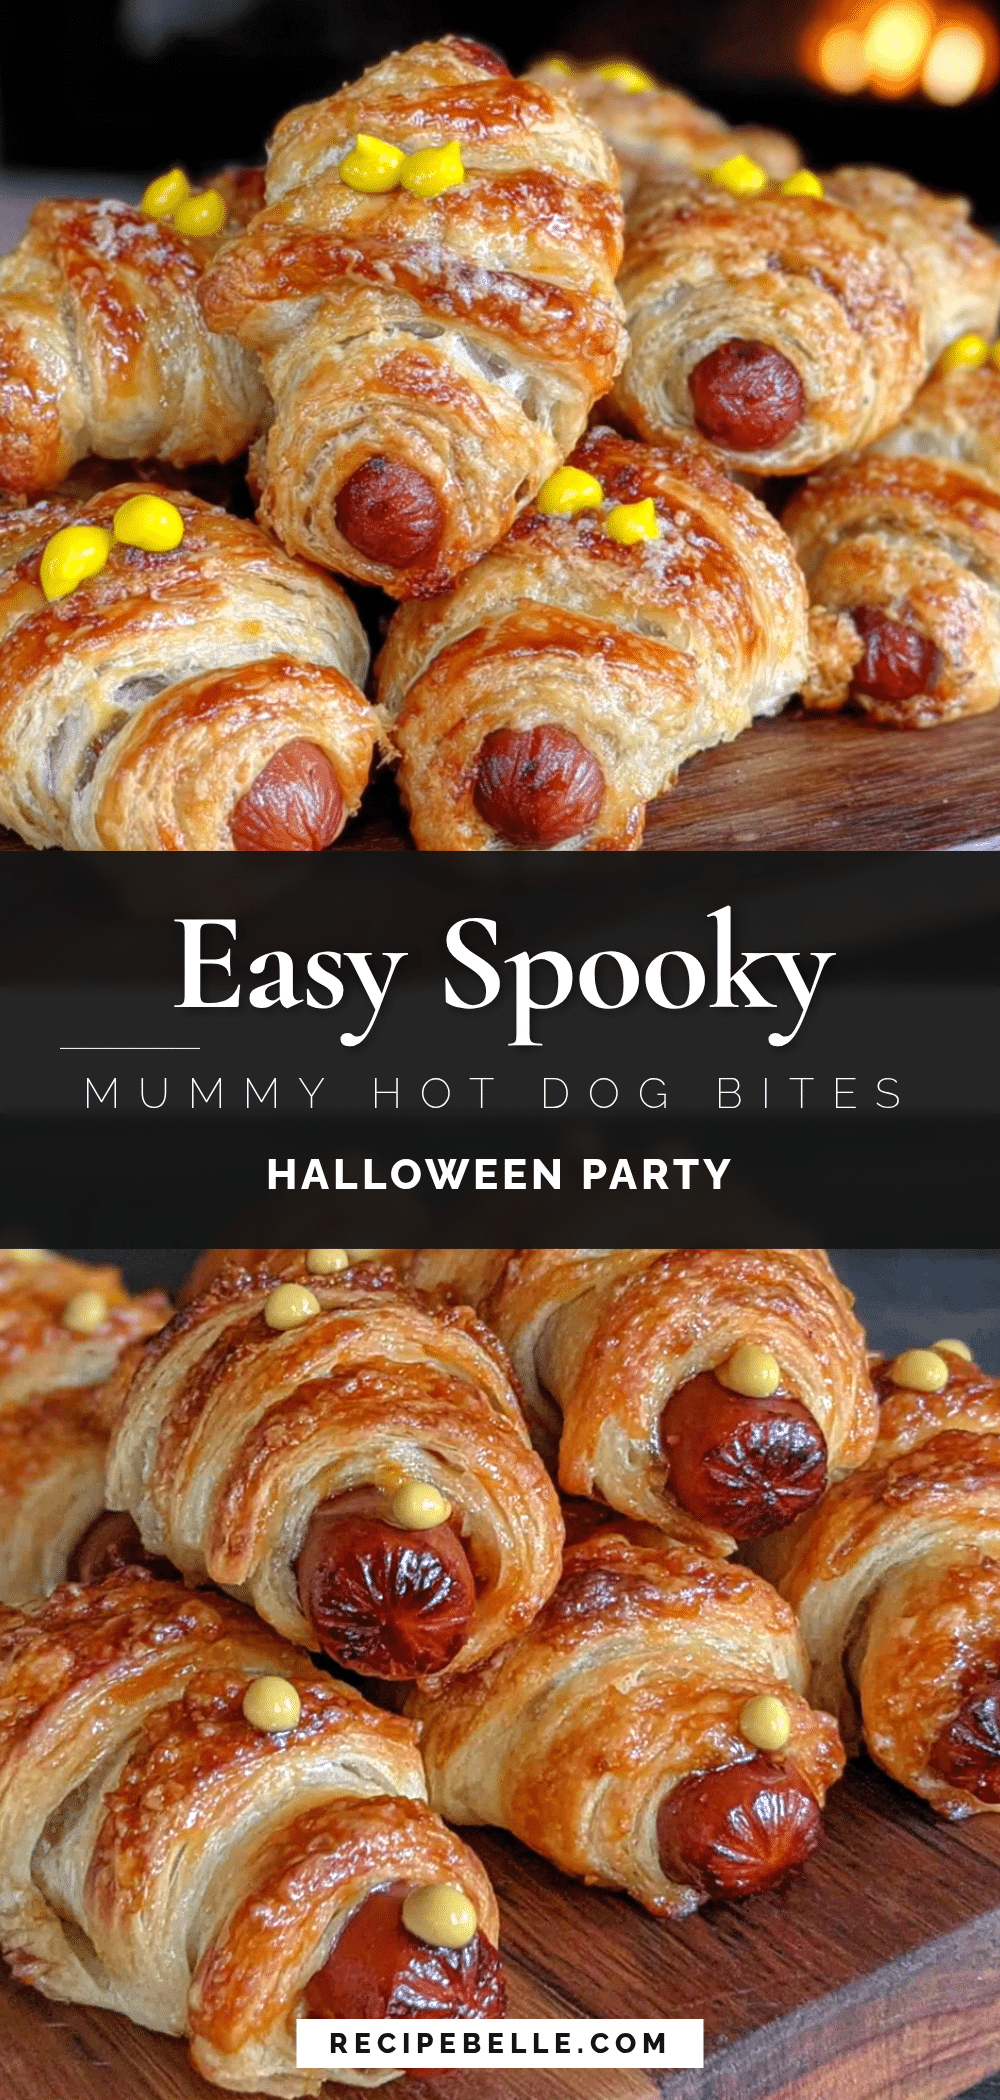
Easy Mummy Hot Dog Bites: Perfect Halloween Appetizer

These Easy Mummy Hot Dog Bites are a quick, fun, and delicious Halloween appetizer made with just hot dogs, crescent roll dough, and mustard. Perfect for parties, they come together in under 20 minutes and are guaranteed to be a crowd-pleaser for kids and adults alike.
- Prep Time: 10 minutes
- Cook Time: 12 minutes
- Total Time: 22 minutes
- Yield: 8 servings 1x
- Category: Appetizer
- Cuisine: American
Ingredients
- 1 package (8 count) hot dogs (beef, turkey, chicken, or plant-based)
- 1 can (8 ounces) refrigerated crescent roll dough
- Yellow mustard (for eyes)
- Ketchup or marinara sauce (for dipping, optional)
Instructions
- Preheat your oven to 375°F (190°C). Line a baking sheet with parchment paper.
- Unroll the crescent dough onto a clean cutting board. If using perforated sheets, press the seams together to create a solid sheet.
- Using a sharp knife or pizza cutter, cut the dough lengthwise into thin strips about 1/4 inch wide (8 to 10 strips per sheet).
- If hot dogs are longer than the dough strips, cut them in half crosswise to about 3 to 4 inches long. Pat dry with a paper towel.
- Wrap one strip of dough around a hot dog piece, starting at one end and leaving a small gap (about 1/2 inch) in the middle for the face. Overlap the dough slightly as you wrap. Press the end to seal. Repeat with remaining hot dogs and dough.
- Place wrapped mummies on the prepared baking sheet about 1 inch apart.
- Bake for 10 to 12 minutes, until the dough is golden brown and hot dogs are heated through.
- Remove from oven and let cool for 2 minutes.
- Dip a toothpick into yellow mustard and dot two small eyes onto the exposed hot dog section.
- Serve immediately with ketchup or marinara sauce for dipping.
Notes
For best results, keep dough cold until ready to use. Do not wrap dough too tightly. Add mustard eyes after baking to prevent melting. Can be prepped up to 4 hours ahead and refrigerated before baking. For a spicier version, brush hot dogs with sriracha before wrapping. For cheesy mummies, stuff hot dogs with cheese before wrapping.
Nutrition
- Serving Size: 1 mummy bite
- Calories: 180
- Sugar: 2
- Sodium: 520
- Fat: 12
- Saturated Fat: 4
- Carbohydrates: 14
- Protein: 6
Keywords: Halloween appetizer, mummy hot dogs, easy Halloween recipe, kid-friendly snack, hot dog bites, crescent roll recipe



