It was 10:47 PM on a rainy Wednesday in late October, and I had a ridiculous, almost desperate craving for pumpkin cheesecake. The kind of craving that makes you rummage through your pantry like you’re searching for buried treasure. I didn’t have a springform pan for a full cheesecake. I didn’t have the patience for a water bath or the hours of chilling time. But I had a box of graham crackers, a block of cream cheese, and a can of pumpkin puree I’d bought on a whim. And then the idea arrived, fully formed, like a gift from the dessert gods: what if I made it into bars?
Honestly, I was skeptical at first. Swirling pumpkin and cheesecake together feels fancy, like something you’d order at a café. But I wanted it to be easy, something I could pull off in my pajamas without any fuss. So I grabbed a square baking dish, lined it with parchment, and started experimenting. I made a mess, got cream cheese on my phone screen, and accidentally spilled a bit of pumpkin on the counter. But when I pulled those bars out of the oven, the whole kitchen smelled like autumn in a jar. That first bite—creamy, spiced, just the right amount of sweet—made me close my eyes. I knew this was a recipe I’d keep coming back to.
Maybe you’ve been there, staring at your pantry, wondering if you can make something special without a lot of effort. These Perfect Pumpkin Cheesecake Swirl Bars are that answer. They’re the dessert that feels impressive but is secretly simple. And let me tell you, they’ve become my go-to for every fall gathering since that rainy night.
Why You’ll Love This Recipe
Let’s be real—there are a million pumpkin desserts out there. But these bars? They’re different. They’re the kind of treat that makes people ask for the recipe before they’ve even finished their first bite. Here’s why they stand out:
- Quick & Easy: No springform pan, no water bath, no complicated steps. From start to finish, you’re looking at about an hour, plus a little chill time. Perfect for a weeknight baking session or a last-minute potluck contribution.
- Simple Ingredients: You probably have most of these in your kitchen right now. No fancy extracts, no hard-to-find spices. Just real, wholesome ingredients that come together beautifully.
- Perfect for Fall Gatherings: Whether it’s Thanksgiving, a Friendsgiving party, or just a cozy Sunday at home, these bars fit right in. They’re portable, easy to slice, and they disappear fast.
- Crowd-Pleaser: I’ve served these to kids, adults, and even picky in-laws. Everyone loves the creamy cheesecake layer against the spiced pumpkin. It’s a guaranteed hit.
- Unbelievably Delicious: The texture is what gets me every time. The crust is buttery and crisp, the cheesecake is silky, and the pumpkin layer is perfectly spiced. It’s comfort food at its finest.
What makes this recipe different from all the other pumpkin bars out there? It’s the swirl technique. Instead of two separate layers, you get these beautiful ribbons of cheesecake running through the pumpkin. It creates the perfect bite every single time—creamy, tangy, and spiced all at once. Plus, I’ve tested this recipe a dozen times to get the ratios just right. No soggy crust, no cracked top, just pure perfection.
This isn’t just another pumpkin dessert. It’s the one you’ll make when you want to impress without the stress. It’s the one that tastes like a hug on a crisp autumn day. Trust me, you’re going to love it.
What Ingredients You Will Need
This recipe uses simple, wholesome ingredients to deliver bold flavor and satisfying texture without the fuss. Most of these are pantry staples, which means you can whip these bars up anytime the craving strikes. Let’s break down what you’ll need and why each ingredient matters.
For the Graham Cracker Crust
- Graham cracker crumbs (1 ½ cups / 180g): You can buy pre-made crumbs or crush your own. I prefer using a food processor for a fine, even texture. (Pro tip: Pulse until it looks like sand—no big chunks!)
- Granulated sugar (¼ cup / 50g): Just a touch of sweetness to balance the buttery crust.
- Unsalted butter, melted (6 tablespoons / 85g): Use real butter here—it makes the crust rich and crisp. I like using Land O’Lakes for consistent results.
- Pinch of salt (⅛ teaspoon): Don’t skip this! Salt enhances the sweetness and keeps the crust from tasting flat.
For the Pumpkin Layer
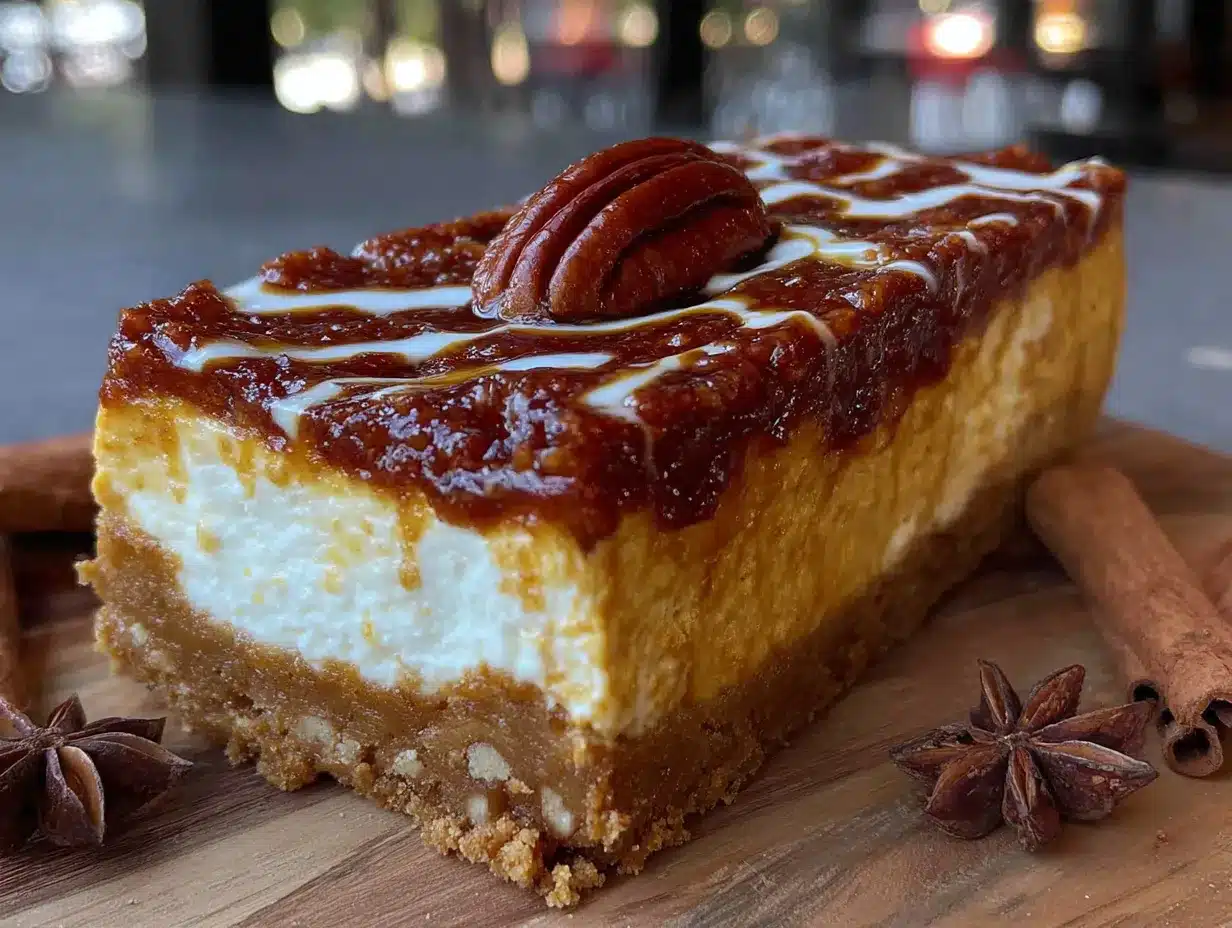
- Pumpkin puree (1 cup / 245g): Make sure you’re using 100% pure pumpkin, not pumpkin pie filling. I recommend Libby’s for a smooth, consistent texture.
- Granulated sugar (½ cup / 100g): Adds sweetness and helps the pumpkin set properly.
- Large egg (1): Binds the pumpkin layer and gives it structure.
- Heavy cream (¼ cup / 60ml): Adds richness and a velvety texture. You can substitute with whole milk if needed, but the bars won’t be as creamy.
- Pumpkin pie spice (1 ½ teaspoons): The star of the show! I use a blend of cinnamon, nutmeg, ginger, and cloves. If you don’t have it, mix 1 teaspoon cinnamon, ¼ teaspoon nutmeg, ¼ teaspoon ginger, and a pinch of cloves.
- Vanilla extract (1 teaspoon): Enhances all the warm, cozy flavors.
- All-purpose flour (2 tablespoons / 16g): A small amount helps thicken the pumpkin layer so it doesn’t get watery.
For the Cheesecake Layer
- Cream cheese, softened (8 ounces / 226g): Use full-fat cream cheese for the best texture. Let it sit at room temperature for at least 30 minutes before mixing. (I like Philadelphia brand.)
- Granulated sugar (¼ cup / 50g): Just enough to sweeten without overpowering the tanginess.
- Large egg (1): Gives the cheesecake structure and helps it set.
- Vanilla extract (1 teaspoon): Adds warmth and depth.
- Sour cream (¼ cup / 60g): This is my secret ingredient! It adds tanginess and makes the cheesecake extra creamy. You can substitute with Greek yogurt if needed.
Substitution Guidance
- Gluten-free option: Use gluten-free graham crackers or crushed gluten-free cookies for the crust. Replace the flour in the pumpkin layer with a gluten-free all-purpose blend.
- Dairy-free option: Use a dairy-free butter alternative (like Earth Balance) and a dairy-free cream cheese (like Kite Hill). Replace heavy cream with full-fat coconut milk and sour cream with dairy-free yogurt.
- Egg-free option: Use a flax egg (1 tablespoon ground flaxseed + 3 tablespoons water) for each egg. The texture will be slightly less creamy but still delicious.
Equipment Needed
You don’t need a fancy kitchen to make these bars. Here’s what you’ll need:
- 8×8-inch square baking pan: This is the perfect size for these bars. If you only have a 9×9-inch pan, the bars will be slightly thinner, so reduce baking time by 5 minutes.
- Parchment paper: Lining the pan makes lifting the bars out a breeze. Trust me, don’t skip this step.
- Mixing bowls: You’ll need at least two medium bowls—one for the crust, one for the pumpkin layer, and one for the cheesecake layer.
- Electric hand mixer or stand mixer: While you can mix everything by hand, a mixer makes the cream cheese layer silky smooth. I’ve done it both ways, and the mixer is worth the extra 30 seconds of cleanup.
- Spatula: For spreading the layers evenly and creating the swirl effect.
- Sharp knife: For clean slices. Run it under hot water and wipe it clean between cuts for perfect bars.
- Food processor (optional): Great for crushing graham crackers, but you can also use a rolling pin and a zip-top bag.
I’ve made these bars in a cheap baking pan from the grocery store and in a high-end ceramic dish. Both worked perfectly. The key is lining the pan with parchment paper—it makes all the difference.
Preparation Method
Alright, let’s get baking! Follow these steps carefully, and you’ll have a pan of perfect pumpkin cheesecake swirl bars in no time.
Step 1: Prepare the Crust
- Preheat your oven to 350°F (175°C). Line your 8×8-inch baking pan with parchment paper, leaving a little overhang on two opposite sides. This will be your “handle” for lifting the bars out later.
- In a medium bowl, combine 1 ½ cups graham cracker crumbs, ¼ cup granulated sugar, and a pinch of salt. Stir to combine.
- Pour in 6 tablespoons of melted unsalted butter and stir until the mixture looks like wet sand. Every crumb should be coated.
- Press the mixture firmly into the bottom of your prepared pan. Use the bottom of a measuring cup or a flat glass to get an even, compact layer. (I usually press for about a minute—don’t rush this step!)
- Bake the crust for 8-10 minutes, until it’s lightly golden and fragrant. Set aside to cool slightly while you make the fillings.
Step 2: Make the Pumpkin Layer
- In a medium bowl, whisk together 1 cup pumpkin puree, ½ cup granulated sugar, 1 large egg, ¼ cup heavy cream, 1 ½ teaspoons pumpkin pie spice, and 1 teaspoon vanilla extract. Whisk until smooth and well combined.
- Sprinkle 2 tablespoons of all-purpose flour over the mixture and whisk again until no lumps remain. The flour helps thicken the pumpkin layer so it doesn’t make the crust soggy.
- Set the bowl aside. The mixture should be thick but pourable.
Step 3: Make the Cheesecake Layer
- In a separate bowl, beat 8 ounces of softened cream cheese with an electric mixer on medium speed until smooth and creamy, about 2 minutes. Scrape down the sides of the bowl with a spatula.
- Add ¼ cup granulated sugar and beat until combined, about 1 minute.
- Add 1 large egg and 1 teaspoon vanilla extract, and beat on low speed just until incorporated. Don’t overmix—you don’t want to incorporate too much air.
- Add ¼ cup sour cream and beat on low until smooth. The mixture should be thick, creamy, and slightly tangy.
Step 4: Assemble the Bars
- Pour the pumpkin mixture over the pre-baked crust. Use a spatula to spread it into an even layer.
- Spoon the cheesecake mixture over the pumpkin layer in small dollops, spacing them evenly across the surface. You’ll have about 8-10 dollops.
- Now for the fun part: the swirl! Take a butter knife or a skewer and gently drag it through the two mixtures in a figure-eight pattern. Don’t over-swirl—you want distinct ribbons of cheesecake, not a fully blended mess. About 5-6 passes is perfect.
- Tap the pan gently on the counter a few times to release any air bubbles. (I always forget this step and end up with tiny holes—don’t be like me!)
Step 5: Bake and Cool
- Bake at 350°F (175°C) for 35-40 minutes, or until the edges are set and the center is slightly jiggly (like Jell-O). A toothpick inserted 2 inches from the edge should come out clean, but the center will still wobble a bit.
- Let the bars cool completely in the pan on a wire rack. This takes about 1 hour.
- Once cool, cover the pan with plastic wrap and refrigerate for at least 4 hours, preferably overnight. This is the hardest part, I know, but it’s essential for clean slices and the best texture.
Step 6: Slice and Serve
- Once fully chilled, use the parchment paper overhang to lift the entire block of bars out of the pan.
- Place on a cutting board and use a sharp knife to slice into 9 or 16 squares. For the cleanest cuts, run the knife under hot water and wipe it dry between each slice.
- Serve cold or at room temperature. I personally love them straight from the fridge—the texture is like a dream.
Cooking Tips & Techniques
Over the years, I’ve made these bars more times than I can count. Here are the lessons I’ve learned the hard way, so you don’t have to:
- Room temperature ingredients matter: Cold cream cheese will give you a lumpy cheesecake layer. Let it sit on the counter for at least 30 minutes before mixing. Same goes for the egg—cold eggs can seize up the batter.
- Don’t overmix the cheesecake: Overmixing incorporates too much air, which can cause cracks during baking. Mix just until everything is combined and smooth.
- Press the crust firmly: A loose crust will crumble when you try to cut the bars. Use the bottom of a measuring cup to press it down with authority. I mean really lean into it.
- Watch the baking time: Every oven is different. Start checking at 30 minutes. The edges should be set and slightly puffed, but the center should still jiggle. It will continue to set as it cools.
- Patience is a virtue: I know it’s tempting to cut into these bars while they’re still warm, but trust me—wait. Chilling them for at least 4 hours (overnight is best) gives you clean, beautiful slices and a creamy, firm texture.
- My biggest failure: I once tried to rush the cooling process by putting the pan in the freezer for 20 minutes. The crust got soggy, and the cheesecake layer had condensation on top. Learn from my mistake—let them cool gradually.
Variations & Adaptations
One of the best things about this recipe is how versatile it is. Here are some variations I’ve tried and loved:
- Ginger Snap Crust: Swap the graham crackers for crushed ginger snaps. The spicy, molasses flavor pairs beautifully with the pumpkin. Use the same amount of butter and sugar.
- Maple Pumpkin Swirl: Replace the granulated sugar in the pumpkin layer with ⅓ cup pure maple syrup. Reduce the heavy cream by 1 tablespoon to compensate for the extra liquid. The maple flavor is incredible.
- Chocolate Drizzle: Once the bars are chilled and sliced, drizzle melted dark chocolate over the top. The bitterness of the chocolate cuts through the sweetness perfectly. I like using 60% cacao chocolate chips.
- Vegan Version: Use dairy-free cream cheese, coconut cream instead of heavy cream, and a flax egg (1 tablespoon ground flaxseed + 3 tablespoons water) for each egg. The texture is slightly different but still delicious.
- Pumpkin Cheesecake Cupcakes: Use a muffin tin lined with paper liners. Press the crust into the bottom of each liner, then fill with the pumpkin and cheesecake mixtures. Bake for 18-22 minutes. Perfect for parties!
I once tried a version with a pecan streusel topping. I sprinkled a mixture of chopped pecans, brown sugar, and melted butter over the top before baking. It was amazing, but it made the bars a bit messy to cut. If you try it, let me know how it goes!
Serving & Storage Suggestions
These bars are incredibly versatile when it comes to serving. Here’s how I like to enjoy them:
- Serving Temperature: I prefer them cold, straight from the fridge. The cheesecake layer is firm and creamy, and the pumpkin layer is perfectly set. If you prefer a softer texture, let them sit at room temperature for 15 minutes before serving.
- Presentation: Arrange the bars on a white platter to let the beautiful swirl pattern stand out. Garnish with a light dusting of cinnamon, a dollop of whipped cream, or a few candied pecans.
- Perfect Pairings: Serve with a hot cup of coffee, a spiced chai latte, or a glass of cold milk. For a boozy option, a bourbon old fashioned or a pumpkin spice martini pairs beautifully.
- Storage: Store leftover bars in an airtight container in the refrigerator for up to 5 days. Place a layer of parchment paper between stacked bars to prevent sticking.
- Freezing: These bars freeze beautifully! Wrap individual slices tightly in plastic wrap, then place them in a freezer-safe bag or container. Freeze for up to 3 months. Thaw in the refrigerator overnight before serving.
One thing I love about these bars is that the flavors actually get better after a day or two in the fridge. The spices meld together, and the texture becomes even more creamy. So don’t be afraid to make them a day ahead!
Nutritional Information & Benefits
While these bars are definitely a treat, they do offer some nutritional benefits thanks to the pumpkin. Here’s a rough estimate per bar (based on 9 servings):
- Calories: ~320
- Fat: 18g
- Carbohydrates: 36g
- Protein: 5g
- Fiber: 2g
- Sugar: 24g
Health Benefits: Pumpkin is packed with vitamin A (great for eye health), fiber (good for digestion), and antioxidants. The cream cheese and sour cream provide calcium and protein. Plus, the warm spices like cinnamon and ginger have anti-inflammatory properties.
Dietary Considerations: This recipe is vegetarian. For gluten-free or dairy-free options, see the substitutions section above. It contains dairy, eggs, and gluten (from the graham crackers), so it’s not suitable for those with allergies to those ingredients.
I personally love that these bars feel indulgent but have a little nutritional redemption from the pumpkin. It’s the kind of dessert that makes you feel good about having a second slice—well, almost!
Conclusion
These Perfect Pumpkin Cheesecake Swirl Bars have become a staple in my fall baking rotation for a reason. They’re simple enough for a weeknight, elegant enough for a holiday table, and absolutely delicious every single time. The creamy cheesecake, the spiced pumpkin, the buttery crust—it’s a combination that just works.
I love how forgiving this recipe is. You don’t need to be a pastry chef to get beautiful swirls. You don’t need special equipment. You just need a little patience and a love for all things pumpkin. And honestly, the hardest part is waiting for them to chill!
I’d love to hear how yours turn out. Did you try any variations? Did you serve them at a gathering? Drop a comment below and let me know. And if you’re looking for more fall dessert inspiration, don’t forget to check out my pumpkin spice cupcakes or my classic apple crisp—they’re both reader favorites.
Happy baking, friends! May your kitchen smell like cinnamon and your bars be perfectly swirled.
Frequently Asked Questions
Can I use a different pan size?
Yes, you can use a 9×9-inch pan, but the bars will be thinner. Reduce the baking time by about 5 minutes and start checking at 30 minutes. A 9×13-inch pan will give you very thin bars, so I don’t recommend it for this recipe.
Why did my cheesecake layer crack?
Cracks usually happen from overmixing or overbaking. Mix the cheesecake batter just until smooth, and don’t bake beyond the point where the center is slightly jiggly. Cooling gradually also helps prevent cracks.
Can I use pumpkin pie filling instead of pumpkin puree?
No, I wouldn’t recommend it. Pumpkin pie filling is already sweetened and spiced, which will throw off the balance of the recipe. Stick with 100% pure pumpkin puree for the best results.
How do I get clean, sharp slices?
Chill the bars for at least 4 hours (overnight is best). Use a sharp knife and run it under hot water, wiping it dry between each cut. This ensures smooth, clean edges.
Can I make these bars ahead of time?
Absolutely! In fact, they taste even better the next day. Make them up to 2 days in advance and store them in the refrigerator. They’re perfect for Thanksgiving prep or any busy holiday schedule.
Pin This Recipe!
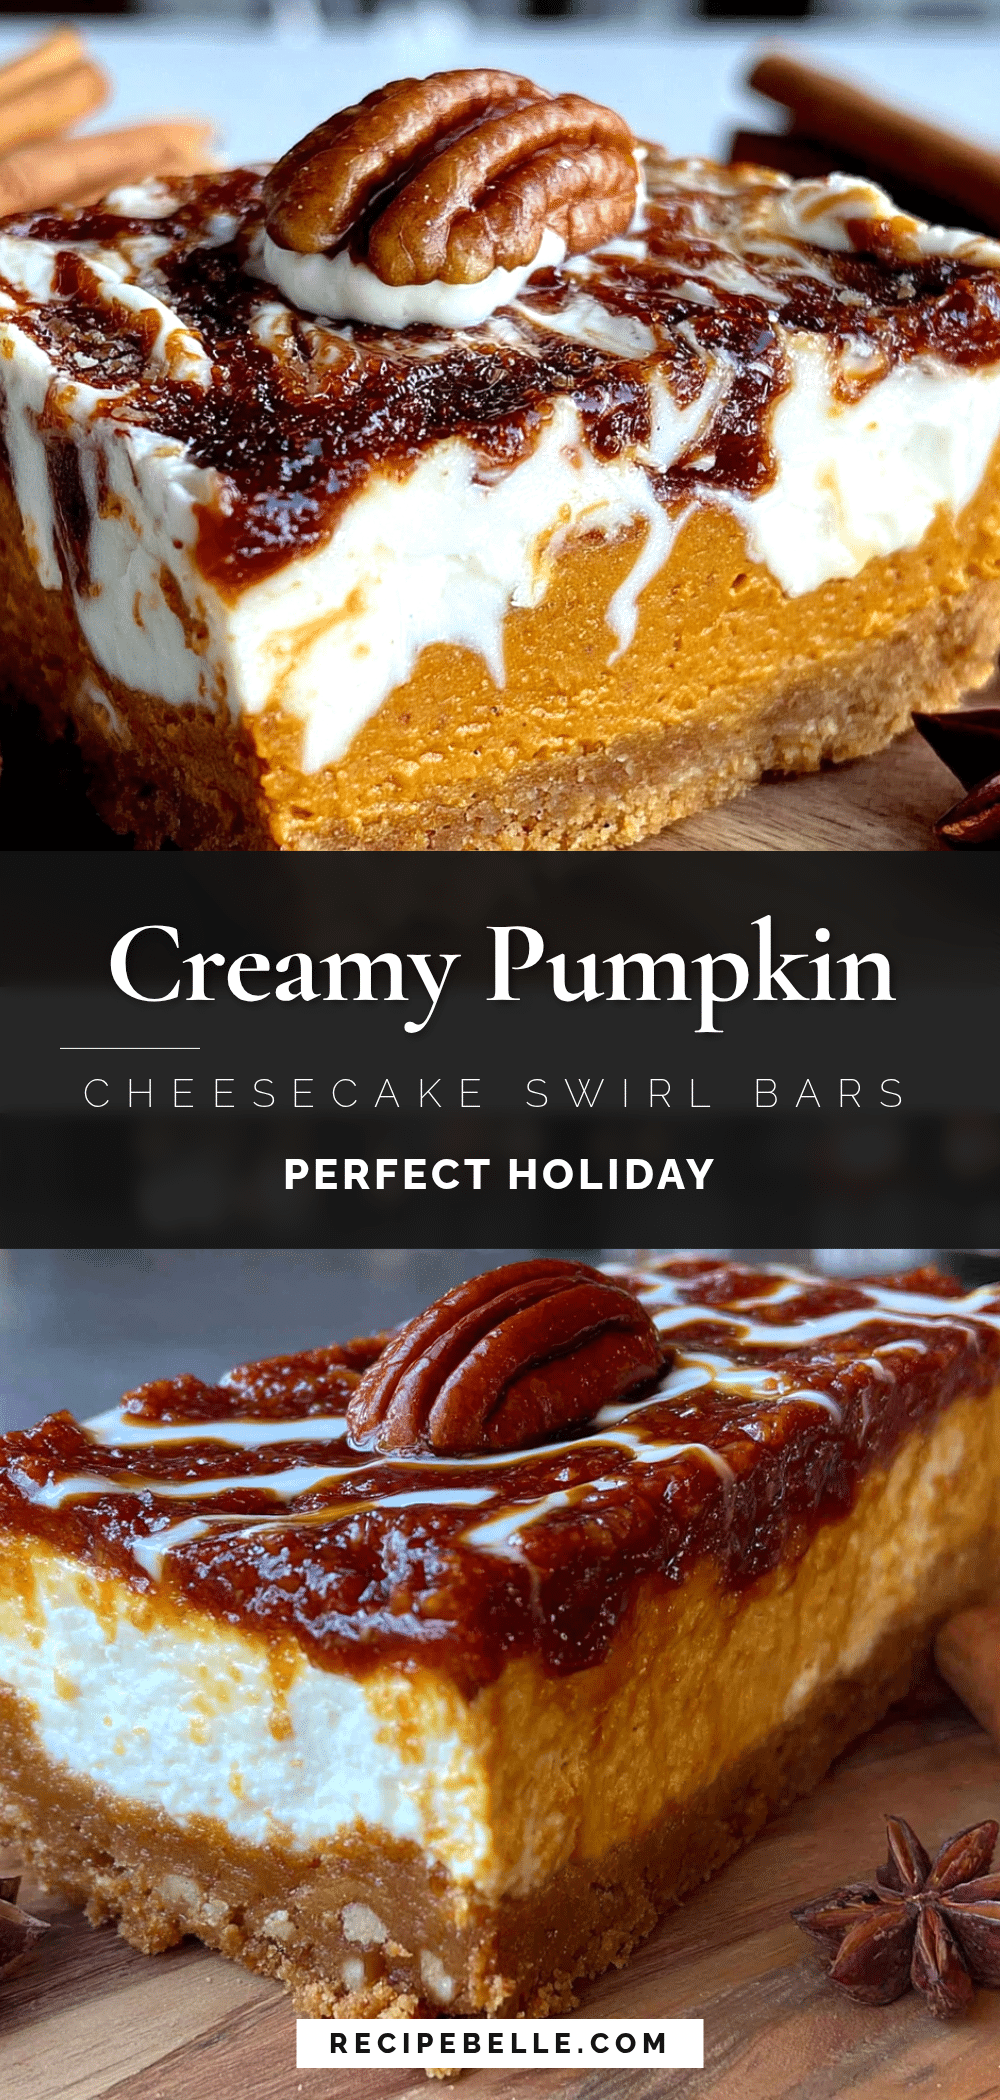
Perfect Pumpkin Cheesecake Swirl Bars: Easy Fall Dessert
These Perfect Pumpkin Cheesecake Swirl Bars are a simple yet impressive fall dessert. With a buttery graham cracker crust, a spiced pumpkin layer, and a creamy cheesecake swirl, they’re easy to make and perfect for any autumn gathering.
- Prep Time: 20 minutes
- Cook Time: 35-40 minutes
- Total Time: 1 hour (plus 4 hours chilling)
- Yield: 9-16 servings 1x
- Category: Dessert
- Cuisine: American
Ingredients
- 1 ½ cups (180g) graham cracker crumbs
- ¼ cup (50g) granulated sugar
- 6 tablespoons (85g) unsalted butter, melted
- ⅛ teaspoon salt
- 1 cup (245g) pumpkin puree
- ½ cup (100g) granulated sugar
- 1 large egg
- ¼ cup (60ml) heavy cream
- 1 ½ teaspoons pumpkin pie spice
- 1 teaspoon vanilla extract
- 2 tablespoons (16g) all-purpose flour
- 8 ounces (226g) cream cheese, softened
- ¼ cup (50g) granulated sugar
- 1 large egg
- 1 teaspoon vanilla extract
- ¼ cup (60g) sour cream
Instructions
- Preheat oven to 350°F (175°C). Line an 8×8-inch baking pan with parchment paper, leaving overhang on two sides.
- In a medium bowl, combine graham cracker crumbs, ¼ cup sugar, and salt. Stir in melted butter until mixture resembles wet sand. Press firmly into the bottom of the prepared pan. Bake for 8-10 minutes until lightly golden. Set aside to cool slightly.
- In a medium bowl, whisk together pumpkin puree, ½ cup sugar, 1 egg, heavy cream, pumpkin pie spice, and 1 teaspoon vanilla until smooth. Sprinkle flour over mixture and whisk until no lumps remain. Set aside.
- In a separate bowl, beat cream cheese with an electric mixer on medium speed until smooth, about 2 minutes. Add ¼ cup sugar and beat until combined. Add 1 egg and 1 teaspoon vanilla, beating on low just until incorporated. Add sour cream and beat on low until smooth.
- Pour pumpkin mixture over the pre-baked crust and spread evenly. Spoon cheesecake mixture over pumpkin layer in small dollops. Use a butter knife or skewer to gently swirl the two mixtures in a figure-eight pattern, making 5-6 passes. Tap pan gently on counter to release air bubbles.
- Bake at 350°F (175°C) for 35-40 minutes, until edges are set and center is slightly jiggly. Cool completely in pan on a wire rack (about 1 hour). Cover with plastic wrap and refrigerate for at least 4 hours, preferably overnight.
- Use parchment overhang to lift bars out of pan. Place on cutting board and slice into 9 or 16 squares using a sharp knife (run under hot water and wipe clean between cuts). Serve cold or at room temperature.
Notes
Room temperature ingredients are key for a smooth cheesecake layer. Don’t overmix the cheesecake to avoid cracks. Press the crust firmly for clean slices. Chill for at least 4 hours (overnight is best) for perfect texture. For gluten-free, use gluten-free graham crackers and gluten-free flour. For dairy-free, use dairy-free butter, cream cheese, heavy cream, and sour cream alternatives. For egg-free, use a flax egg for each egg.
Nutrition
- Serving Size: 1 bar (based on 9 se
- Calories: 320
- Sugar: 24
- Sodium: 220
- Fat: 18
- Saturated Fat: 10
- Carbohydrates: 36
- Fiber: 2
- Protein: 5
Keywords: pumpkin cheesecake bars, fall dessert, easy pumpkin dessert, cheesecake swirl bars, pumpkin bars



