I know, I know—another chocolate chip cookie recipe. But hear me out. I spent two years testing these things. Two years of flat cookies, cakey cookies, cookies that spread into one giant sheet, and cookies that were so hard I could have used them as hockey pucks. My kitchen looked like a flour bomb went off. My neighbors started avoiding me because I kept showing up with yet another batch of “testers.”
Then, on a random Tuesday—not a special occasion, not a holiday bake-off—I finally cracked the code. It wasn’t some fancy technique I learned in a pastry class. It was a happy accident. I was rushing, got distracted by my phone ringing, and left the dough in the fridge overnight instead of the planned 30 minutes. The next day, those cookies came out of the oven looking like they belonged in a glass case at a high-end bakery. Thick. Chewy. Golden on the edges, soft in the center. My husband took one bite and said, “Don’t change a thing.”
Maybe you’ve been there too—following a recipe to the letter and still ending up with disappointing cookies. Let me tell you, the secret isn’t some magic ingredient. It’s a few simple tricks that make all the difference. Honestly, once you try this method, you’ll never go back to flat, sad cookies again.
Why You’ll Love This Recipe
These aren’t just good chocolate chip cookies. They’re the kind that make people close their eyes after the first bite. I’ve brought them to potlucks, served them at book club, and even mailed them to my sister across the country. Every single time, the reaction is the same: “Where did you buy these?”
Here’s why this recipe stands out from the hundreds of others out there:
- Thick and Chewy, Not Cakey or Flat — The texture is the star here. You get that satisfying chew without it being dense or dry. It’s the perfect balance.
- Simple Pantry Ingredients — No weird ingredients like cream of tartar or corn syrup. You probably have everything in your kitchen right now. Butter, sugar, eggs, flour, chocolate chips—that’s it.
- No Chill Time Required — I know, I just told you my accidental overnight chill story. But I’ve refined the recipe since then. You can bake these immediately if you’re impatient (I get it). The overnight rest just makes them even better.
- Perfect for Busy Bakers — From start to finish, these cookies take about 25 minutes. Mix the dough, scoop, bake, done. No complicated steps or fancy equipment needed.
- Crowd-Pleaser Guaranteed — I’ve tested these on kids, adults, picky eaters, and cookie snobs. Zero complaints. Actually, that’s a lie—people complain that I didn’t make enough.
What makes this different from every other chocolate chip cookie recipe? It’s the method. We’re using melted butter for extra chewiness, an extra egg yolk for richness, and a specific ratio of brown to white sugar that creates that perfect texture. Plus, I’ll show you how to get those beautiful crinkly tops without any special tricks.
This isn’t just another version of chocolate chip cookies. It’s the version. The one you’ll bookmark, print out, and pass down to your kids. The one that makes you feel like a professional baker even if you’ve never made cookies from scratch before.
What Ingredients You Will Need
This recipe uses simple, straightforward ingredients to create something truly special. The magic isn’t in fancy additions—it’s in how you handle the basics. Let me walk you through each ingredient and why it matters.
- 2 cups all-purpose flour (250g) — Spoon and level your flour. Scooping directly with the measuring cup packs in too much flour and makes dry cookies. I use Gold Medal or King Arthur Flour for consistent results.
- 1/2 teaspoon baking soda — Make sure it’s fresh. Test it by dropping a pinch into vinegar—if it fizzes, it’s good. Old baking soda won’t give you the lift you need.
- 1/2 teaspoon salt — I use fine sea salt for the dough and flaky sea salt for sprinkling on top. Don’t skip the salt—it balances the sweetness and enhances the chocolate flavor.
- 1/2 cup unsalted butter (113g) — Melted and slightly cooled. Melted butter is the key to chewy cookies. It coats the flour proteins differently than creamed butter, resulting in a denser, chewier texture. I recommend using a good quality butter like Kerrygold or Plugrà for richer flavor.
- 1/2 cup granulated sugar (100g) — White sugar helps with spread and gives the edges that slight crispness.
- 1/2 cup packed light brown sugar (100g) — Brown sugar adds moisture and that deep, caramel-like flavor. Pack it firmly into the measuring cup. You can use dark brown sugar for even more molasses flavor.
- 1 large egg + 1 egg yolk — The extra yolk adds richness and tenderness. Make sure your eggs are at room temperature—cold eggs will seize the melted butter and create a grainy dough.
- 2 teaspoons vanilla extract — Pure vanilla extract, not imitation. It makes a noticeable difference. I like Nielsen-Massey or Simply Organic brands.
- 1 1/2 cups semi-sweet chocolate chips (270g) — Or chopped chocolate bars if you want those melty pools of chocolate. I use Ghirardelli semi-sweet chips for reliable results. You can also use dark chocolate, milk chocolate, or a mix.
Substitution Notes: For a dairy-free version, use vegan butter sticks (not tub margarine) and dairy-free chocolate chips. For gluten-free, swap the all-purpose flour with a 1:1 gluten-free baking flour blend. I’ve tested both options and they work beautifully.
Equipment Needed
You don’t need a fancy kitchen setup to make these cookies. Here’s what you’ll actually use:
- Large mixing bowl — Any bowl works, but glass or ceramic is ideal because they don’t react with ingredients.
- Whisk — For combining the wet ingredients smoothly.
- Rubber spatula or wooden spoon — For folding in the flour and chocolate chips without overmixing.
- Measuring cups and spoons — Accurate measurements matter in baking. I prefer metal measuring cups for dry ingredients and glass liquid measuring cups for wet ingredients.
- Kitchen scale (optional but recommended) — Weighing your ingredients is the most accurate method. I bought a $15 scale from Amazon and it’s been a game-changer for consistent results.
- Baking sheets — Light-colored, rimmed baking sheets work best. Dark sheets absorb more heat and can over-brown the bottoms.
- Parchment paper or silicone baking mat — Parchment paper is my go-to. It prevents sticking and makes cleanup effortless. Silicone mats work too but can slightly affect spread.
- Cookie scoop — A 1.5-tablespoon scoop creates uniform cookies that bake evenly. I use a #40 scoop. If you don’t have one, use two spoons to portion the dough.
- Cooling rack — Letting cookies cool on the pan for 5 minutes, then transferring to a rack prevents soggy bottoms.
I’ve made these cookies with just a bowl and a spoon more times than I can count. Don’t let the equipment list intimidate you. The only non-negotiable is the parchment paper—trust me on this one.
Preparation Method
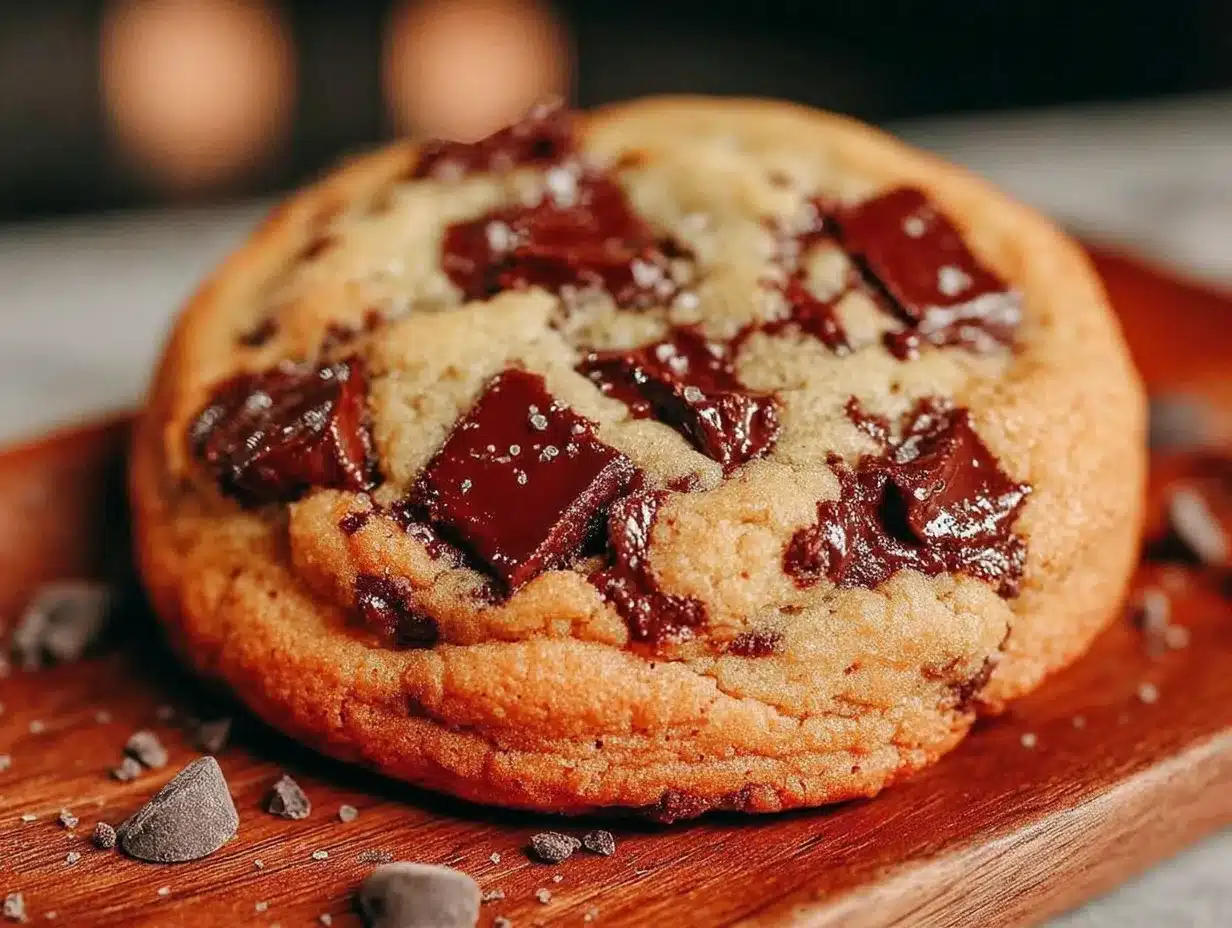
Let’s make some cookies. I’ll walk you through each step so you get perfect results every time.
- Preheat your oven to 350°F (175°C). Line two baking sheets with parchment paper. This is important—don’t skip the parchment. It prevents the bottoms from burning and makes cleanup a breeze.
- Melt the butter. In a microwave-safe bowl, melt the butter in 20-second intervals until just melted. You want it liquid but not hot. Let it cool for 2-3 minutes. If you add the sugar to hot butter, it can melt the sugar crystals and change the texture of your cookies.
- Mix the wet ingredients. In a large bowl, whisk together the melted butter, granulated sugar, and brown sugar until smooth. It should look like wet sand. Add the egg, egg yolk, and vanilla extract. Whisk vigorously for about 30 seconds until the mixture is pale and slightly thickened. This step aerates the dough and helps create those beautiful crinkly tops.
- Combine the dry ingredients. In a separate medium bowl, whisk together the flour, baking soda, and salt. Make sure there are no lumps. I always whisk for at least 15 seconds to distribute the baking soda evenly—nobody wants a mouthful of baking soda in one bite.
- Add dry ingredients to wet. Pour the flour mixture into the butter mixture. Use a rubber spatula to fold everything together gently. Stop as soon as you no longer see streaks of flour. Overmixing develops gluten and makes tough cookies. A few streaks of flour left are better than overmixed dough.
- Fold in the chocolate chips. Add the chocolate chips and fold 3-4 times until distributed. Don’t overwork the dough at this stage. If you want picture-perfect cookies, reserve about 2 tablespoons of chips to press onto the tops of the scooped dough balls right before baking.
- Chill the dough (optional but recommended). Here’s where you have a choice. For immediate gratification, scoop and bake right away. For thicker, chewier cookies with deeper flavor, cover the bowl and refrigerate for at least 2 hours, or up to 72 hours. The longer chill allows the flavors to meld and the flour to fully hydrate. I’ve found 24 hours is the sweet spot.
- Scoop the dough. Use a cookie scoop or two spoons to portion the dough into 1.5-tablespoon balls (about 30g each). Place them 3 inches apart on the prepared baking sheets. You should get about 18-20 cookies. For bakery-style cookies, roll each ball between your palms until smooth—this creates those perfectly round cookies.
- Bake one sheet at a time. Place one baking sheet on the middle rack of your preheated oven. Bake for 9-11 minutes. The cookies should look puffy, golden around the edges, and still soft and slightly underdone in the center. They will continue to set as they cool. I aim for 10 minutes exactly—the edges are set but the centers look slightly puffy and pale.
- Cool on the pan. Let the cookies rest on the baking sheet for 5 minutes. This is crucial—they’re too fragile to move immediately. During this time, they’ll continue to cook from the residual heat and set properly. After 5 minutes, transfer them to a wire cooling rack.
- Add finishing touches. While the cookies are still warm, press a few extra chocolate chips into the tops if you reserved some. Sprinkle with flaky sea salt if you’re feeling fancy. The salt really does elevate the chocolate flavor—don’t knock it till you try it.
- Repeat with remaining dough. Let the baking sheet cool completely between batches, or use a second sheet. Placing dough on a hot sheet will cause the butter to melt too quickly and create flat cookies.
Pro tip: If you’re baking chilled dough, add 1-2 minutes to the baking time. The dough should be slightly warmer than fridge temperature—if it’s rock hard, let it sit at room temperature for 10 minutes before scooping.
Cooking Tips & Techniques
After dozens of batches, I’ve learned a few things the hard way. Here are my best tips for perfect cookies every time.
Use melted butter, not softened. This is the biggest game-changer for chewy cookies. Melted butter coats the flour proteins differently than creamed butter, resulting in a denser, chewier texture. I learned this after baking a batch with softened butter that turned out cakey and disappointing.
Weigh your flour. I cannot stress this enough. Measuring flour by volume is wildly inconsistent. One cup can range from 120g to 150g depending on how you scoop. A $15 kitchen scale will transform your baking. If you don’t have one, spoon the flour into your measuring cup and level it off with a knife—never scoop directly from the bag.
Don’t overbake. Pull the cookies out when the edges are golden but the centers still look slightly underdone. They will continue to bake on the hot pan. I’ve ruined so many batches by waiting for the centers to look fully set. By the time they look done, they’re overbaked.
Let the dough rest. Even 30 minutes in the fridge makes a difference. It allows the flour to hydrate fully, which creates a more tender cookie. The butter solidifies slightly, which means less spread and thicker cookies. Plus, the flavors develop and deepen over time.
Use room temperature eggs. Cold eggs will cause the melted butter to seize up and create a grainy, separated dough. If you forgot to take your eggs out of the fridge, place them in a bowl of warm water for 5 minutes.
Rotate your baking sheet halfway through. Ovens have hot spots. Halfway through baking, rotate the sheet 180 degrees for even browning. I learned this after one batch came out with half the cookies perfect and half burnt on the bottoms.
One of my biggest failures: I once tried to double the batch and used baking powder instead of baking soda. The cookies puffed up like little pillows and then collapsed into flat, greasy discs. Always double-check your leavening agents before you start.
Variations & Adaptations
Once you’ve mastered the basic recipe, feel free to experiment. Here are some of my favorite variations.
Double Chocolate Chip Cookies. Replace 1/4 cup of the all-purpose flour with 1/4 cup of unsweetened cocoa powder. Use white chocolate chips or dark chocolate chunks for a stunning contrast. These are dangerously good—I ate six in one sitting.
Nutty Brown Butter Cookies. Brown the butter instead of just melting it. Cook the butter in a saucepan over medium heat, swirling occasionally, until it turns golden brown and smells nutty—about 5-7 minutes. Let it cool completely before using. Add 1/2 cup of toasted chopped pecans or walnuts along with the chocolate chips. The nutty flavor pairs beautifully with the caramel notes from the brown sugar.
Gluten-Free Version. Substitute the all-purpose flour with a 1:1 gluten-free baking blend that contains xanthan gum. I’ve tested this with Bob’s Red Mill 1:1 Baking Flour and King Arthur Measure for Measure Flour—both work perfectly. Add an extra tablespoon of milk if the dough seems too dry.
Vegan Chocolate Chip Cookies. Use vegan butter sticks (I like Earth Balance or Miyoko’s) and a flax egg (1 tablespoon ground flaxseed mixed with 3 tablespoons water, let sit for 5 minutes). Use dairy-free chocolate chips. The texture is slightly different—a bit more tender—but still delicious.
Stuffed Cookies. Flatten a scoop of dough, place a chocolate truffle or a dollop of peanut butter in the center, then wrap the dough around it. Bake as directed. These are perfect for special occasions or when you want to impress someone.
I once made a batch with crushed potato chips and pretzels mixed in. Sounds weird, I know, but the salty crunch against the sweet, chewy cookie was incredible. Don’t be afraid to get creative—cookies are forgiving.
Serving & Storage Suggestions
These cookies are best enjoyed warm, when the chocolate is still melty and the edges are perfectly crisp. But let’s be real—they’re pretty amazing at room temperature too.
How to serve: Let the cookies cool on the baking sheet for 5 minutes, then transfer to a wire rack. For an extra special treat, serve them slightly warm with a glass of cold milk or a scoop of vanilla ice cream. I’ve also crumbled them over yogurt for breakfast (no judgment, please).
Storage: Store baked cookies in an airtight container at room temperature for up to 5 days. Place a slice of bread in the container—it absorbs excess moisture and keeps the cookies soft. Replace the bread slice every 2 days. I learned this trick from my grandmother and it works like magic.
Freezing baked cookies: Place cooled cookies in a single layer on a baking sheet and freeze for 1 hour. Transfer to a freezer-safe bag or container. They’ll keep for up to 3 months. Thaw at room temperature for 15 minutes, or microwave for 10-15 seconds for that fresh-from-the-oven experience.
Freezing cookie dough: Scoop the dough into balls and place them on a parchment-lined baking sheet. Freeze until solid, about 1 hour. Transfer the frozen dough balls to a freezer bag. You can bake them directly from frozen—just add 2-3 minutes to the baking time. This is my favorite meal prep trick. I always keep a batch of dough balls in the freezer for cookie emergencies.
Reheating: For that just-baked texture, reheat cookies in a 300°F (150°C) oven for 3-5 minutes. The microwave works in a pinch but can make them rubbery. If you’re reheating a single cookie, 10 seconds in the microwave is usually enough.
Flavor development: Here’s something interesting—these cookies actually taste better the next day. The flavors meld and deepen overnight. If you can resist eating them all immediately, store them in an airtight container and enjoy them tomorrow. They’ll be even better.
Nutritional Information & Benefits
Let’s be honest—these are cookies, not health food. But knowing what’s in them helps with mindful indulgence.
Per cookie (based on 20 cookies): Approximately 180 calories, 9g fat, 24g carbohydrates, 3g protein, 14g sugar, 1g fiber. Values are estimates and will vary based on specific ingredients used.
Key ingredient benefits:
- Butter provides vitamin A and healthy fats. Using unsalted butter lets you control the sodium content.
- Eggs add protein and essential nutrients like vitamin B12 and selenium.
- Dark chocolate (if you use 70% or higher) contains antioxidants and flavonoids that support heart health.
- Brown sugar contains molasses, which provides small amounts of calcium, potassium, and iron.
Dietary considerations: This recipe contains gluten, dairy, and eggs. For allergen-friendly versions, see the variations section above. To reduce sugar, you can substitute up to half the sugar with a granular monk fruit sweetener, but the texture will be slightly different.
I believe in balance. These cookies are a treat, not an everyday food. But when you do indulge, make it count. Quality ingredients and mindful eating make all the difference.
Frequently Asked Questions
Why did my cookies turn out flat?
Flat cookies usually happen for one of three reasons: your butter was too warm, your baking soda is expired, or you didn’t chill the dough long enough. Make sure your melted butter is cooled to room temperature before adding the sugar. Test your baking soda by dropping a pinch into vinegar—if it doesn’t fizz, it’s time for a new box.
Can I use margarine instead of butter?
I don’t recommend it. Margarine has a higher water content than butter, which affects the texture and spread of the cookies. If you need a dairy-free option, use vegan butter sticks (not tub margarine) for the best results.
How do I get those crinkly tops like bakery cookies?
The crinkly tops come from whisking the wet ingredients vigorously for 30 seconds after adding the eggs. This incorporates air into the batter. Chilling the dough also helps create those beautiful cracks on top as the cookies bake.
Can I make these cookies smaller or larger?
Absolutely. For mini cookies, use a 1-teaspoon scoop and bake for 7-8 minutes. For giant bakery-style cookies, use a 3-tablespoon scoop and bake for 12-14 minutes. Adjust baking time based on size and watch for golden edges.
Why do my cookies taste like flour?
This usually means you’ve overmeasured your flour or underbaked the cookies. Make sure you’re spooning and leveling your flour rather than scooping directly from the bag. Also, pull the cookies when the edges are golden but the centers are still soft—they’ll continue to set as they cool.
Conclusion
These thick and chewy chocolate chip cookies are everything I’ve ever wanted in a cookie recipe. They’re simple enough for a Tuesday afternoon baking session but impressive enough to bring to any gathering. The texture is spot-on—chewy without being tough, soft without being cakey.
I love that this recipe works with basic pantry ingredients and doesn’t require any special techniques. It’s the kind of recipe you’ll memorize after making it a few times. The kind your family will request for birthdays, holidays, and random Tuesday nights.
I encourage you to make these your own. Try the variations, experiment with different chocolate, or add your favorite mix-ins. Baking should be fun, not stressful. And if your first batch doesn’t turn out perfect? That’s okay. Eat the imperfect ones anyway—they’re still delicious.
When you make these cookies, I’d love to hear how they turn out. Drop a comment below and let me know if you tried any variations or if these became your new go-to recipe. Happy baking, friend!
Pin This Recipe!
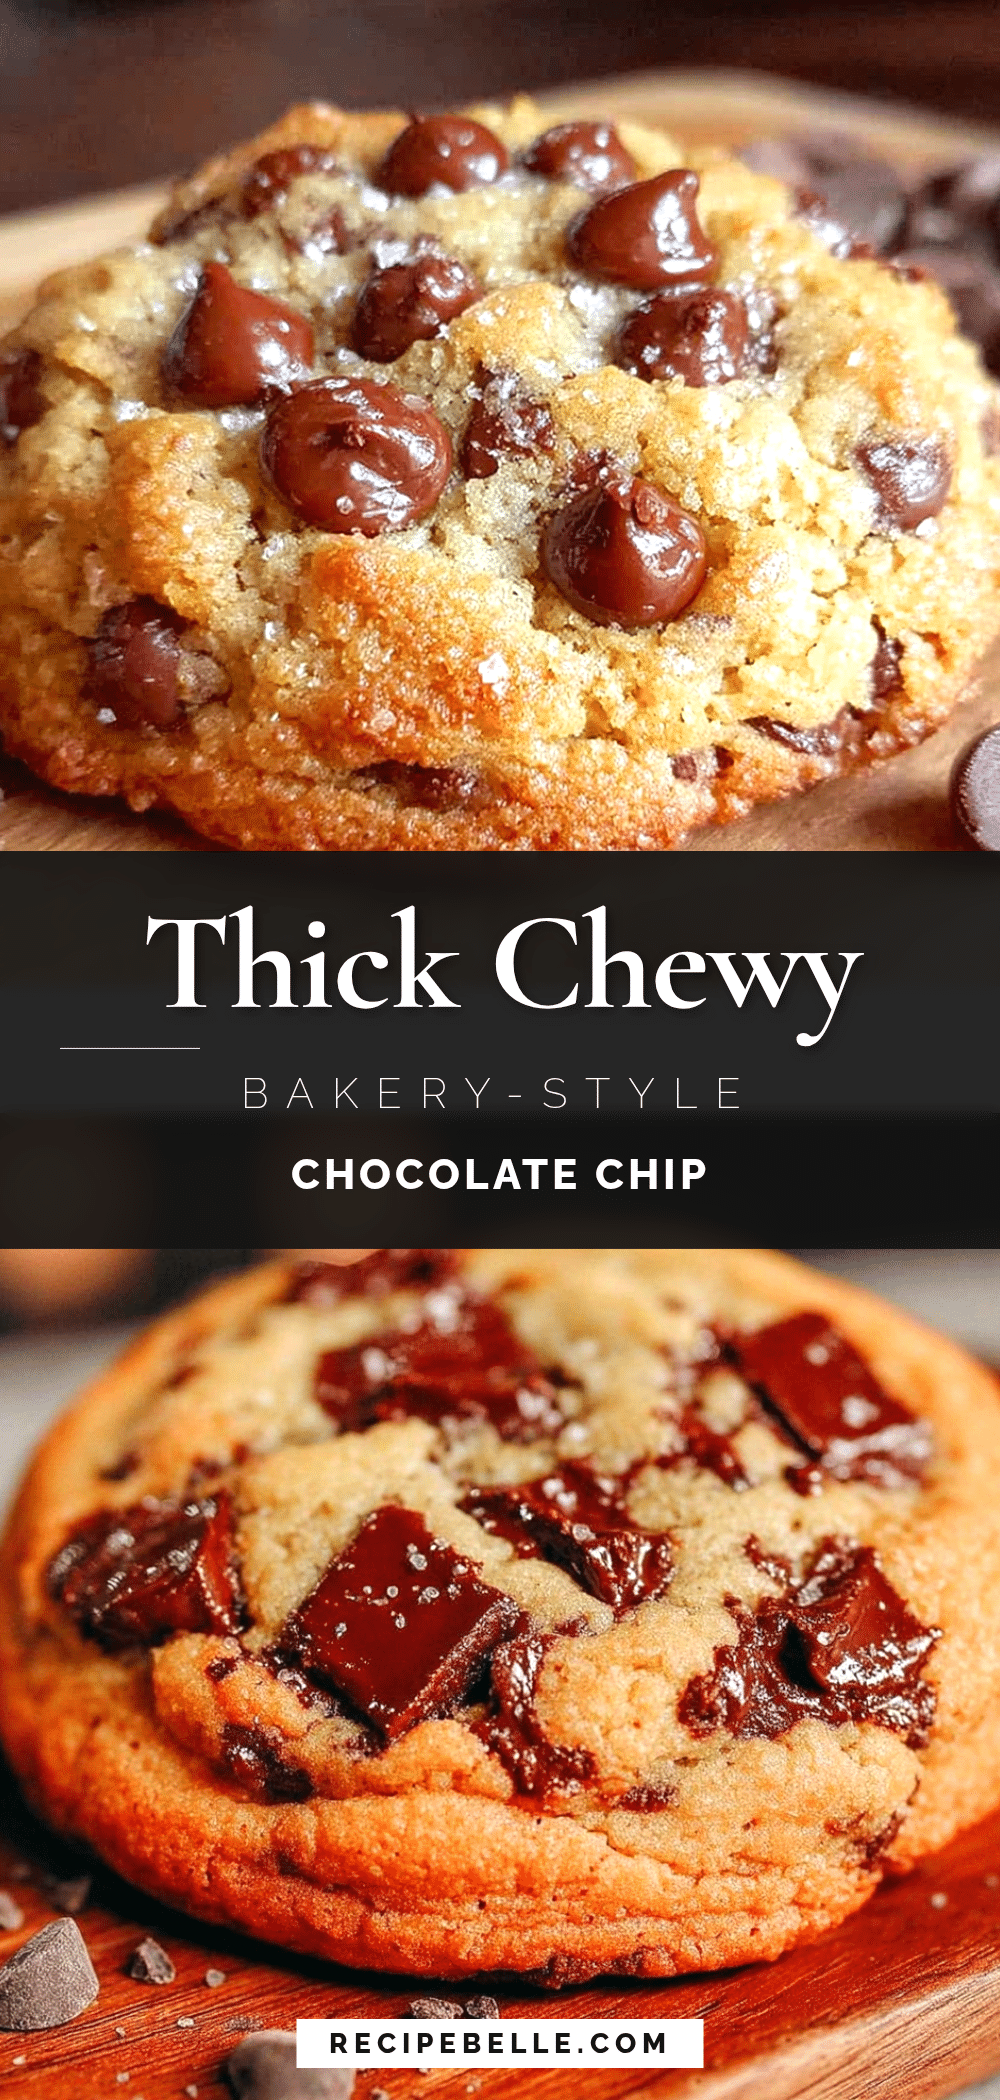
Best Homemade Thick and Chewy Chocolate Chip Cookies Recipe
These thick and chewy chocolate chip cookies are the result of two years of testing. With melted butter, an extra egg yolk, and a perfect sugar ratio, they deliver bakery-quality results with simple pantry ingredients and no chill time required.
- Prep Time: 15 minutes
- Cook Time: 10 minutes
- Total Time: 25 minutes (plus optional chilling time)
- Yield: 18-20 cookies 1x
- Category: Dessert
- Cuisine: American
Ingredients
- 2 cups all-purpose flour (250g)
- 1/2 teaspoon baking soda
- 1/2 teaspoon salt
- 1/2 cup unsalted butter (113g), melted and slightly cooled
- 1/2 cup granulated sugar (100g)
- 1/2 cup packed light brown sugar (100g)
- 1 large egg + 1 egg yolk, at room temperature
- 2 teaspoons pure vanilla extract
- 1 1/2 cups semi-sweet chocolate chips (270g)
Instructions
- Preheat your oven to 350°F (175°C). Line two baking sheets with parchment paper.
- Melt the butter in a microwave-safe bowl in 20-second intervals until just melted. Let it cool for 2-3 minutes.
- In a large bowl, whisk together the melted butter, granulated sugar, and brown sugar until smooth. Add the egg, egg yolk, and vanilla extract. Whisk vigorously for about 30 seconds until pale and slightly thickened.
- In a separate medium bowl, whisk together the flour, baking soda, and salt for at least 15 seconds.
- Pour the flour mixture into the butter mixture. Use a rubber spatula to fold together gently until just combined. Do not overmix.
- Fold in the chocolate chips until distributed. Reserve about 2 tablespoons of chips to press onto the tops of the dough balls before baking, if desired.
- For best results, cover the bowl and refrigerate for at least 2 hours, or up to 72 hours. For immediate baking, proceed to the next step.
- Scoop the dough into 1.5-tablespoon balls (about 30g each) and place them 3 inches apart on the prepared baking sheets. Roll each ball between your palms until smooth for perfectly round cookies.
- Bake one sheet at a time on the middle rack for 9-11 minutes. The cookies should look puffy, golden around the edges, and still soft in the center.
- Let the cookies rest on the baking sheet for 5 minutes, then transfer to a wire cooling rack.
- While still warm, press extra chocolate chips into the tops and sprinkle with flaky sea salt if desired.
- Repeat with remaining dough, letting the baking sheet cool completely between batches.
Notes
For thicker, chewier cookies, chill the dough for at least 2 hours or up to 72 hours. The longer chill allows flavors to meld and flour to fully hydrate. If baking chilled dough, add 1-2 minutes to baking time. Let dough sit at room temperature for 10 minutes if rock hard. Use room temperature eggs to prevent butter from seizing. Rotate baking sheet halfway through for even browning. Store baked cookies in an airtight container at room temperature for up to 5 days with a slice of bread to keep them soft. Freeze baked cookies for up to 3 months or cookie dough balls for up to 3 months.
Nutrition
- Serving Size: 1 cookie
- Calories: 180
- Sugar: 14
- Sodium: 120
- Fat: 9
- Saturated Fat: 5
- Carbohydrates: 24
- Fiber: 1
- Protein: 3
Keywords: chocolate chip cookies, thick cookies, chewy cookies, homemade cookies, easy cookie recipe, best chocolate chip cookies



