I was at the farmer’s market last fall, juggling a bag of Honeycrisp apples and a wedge of sharp cheddar, when the guy behind the cheese stall—let’s call him Dave, because that was his name—looked at my haul and said, “You know those two are basically made for each other, right?” I laughed it off. I mean, sure, apple and cheese is a classic snack plate combo. But a melt? That thought had never crossed my mind. Dave just shrugged, wiped his hands on his apron, and told me about the time his grandmother would throw thinly sliced apples into a grilled cheese for him as a kid. He made it sound so simple, so ordinary. But honestly, the way he described the sweet-tart apples getting all soft and warm against that salty, melty cheddar? I couldn’t shake it.
So I went home, slightly embarrassed that my best dinner plan was just “eat an apple and stare at the fridge,” and decided to give it a shot. The first attempt was a bit of a mess—I sliced the apples too thick, and they slid right out of the bread when I flipped it. Let me tell you, chasing a rogue apple slice around a hot skillet is not my idea of a good time. But the second time? That was the magic moment. The bread got perfectly golden and crunchy, the cheddar turned into this glorious, gooey blanket, and the apples softened just enough to release their juice. It was sweet, savory, and totally unexpected.
Maybe you’ve been there—staring at a random ingredient combo and wondering if it actually works. This one does. It’s the kind of recipe that feels like a happy accident, but I’ve been making it on purpose ever since. It’s quick, it’s satisfying, and it proves that sometimes the best ideas come from a guy named Dave at a farmer’s market.
Why You’ll Love This Recipe
This isn’t your average grilled cheese. The Crispy Honeycrisp Apple Cheddar Melt is a total game-changer for anyone who wants a savory-sweet fix in under ten minutes. I’ve tested this about a dozen times to get the texture just right—you want the bread shatteringly crisp and the inside perfectly molten. Here’s why it’s earned a permanent spot in my weekly rotation:
- Quick & Easy: From start to finish, you’re looking at about 10 minutes. Perfect for a lazy lunch, a quick dinner, or even a late-night snack when you need something comforting fast.
- Simple Ingredients: You only need a handful of pantry staples. No fancy trips to a specialty store—just bread, butter, cheddar, and a Honeycrisp apple.
- Perfect for Fall (or Any Season): While it screams autumn, the combo of crisp apple and melted cheese works year-round. It’s great for a cozy night in or a quick lunch before heading out.
- Crowd-Pleaser: I’ve served these to kids, adults, and picky eaters. Everyone loves the salty-sweet crunch. It’s one of those recipes that gets devoured before you can even sit down.
- Unbelievably Delicious: The contrast between the cold, crunchy apple and the hot, melted cheddar is next-level. It sounds simple, but the flavor combo is honestly addictive.
What makes this different from other apple melts? It’s all in the technique. I use a specific method to get the bread extra crispy without burning the cheese, and I slice the apples paper-thin so they soften perfectly without making the bread soggy. This isn’t just another version—it’s the best version. Trust me, one bite and you’ll be closing your eyes. It’s comfort food reimagined: faster, fresher, but with the same soul-soothing satisfaction.
What Ingredients You Will Need
This recipe uses simple, wholesome ingredients to deliver bold flavor without the fuss. Most of these are probably already in your kitchen, which makes this a great last-minute meal.
- 2 slices of sourdough bread (or any sturdy bread like ciabatta or country loaf; avoid soft sandwich bread as it gets too soggy)
- 1 ½ tablespoons unsalted butter, softened (I like using Kerrygold for its rich flavor, but any good butter works)
- 2 to 3 ounces sharp cheddar cheese, thinly sliced (use a block and slice it yourself—pre-shredded doesn’t melt as smoothly)
- ½ medium Honeycrisp apple, cored and thinly sliced (about 1/8-inch thick; leave the peel on for color and texture)
- Pinch of flaky sea salt (like Maldon; optional but highly recommended for that salty crunch)
- Optional: 1 teaspoon Dijon mustard (spread on the inside of the bread for a tangy kick)
- Optional: 1 tablespoon honey (drizzle over the apples for extra sweetness)
Ingredient Tips: For the best texture, look for a Honeycrisp apple that’s firm and crisp—not mealy. The sharpness of the cheddar is key here; it balances the sweetness of the apple. If you’re out of sourdough, a good rustic whole wheat or rye works beautifully too. For a dairy-free version, use your favorite plant-based butter and a sharp vegan cheddar.
Equipment Needed
You don’t need a fancy kitchen to make this melt. Here’s what you’ll need:
- Non-stick skillet or cast-iron pan (a 10-inch skillet works best; cast iron gives you that extra-crispy crust)
- Spatula (a thin, flexible metal spatula is ideal for flipping without losing your filling)
- Sharp knife (for slicing the apple and cheese thinly; a mandoline slicer works great for consistent apple slices)
- Cutting board
- Butter knife (for spreading the butter)
If you don’t have a cast-iron pan, don’t worry. A good non-stick skillet works perfectly. Just make sure it’s preheated properly. I’ve also made these on a griddle with great results—it’s actually easier to flip them on a flat top. For the apple slices, a sharp chef’s knife does the job, but if you have a mandoline, it’s a game-changer for getting those even, thin slices.
Preparation Method

Follow these steps carefully, and you’ll have a perfect melt every time. The key is patience and paying attention to the heat.
- Prep your ingredients. Core your Honeycrisp apple and slice it into thin rounds, about 1/8-inch thick. You want them thin enough to soften quickly but thick enough to hold their shape. Slice your cheddar cheese into thin pieces as well—about 1/16-inch thick. Set everything aside.
- Butter the bread. Lay your two slices of sourdough on a cutting board. Spread the softened butter evenly on one side of each slice. This is the outside of your sandwich, so be generous but not excessive. A thin, even layer is all you need.
- Assemble the sandwich. Place one slice of bread, butter-side down, on a plate. Layer half of the cheddar slices on the bread. Arrange the apple slices in a single, even layer over the cheese—slightly overlapping is fine. Top with the remaining cheddar slices. If you’re using Dijon mustard or honey, spread it on the inside of the top slice of bread before placing it on top. Finish with the second slice of bread, butter-side up.
- Preheat the pan. Place your skillet over medium-low heat. Let it warm up for a full 2 minutes. This is crucial—if the pan is too hot, the bread will burn before the cheese melts. If it’s too cold, the bread will soak up butter and get greasy.
- Cook the first side. Carefully place the sandwich in the preheated skillet. Let it cook undisturbed for 3 to 4 minutes. You’ll know it’s ready to flip when the bottom is golden brown and crispy. Use your spatula to gently lift a corner and check the color. Resist the urge to press down on the sandwich—you’ll squeeze out the cheese.
- Flip and cook the second side. Using your spatula, carefully flip the sandwich. Cook for another 3 to 4 minutes, until the second side is golden brown and the cheese is fully melted. If the bread is browning too quickly, reduce the heat slightly. The cheese should be oozing out the sides just a bit—that’s the sign of a perfect melt.
- Rest and serve. Remove the sandwich from the pan and let it rest on a cutting board for 1 minute. This allows the cheese to set slightly so it doesn’t all slide out when you cut it. Use a sharp knife to slice it diagonally. Sprinkle with a pinch of flaky sea salt while it’s still warm.
Personal Tip: I always cook these one at a time, even if I’m making multiple. Crowding the pan drops the temperature and makes the bread soggy. It’s worth the extra minute to do them individually.
Cooking Tips & Techniques
I’ve made my fair share of sad, soggy melts. Here’s what I’ve learned the hard way so you don’t have to.
- Low and slow is your friend. Medium-low heat is the sweet spot. It gives the cheese enough time to melt completely while the bread turns a perfect golden brown. I once cranked the heat to high thinking I’d save time, and I ended up with burnt bread and unmelted cheese. Not a good look.
- Don’t skimp on the cheese. Use enough cheddar to cover the bread in a single layer, plus a little extra around the edges. The cheese acts as a “glue” that holds the apples in place. Too little cheese, and your apples will slide out when you flip.
- Slice apples uniformly. Uneven slices mean some parts will be crunchy while others are mushy. Aim for 1/8-inch thickness. A mandoline slicer makes this foolproof, but a steady hand with a knife works too.
- Use a lid for stubborn cheese. If your cheese isn’t melting fast enough, cover the pan with a lid for the last minute of cooking. The trapped steam helps melt the cheese without burning the bread. Just don’t leave it on too long, or your bread will lose its crunch.
- Let it rest. I know it’s hard to wait, but that one-minute rest is non-negotiable. If you cut into it immediately, the molten cheese will ooze out and leave you with a sad, hollow sandwich.
Variations & Adaptations
This recipe is super flexible. Here are a few ways to switch it up:
- Savory Herb Twist: Add a few fresh thyme leaves or a sprinkle of rosemary to the apples before closing the sandwich. The herbal notes pair beautifully with the sharp cheddar.
- Spicy Kick: Spread a thin layer of hot honey or sriracha on the inside of the bread. The heat cuts through the richness of the cheese and complements the sweet apple.
- Nutty Upgrade: Swap the cheddar for Gruyère or aged Gouda. These cheeses have a nuttier flavor that works wonderfully with Honeycrisp apples. You can also add a handful of toasted walnuts inside the sandwich for extra crunch.
- Gluten-Free Option: Use your favorite gluten-free bread. Just be careful—gluten-free bread tends to burn faster, so keep the heat on the lower side and watch it closely.
- Vegan Version: Use vegan butter and a good-quality sharp vegan cheddar. I’ve tried this with Violife cheddar-style slices, and it melts surprisingly well. Add a drizzle of maple syrup instead of honey for sweetness.
I once tried a version with Brie instead of cheddar, and honestly, it was amazing. The creamy Brie paired with the crisp apples felt way more decadent. Just be prepared for a messier melt—Brie gets very runny.
Serving & Storage Suggestions
This melt is best enjoyed fresh and hot, right off the skillet. Serve it immediately with a side of tomato soup or a simple arugula salad dressed with lemon vinaigrette. The peppery greens balance the richness of the cheese beautifully.
For a heartier meal, pair it with a bowl of roasted butternut squash soup or a crunchy apple slaw. If you’re serving it for brunch, add a side of crispy bacon or prosciutto. The saltiness takes it over the top.
Storage: Let’s be real—these are best eaten right away. But if you have leftovers (unlikely, but possible), wrap the cooled sandwich tightly in foil and store it in the fridge for up to 1 day. To reheat, place it in a dry skillet over medium-low heat for 2 to 3 minutes per side. Do not microwave it—the bread will turn into a sad, chewy sponge. The texture won’t be as crispy as fresh, but it’ll still hit the spot.
Make-Ahead Tip: You can slice the apples and cheese up to a day in advance. Store the apple slices in a bowl of cold water with a squeeze of lemon juice to prevent browning. Just pat them dry before assembling.
Nutritional Information & Benefits
Here’s an approximate breakdown per sandwich (using sourdough, butter, sharp cheddar, and one apple half):
- Calories: ~450
- Fat: 28g
- Carbohydrates: 38g
- Fiber: 4g
- Protein: 17g
- Sugar: 14g
Health Highlights: Honeycrisp apples are packed with fiber and vitamin C, which supports your immune system. Cheddar cheese provides calcium and protein, making this a surprisingly balanced meal. The sourdough bread is easier to digest than regular bread due to its fermentation process. If you’re watching your sodium, use a low-sodium cheddar and skip the flaky salt.
This recipe is naturally vegetarian. For a lower-calorie option, use whole wheat bread and reduce the butter to 1 tablespoon. It’s not quite as indulgent, but it’s still delicious.
Conclusion
This Crispy Honeycrisp Apple Cheddar Melt is proof that the best recipes come from the most unexpected places—in this case, a farmer’s market conversation with a cheese guy named Dave. It’s quick, it’s simple, and it delivers that perfect sweet-salty-crunchy combo that’s impossible to resist.
I love this recipe because it feels like a little secret. It’s not fancy, but it’s so much more than the sum of its parts. The next time you’re staring at a Honeycrisp apple and a block of cheddar, I hope you give this a try. Play with the variations, make it your own, and don’t forget that flaky salt on top—it really does make a difference.
Have you tried this melt? I’d love to hear how it turned out. Drop a comment below and let me know your favorite twist. And if you’re looking for another quick comfort food fix, you might enjoy my creamy tomato basil soup—it’s the perfect pairing for this sandwich. Happy cooking!
Frequently Asked Questions
Can I use a different type of apple?
Absolutely. While Honeycrisp is my top pick for its sweet-tart balance and crunch, you can use Fuji, Gala, or Pink Lady. Avoid Red Delicious—they turn mushy when heated and don’t have enough flavor.
How do I keep the apples from making the bread soggy?
The key is slicing them thin and patting them dry with a paper towel before assembling. Also, make sure your cheese layer acts as a barrier between the apples and the bread. Don’t overload the sandwich with too many apple slices.
Can I make this in an air fryer?
Yes! Preheat your air fryer to 350°F. Assemble the sandwich as directed, then place it in the basket. Cook for 4 to 5 minutes, flip carefully, and cook for another 3 to 4 minutes until golden and melty. It won’t be as evenly browned as stovetop, but it’s a great hands-off method.
What’s the best bread for this recipe?
Sourdough is my go-to because it’s sturdy and has a tang that complements the cheddar. Ciabatta or a rustic country loaf also work well. Avoid soft white sandwich bread—it gets too soggy and won’t hold up to the filling.
Can I prepare these ahead of time for a party?
You can assemble the sandwiches up to 2 hours ahead and keep them in the fridge, covered. Cook them right before serving. For a crowd, I recommend cooking them in batches on a griddle or in a large skillet. They’re best served immediately.
Pin This Recipe!
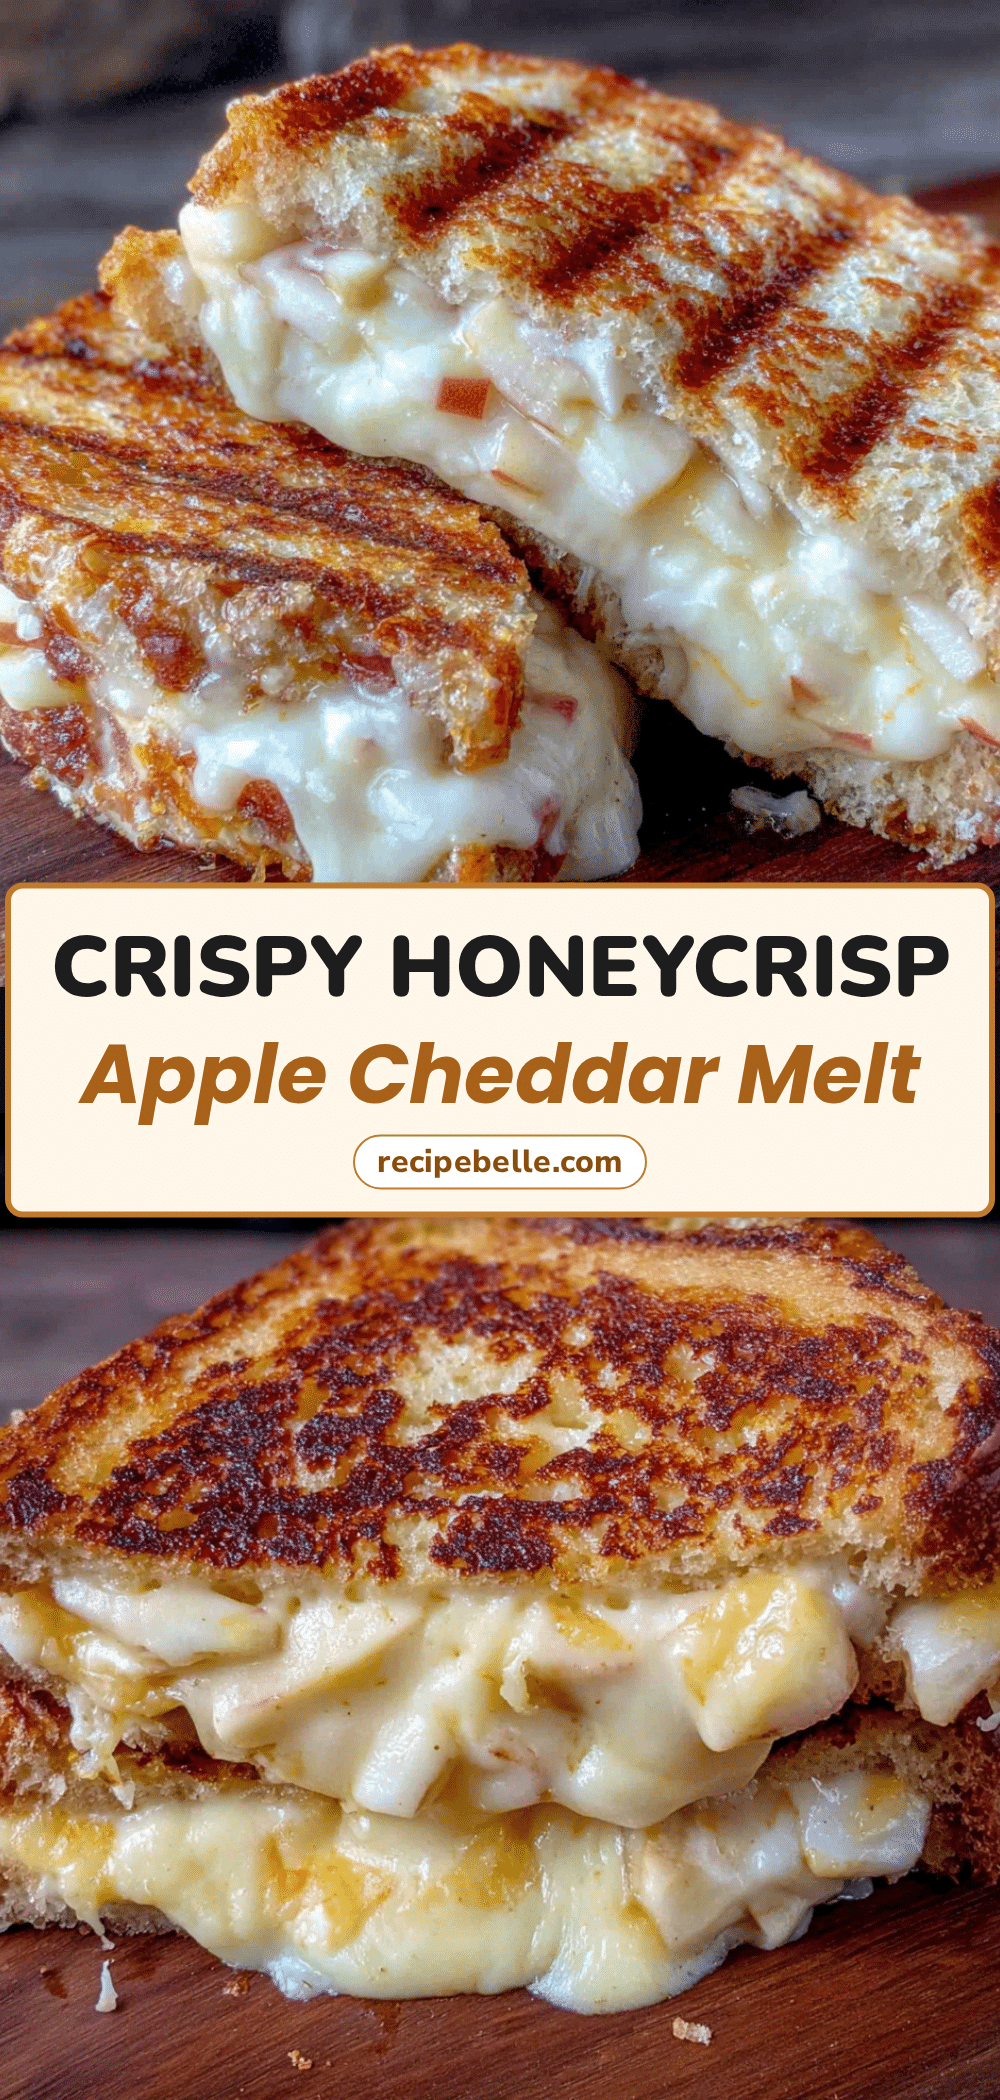
Crispy Honeycrisp Apple Cheddar Melt – Easy 10-Minute Recipe

A quick and easy savory-sweet grilled cheese featuring crisp Honeycrisp apples and sharp cheddar on golden sourdough. Perfect for a 10-minute lunch, dinner, or snack.
- Prep Time: 5 minutes
- Cook Time: 8 minutes
- Total Time: 13 minutes
- Yield: 1 serving 1x
- Category: Main Course
- Cuisine: American
Ingredients
- 2 slices of sourdough bread (or ciabatta or country loaf)
- 1 ½ tablespoons unsalted butter, softened
- 2 to 3 ounces sharp cheddar cheese, thinly sliced
- ½ medium Honeycrisp apple, cored and thinly sliced (about 1/8-inch thick)
- Pinch of flaky sea salt (optional)
- 1 teaspoon Dijon mustard (optional)
- 1 tablespoon honey (optional)
Instructions
- Core the Honeycrisp apple and slice into thin rounds, about 1/8-inch thick. Slice the cheddar cheese into thin pieces, about 1/16-inch thick.
- Lay the two slices of sourdough on a cutting board. Spread the softened butter evenly on one side of each slice (the outside of the sandwich).
- Place one slice of bread, butter-side down, on a plate. Layer half of the cheddar slices on the bread. Arrange the apple slices in a single, even layer over the cheese. Top with the remaining cheddar slices. If using Dijon mustard or honey, spread it on the inside of the top slice of bread before placing it on top. Finish with the second slice of bread, butter-side up.
- Place a skillet over medium-low heat and let it warm up for 2 minutes.
- Carefully place the sandwich in the preheated skillet. Cook undisturbed for 3 to 4 minutes, until the bottom is golden brown and crispy.
- Flip the sandwich carefully and cook for another 3 to 4 minutes, until the second side is golden brown and the cheese is fully melted.
- Remove the sandwich from the pan and let it rest on a cutting board for 1 minute. Slice diagonally and sprinkle with flaky sea salt while still warm.
Notes
For best results, cook sandwiches one at a time to avoid crowding the pan. Slice apples uniformly (1/8-inch thick) and pat them dry to prevent sogginess. Use a lid for the last minute if cheese isn’t melting fast enough. Let the sandwich rest for 1 minute before cutting to keep the cheese from oozing out.
Nutrition
- Serving Size: 1 sandwich
- Calories: 450
- Sugar: 14
- Sodium: 680
- Fat: 28
- Saturated Fat: 16
- Carbohydrates: 38
- Fiber: 4
- Protein: 17
Keywords: apple cheddar melt, grilled cheese with apple, honeycrisp apple recipe, quick lunch, easy dinner, savory sweet sandwich



