When they closed two years ago—just packed up and vanished one November—I felt a little pang of grief I wasn’t expecting. It wasn’t just the candy corn cookies they made, though those were spectacular. It was the whole experience: a little cardboard box lined with orange tissue paper, filled with tiny sweet and salty bites that my kids would devour in about four minutes flat. I tried recreating that feeling for Halloween parties ever since, and honestly? I failed. The first attempt was a sad plate of store-bought cookies and a handful of candy corn that looked more like a sad snack than a celebration. The second was better, but still missing that “wow” factor that made my kids’ eyes go wide.
After six tries—including one where I accidentally used ghost pepper cheese (don’t ask)—I finally cracked the code. This kid-approved Halloween charcuterie board with candy corn is the result of that obsession. It has the same playful energy as those bakery boxes, but it’s easier, cheaper, and way more fun to make at home. I mean, let me tell you, the first time I set this board down in front of my crew, my youngest actually gasped. That’s the kind of reaction you can’t buy, you know?
Maybe you’ve been there too—trying to find that perfect Halloween snack that feels special but doesn’t require a culinary degree or a second mortgage. This board is it. It’s got the sweet, the salty, the crunchy, and the creamy, all anchored by that iconic candy corn that somehow makes everything feel festive. And the best part? You probably already have most of the ingredients in your pantry right now.
Why You’ll Love This Recipe
This isn’t just another snack board. It’s a crowd-pleasing, budget-friendly, make-ahead marvel that solves the eternal Halloween dilemma: what do you feed the kids before they hit the streets for trick-or-treating?
- Quick & Easy: This board comes together in under 20 minutes. I timed it. No cooking, no baking, no stress. Just assembly and a whole lot of fun.
- Simple Ingredients: No fancy grocery trips needed. You likely already have cheese, crackers, and fruit in your kitchen. The candy corn is the star, and it’s everywhere this time of year.
- Perfect for Halloween Parties: Whether it’s a school party, a neighborhood gathering, or just a cozy family movie night, this board fits the bill. It’s portable, shareable, and endlessly customizable.
- Crowd-Pleaser: I’ve served this to kids from ages 3 to 13, and they all go for the same things first: the candy corn, the cheese cubes, and the little pretzel ghosts. It’s like a magnet for little hands.
- Unbelievably Delicious: The combination of sweet candy corn, salty pretzels, creamy cheese, and fresh fruit is pure magic. It’s the kind of snack that makes you close your eyes after the first bite—and then reach for another piece.
What makes this recipe different from the rest? It’s the balance. Most Halloween boards are either all sugar or all savory. This one hits every note. Plus, I’ve tested it with my own picky eaters, so I know it works. It’s not just another version—it’s the version that has survived multiple Halloween parties, a school bake sale, and a very intense episode of Paw Patrol.
This recipe isn’t just good—it’s the kind that makes you feel like a Halloween hero without breaking a sweat. Perfect for impressing guests without stress, or turning a simple snack into something memorable.
What Ingredients You Will Need
This recipe uses simple, wholesome ingredients to deliver bold flavor and satisfying texture without the fuss. Most of these are pantry staples or easy to find at any grocery store during October.
- Candy Corn: 1 cup (about 150g) of classic candy corn. I prefer Brach’s for the classic taste, but any brand works. (Pro tip: buy the big bag—you’ll want extra for snacking.)
- Pretzel Twists: 1 cup (about 100g) of salted pretzel twists. The saltiness balances the sweet candy corn perfectly. You can also use pretzel sticks or mini pretzels.
- Cheddar Cheese Cubes: 1 cup (about 150g) of sharp cheddar cheese, cut into ½-inch cubes. The orange color is perfect for Halloween. I recommend Tillamook or Cabot for great flavor.
- Colby Jack Cheese Cubes: 1 cup (about 150g) of Colby Jack cheese, also cut into ½-inch cubes. The white and orange marbling adds visual interest.
- Red Seedless Grapes: 1 cup (about 150g) of red seedless grapes, washed and dried. They look like little eyeballs—perfect for Halloween!
- Orange Slices: 2 medium oranges, peeled and sliced into rounds. The bright color adds a pop of Halloween orange. (Use navel oranges for sweetness.)
- Halloween-Themed Crackers: 1 cup (about 100g) of Halloween-shaped crackers—think bats, pumpkins, or ghosts. Pepperidge Farm Goldfish makes a Halloween mix, or you can find generic ones at most stores.
- Miniature Marshmallows: ½ cup (about 50g) of mini marshmallows. They add a soft, sweet contrast to the crunchy elements.
- Chocolate-Covered Raisins: ½ cup (about 80g) of chocolate-covered raisins. They look like little bugs or creepy crawlies—kids love the visual.
- Pumpkin Seeds (Pepitas): ¼ cup (about 30g) of roasted and salted pumpkin seeds. They add a nice crunch and a seasonal touch.
- Apple Slices: 1 medium apple (Granny Smith or Honeycrisp), cored and sliced thin. Toss them in a little lemon juice to prevent browning.
- Optional Dips: ¼ cup (60ml) of caramel sauce for dipping and ¼ cup (60g) of Greek yogurt or cream cheese for a savory option.
Substitution Guidance: If you’re avoiding gluten, swap the pretzels and crackers for gluten-free versions. Use dairy-free cheese if needed, though the texture may be a bit softer. For a nut-free board, skip the pumpkin seeds and check that your chocolate-covered raisins are nut-free.
Equipment Needed
You don’t need anything fancy for this board. Here’s what I use:
- Large Wooden Cutting Board or Serving Platter: At least 12×16 inches. I use a round bamboo board I got at a thrift store for five bucks. A baking sheet lined with parchment paper works in a pinch.
- Small Bowls or Ramekins: For the dips and loose ingredients like candy corn and pumpkin seeds. I have a set of orange ramekins I use just for Halloween.
- Cheese Knife or Small Paring Knife: For cutting the cheese and fruit. Nothing fancy—a sharp knife is all you need.
- Cutting Board: For prepping the fruit and cheese. I use a small plastic one that’s easy to clean.
- Serving Spoons or Tongs: For the grapes, apple slices, and loose items. Small tongs are great for little hands.
- Parchment Paper (Optional): To line the board for easy cleanup. I do this when I’m serving kids—they’re messy!
Budget-Friendly Tip: Don’t have a fancy board? Use a large baking sheet, a clean pizza pan, or even a flat piece of cardboard covered in foil. Presentation matters, but practicality wins every time.
Preparation Method
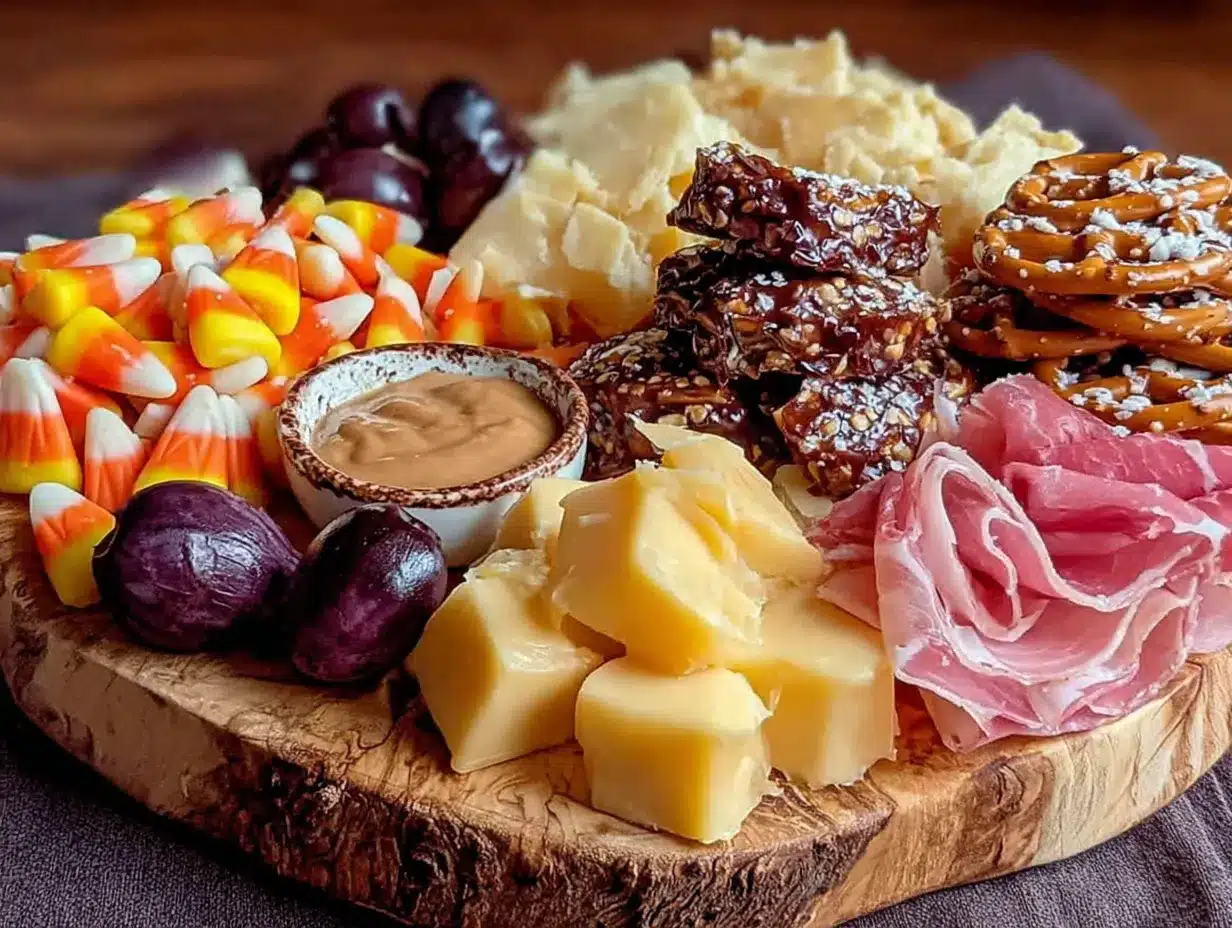
Let’s get this board party-ready. Follow these steps, and you’ll have a spooky, snackable masterpiece in no time.
- Wash and Prep the Fruit: Start by washing the grapes and apple thoroughly. Pat them dry with a clean towel. Core the apple and slice it into thin wedges. Toss the apple slices in a little lemon juice (about 1 tablespoon) to keep them from turning brown. Peel and slice the oranges into rounds about ¼-inch thick. Set everything aside.
- Cut the Cheese: Take your cheddar and Colby Jack blocks. Cut them into ½-inch cubes. I like to keep the cubes uniform so they look neat on the board. If you have a cheese slicer, this goes faster. Aim for about 20 cubes of each cheese. (Pro tip: cut the cheese while it’s cold—it’s easier to handle.)
- Arrange the Bowls: Place your small bowls or ramekins on the board first. This anchors the design. Fill one bowl with caramel sauce, another with Greek yogurt (if using), and a third with the candy corn. The bowls should be spaced out so there’s room for everything else.
- Create the Cheese and Fruit Zones: Around the bowls, start building your clusters. Group the cheddar cubes in one corner and the Colby Jack in another. Place the orange slices in a fan pattern near the cheese. Add the grapes in a small pile—they look like little eyeballs staring at you!
- Add the Crunchy Elements: Fill in the gaps with the pretzels, Halloween crackers, and pumpkin seeds. I like to scatter the pretzels in a zigzag pattern across the board. The crackers can be stacked or laid flat. The pumpkin seeds go in any remaining empty spots.
- Place the Sweet Bites: Now for the fun part. Add the chocolate-covered raisins in a small cluster—they look like little bugs. Scatter the mini marshmallows around the board for a soft, fluffy touch. Arrange the apple slices near the caramel dip.
- Final Touches with Candy Corn: This is where the magic happens. Take a handful of candy corn and sprinkle it artfully across the board. Don’t just dump it—place a few pieces here and there, creating little trails and clusters. The candy corn should be visible from every angle.
- Check the Balance: Step back and look at your board. Are there any empty spots? Fill them with extra grapes, pretzels, or candy corn. The goal is a full, abundant look that invites grazing. Add a few extra cheese cubes if needed.
- Serve Immediately or Refrigerate: This board is best served at room temperature. If you’re making it ahead, cover it loosely with plastic wrap and refrigerate for up to 4 hours. Take it out 20 minutes before serving to let the cheese soften slightly.
Sensory Cues: When you’re done, the board should look like a Halloween party exploded on it—colorful, abundant, and inviting. The cheese should be firm but not hard, the fruit bright and fresh, and the candy corn glistening like little gems. Your kids will probably start grabbing things before you finish arranging—mine always do!
Cooking Tips & Techniques
I’ve made this board more times than I can count, and I’ve learned a few tricks along the way. Here’s what I wish I knew from the start.
- Don’t Overcrowd the Board: It’s tempting to pile everything on, but leave a little breathing room. Kids need space to grab things without knocking over bowls. I learned this the hard way when my son sent a bowl of caramel sauce flying across the kitchen.
- Keep It Cold Until Serving: If you’re prepping in advance, keep the cheese and fruit refrigerated separately. Assemble the board just before serving to keep everything fresh. The candy corn can stay at room temperature.
- Use Color Contrast: Halloween is all about orange and black, but don’t forget the greens and reds. The green apple slices and red grapes break up the orange overload and make the board more visually appealing.
- Make It Interactive: Let the kids help arrange the board. My daughter loves placing the candy corn in little patterns. It keeps them busy and gives them ownership over the snack. Plus, they’re more likely to eat something they helped create.
- Watch the Candy Corn Placement: Candy corn can get sticky if it sits too close to moist fruit. Keep it near the dry elements like pretzels and crackers. I learned this after a batch of candy corn turned into a sticky puddle next to orange slices.
- Double Up on Favorites: If your kids love a particular element—like the chocolate-covered raisins or the pretzels—add extra. It’s better to have too much than to run out mid-party.
Variations & Adaptations
This board is endlessly customizable. Here are a few variations I’ve tried and loved.
- Nut-Free Version: Skip the pumpkin seeds and check that your chocolate-covered raisins are processed in a nut-free facility. Add extra pretzels or Halloween crackers for crunch. My neighbor’s son has a nut allergy, and this version has been a hit at their Halloween parties.
- Dairy-Free Option: Use dairy-free cheese alternatives—I like Daiya or Violife for meltability and flavor. Swap the yogurt dip for a dairy-free ranch or hummus. The rest of the board is naturally dairy-free.
- Savory Twist: Add some salami or pepperoni slices for a protein boost. I’ve done this for older kids and adults, and it balances the sweetness of the candy corn. Just keep the meat separate from the fruit to avoid cross-contamination.
- Monster-Themed Board: Use cookie cutters to shape cheese slices into bats, ghosts, or pumpkins. My kids went crazy for this version. It takes an extra five minutes but adds a huge wow factor.
- Healthy Halloween Board: Swap the candy corn for dried apricots or mango slices. Use dark chocolate-covered almonds instead of raisins. Add veggie sticks like carrot and cucumber rounds. It’s still festive but a bit lighter.
Personal Variation: One year, I added a small bowl of popcorn tossed with orange food coloring and a little cinnamon sugar. It looked like autumn leaves and tasted amazing. My kids still ask for “Halloween popcorn” every year.
Serving & Storage Suggestions
This board is best enjoyed at room temperature, so take it out of the fridge about 20 minutes before serving. Arrange it on a large platter or board and let the kids go to town.
Presentation Tips: Serve the board on a festive Halloween-themed platter if you have one. Add a few fake spider webs or plastic spiders around the edges for a spooky touch. My kids love finding the “surprise” spiders hidden among the snacks.
Complementary Dishes: This board pairs beautifully with warm apple cider or a pumpkin spice smoothie. For a full Halloween meal, serve it alongside mini sliders or a batch of chili. It also works great as a pre-trick-or-treat snack to fill little bellies before the candy haul.
Storage Instructions: Leftovers can be stored in separate airtight containers in the refrigerator. The cheese and fruit will keep for 2-3 days. The candy corn and pretzels can be stored at room temperature for up to a week. I like to repurpose the leftovers for lunchbox snacks the next day.
Reheating: No reheating needed for this board! If the cheese has been refrigerated, let it sit at room temperature for 15 minutes before serving. The fruit and crackers are best enjoyed cold or at room temperature.
Flavor Development: Interestingly, the flavors meld together beautifully after a few hours. The candy corn softens slightly, and the cheese takes on a subtle sweetness from the fruit. If you’re making this for a party, assembling it an hour ahead actually improves the experience.
Nutritional Information & Benefits
This board is a balanced snack that offers a mix of nutrients. Here’s a rough estimate per serving (assuming 8 servings):
- Calories: Approximately 350-400 per serving
- Protein: 10-12g (from cheese and pumpkin seeds)
- Carbohydrates: 45-50g (from fruit, crackers, and candy corn)
- Fat: 15-18g (from cheese and chocolate-covered raisins)
- Fiber: 3-4g (from fruit and pumpkin seeds)
- Sugar: 25-30g (from candy corn and fruit)
Health Benefits: The cheese provides calcium and protein, while the fruit offers vitamins and antioxidants. Pumpkin seeds are rich in magnesium and zinc. Even the candy corn, in moderation, adds a fun treat that makes the board feel special.
Dietary Considerations: This board can be made gluten-free, dairy-free, or nut-free with simple substitutions. The base recipe is vegetarian. For a lower-sugar version, reduce the candy corn and add more fruit and cheese.
Allergen Note: This recipe contains dairy (cheese) and potential allergens from chocolate and crackers. Always check labels if serving to guests with allergies.
Personal Perspective: I love that this board lets kids enjoy a treat without feeling deprived. It’s about balance—a little candy, a little cheese, a little fruit. My kids eat more fruit on Halloween night than any other night of the year, just because it’s part of the fun.
Conclusion
This kid-approved Halloween charcuterie board with candy corn is more than just a snack—it’s a memory in the making. I’ve watched my kids’ faces light up every time I set it on the table, and honestly, that never gets old. It’s the kind of recipe that turns a regular October evening into something special, without requiring hours in the kitchen or a trip to five different stores.
I hope you’ll try this board and make it your own. Add your family’s favorite snacks, swap in seasonal fruits, or let your kids design their own arrangement. The beauty of this recipe is its flexibility—it works for everyone, every time.
If you make this board, I’d love to hear about it! Drop a comment below and tell me what your kids grabbed first. Did they go for the candy corn? The cheese? The grapes? Share your photos and tag me—I can’t wait to see your Halloween creations. Until then, happy snacking, and may your Halloween be filled with just the right amount of spooky and sweet!
Frequently Asked Questions
Can I make this board ahead of time?
Yes! You can prep all the ingredients up to 24 hours in advance. Store the cheese, fruit, and dips separately in the refrigerator. Assemble the board about 30 minutes before serving. The candy corn and crackers can stay at room temperature.
How do I keep the apple slices from turning brown?
Toss the apple slices in a mixture of 1 tablespoon lemon juice and 1 tablespoon water. This will keep them fresh and bright for several hours. You can also use a commercial fruit preserver like Fruit-Fresh.
Can I use different types of cheese?
Absolutely! Gouda, mozzarella balls, or even cream cheese spread work well. I’ve used pepper jack for a little kick, though my kids prefer the milder cheddar and Colby Jack. Just keep the texture firm enough to hold up on the board.
How long can the board sit out at a party?
For food safety, don’t leave the board out for more than 2 hours at room temperature. If you’re hosting a longer party, consider replenishing the board with fresh ingredients from the fridge every couple of hours.
Can I make this board for adults only?
Definitely! Swap the candy corn for dark chocolate, add some cured meats like prosciutto or salami, and include a brie or aged gouda. A drizzle of honey over the cheese adds a sophisticated touch. It’s just as fun for grown-ups!
Pin This Recipe!
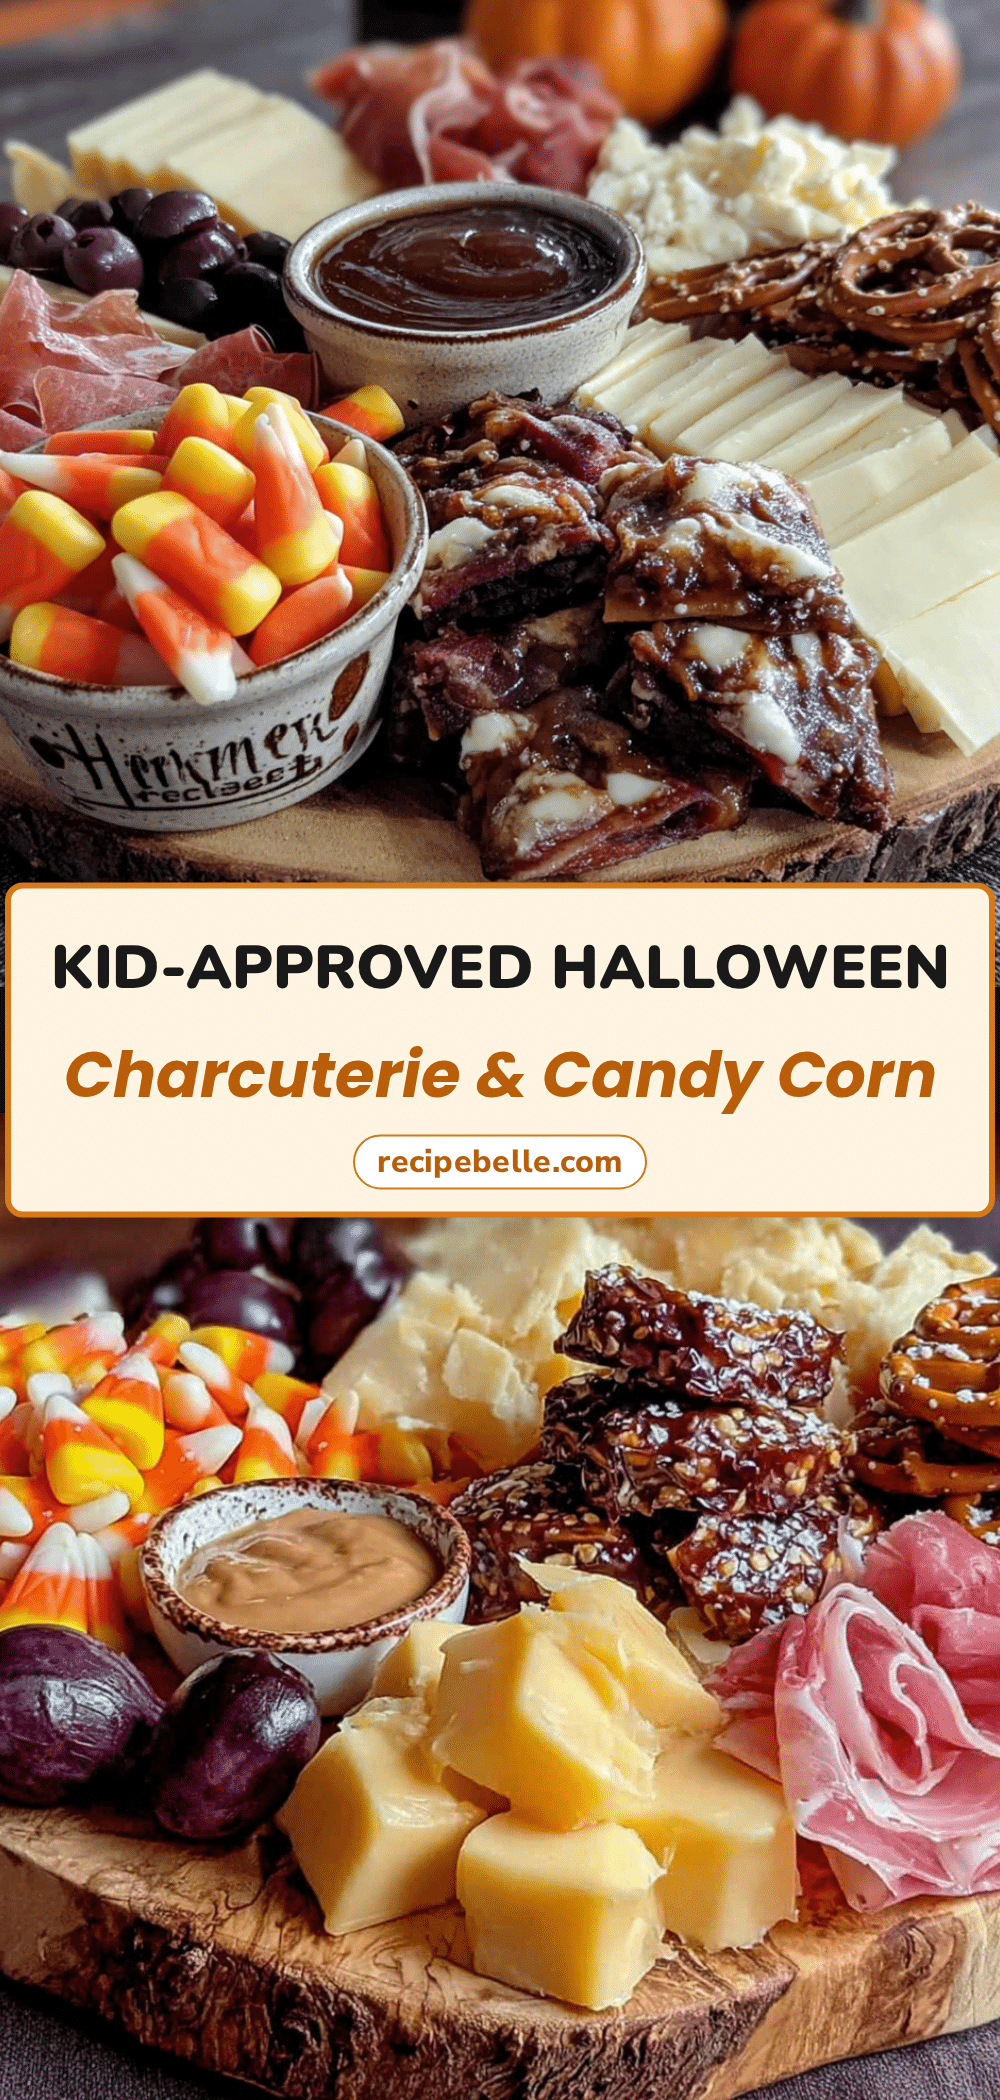
Easy Kid-Approved Halloween Charcuterie Board with Candy Corn
A fun, festive, and easy-to-assemble Halloween snack board featuring candy corn, cheese, fruit, and crunchy treats. Perfect for parties, movie nights, or pre-trick-or-treating fuel.
- Prep Time: 20 minutes
- Cook Time: 0 minutes
- Total Time: 20 minutes
- Yield: 8 servings 1x
- Category: Appetizer
- Cuisine: American
Ingredients
- 1 cup (about 150g) candy corn
- 1 cup (about 100g) salted pretzel twists
- 1 cup (about 150g) sharp cheddar cheese, cut into ½-inch cubes
- 1 cup (about 150g) Colby Jack cheese, cut into ½-inch cubes
- 1 cup (about 150g) red seedless grapes, washed and dried
- 2 medium oranges, peeled and sliced into rounds
- 1 cup (about 100g) Halloween-shaped crackers
- ½ cup (about 50g) miniature marshmallows
- ½ cup (about 80g) chocolate-covered raisins
- ¼ cup (about 30g) roasted and salted pumpkin seeds
- 1 medium apple (Granny Smith or Honeycrisp), cored and sliced thin
- 1 tablespoon lemon juice (for apple slices)
- ¼ cup (60ml) caramel sauce (optional, for dipping)
- ¼ cup (60g) Greek yogurt or cream cheese (optional, for dipping)
Instructions
- Wash and prep the fruit: Wash grapes and apple thoroughly; pat dry. Core apple and slice into thin wedges; toss with 1 tablespoon lemon juice to prevent browning. Peel and slice oranges into ¼-inch rounds. Set aside.
- Cut the cheese: Cut cheddar and Colby Jack blocks into ½-inch cubes (about 20 cubes each). Keep cheese cold for easier cutting.
- Arrange the bowls: Place small bowls or ramekins on a large wooden cutting board or serving platter. Fill one with caramel sauce, one with Greek yogurt (if using), and one with candy corn. Space bowls out.
- Create cheese and fruit zones: Group cheddar cubes in one corner and Colby Jack in another. Fan orange slices near cheese. Add grapes in a small pile.
- Add crunchy elements: Fill gaps with pretzels, Halloween crackers, and pumpkin seeds. Scatter pretzels in a zigzag pattern; stack or lay crackers flat; sprinkle pumpkin seeds in empty spots.
- Place sweet bites: Add chocolate-covered raisins in a small cluster. Scatter mini marshmallows around the board. Arrange apple slices near caramel dip.
- Final touches with candy corn: Sprinkle candy corn artfully across the board, creating little trails and clusters. Ensure candy corn is visible from every angle.
- Check balance: Step back and look for empty spots. Fill with extra grapes, pretzels, or candy corn. Add more cheese cubes if needed.
- Serve immediately or refrigerate: Best served at room temperature. If making ahead, cover loosely with plastic wrap and refrigerate for up to 4 hours. Remove from fridge 20 minutes before serving.
Notes
For a gluten-free version, swap pretzels and crackers for gluten-free alternatives. For dairy-free, use dairy-free cheese and yogurt. For nut-free, skip pumpkin seeds and check chocolate-covered raisins. Keep candy corn away from moist fruit to prevent stickiness. Let kids help arrange for added fun.
Nutrition
- Serving Size: 1 serving (about 1/8
- Calories: 375
- Sugar: 28
- Sodium: 450
- Fat: 16
- Saturated Fat: 8
- Carbohydrates: 48
- Fiber: 3
- Protein: 11
Keywords: Halloween charcuterie board, kid-friendly snack, candy corn, Halloween party food, easy appetizer, no-cook snack



