I was standing in the frozen foods aisle last October when a bag of pre-made ghost-shaped marshmallows caught my eye—and suddenly I was seven years old at my Aunt Carla’s kitchen table, the smell of burnt sugar hanging in the air like a ghost itself. She’d let me pipe meringue for the first time, my little hands shaking, and every single ghost came out lopsided with one wing bigger than the other. She laughed and said they were “character ghosts” and popped one right into my mouth before it even cooled. I remember the way it dissolved on my tongue—crisp on the outside, then nothing but air and sweetness. That moment has lived in my head rent-free for decades.
Aunt Carla passed a few years back, and honestly, I’ve been chasing that exact feeling ever since. You know that feeling when you taste something and it’s not just food—it’s a time machine? That’s what these cozy ghost meringue cookies are for me. And here’s the thing: I’ve made a lot of meringue in my life, but I never got it quite right until I stopped trying to be perfect. I burned a batch so bad last Halloween that the kitchen smelled like a campfire for three days. My dog wouldn’t come near me. But that failure taught me more than any recipe book ever did.
So this recipe isn’t about flawless ghosts with perfect little faces. It’s about the kind of cookie that makes you slow down, makes you laugh when one falls over in the oven, and makes your whole house smell like vanilla and cozy October evenings. Maybe you’ve been there—standing in your kitchen, trying to recreate something from your childhood that feels just out of reach. These ghosts are my way of holding onto that memory, one crispy, sweet bite at a time.
Why You’ll Love This Recipe
I’ve tested this recipe about seven times to get it just right, and let me tell you—each batch taught me something new. The first batch was too flat. The second was too chewy. But by batch number four, I had it down, and by batch seven, I was eating ghosts for breakfast. (No regrets.) Here’s why this version stands out from every other ghost cookie you’ll see on Pinterest this season.
- Quick & Easy: These come together in about 20 minutes of active prep time. The oven does most of the work while you sip your coffee or watch the leaves fall outside your window.
- Simple Ingredients: You probably have everything already—egg whites, sugar, vanilla, and a pinch of cream of tartar. No weird specialty items or expensive extracts.
- Perfect for Halloween: These are spooky enough for a costume party but cozy enough for a quiet night in with hot cocoa and a scary movie.
- Crowd-Pleaser: Kids love the ghost shapes, and adults love that they’re light and not overly sweet. I’ve watched a room full of grown-ups fight over the last one.
- Unbelievably Delicious: The texture is what gets me—crisp on the outside, airy and light on the inside, with that classic vanilla sweetness that melts on your tongue.
What makes this recipe different is the technique I figured out after that burnt batch incident. Instead of rushing the sugar dissolving process, I take it slow and steady. I use a thermometer now (because guessing is for people who don’t mind crying over spilled sugar), and I add a secret splash of vinegar that makes the meringue extra stable. The result? Ghosts that hold their shape, don’t weep in the oven, and have that perfect crisp-then-melt texture that makes meringue so addictive.
This recipe isn’t just good—it’s the kind that makes you close your eyes after the first bite. It’s comfort food reimagined as something light and airy, but with the same soul-soothing satisfaction as your favorite childhood treat. Perfect for impressing guests without stress, or turning a simple October evening into something memorable.
What Ingredients You Will Need
This recipe uses simple, pantry-friendly ingredients to create something that feels truly magical. The key is quality and temperature—room-temperature egg whites whip up fluffier, and pure vanilla extract makes a noticeable difference in flavor. Here’s everything you’ll need:
For the Meringue Ghosts
- 4 large egg whites, room temperature (this is crucial—cold eggs won’t whip properly)
- 1 cup (200g) granulated white sugar (I prefer organic sugar for cleaner flavor, but any works)
- 1/4 teaspoon cream of tartar (stabilizes the meringue and helps it hold shape)
- 1 teaspoon pure vanilla extract (I use Nielsen-Massey—worth the splurge for the rich flavor)
- 1/2 teaspoon white vinegar (my secret ingredient for extra stability, adds no taste)
- Pinch of fine sea salt (balances the sweetness)
For Decoration (Optional but Fun)
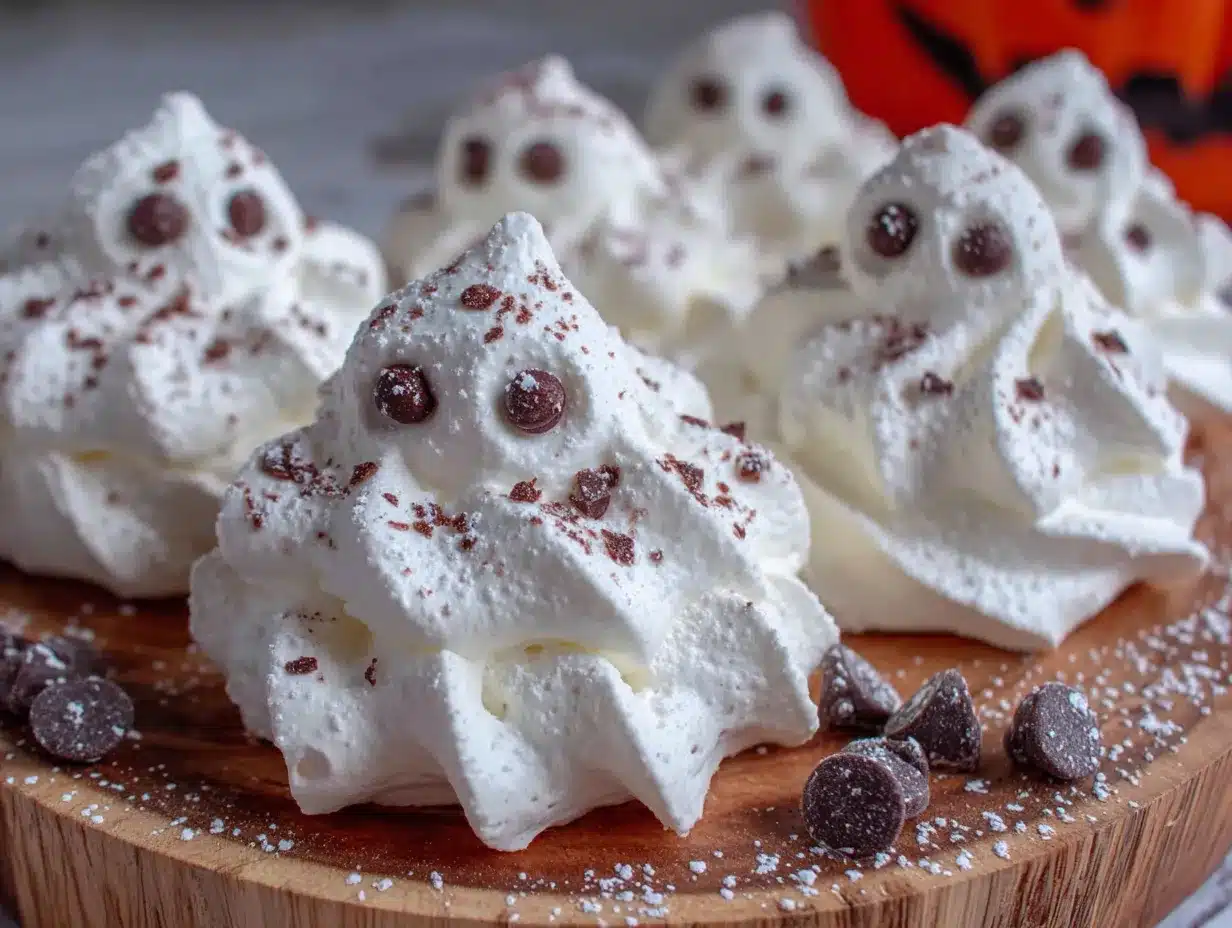
- Mini chocolate chips for eyes (about 1/4 cup, or use black gel food coloring to pipe faces)
- Black gel food coloring (easier to control than chocolate chips for detailed faces)
- Edible glitter or luster dust (for a magical, spooky sparkle—my kids love this)
Ingredient Tips: For the fluffiest meringue, make sure your bowl and whisk are completely clean and free of grease. Even a tiny bit of fat can ruin the whip. I wipe my bowl with a bit of lemon juice or vinegar before starting—old baker’s trick. If you’re using a copper bowl, you can skip the cream of tartar entirely. But let’s be honest, who has a copper bowl? Not me.
Substitutions: If you need a vegan version, use aquafaba (the liquid from a can of chickpeas) instead of egg whites—about 3 tablespoons per egg white. It whips up surprisingly similar, though the texture is slightly less crisp. For a lower-sugar option, you can use superfine caster sugar, which dissolves faster and creates a more stable meringue. Just don’t try to use powdered sugar or brown sugar—they’ll change the texture completely.
Equipment Needed
You don’t need a fancy kitchen to make these ghosts, but having the right tools makes the process smoother. Here’s what you’ll need:
- Stand mixer or hand mixer: A stand mixer is ideal because you can walk away while it whips, but a hand mixer works perfectly too. I’ve made these with both. Your arm will get tired with the hand mixer, but it’s doable.
- Large mixing bowl: Glass or metal works best—plastic can hold onto grease even after washing.
- Piping bag with a round tip: A #12 or #10 round tip works great for ghost shapes. If you don’t have a piping bag, use a zip-top bag with the corner snipped off. It’s not as precise, but it works in a pinch.
- Baking sheets: Two large baking sheets lined with parchment paper. Silpat mats work too, but parchment is easier to peel off.
- Candy thermometer: Not strictly necessary, but highly recommended if you’re new to meringue. It takes the guesswork out of knowing when the sugar is fully dissolved.
- Cooling rack: For letting your ghosts cool completely before decorating.
Budget-Friendly Tip: Don’t run out and buy a fancy piping bag. A sturdy zip-top bag with a small hole cut in the corner works just fine. I’ve been doing it that way for years and only upgraded because I wanted prettier ghosts for photos. Also, if you don’t have a thermometer, rub a bit of the meringue between your fingers—if it feels gritty, the sugar hasn’t dissolved yet.
Preparation Method
Alright, let’s make some ghosts! I’m going to walk you through every step, including the little things I’ve learned the hard way. The total active time is about 20 minutes, plus 1.5 to 2 hours for baking and cooling.
- Preheat your oven to 200°F (95°C). Yes, that’s very low. We’re not baking these so much as drying them out. Line two baking sheets with parchment paper and set them aside.
- Clean your bowl and whisk attachment with a splash of lemon juice or white vinegar on a paper towel. This removes any trace of grease that could ruin your meringue. I learned this the hard way after three failed batches in a row. Not fun.
- Separate your eggs while they’re cold—it’s easier to separate yolks from whites when they’re straight from the fridge. Then let the whites come to room temperature in your mixing bowl for about 20 minutes. Room-temperature whites whip up to a much greater volume. Trust me on this.
- Add the cream of tartar and salt to the egg whites. Beat on medium speed (speed 4 on a KitchenAid) until soft peaks form. This takes about 2-3 minutes. You’ll know it’s ready when the whites are frothy and hold a soft shape that flops over when you lift the whisk.
- With the mixer running on medium-low, start adding the sugar one tablespoon at a time. I know it’s tedious, but rushing this step causes gritty meringue. Take your time—about 15-20 seconds between each addition. The whole process takes about 5 minutes.
- Once all the sugar is added, increase the speed to medium-high (speed 6-8) and beat until stiff, glossy peaks form. This takes about 5-7 minutes. Here’s how you know it’s ready: lift the whisk attachment and the meringue should stand up in a stiff peak that doesn’t droop. Also, rub a little between your fingers—if it feels smooth and not gritty, the sugar is fully dissolved. If it’s gritty, keep beating.
- Add the vanilla and vinegar and beat on low for about 10 seconds, just until combined. Don’t overmix at this stage or you’ll deflate the meringue.
- Transfer the meringue to your piping bag fitted with a round tip. If using a zip-top bag, snip about 1/2 inch off one corner. Fill the bag about halfway—don’t overfill or it’ll be hard to control.
- Pipe your ghosts: Hold the bag perpendicular to the baking sheet about 1 inch above the surface. Apply steady pressure to create a round body about 1.5 inches wide. Then, as you lift the bag straight up, release pressure slightly to create a smaller head on top. Pull the bag away quickly to create a little peak on top. (Don’t worry if they look weird—my first batch looked like blobs with hats. They still tasted amazing.)
- For the arms: Pipe two small teardrop shapes on either side of each ghost. Or skip the arms entirely for a more classic ghost shape. I usually do half with arms and half without, just for variety.
- Bake for 1.5 hours at 200°F (95°C). Do NOT open the oven door during baking—the steam will ruin your meringues. After 1.5 hours, turn the oven off but leave the ghosts inside to cool completely for another 1-2 hours. This step is crucial for getting that perfect dry, crisp texture.
- Once completely cool, gently peel the ghosts off the parchment paper. If they stick, they need more drying time. Pop them back in the turned-off oven for another 30 minutes.
- Decorate your ghosts: Use black gel food coloring to pipe little eyes and a mouth on each ghost. Or gently press mini chocolate chips into the meringue for eyes—just be careful not to crush the delicate cookie. If you’re using edible glitter, dust it on lightly with a small brush.
Cooking Tips & Techniques
I’ve made every mistake in the book with meringue, so let me save you some trouble. Here are the things I wish someone had told me before I started:
Humidity is your enemy. Meringue hates humid days. If it’s raining or super muggy outside, wait for a drier day to make these. The sugar absorbs moisture from the air and your meringue will turn out sticky and flat. I learned this the hard way during a summer thunderstorm—my ghosts looked like sad, deflated balloons.
Don’t overbeat your meringue. I know I said to beat until stiff peaks form, but there’s a fine line between perfect and overbeaten. Overbeaten meringue looks grainy and separated, and it will weep in the oven. Stop as soon as the peaks are stiff and glossy. If you see the mixture starting to look dry or curdled, you’ve gone too far.
Low and slow is the way to go. I know you want to speed things up, but don’t raise the oven temperature. Meringue bakes at a low temperature for a long time—it’s more about drying than cooking. If you rush it, your ghosts will brown on the outside and stay chewy on the inside. And nobody wants a chewy ghost.
Let them cool completely in the oven. This is non-negotiable. The residual heat finishes the drying process. If you pull them out too early, they’ll collapse and get sticky. I once made the mistake of opening the oven after an hour because I was impatient, and my ghosts immediately deflated like they were embarrassed.
Multitasking tip: While the meringue is whipping, line your baking sheets and get your piping bag ready. That way, once the meringue is ready, you can pipe immediately. Meringue starts to deflate the longer it sits, so work quickly.
Variations & Adaptations
One of the best things about this recipe is how easy it is to customize. Here are some variations I’ve tried and loved:
Spooky Chocolate Ghosts
Swap 2 tablespoons of sugar for 2 tablespoons of unsweetened cocoa powder. Sift it into the meringue at the very end and fold gently. The result is a chocolate ghost that looks extra spooky and tastes like a light, airy brownie. My nephew refused to eat the white ones but devoured the chocolate ones.
Peppermint Ghosts for Christmas
Replace the vanilla extract with 1/2 teaspoon peppermint extract and add a drop of red food coloring to create a subtle pink swirl. These are perfect for holiday cookie exchanges and look gorgeous on a Christmas platter. Just be careful—peppermint extract is strong, so don’t overdo it.
Vegan Aquafaba Ghosts
Use the liquid from a can of chickpeas (about 3/4 cup) instead of egg whites. Add an extra 1/4 teaspoon cream of tartar and beat for longer—about 10-12 minutes. The texture is slightly less crisp but still delicious. I tested this for a friend with egg allergies and was honestly surprised at how well it worked.
Lavender Honey Ghosts
Add 1 tablespoon of culinary lavender buds to the sugar before grinding it in a food processor (or just crush them finely). Replace the vanilla with 1 teaspoon honey. The floral notes pair beautifully with the sweet meringue, and the lavender gives the ghosts a subtle purple tint. These feel very fancy and cozy at the same time.
Serving & Storage Suggestions
These ghosts are best served at room temperature, straight from the oven (well, after they’ve cooled). They’re light and airy, so they pair beautifully with a warm drink. I love serving them alongside hot cocoa with marshmallows, a spiced chai latte, or even a cup of black coffee to balance the sweetness.
For a Halloween party spread, arrange the ghosts on a platter with some candy corn, chocolate spiders, and maybe a bowl of pumpkin seeds. They make a stunning centerpiece that looks way more impressive than the effort suggests. I once arranged them on a black cake stand with fake cobwebs underneath, and people thought I bought them from a bakery.
Storage: Store your meringue ghosts in an airtight container at room temperature for up to 2 weeks. Do NOT refrigerate them—the moisture will make them sticky and soft. If you live in a humid climate, add a silica gel packet (the kind that comes in shoe boxes) to the container to absorb excess moisture. Sounds weird, but it works.
Freezer Instructions: You can freeze undecorated meringues in an airtight container for up to 3 months. Layer them between sheets of parchment paper so they don’t stick together. Thaw at room temperature for about 30 minutes before decorating and serving. The texture holds up surprisingly well.
Flavor Development: Fresh meringues are amazing, but I actually prefer them after a day or two. The flavors mellow and the texture becomes even more crisp. Just make sure they’re stored properly—one humid day can ruin a whole batch.
Nutritional Information & Benefits
Let’s be real—these are cookies, not health food. But they’re lighter than most treats, which is something. Here’s the estimated nutrition per ghost (based on 24 cookies):
| Nutrient | Amount per Ghost |
|---|---|
| Calories | 35 |
| Total Fat | 0g |
| Carbohydrates | 8g |
| Sugar | 8g |
| Protein | 1g |
| Sodium | 10mg |
Dietary Considerations: These ghosts are naturally gluten-free, dairy-free, and nut-free (assuming no cross-contamination). They’re also low in fat and relatively low in calories compared to traditional cookies. The main concern is sugar content, so enjoy them as an occasional treat rather than an everyday snack.
Potential Allergens: Egg whites are the main allergen here. If you have egg allergies, try the aquafaba variation mentioned above. Also check your vanilla extract—some brands contain alcohol, which is fine for most people but worth noting.
Health Perspective: I like that these satisfy my sweet tooth without the heavy feeling I get from butter-based cookies. They’re light, airy, and feel like a special treat rather than a daily indulgence. Plus, making them is a fun activity that gets kids in the kitchen—and that’s good for the soul, even if it’s not on a nutrition label.
Conclusion
These cozy ghost meringue cookies are more than just a Halloween treat—they’re a way to slow down, create something with your hands, and maybe even make a memory that sticks with someone the way Aunt Carla’s lopsided ghosts stuck with me. They’re forgiving, fun, and honestly, they taste like childhood in the best possible way.
I hope you give them a try, even if your first batch looks a little wonky. That’s part of the charm. Every ghost has its own personality, and that’s what makes them special. Maybe you’ll make them for a Halloween party, or maybe you’ll make them on a quiet Tuesday night just because you need a little magic in your kitchen. Either way, I’d love to hear how they turn out.
Drop a comment below and tell me about your ghost-making adventures—did yours have arms? Did you try the chocolate version? Did your dog try to eat one off the cooling rack? (Mine did. He regrets nothing.) And if you have a favorite variation I haven’t tried, please share it. I’m always looking for new ways to make these little ghosts even more magical.
Happy baking, and may your ghosts be perfectly imperfect.
Frequently Asked Questions
Why did my meringue ghosts turn out flat?
Flat meringue usually means the egg whites weren’t whipped enough, or the sugar wasn’t fully dissolved. Make sure you’re beating to stiff peaks and that the sugar feels smooth when rubbed between your fingers. Also, check your oven temperature—if it’s too hot, the meringue will spread before it sets.
Can I use liquid egg whites from a carton?
I don’t recommend it. Carton egg whites are pasteurized, which changes the protein structure and makes them harder to whip into stiff peaks. Fresh egg whites from whole eggs give you the best volume and stability. If you must use carton whites, add an extra 1/2 teaspoon of cream of tartar to help them stabilize.
How do I know when the meringue is fully baked?
Fully baked meringue ghosts should be completely dry to the touch and should lift easily off the parchment paper. If they feel sticky or soft, they need more time in the oven. The baking time can vary depending on your oven and humidity levels, so don’t be afraid to leave them in longer if needed.
Can I make these without a piping bag?
Absolutely! Use a sturdy zip-top bag with a small hole cut in one corner. You can also use a spoon to drop dollops of meringue onto the baking sheet and shape them gently with the back of the spoon. They won’t look as fancy, but they’ll taste just as good. I’ve done this many times when I couldn’t find my piping tips.
Why did my meringue get sticky after a day?
Sticky meringue is usually a sign of moisture exposure. Either the ghosts weren’t fully dried out during baking, or they were stored in a humid environment. Make sure to bake them long enough and store them in an airtight container at room temperature. If you live somewhere humid, add a silica gel packet to the container.
Pin This Recipe!
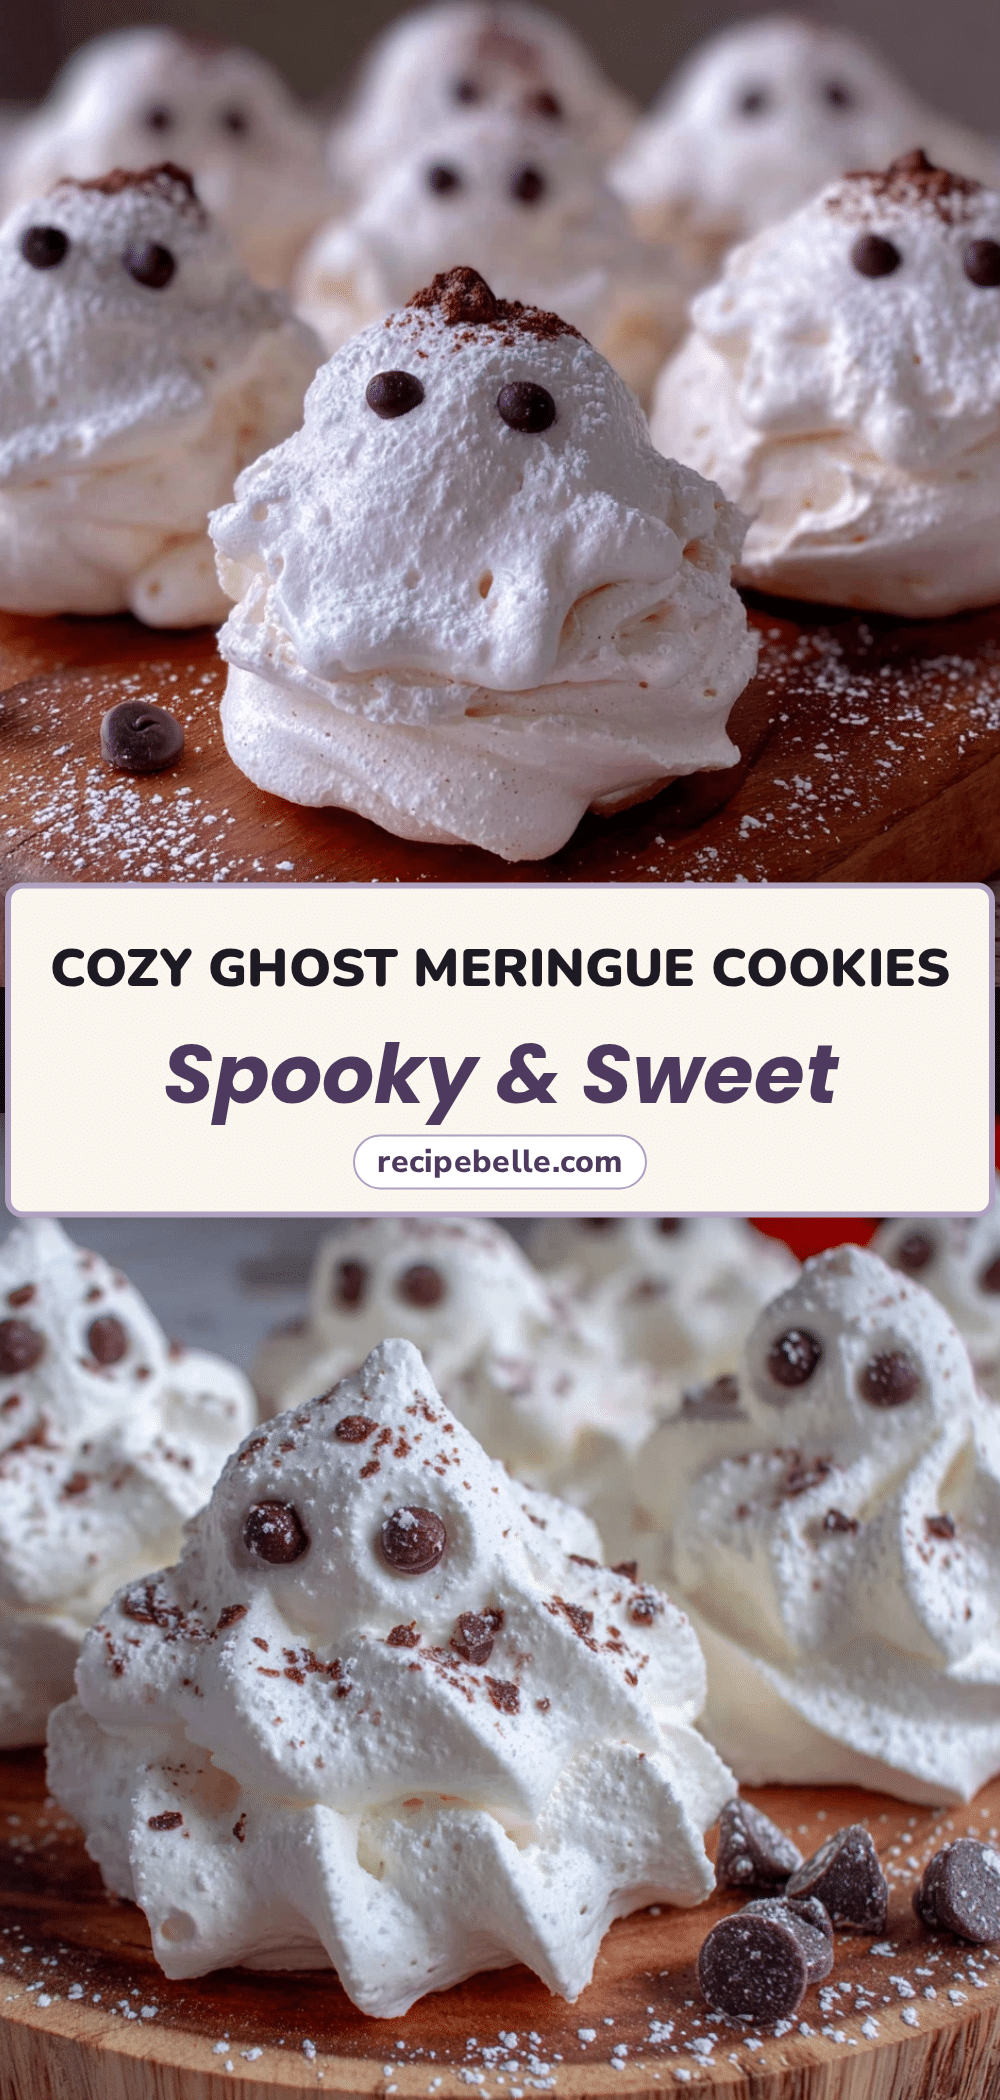
Cozy Ghost Meringue Cookies: Easy & Spooky Sweet Treat
These light and airy ghost-shaped meringue cookies are a perfect Halloween treat. With a crisp exterior and melt-in-your-mouth texture, they’re easy to make with simple ingredients and are sure to be a crowd-pleaser.
- Prep Time: 20 minutes
- Cook Time: 1.5 hours
- Total Time: 2 hours 20 minutes (plus 1-2 hours cooling)
- Yield: 24 cookies 1x
- Category: Dessert
- Cuisine: American
Ingredients
- 4 large egg whites, room temperature
- 1 cup (200g) granulated white sugar
- 1/4 teaspoon cream of tartar
- 1 teaspoon pure vanilla extract
- 1/2 teaspoon white vinegar
- Pinch of fine sea salt
- Mini chocolate chips for eyes (about 1/4 cup) (optional)
- Black gel food coloring (optional)
- Edible glitter or luster dust (optional)
Instructions
- Preheat your oven to 200°F (95°C). Line two baking sheets with parchment paper.
- Clean your bowl and whisk attachment with a splash of lemon juice or white vinegar on a paper towel to remove any grease.
- Separate your eggs while cold, then let the whites come to room temperature in your mixing bowl for about 20 minutes.
- Add the cream of tartar and salt to the egg whites. Beat on medium speed until soft peaks form, about 2-3 minutes.
- With the mixer running on medium-low, add the sugar one tablespoon at a time, taking about 15-20 seconds between each addition (about 5 minutes total).
- Once all sugar is added, increase speed to medium-high and beat until stiff, glossy peaks form, about 5-7 minutes. The meringue should feel smooth, not gritty, when rubbed between your fingers.
- Add the vanilla and vinegar and beat on low for about 10 seconds, just until combined.
- Transfer the meringue to a piping bag fitted with a round tip (or a zip-top bag with a 1/2-inch corner snipped off). Fill the bag about halfway.
- Pipe ghosts onto the prepared baking sheets: hold the bag perpendicular about 1 inch above the surface, apply steady pressure to create a round body about 1.5 inches wide, then lift the bag straight up while releasing pressure slightly to create a smaller head. Pull the bag away quickly to create a little peak on top.
- Optionally, pipe two small teardrop shapes on either side of each ghost for arms.
- Bake for 1.5 hours at 200°F (95°C). Do not open the oven door during baking.
- After 1.5 hours, turn the oven off but leave the ghosts inside to cool completely for another 1-2 hours.
- Once completely cool, gently peel the ghosts off the parchment paper. If they stick, return them to the turned-off oven for another 30 minutes.
- Decorate the ghosts: use black gel food coloring to pipe eyes and a mouth, or gently press mini chocolate chips into the meringue for eyes. Optionally, dust with edible glitter.
Notes
Humidity is the enemy of meringue—avoid making these on rainy or humid days. Ensure all equipment is completely clean and grease-free. Do not open the oven door during baking. Let ghosts cool completely in the turned-off oven for best texture. Store in an airtight container at room temperature for up to 2 weeks; do not refrigerate. For vegan version, use aquafaba (3/4 cup) instead of egg whites and add extra 1/4 teaspoon cream of tartar.
Nutrition
- Serving Size: 1 ghost cookie
- Calories: 35
- Sugar: 8
- Sodium: 10
- Carbohydrates: 8
- Protein: 1
Keywords: ghost meringue cookies, Halloween cookies, meringue ghosts, easy Halloween treat, spooky cookies, gluten-free cookies, dairy-free cookies



