I’m not supposed to play favorites with recipes, but let’s be honest—some dishes just earn their spot at the top of the list. This one got its place on a random Tuesday afternoon in October, when my neighbor Carla called me over under the pretense of “helping her decide on a paint color for the dining room.” I walked into her kitchen and the smell hit me before I even got past the doorway. It was smoky, a little sweet, and distinctly like something roasting that I desperately wanted to eat.
Carla wasn’t even trying to impress me. She had a dish towel slung over her shoulder, her hair was in a messy bun, and she was casually scooping rice mixture into hollowed-out bell peppers like it was the most boring thing in the world. “Oh, these? Just something I threw together for the kids’ Halloween party,” she said, waving her hand. But the thing is—I’ve eaten a lot of stuffed peppers in my life, and none of them looked like grinning jack-o-lantern faces staring back at me from the baking dish. I mean, honestly. The casualness of it all was the whole point. She made something extraordinary look like it was nothing.
I stood there for a solid minute, just staring at those little pepper faces. Maybe you’ve been there—seeing a dish that makes you stop and think, “Why didn’t I think of that?” That’s exactly how I felt. I asked for the recipe, and she shrugged and scribbled it on the back of an old grocery receipt. I’ve been making these Guest-Favorite Jack-o-Lantern Stuffed Peppers ever since, and every single time, they steal the show. Whether it’s a Halloween party, a fall dinner gathering, or just a Tuesday that needs a little fun, these peppers deliver. They’re the kind of dish that makes people take out their phones and take pictures before anyone’s allowed to take a bite.
Why You’ll Love This Recipe
Let me tell you—I’ve tested this recipe about a dozen times to get it just right. I’ve tried different rice-to-meat ratios, experimented with various cheeses, and even tested out different ways to carve the pepper faces so they hold up during baking. What I landed on is something truly special. These jack-o-lantern stuffed peppers aren’t just cute—they’re genuinely delicious, and they’re designed to make you look like a kitchen rockstar with minimal effort.
- Quick & Easy: From start to table in about 45 minutes. The prep work takes maybe 15 minutes, and the oven does the rest. Perfect for busy weeknights when you still want to serve something that looks like you spent hours on it.
- Simple Ingredients: Ground beef or turkey, rice, tomato sauce, cheese, and bell peppers. That’s it. No fancy grocery trips, no obscure spices you’ll never use again. You probably have most of this in your kitchen right now.
- Perfect for Halloween Gatherings: These are made for parties. They’re individual servings, they’re visually stunning, and they spark instant conversation. Kids love them, adults love them, and everyone wants to know how you did it.
- Crowd-Pleaser: I’ve served these at potlucks, Halloween parties, and even casual family dinners. They get rave reviews every single time. The combination of savory filling, melted cheese, and sweet roasted pepper is just unbeatable.
- Unbelievably Delicious: The texture is what gets me—the tender pepper, the hearty filling, the gooey cheese peeking out of those little carved faces. It’s comfort food with a side of fun, and it hits every single time.
What makes this recipe different from all the other stuffed pepper recipes out there? It’s the presentation, sure, but it’s also the attention to detail. I’ve perfected the filling so it’s not too dry and not too wet—just the right consistency that holds together beautifully when you cut into it. The seasoning blend is balanced, the cheese is generous, and the whole thing comes together in a way that feels both familiar and fresh. This isn’t just another version of stuffed peppers—it’s your new go-to for any fall gathering where you want to impress without stress.
Honestly, this is the kind of recipe that makes you close your eyes after the first bite. It’s that good. And when you see the smiles on your guests’ faces as they pick up their own little jack-o-lantern pepper, you’ll know exactly why this one is a keeper.
What Ingredients You Will Need
This recipe uses simple, wholesome ingredients that come together to deliver bold flavor and satisfying texture. Most of these are pantry staples or easy to find at any grocery store, which makes this recipe perfect for last-minute Halloween planning or spontaneous fall dinners.
For the Filling
- 1 pound ground beef (80/20) — I prefer 80/20 for the best flavor and moisture. If you want a leaner option, ground turkey works great too, just add a tablespoon of olive oil to keep it from drying out.
- 1 cup cooked rice — Any rice works here. I usually use long-grain white rice because it’s what I always have on hand, but brown rice, jasmine, or even quinoa are excellent options. Leftover rice from takeout is perfect for this.
- 1 small onion, finely diced — Yellow or white onion works best. The finer you dice it, the more evenly it distributes through the filling.
- 2 cloves garlic, minced — Fresh garlic is non-negotiable here. The pre-minced stuff in a jar just doesn’t have the same punch. Trust me on this one.
- 1 can (15 ounces) tomato sauce — I recommend Hunt’s or Muir Glen for consistent flavor. You’ll use most of it in the filling and save a little for brushing on the peppers before baking.
- 1 teaspoon dried oregano — This adds that classic Italian-American stuffed pepper flavor. If you have fresh oregano, use about 1 tablespoon, chopped.
- 1 teaspoon dried basil — Or 1 tablespoon fresh, chopped. The combination of oregano and basil is what makes this filling sing.
- 1/2 teaspoon salt — I use fine sea salt. Adjust to taste depending on your dietary needs.
- 1/4 teaspoon black pepper — Freshly ground is always better, but pre-ground works in a pinch.
- 1 cup shredded mozzarella cheese — Divided. Half goes into the filling, and the other half gets sprinkled on top before baking. I recommend whole-milk mozzarella for the best melt and flavor.
- 2 tablespoons grated Parmesan cheese — This adds a salty, nutty depth to the filling that mozzarella alone can’t provide.
For the Peppers
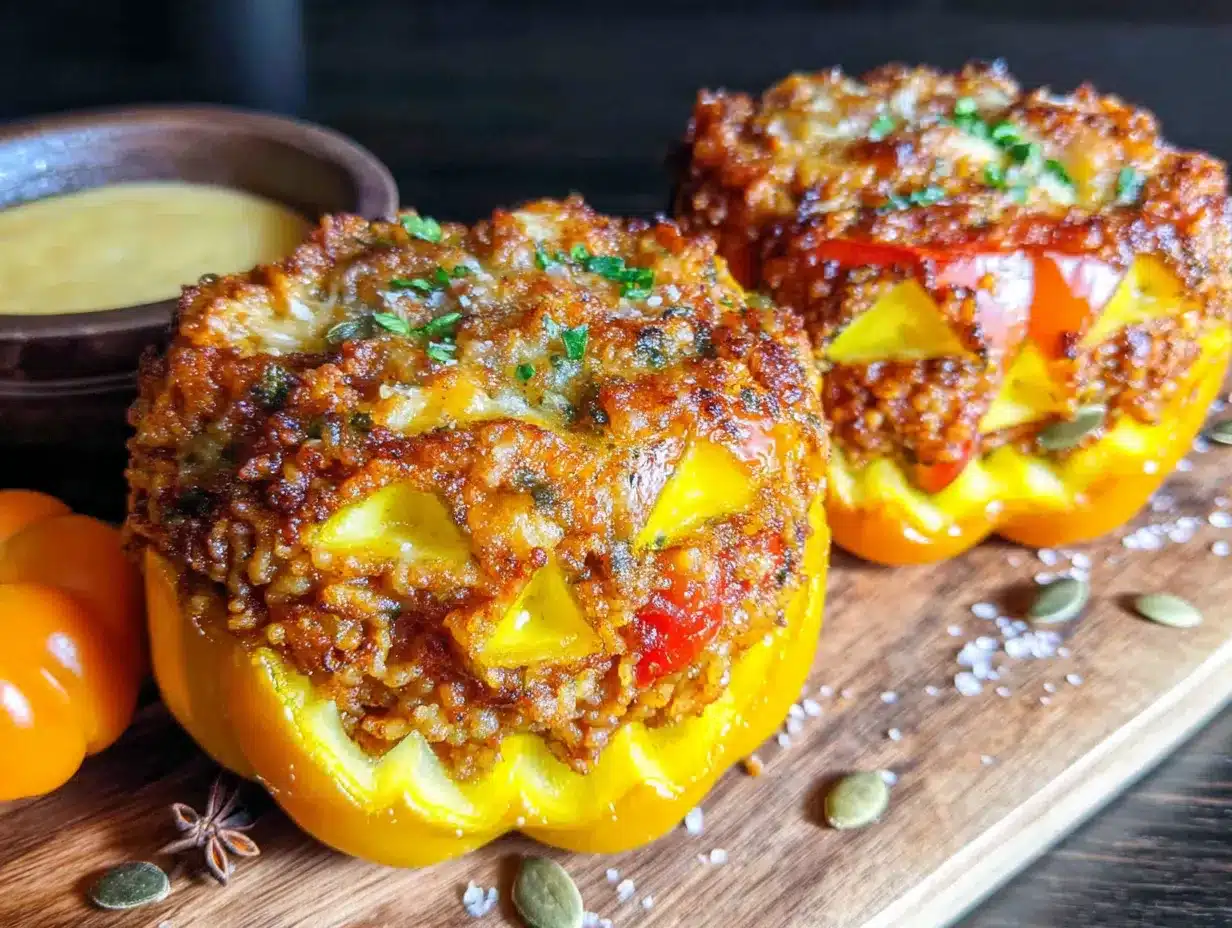
- 4 large bell peppers — Orange bell peppers work best for the jack-o-lantern look because they naturally have that pumpkin color. Yellow peppers also look great. Green peppers work in a pinch but don’t have the same visual impact. Look for peppers that are squat and round rather than tall and narrow—they look more like pumpkins.
- 1 tablespoon olive oil — For brushing the peppers before baking. This helps them get that lovely roasted sheen.
Optional Garnishes
- Fresh parsley or chives, chopped — For a pop of green color on top. It’s purely aesthetic but makes a difference in photos.
- Sour cream or Greek yogurt — A dollop on the side adds a cool, tangy contrast to the warm, savory peppers.
One thing I’ve learned through trial and error: don’t skip salting the inside of the peppers before filling them. Just a tiny pinch inside each hollowed-out pepper makes a surprising difference in the final flavor. Also, if you’re making these for a crowd, you can easily double or triple the recipe. Just use two baking dishes and rotate them halfway through baking.
Equipment Needed
You don’t need anything fancy to make these jack-o-lantern stuffed peppers, which is part of what makes this recipe so accessible. Here’s what you’ll need:
- Large skillet or frying pan — For browning the meat and sautéing the onions and garlic. A 12-inch skillet gives you plenty of room to work.
- Medium mixing bowl — For combining all the filling ingredients. Any bowl will do, but I prefer a glass or ceramic one for easy cleanup.
- Sharp paring knife — This is the most important tool for carving the jack-o-lantern faces. A small, sharp knife gives you the control you need to cut clean shapes without tearing the pepper.
- Small spoon or melon baller — For scooping out the seeds and membranes from inside the peppers. A melon baller works surprisingly well for this.
- Baking dish (9×13 inches) — Large enough to hold 4 stuffed peppers with a little space between them. A glass or ceramic dish works best for even heating.
- Aluminum foil — For covering the dish during the first part of baking. This traps steam and helps the peppers cook through without drying out.
- Pastry brush — For brushing olive oil onto the peppers. If you don’t have one, you can use a paper towel or just drizzle and rub it in with your fingers.
If you don’t have a paring knife, a small serrated knife can work, though it’s a bit trickier to get clean lines. And if you’re short on time, you can use pre-cooked rice from the freezer section—just make sure it’s fully thawed before mixing it into the filling. I’ve done this plenty of times when I was in a rush, and it works like a charm.
Preparation Method
Alright, let’s get cooking. I’ve broken this down into clear steps so you can follow along without any confusion. Take your time with the pepper carving—it’s the fun part, and it sets the tone for the whole dish.
- Preheat your oven to 375°F (190°C). While it’s heating up, fill a large pot with water and bring it to a boil. You’ll need this to blanch the peppers briefly before stuffing them. This step softens them just enough so they cook evenly in the oven without becoming mushy.
- Prepare the peppers. Wash your bell peppers and pat them dry. Using your sharp paring knife, cut the top off each pepper—about 1/2 inch from the stem. Set the tops aside. Reach inside each pepper and remove all the seeds and white membranes. Rinse the inside briefly and pat dry with a paper towel. Now for the fun part: use your paring knife to carve jack-o-lantern faces into the sides of each pepper. Keep it simple—triangle eyes, a jagged or smiling mouth. Don’t overthink it. The imperfections make them look charming. Just be careful not to cut all the way through the pepper wall; you want the filling to stay inside.
- Blanch the peppers. Once your water is boiling, carefully lower the hollowed-out peppers into the pot. Let them boil for 3 minutes. This is just enough time to soften them slightly without losing their shape. Use tongs to remove them and place them upside down on a paper towel to drain. Let them cool for a few minutes while you make the filling.
- Cook the filling. Heat your large skillet over medium-high heat. Add the ground beef and cook, breaking it up with a wooden spoon, until it’s browned and no longer pink—about 5 to 7 minutes. If there’s excess fat, drain it off, leaving about a tablespoon in the pan for flavor. Add the diced onion and cook for 2 to 3 minutes until it starts to soften. Add the minced garlic and cook for another 30 seconds until fragrant. Your kitchen is going to smell amazing right about now.
- Combine the filling ingredients. Reduce the heat to low. Stir in the cooked rice, tomato sauce (reserve about 2 tablespoons for brushing the peppers), dried oregano, dried basil, salt, and pepper. Mix everything together until well combined. Let it simmer for 2 minutes so the flavors meld. Remove from heat and stir in half of the shredded mozzarella cheese and all of the grated Parmesan. Taste and adjust seasoning if needed. I always add a little extra black pepper because I like the kick.
- Stuff the peppers. Place the blanched peppers upright in your baking dish. Using a spoon, divide the filling evenly among the four peppers. Pack it in gently but firmly—you want the peppers to be full without being overstuffed. Don’t worry if a little filling peeks out of the carved faces; that’s actually a good look. It makes them look more rustic and inviting.
- Brush and top. Using your pastry brush, lightly brush the outside of each pepper with olive oil. This helps them develop that beautiful roasted appearance. Take the reserved tomato sauce and brush a thin layer over the exposed filling on top of each pepper. Sprinkle the remaining shredded mozzarella over the tops, letting some fall into the carved openings for that oozing cheese effect.
- Bake. Cover the baking dish with aluminum foil and bake for 25 minutes. The foil traps steam and ensures the peppers cook through without drying out. After 25 minutes, remove the foil and bake for another 10 to 15 minutes, until the cheese is bubbly and golden and the peppers are tender. If you want extra browning on the cheese, switch the oven to broil for the last 2 minutes—just watch it closely so it doesn’t burn.
- Rest and serve. Remove the dish from the oven and let the peppers rest for 5 minutes. This resting time is crucial—it lets the filling set so the peppers hold their shape when you serve them. Garnish with fresh parsley or chives if you’re feeling fancy, and serve warm with a dollop of sour cream on the side.
A quick note: the peppers will be very hot when they come out of the oven. The filling retains heat like crazy, so warn your guests to let them cool for a minute before diving in. I learned this the hard way when I burned my tongue on the very first batch I made.
Cooking Tips & Techniques
Over the years, I’ve made these jack-o-lantern stuffed peppers more times than I can count, and I’ve picked up a few tricks along the way. Some came from happy accidents, others from flat-out mistakes. Here’s what I’ve learned so you don’t have to make the same errors I did.
Choose the right peppers. Not all bell peppers are created equal when it comes to this recipe. Look for peppers that are as round and squat as possible—they naturally look more like pumpkins. Tall, narrow peppers end up looking more like, well, peppers. Also, check that the bottom is flat enough that the pepper can stand upright without wobbling. A wobbly pepper is a disaster waiting to happen when you’re trying to stuff it.
Don’t over-blanch. I made this mistake once when I got distracted by my phone ringing. I left the peppers in the boiling water for about 6 minutes instead of 3, and they came out so soft that they collapsed under the weight of the filling. Three minutes is the sweet spot—enough to soften them for even cooking, but not so much that they lose their structural integrity. Set a timer and stick to it.
Carve with confidence. When you’re cutting the jack-o-lantern faces, use a sawing motion rather than trying to push the knife through in one go. This gives you more control and cleaner lines. If you make a mistake—say, you accidentally cut a hole that’s too big—don’t panic. A little piece of cheese placed strategically over the gap will hide it perfectly. I’ve done this more times than I care to admit.
Prep ahead for parties. If you’re hosting a Halloween gathering, you can prepare these peppers up to 24 hours in advance. Carve the peppers, make the filling, and stuff them, then cover and refrigerate. When you’re ready to bake, just add about 10 minutes to the covered baking time to account for the cold filling. This is a lifesaver when you’re trying to get everything ready at the same time.
Double the recipe without doubling the work. These peppers freeze beautifully, so I often make a double batch. I bake one batch for dinner and freeze the other before baking. When I want them, I thaw them overnight in the fridge and bake as directed. It’s like having a Halloween dinner in the freezer, ready whenever you need it.
Use the pepper tops. Don’t throw away the tops you cut off! You can chop them up and sauté them with the onions, or use them as a garnish. Alternatively, if you want to get really cute, you can place the stem tops back on the peppers after baking, like little hats. It makes them look even more like jack-o-lanterns.
Variations & Adaptations
One of the best things about this recipe is how adaptable it is. I’ve experimented with different fillings, different cheeses, and even different cooking methods. Here are some variations I’ve tried and loved.
Vegetarian Version: Swap the ground beef for 1 can of black beans (drained and rinsed) and 1 cup of cooked quinoa. The texture is slightly different, but the flavor is fantastic. Add an extra 1/2 teaspoon of cumin to the filling for a smoky, earthy note that pairs beautifully with the bell peppers. I served this version at a potluck last fall, and honestly, no one even noticed there was no meat.
Spicy Kick: If you like heat, add 1/2 teaspoon of red pepper flakes or a diced jalapeño (seeds removed) to the filling along with the onions. You can also use pepper jack cheese instead of mozzarella for an extra layer of spice. My husband loves this version, and he always asks for extra hot sauce on the side.
Mexican-Inspired Twist: Replace the oregano and basil with 1 teaspoon of cumin and 1/2 teaspoon of chili powder. Use cilantro instead of parsley for garnish, and top with a spoonful of salsa and a dollop of sour cream. This version is a huge hit with kids because it tastes like taco night in a pepper.
Low-Carb Option: Skip the rice entirely and replace it with 1 cup of riced cauliflower. You can buy it frozen or make your own by pulsing cauliflower florets in a food processor. The texture is surprisingly similar, and it cuts the carbs significantly. I’ve made this for friends who are watching their carb intake, and they’ve all asked for the recipe.
Cheese Lover’s Version: Use a blend of mozzarella, provolone, and a sharp cheddar for the topping. The cheddar adds a beautiful orange color that matches the jack-o-lantern theme perfectly. I also mix a little cream cheese into the filling for extra richness. It’s indulgent, but for a Halloween party, why not go all out?
Air Fryer Method: If you’re short on time or don’t want to heat up your whole oven, you can cook these in an air fryer. Preheat the air fryer to 350°F (175°C). Place the stuffed peppers in the basket, making sure they’re not touching. Cook for 15 to 18 minutes, checking for doneness at the 15-minute mark. The cheese gets beautifully browned and the peppers come out perfectly tender. Just note that you might need to work in batches depending on the size of your air fryer.
Serving & Storage Suggestions
These jack-o-lantern stuffed peppers are a showstopper on any table, but how you serve them can take them from great to unforgettable. Here’s what I’ve learned about presentation, pairing, and storage.
Serving Temperature and Presentation: Serve these peppers warm, straight from the oven. The cheese should be bubbly and the peppers tender but still holding their shape. Arrange them on a large platter with the carved faces facing outward so guests can see the jack-o-lantern designs. If you’re serving a crowd, place them on a bed of fresh arugula or spinach for a pop of green color that contrasts beautifully with the orange peppers. A sprinkle of fresh parsley or chives on top adds a finishing touch that makes them look professionally plated.
What to Serve Alongside: These peppers are hearty enough to be a main course on their own, but they pair beautifully with a simple side salad dressed with a light vinaigrette. The acidity of the dressing cuts through the richness of the filling. A crusty baguette or garlic bread is also a great choice for soaking up any extra sauce in the dish. For a Halloween-themed dinner, serve them with roasted pumpkin soup or a simple butternut squash soup for a full fall experience.
Beverage Pairings: A medium-bodied red wine like a Merlot or Zinfandel pairs nicely with the savory filling. For non-alcoholic options, apple cider (hot or cold) is a natural fit for the fall theme. Kids love these with a glass of milk or apple juice.
Storage Instructions: Leftover stuffed peppers can be stored in an airtight container in the refrigerator for up to 4 days. The flavors actually meld and deepen overnight, so leftovers are often even better the next day. To reheat, place them in a baking dish, cover with foil, and warm in a 350°F (175°C) oven for about 15 minutes, or until heated through. You can also microwave them on high for 2 to 3 minutes, but the peppers will be softer and the cheese won’t be as melty.
Freezing Instructions: These peppers freeze exceptionally well. To freeze, assemble the peppers completely but do not bake them. Place them in a freezer-safe baking dish, cover tightly with plastic wrap and then aluminum foil, and freeze for up to 3 months. When you’re ready to bake, thaw them overnight in the refrigerator, then bake as directed, adding about 10 minutes to the covered baking time. I always keep a batch in the freezer for busy weeknights or unexpected guests.
How Flavors Develop Over Time: As I mentioned, these peppers taste even better the next day. The rice absorbs more of the tomato sauce and the seasonings have time to meld together. The peppers themselves become more tender and flavorful as they sit in the sauce. If you’re planning ahead, I actually recommend making the filling a day in advance and refrigerating it before stuffing the peppers. It makes a noticeable difference in depth of flavor.
Nutritional Information & Benefits
I’m not a nutritionist, but I’ve done my research on this recipe because I make it so often. Here’s a rough breakdown of what you’re getting in each serving, based on using 80/20 ground beef, white rice, and whole-milk mozzarella.
| Nutrient | Amount Per Serving (1 stuffed pepper) |
|---|---|
| Calories | 385 |
| Protein | 28g |
| Carbohydrates | 22g |
| Fiber | 4g |
| Fat | 18g |
| Saturated Fat | 8g |
| Sodium | 680mg |
| Vitamin C | 190% DV |
| Vitamin A | 35% DV |
| Calcium | 20% DV |
| Iron | 15% DV |
Bell peppers are nutritional powerhouses. A single orange bell pepper contains more than 150% of your daily recommended intake of Vitamin C, which is great for immune health—especially during cold and flu season. They’re also rich in Vitamin A, which supports eye health and skin health. The ground beef provides a solid dose of protein and iron, while the cheese adds calcium for bone health.
Dietary Considerations: This recipe can be made gluten-free by using certified gluten-free rice and ensuring your tomato sauce and seasonings are gluten-free. For a dairy-free version, use dairy-free cheese alternatives or simply omit the cheese entirely—the filling is flavorful enough on its own. For a lower-sodium option, use low-sodium tomato sauce and reduce the added salt. And as I mentioned earlier, the low-carb version with cauliflower rice works beautifully for those watching their carbohydrate intake.
Potential Allergens: This recipe contains dairy (cheese) and, depending on your rice choice, may contain gluten if cross-contamination is a concern. Always check your ingredient labels if you’re cooking for someone with allergies.
I personally love that this recipe feels indulgent and fun—perfect for a Halloween celebration—but it’s actually a balanced meal with protein, vegetables, and carbs all in one dish. It’s comfort food that doesn’t leave you feeling guilty, and that’s a win in my book.
Conclusion
So there you have it—my tried-and-true recipe for Guest-Favorite Jack-o-Lantern Stuffed Peppers. These little guys have become a staple in my fall cooking rotation, and for good reason. They’re fun, they’re delicious, and they never fail to get a reaction from the people I serve them to. Whether you’re hosting a Halloween party, bringing a dish to a potluck, or just want to make a regular Tuesday night feel a little more special, these peppers deliver every single time.
What I love most about this recipe is how it brings people together. There’s something about seeing a plate of grinning jack-o-lantern faces that makes everyone smile—kids and adults alike. It’s the kind of dish that sparks conversation, creates memories, and makes people feel like you put a little extra love into what you’re serving. And honestly, you did. Because carving those faces and stuffing those peppers takes a little effort, but it’s the kind of effort that pays off in spades.
I’d love to hear how yours turn out! Did you try any of the variations? Did you come up with your own jack-o-lantern face design? Drop a comment below and let me know—I read every single one, and I love seeing photos of your creations. And if you’re looking for more Halloween-friendly recipes, be sure to check out some of my other fall favorites on the blog. Happy cooking, and happy Halloween!
Frequently Asked Questions
Can I make these jack-o-lantern stuffed peppers ahead of time?
Absolutely! You can assemble the peppers up to 24 hours in advance. Just carve, stuff, and refrigerate them in the baking dish. When you’re ready to bake, add about 10 minutes to the covered baking time to account for the cold filling. This is honestly the best way to do it if you’re hosting a party—it takes so much stress off your shoulders.
What’s the best type of bell pepper to use for the jack-o-lantern look?
Orange bell peppers are your best bet because they naturally have that pumpkin color. Yellow peppers also work well and give a slightly different look. Green peppers work in a pinch, but they don’t have the same visual impact. Whatever color you choose, look for peppers that are squat and round rather than tall and narrow—they look more like pumpkins that way.
Can I freeze these stuffed peppers?
Yes, and they freeze beautifully! Assemble the peppers completely but don’t bake them. Wrap the dish tightly in plastic wrap and then aluminum foil, and freeze for up to 3 months. When you’re ready to eat, thaw them in the refrigerator overnight and bake as directed, adding about 10 minutes to the covered baking time. I always keep a batch in my freezer for busy nights.
How do I prevent the peppers from falling apart during baking?
The key is not to over-blanch them. Three minutes in boiling water is perfect—it softens them just enough without making them mushy. Also, be gentle when stuffing them. Pack the filling in firmly but don’t overstuff, and make sure the peppers are sitting flat in the baking dish. If they’re wobbly, they’re more likely to tip over and spill their filling.
Can I make this recipe vegetarian or vegan?
Definitely! For a vegetarian version, swap the ground beef for a can of black beans (drained and rinsed) and a cup of cooked quinoa. For a vegan version, use dairy-free cheese alternatives or simply omit the cheese—the filling is flavorful enough on its own. I’ve made both versions, and they’re always a hit, even with the meat-eaters at the table.
Pin This Recipe!
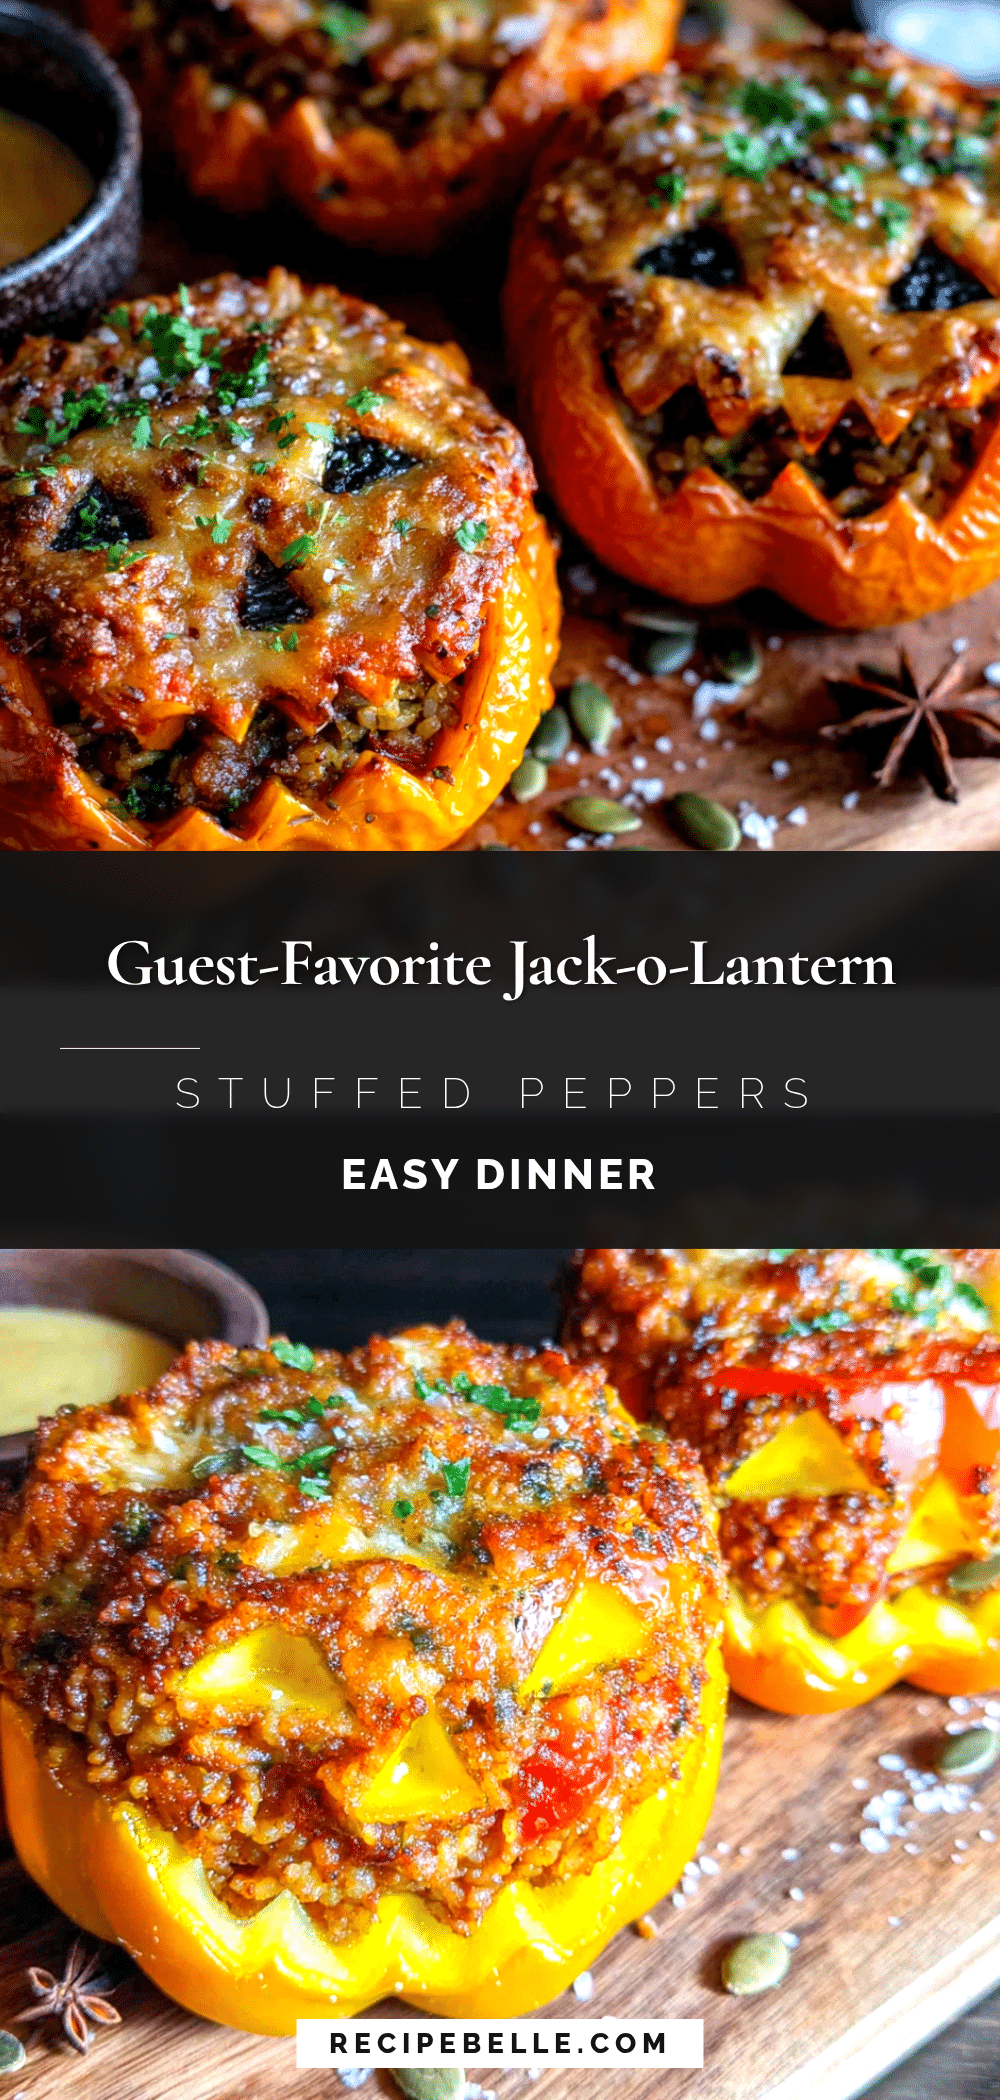
Best Easy Jack-o-Lantern Stuffed Peppers Recipe for Halloween
These fun and delicious jack-o-lantern stuffed peppers are perfect for Halloween parties or fall dinners. Made with simple ingredients like ground beef, rice, tomato sauce, and cheese, they’re quick to prepare and guaranteed to impress.
- Prep Time: 15 minutes
- Cook Time: 30 minutes
- Total Time: 45 minutes
- Yield: 4 servings 1x
- Category: Main Course
- Cuisine: American
Ingredients
- 1 pound ground beef (80/20)
- 1 cup cooked rice
- 1 small onion, finely diced
- 2 cloves garlic, minced
- 1 can (15 ounces) tomato sauce
- 1 teaspoon dried oregano
- 1 teaspoon dried basil
- 1/2 teaspoon salt
- 1/4 teaspoon black pepper
- 1 cup shredded mozzarella cheese, divided
- 2 tablespoons grated Parmesan cheese
- 4 large bell peppers (orange preferred)
- 1 tablespoon olive oil
- Fresh parsley or chives, chopped (optional)
- Sour cream or Greek yogurt (optional)
Instructions
- Preheat oven to 375°F (190°C). Bring a large pot of water to a boil.
- Wash and dry bell peppers. Cut off tops about 1/2 inch from stem. Remove seeds and membranes. Carve jack-o-lantern faces into sides using a sharp paring knife, being careful not to cut through the pepper wall.
- Blanch peppers in boiling water for 3 minutes. Remove with tongs and drain upside down on paper towels.
- In a large skillet over medium-high heat, cook ground beef until browned, about 5-7 minutes. Drain excess fat, leaving about 1 tablespoon. Add onion and cook 2-3 minutes until softened. Add garlic and cook 30 seconds until fragrant.
- Reduce heat to low. Stir in cooked rice, tomato sauce (reserve 2 tablespoons for brushing), oregano, basil, salt, and pepper. Simmer 2 minutes. Remove from heat and stir in half the mozzarella and all the Parmesan.
- Place blanched peppers upright in a baking dish. Divide filling evenly among peppers, packing gently but firmly.
- Brush outside of peppers with olive oil. Brush reserved tomato sauce over exposed filling on top. Sprinkle remaining mozzarella over tops.
- Cover dish with aluminum foil and bake 25 minutes. Remove foil and bake another 10-15 minutes until cheese is bubbly and golden and peppers are tender. Optionally, broil last 2 minutes for extra browning.
- Let rest 5 minutes before serving. Garnish with parsley or chives and serve with sour cream if desired.
Notes
Choose squat, round orange bell peppers for the best pumpkin look. Don’t over-blanch peppers (3 minutes is perfect). For a vegetarian version, substitute ground beef with black beans and quinoa. Peppers can be assembled up to 24 hours in advance and refrigerated. Freeze unbaked peppers for up to 3 months.
Nutrition
- Serving Size: 1 stuffed pepper
- Calories: 385
- Sodium: 680
- Fat: 18
- Saturated Fat: 8
- Carbohydrates: 22
- Fiber: 4
- Protein: 28
Keywords: stuffed peppers, jack-o-lantern, Halloween, ground beef, bell peppers, fall recipe, party food



