There used to be a tiny bakery tucked behind the old hardware store in my hometown that made the most unforgettable caramel apple crumble bars. When they closed their doors after thirty years, I honestly felt a little lost. That first autumn without them, I must have tried seven different recipes, and each one was just… off. Too sweet, not enough crunch, or the apples turned to mush. After twelve tries—and one particularly sad batch that I accidentally dropped on the floor—I finally cracked the code.
I remember the Tuesday afternoon it happened. The power had flickered during a storm, and I was determined to bake something comforting before the lights went out for good. I grabbed a bag of Honeycrisp apples, some oats, and a jar of homemade caramel sauce a neighbor had given me. The smell that filled my kitchen was so spot-on that I actually teared up a little. Maybe you’ve been there—chasing a flavor from your past, trying to capture a moment you can’t quite reach again.
These cozy caramel apple crumble bars are that exact memory, baked into every golden, buttery layer. The shortbread base holds up perfectly, the apple filling is spiced just right, and the crumble topping gets that irresistible crunch. Let me tell you, the first bite had me closing my eyes. It tasted like coming home. This recipe stayed with me because it’s not just dessert—it’s a hug on a plate, and honestly, we all need one of those sometimes.
Why You’ll Love This Recipe
These aren’t your average apple bars. I’ve tested this recipe more times than I care to admit, and each batch taught me something new about getting that perfect balance of textures and flavors. Here’s why this version stands out from the rest:
- Quick & Easy: Comes together in under an hour, with just 15 minutes of active prep. Perfect for those busy weeknights when you need a little comfort without the fuss.
- Simple Ingredients: No fancy grocery trips needed. You likely have everything in your pantry right now—flour, oats, butter, sugar, and apples.
- Perfect for Fall Gatherings: Great for Thanksgiving dessert tables, Halloween parties, or just a cozy Sunday afternoon treat.
- Crowd-Pleaser: Always gets rave reviews from kids and adults alike. The caramel drizzle makes them look fancy, but they’re secretly simple.
- Unbelievably Delicious: The texture combo is next-level—crispy shortbread, tender apples, and a buttery oat crumble that stays crunchy even the next day.
What makes this recipe different is the technique of par-baking the crust. Most recipes skip this step, and you end up with a soggy bottom. By baking the shortbread layer first, you get that sturdy foundation that holds up to the juicy apple filling. I also use a mix of brown and white sugar in the crumble for deeper caramel notes without being cloying.
This recipe isn’t just good—it’s the kind that makes you close your eyes after the first bite. It’s comfort food reimagined: faster than a traditional pie, easier than a layered pastry, but with the same soul-soothing satisfaction. Perfect for impressing guests without stress, or turning a simple Tuesday night into something memorable.
What Ingredients You Will Need
This recipe uses simple, wholesome ingredients to deliver bold flavor and satisfying texture without the fuss. Most of these are pantry staples, which makes these bars perfect for spontaneous baking cravings.
For the Shortbread Crust
- 1 ½ cups all-purpose flour (I prefer King Arthur for consistent results)
- ½ cup granulated sugar
- ¾ cup cold unsalted butter, cubed (adds richness and flakiness)
- ¼ teaspoon salt
For the Apple Filling
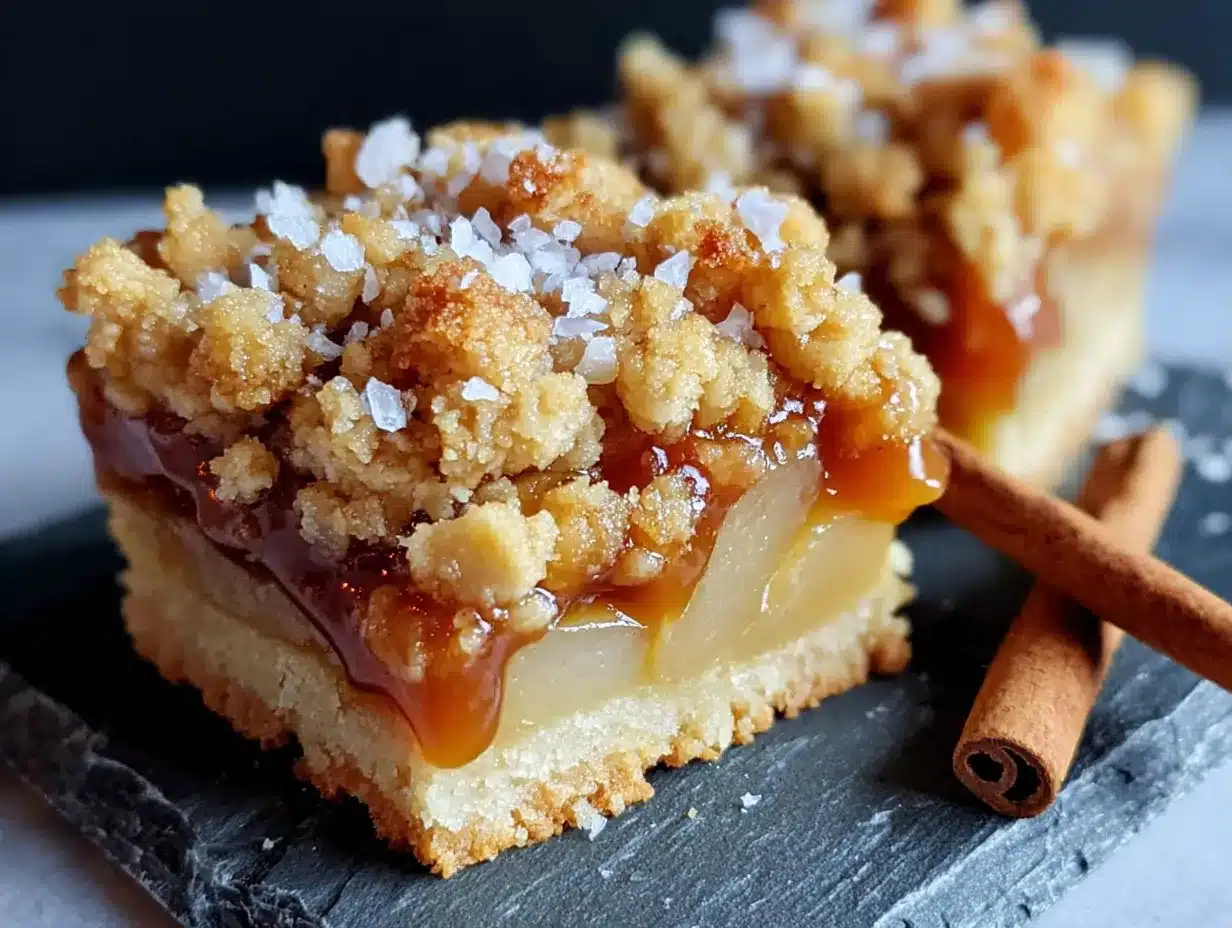
- 4 medium Honeycrisp or Granny Smith apples, peeled and diced into ½-inch pieces (about 4 cups)
- ¼ cup granulated sugar
- 2 tablespoons all-purpose flour
- 1 teaspoon ground cinnamon
- ¼ teaspoon ground nutmeg (freshly grated if possible)
- 1 tablespoon lemon juice (prevents browning and brightens flavor)
For the Crumble Topping
- 1 cup old-fashioned rolled oats (not quick oats—they get mushy)
- ½ cup all-purpose flour
- ½ cup packed light brown sugar
- ½ teaspoon ground cinnamon
- ¼ teaspoon salt
- ½ cup cold unsalted butter, cubed
For the Caramel Drizzle
- ½ cup store-bought or homemade caramel sauce (I recommend Trader Joe’s or make your own with 1 cup sugar, ¼ cup water, ½ cup heavy cream, and 2 tablespoons butter)
- Flaky sea salt for finishing (optional but highly recommended)
Ingredient Tips: For the apples, look for firm, tart-sweet varieties that hold their shape during baking. Honeycrisp is my top choice, but Fuji or Braeburn work beautifully too. If you only have Granny Smith, add an extra tablespoon of brown sugar to balance the tartness. Use dairy-free butter and certified gluten-free oats and flour for a gluten-free version—I’ve tested it with Bob’s Red Mill 1-to-1 flour and it worked perfectly.
Equipment Needed
You don’t need a fancy kitchen to make these bars, but a few key tools make the process smoother. Here’s what I use every time:
- 9×13-inch baking pan — Glass or metal both work; just note that glass may need an extra 5 minutes of baking time
- Parchment paper — Essential for easy removal. Leave overhang on two sides for handles
- Food processor or pastry cutter — For cutting butter into the crust and crumble. I use my fingers if I’m feeling rustic
- Chef’s knife and cutting board — For dicing apples evenly
- Large mixing bowls — At least two: one for crust, one for crumble
- Medium saucepan — If making homemade caramel
- Cooling rack — Helps the bars set properly before cutting
If you don’t have a food processor, a pastry cutter or even two forks work fine—just be patient and work the butter into pea-sized pieces. I’ve also used a box grater to grate frozen butter directly into the flour mixture, which creates incredibly flaky results. My first few batches were made with a cheap baking pan that warped in the oven, so invest in a sturdy one if you bake often. It makes a real difference.
Preparation Method
Let’s get baking! I’ll walk you through each step with the little tricks I’ve learned along the way. Trust me, following these details makes all the difference.
- Preheat and Prep: Preheat your oven to 350°F (175°C). Line your 9×13-inch pan with parchment paper, leaving about 2 inches of overhang on the long sides. This creates handles for lifting the bars out later. Lightly grease the parchment with butter or non-stick spray.
- Make the Shortbread Crust: In a food processor, pulse together the flour, sugar, and salt until combined. Add the cold cubed butter and pulse until the mixture looks like coarse sand with a few pea-sized butter pieces remaining. Don’t overmix—those little butter bits create flaky layers. If using your hands, work quickly so the butter stays cold. Press the mixture firmly and evenly into the prepared pan. I use the bottom of a measuring cup to get it flat. Bake for 15 minutes, until the edges are just starting to turn golden. The center will still look pale—that’s perfect. Let it cool on a rack while you prepare the filling.
- Prepare the Apple Filling: In a large bowl, toss the diced apples with lemon juice first—this prevents browning and adds brightness. Add the sugar, flour, cinnamon, and nutmeg, and toss until every piece is coated. Let it sit for 5 minutes while the apples release some of their juice. This step is key: if you skip the resting time, your filling will be watery. The mixture should look glossy but not swimming in liquid.
- Make the Crumble Topping: In a medium bowl, whisk together the oats, flour, brown sugar, cinnamon, and salt. Add the cold cubed butter and use your fingers or a pastry cutter to work it in until the mixture forms clumps. Some larger clumps are great—they create those crunchy bits everyone fights over. Don’t overwork it; you want a mix of textures from fine crumbs to pea-sized clusters. Pop the bowl in the fridge while you assemble the bars.
- Assemble the Bars: Spread the apple filling evenly over the pre-baked crust. Don’t press it down—just let it settle naturally. Sprinkle the crumble topping evenly over the apples, covering them completely. Some apples will peek through, and that’s fine. Use your hands to drop the crumble in clumps for the best texture.
- Bake: Place the pan in the preheated oven and bake for 35-40 minutes. The filling should be bubbly around the edges, and the crumble should be deep golden brown. If the top is browning too quickly after 25 minutes, tent loosely with foil. Your kitchen will smell incredible at this point—like autumn in a pan.
- Cool and Add Caramel: Let the bars cool in the pan on a wire rack for at least 20 minutes. This is crucial—cutting too early results in a messy puddle. While still warm, drizzle the caramel sauce over the top. If using flaky sea salt, sprinkle it on now while the caramel is sticky. Let the bars cool completely, about 1 hour, before lifting them out using the parchment handles.
- Slice and Serve: Use a sharp knife to cut into squares. For clean cuts, wipe the knife between slices. I like 12 generous squares, but 16 smaller ones work for a crowd. Serve warm or at room temperature.
Cooking Tips & Techniques
After making these bars more times than I can count, I’ve collected a few hard-earned lessons. Let me save you from my mistakes:
Keep Everything Cold: The secret to a flaky crust and crunchy crumble is cold butter. If your butter softens while you’re working, pop the bowl in the fridge for 10 minutes. I once used room-temperature butter out of impatience, and the crust turned out dense and greasy. Never again.
Don’t Skip Par-Baking: I know it adds an extra step, but par-baking the crust prevents the dreaded soggy bottom. The shortbread layer needs that head start to set before the juicy apples go on top. Trust me on this one—I learned the hard way when my first batch turned into apple soup with floating crust bits.
Watch Your Apple Size: Dice the apples into uniform ½-inch pieces. If they’re too large, they won’t soften enough. Too small, and they’ll turn to mush. I aim for pieces about the size of my pinky nail. Consistent sizing ensures even cooking throughout the pan.
The Toothpick Test: To check doneness, insert a toothpick into the center of the crumble (not the apples). It should come out clean or with a few dry crumbs. If it’s wet, give it another 5 minutes. The edges should be visibly bubbly with thick, syrupy juice.
Patience with Cooling: This is the hardest part! Let the bars cool completely before slicing. I know the smell is torture, but cutting warm bars creates a crumbly mess. If you’re in a rush, pop the pan in the fridge for 30 minutes after the initial 20-minute counter cool.
Variations & Adaptations
One of the best things about this recipe is how flexible it is. Here are some variations I’ve tried and loved:
Gluten-Free Version: Substitute the all-purpose flour with a good 1-to-1 gluten-free flour blend. I’ve had great success with Bob’s Red Mill. Use certified gluten-free oats for the crumble. The texture is slightly more delicate, so let the bars cool completely before slicing.
Vegan Adaptation: Use cold coconut oil or vegan butter sticks in place of dairy butter. For the caramel, use a store-bought vegan caramel or make one with coconut cream. The crust will be a bit more crumbly, but the flavor is still incredible. My vegan friend brought these to a potluck and nobody could tell the difference.
Seasonal Fruit Swaps: In summer, try fresh peaches or nectarines instead of apples. Reduce the sugar by 2 tablespoons since stone fruits are sweeter. In spring, rhubarb works beautifully—just increase the sugar to ⅓ cup to balance the tartness. For a winter twist, use pears with a pinch of cardamom.
Spice It Up: Add ¼ teaspoon of ground ginger and a pinch of cloves to the apple filling for a chai-inspired version. Or swap the cinnamon for pumpkin pie spice for a more autumnal flavor. I once added a tablespoon of bourbon to the caramel drizzle for an adult version—highly recommended.
Nutty Crumble: Add ½ cup of chopped pecans or walnuts to the crumble topping. Toast them first for extra flavor. This adds a lovely crunch and makes the bars feel more substantial. My husband calls this his “favorite version” every time I make it.
Serving & Storage Suggestions
These bars are incredibly versatile when it comes to serving. Here’s how I enjoy them:
Serving Temperature: They’re delicious warm, at room temperature, or even straight from the fridge. Warm them in the microwave for 15 seconds if you want that fresh-from-the-oven experience. The caramel gets wonderfully gooey.
Presentation Ideas: Serve on a rustic wooden board with a dusting of powdered sugar and an extra drizzle of caramel. A scoop of vanilla bean ice cream on top takes these to dessert heaven. For a more elegant presentation, cut into small squares and serve on a tiered stand with coffee.
Perfect Pairings: These bars pair beautifully with hot apple cider, a spiced chai latte, or a strong cup of black coffee. For a cozy dessert spread, serve alongside warm apple cider and a cheese board with sharp cheddar.
Storage Instructions: Store in an airtight container at room temperature for up to 3 days. For longer storage, refrigerate for up to a week. The texture stays surprisingly good—the crumble remains crunchy thanks to the oat-to-butter ratio.
Freezing Tips: These freeze beautifully! Wrap individual bars tightly in plastic wrap, then place in a freezer-safe bag. They’ll keep for up to 3 months. Thaw at room temperature for about an hour, then warm in the oven at 300°F for 10 minutes. The caramel might be a bit sticky after freezing, but the flavor is just as good.
Flavor Development: Honestly, these bars taste even better the next day. The flavors meld together overnight, and the texture becomes perfectly balanced. If you can resist, make them a day ahead for the best results.
Nutritional Information & Benefits
While these bars are definitely a treat, they do offer some nutritional benefits worth noting. Here’s the estimated breakdown per serving (based on 12 servings):
| Nutrient | Amount Per Serving |
|---|---|
| Calories | 380 |
| Total Fat | 18g |
| Saturated Fat | 11g |
| Carbohydrates | 52g |
| Fiber | 3g |
| Sugar | 32g |
| Protein | 4g |
| Sodium | 180mg |
Health Benefits: Apples are rich in fiber and vitamin C, and the oats provide heart-healthy beta-glucan. The cinnamon adds anti-inflammatory properties. While this is an indulgent dessert, using real ingredients means you’re getting more nutritional value than packaged alternatives. I feel good about serving these to my family because I know exactly what’s in them—no preservatives, no artificial flavors.
Dietary Considerations: This recipe contains gluten and dairy. For a gluten-free version, use the substitutions mentioned earlier. For a lower-sugar option, reduce the sugar in the filling to 2 tablespoons and use a sugar-free caramel sauce. The bars will be slightly less sweet but still delicious.
Conclusion
These cozy caramel apple crumble bars are more than just a dessert—they’re a little piece of autumn you can hold in your hands. After all those failed attempts chasing that bakery memory, I finally have a recipe that feels like home. The buttery shortbread, the spiced apple filling, the crunchy oat crumble, and that luscious caramel drizzle—every layer brings me back to that tiny bakery and the feeling of comfort it gave me.
I hope you’ll try this recipe and make it your own. Maybe you’ll add extra cinnamon like my neighbor does, or swap in pears like my sister-in-law prefers. That’s the beauty of baking—it’s personal, it’s forgiving, and it always tastes better when shared. If you make these bars, I’d love to hear about it. Drop a comment below and tell me what variation you tried, or tag me in your photos on social media. Happy baking, friends. Here’s to cozy kitchens and the sweet moments that make life good.
Frequently Asked Questions
Can I use quick oats instead of old-fashioned oats?
I don’t recommend it. Quick oats absorb moisture differently and will make your crumble topping soft rather than crunchy. Old-fashioned rolled oats give that perfect texture that holds up during baking. If you only have quick oats, your bars will still taste good, but the crumble won’t have the same satisfying crunch.
Why did my crust turn out soggy?
This usually happens for one of two reasons: you skipped the par-baking step, or you didn’t let the apples rest after tossing them with sugar and flour. Par-baking creates a barrier that prevents the apple juices from soaking into the crust. Also, letting the apples sit for 5 minutes allows them to release excess liquid before baking. Make sure you do both steps for a perfectly crisp base.
Can I make these bars ahead of time?
Absolutely! In fact, they taste even better the next day. You can assemble the bars completely (without the caramel drizzle) and refrigerate for up to 24 hours before baking. Or bake them fully, cool, and store in an airtight container for up to 3 days. Add the caramel drizzle just before serving for the best presentation.
How do I prevent the crumble topping from sinking into the apples?
Make sure your apple pieces are diced small—about ½-inch cubes—and that your crumble has good-sized clumps. If the crumble is too fine, it will sink into the apple filling during baking. Also, don’t press the crumble into the apples; just sprinkle it evenly on top. The clumps should sit on the surface, not get pushed down.
Can I freeze these bars with the caramel drizzle?
I recommend freezing the bars without the caramel drizzle. The caramel can become grainy or separate during freezing and thawing. Bake, cool, and freeze the bars plain. When you’re ready to serve, thaw them at room temperature, then warm in the oven at 300°F for 10 minutes, and add the caramel drizzle right before serving. This keeps the texture and flavor at their best.
Pin This Recipe!
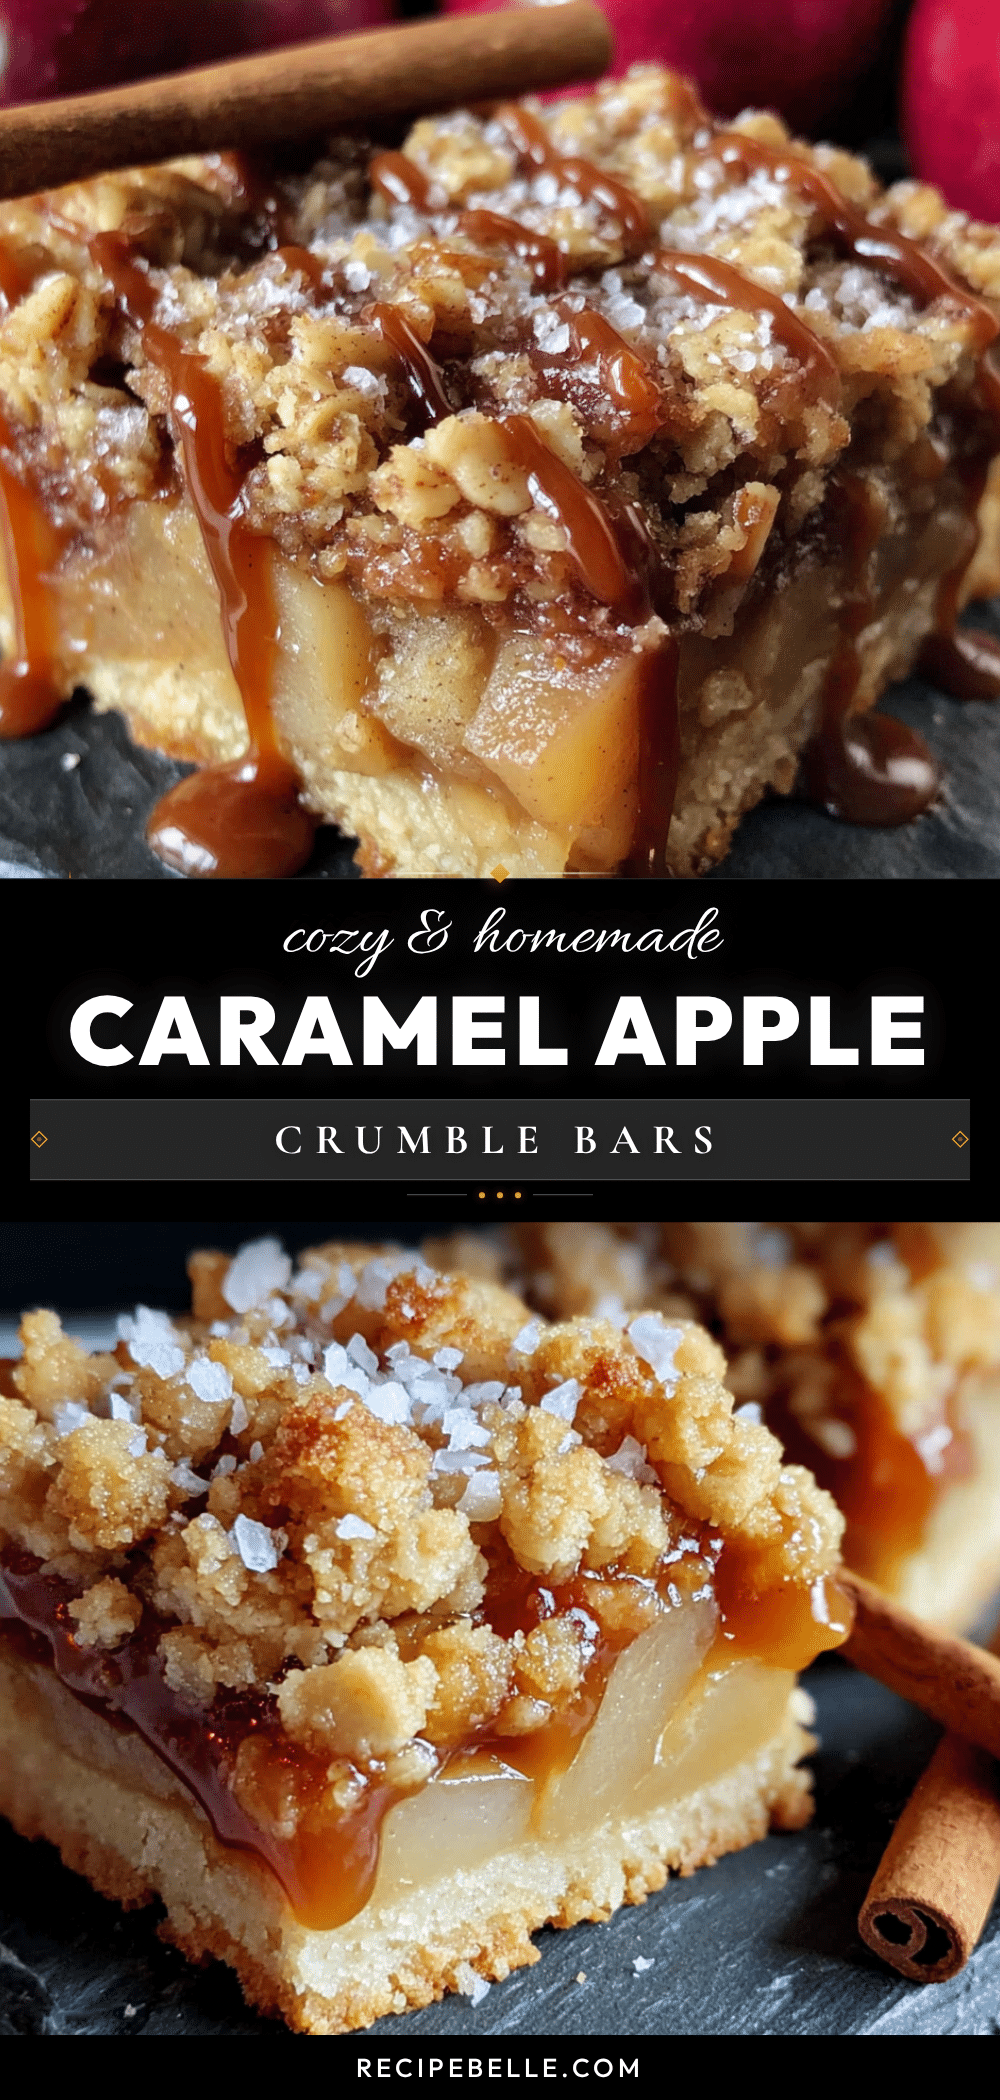
Cozy Caramel Apple Crumble Bars: Easy Fall Dessert
These cozy caramel apple crumble bars feature a buttery shortbread crust, spiced apple filling, crunchy oat crumble, and a luscious caramel drizzle. They’re the perfect easy fall dessert that tastes like a hug on a plate.
- Prep Time: 15 minutes
- Cook Time: 40 minutes
- Total Time: 55 minutes
- Yield: 12 servings 1x
- Category: Dessert
- Cuisine: American
Ingredients
- 1 ½ cups all-purpose flour
- ½ cup granulated sugar
- ¾ cup cold unsalted butter, cubed
- ¼ teaspoon salt
- 4 medium Honeycrisp or Granny Smith apples, peeled and diced into ½-inch pieces (about 4 cups)
- ¼ cup granulated sugar
- 2 tablespoons all-purpose flour
- 1 teaspoon ground cinnamon
- ¼ teaspoon ground nutmeg
- 1 tablespoon lemon juice
- 1 cup old-fashioned rolled oats
- ½ cup all-purpose flour
- ½ cup packed light brown sugar
- ½ teaspoon ground cinnamon
- ¼ teaspoon salt
- ½ cup cold unsalted butter, cubed
- ½ cup store-bought or homemade caramel sauce
- Flaky sea salt for finishing (optional)
Instructions
- Preheat your oven to 350°F (175°C). Line a 9×13-inch pan with parchment paper, leaving about 2 inches of overhang on the long sides. Lightly grease the parchment with butter or non-stick spray.
- Make the shortbread crust: In a food processor, pulse together 1 ½ cups flour, ½ cup granulated sugar, and ¼ teaspoon salt until combined. Add ¾ cup cold cubed butter and pulse until the mixture looks like coarse sand with a few pea-sized butter pieces remaining. Press the mixture firmly and evenly into the prepared pan. Bake for 15 minutes, until the edges are just starting to turn golden. Let cool on a rack.
- Prepare the apple filling: In a large bowl, toss the diced apples with 1 tablespoon lemon juice. Add ¼ cup granulated sugar, 2 tablespoons flour, 1 teaspoon cinnamon, and ¼ teaspoon nutmeg. Toss until every piece is coated. Let sit for 5 minutes.
- Make the crumble topping: In a medium bowl, whisk together 1 cup oats, ½ cup flour, ½ cup brown sugar, ½ teaspoon cinnamon, and ¼ teaspoon salt. Add ½ cup cold cubed butter and use your fingers or a pastry cutter to work it in until the mixture forms clumps. Refrigerate while assembling.
- Assemble the bars: Spread the apple filling evenly over the pre-baked crust. Sprinkle the crumble topping evenly over the apples.
- Bake for 35-40 minutes, until the filling is bubbly around the edges and the crumble is deep golden brown. If the top is browning too quickly after 25 minutes, tent loosely with foil.
- Let the bars cool in the pan on a wire rack for at least 20 minutes. While still warm, drizzle the caramel sauce over the top. If using flaky sea salt, sprinkle it on now. Let cool completely, about 1 hour, before lifting out using the parchment handles.
- Slice into squares using a sharp knife, wiping the knife between cuts for clean edges. Serve warm or at room temperature.
Notes
For the apples, look for firm, tart-sweet varieties that hold their shape during baking. Honeycrisp is my top choice, but Fuji or Braeburn work beautifully too. If you only have Granny Smith, add an extra tablespoon of brown sugar to balance the tartness. Use dairy-free butter and certified gluten-free oats and flour for a gluten-free version. Keep everything cold for a flaky crust and crunchy crumble. Don’t skip par-baking the crust to prevent a soggy bottom. Dice apples into uniform ½-inch pieces. Let bars cool completely before slicing for clean cuts. These bars taste even better the next day.
Nutrition
- Serving Size: 1 bar (1/12 of recip
- Calories: 380
- Sugar: 32
- Sodium: 180
- Fat: 18
- Saturated Fat: 11
- Carbohydrates: 52
- Fiber: 3
- Protein: 4
Keywords: caramel apple crumble bars, apple crumble bars, fall dessert, apple bars, easy apple dessert



