It was 11:47 PM on a soggy Tuesday in late October, and I had a very specific, almost aggressive craving for something that tasted like a warm blanket. I didn’t have the patience for a full pie crust—the thought of chilling dough felt like a personal insult at that hour—but I had a bag of pecans that was practically staring at me from the pantry, a half-empty bottle of bourbon my brother had left last Christmas, and a jar of maple syrup that was dangerously close to its “use by” date. The idea arrived in a flash of pure, sleep-deprived genius: why not just press it all into a bar? No rolling, no crimping, just a buttery shortbread crust, a sticky, boozy filling, and a whole lot of hope. I mean, honestly, the best recipes come from a place of “I can’t be bothered,” don’t they?
The kitchen was a disaster—flour on the counter, a sticky measuring cup in the sink—but the smell that filled my tiny apartment was pure alchemy. It was the kind of scent that makes you stop what you’re doing and just breathe in. That first bite, still warm from the oven, was a revelation. The shortbread crust was crumbly and buttery, the filling was a deep, rich caramel with a smoky kick from the bourbon, and the pecans were perfectly toasted on top. I stood there at the counter, in my pajamas, eating a bar that was definitely not supposed to be dinner, and felt a wave of calm wash over me. Maybe you’ve been there—when a late-night kitchen experiment turns into your new favorite thing. This recipe stayed with me because it captured that whole feeling: the quiet, the impulse, the pure comfort of making something wonderful out of what you have.
Why You’ll Love This Recipe
Let me tell you, these Cozy Maple Bourbon Pecan Pie Bars are not just another dessert recipe. They are, without a doubt, the easiest way to get that classic pecan pie flavor without the stress of a fussy pastry crust. I’ve tested this dozens of times—once with a friend who is a professional baker, and she admitted these were better than her full-size pie. That’s the kind of authority I’m bringing to the table here.
- Quick & Easy: From start to finish, you’re looking at about 45 minutes. No chilling dough, no blind baking. Just mix, press, pour, and bake.
- Simple Ingredients: You probably have most of this in your pantry right now. Butter, flour, sugar, eggs, and pecans. The bourbon and maple syrup are the only “special” items, but they’re worth the trip.
- Perfect for Cozy Evenings: These bars are made for a cold night, a rough day, or a holiday gathering where you want to impress without the panic.
- Crowd-Pleaser: I brought these to a Friendsgiving last year, and they were gone in twenty minutes. People kept asking for the recipe, which is always the best compliment.
- Unbelievably Delicious: The texture is the real star here. You get that buttery, sandy shortbread, followed by a gooey, rich filling that’s not overly sweet, and finally, a crunchy pecan topping. It’s comfort food, perfected.
What makes this recipe different from the rest? It’s the balance. The maple syrup adds a deep, woodsy sweetness that plays beautifully with the smoky warmth of the bourbon. I’ve tried versions with just corn syrup, and they were one-note. This version has layers. It’s the kind of bar that makes you close your eyes after the first bite—it’s that good. It’s comfort food, reimagined as a bar, and it’s ready faster than you think.
What Ingredients You Will Need
This recipe uses simple, wholesome ingredients to deliver bold flavor and satisfying texture without any fuss. Most of these are pantry staples, but I’ll give you my notes on the best ones to grab.
- For the Shortbread Crust:
- 1 ½ cups (190g) all-purpose flour (I use King Arthur for consistent results)
- ½ cup (100g) granulated sugar
- ½ teaspoon salt
- ¾ cup (170g) unsalted butter, cold and cut into small cubes (this is key for a flaky crust)
- For the Maple Bourbon Filling:
- ¾ cup (180ml) pure maple syrup (not pancake syrup—the real stuff makes a difference)
- ½ cup (100g) packed light brown sugar
- 2 large eggs, at room temperature
- ¼ cup (60ml) bourbon (I like Bulleit or Maker’s Mark for their smooth, oaky flavor)
- 2 tablespoons unsalted butter, melted
- 1 teaspoon vanilla extract
- ¼ teaspoon salt
- For the Topping:
- 2 cups (200g) pecan halves (you can chop them if you prefer, but I love the look of whole halves)
A few quick notes on ingredients: For the maple syrup, look for Grade A Dark Amber for the most robust flavor. If you’re out of bourbon, you can substitute with a splash of dark rum or even a teaspoon of vanilla extract mixed with a tablespoon of water—though you’ll miss that smoky kick. For the pecans, I recommend buying them raw and toasting them lightly in a dry pan for 3-4 minutes before using. It wakes up their oils and makes them incredibly fragrant. If you’re nut-free, you could try this with roasted pumpkin seeds, but honestly, the pecans are the star here.
Equipment Needed
You don’t need a fancy kitchen to make these bars. Here’s what you’ll need:
- 9×9-inch baking pan: This is the perfect size for thick bars. If you only have an 8×8, the bars will be a bit taller and may need an extra 5 minutes of baking time.
- Parchment paper: Non-negotiable. It makes lifting the bars out of the pan so much easier. Leave a little overhang on two sides for handles.
- Food processor or pastry cutter: For cutting the butter into the flour. I use a food processor because it’s faster, but a pastry cutter or even two forks work perfectly.
- Mixing bowls: One large, one medium.
- Whisk: For the filling.
- Spatula: For pressing the crust and scraping every last bit of filling.
- Cooling rack: Essential for letting the bars cool evenly so they set properly.
I once used a glass baking dish when my metal pan was in the dishwasher. It worked fine, but the edges got a little darker. Just keep an eye on it. Also, if you don’t have a food processor, don’t sweat it. The “rubbing in” method with your fingertips is oddly therapeutic—just make sure your hands are cold!
Preparation Method
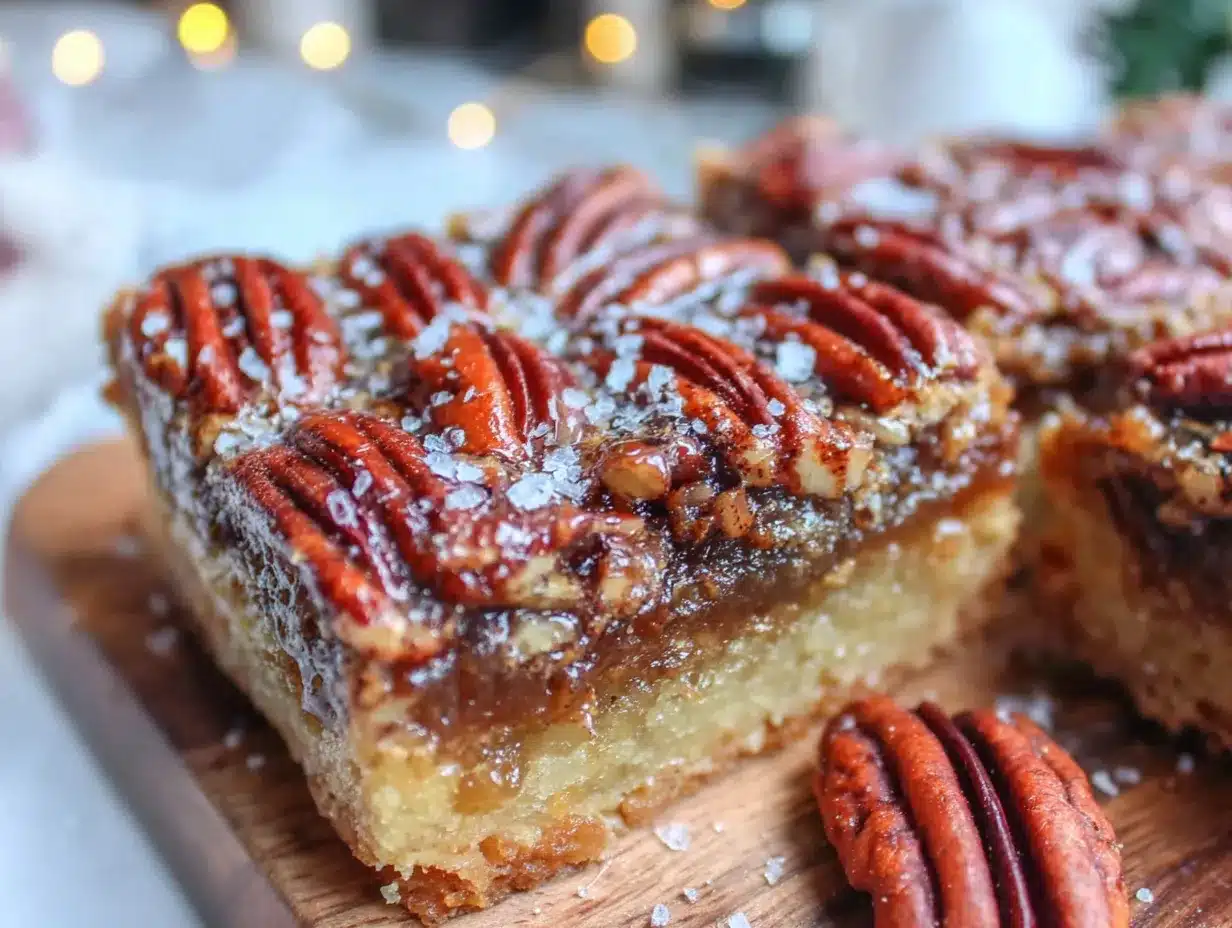
Let’s get into the good stuff. Follow these steps, and you’ll have a pan of pure comfort in under an hour.
- Preheat and Prep: Preheat your oven to 350°F (175°C). Line your 9×9-inch baking pan with parchment paper, leaving a 2-inch overhang on two sides. This will be your “handle” to lift the bars out later.
- Make the Crust: In a food processor, combine the flour, granulated sugar, and salt. Pulse a few times to mix. Add the cold, cubed butter and pulse until the mixture looks like coarse meal with pea-sized butter pieces. Don’t over-process—you want those little butter chunks for a tender crust. If you’re doing this by hand, rub the butter into the flour mixture with your fingertips until it resembles coarse sand.
- Press the Crust: Dump the crumbly mixture into your prepared pan. Using your fingers or the bottom of a measuring cup, press it down firmly and evenly. I like to use the flat bottom of a glass to get it super smooth. Bake for 18-20 minutes, until the edges are just starting to turn golden. The center should look dry and set. Let it cool on a wire rack for 10 minutes while you make the filling.
- Make the Filling: In a medium bowl, whisk together the maple syrup, brown sugar, eggs, bourbon, melted butter, vanilla extract, and salt. Whisk until everything is smooth and well combined. Don’t over-whisk—you don’t want to incorporate too much air. You’re looking for a glossy, homogeneous liquid.
- Assemble the Bars: Sprinkle the pecan halves evenly over the warm pre-baked crust. Pour the maple bourbon filling over the pecans. Don’t worry if the pecans float—they will. Just make sure they’re mostly covered by the liquid. Gently tilt the pan to spread the filling evenly if needed.
- Bake to Perfection: Bake for 25-30 minutes, until the filling is set around the edges but still has a slight jiggle in the center. It should be bubbly and a deep golden brown. If you tap the pan, the center should wobble just a little—it will continue to set as it cools. Over-baking will make the filling tough, so err on the side of under-done.
- Cool Completely: This is the hardest part. Let the bars cool in the pan on a wire rack for at least 2 hours. The filling needs this time to firm up. If you cut them too soon, you’ll get a delicious but messy puddle. Trust me on this—I’ve made that mistake twice. Once they’re cool, use the parchment overhang to lift the entire block out onto a cutting board.
- Slice and Serve: Using a sharp knife, cut into 16 squares. For clean cuts, wipe the knife with a damp paper towel between slices. Serve at room temperature or slightly warm.
Cooking Tips & Techniques
Here are some things I’ve learned the hard way so you don’t have to.
Don’t Overwork the Crust. I know it’s tempting to keep mixing until it looks like a perfect dough, but you want those little butter pockets. They melt in the oven and create steam, which makes the crust tender and flaky. If you overwork it, you’ll get a tough, dense crust. I once used a food processor for a full minute, and the crust came out like a hockey puck. Learn from my failure.
The Bourbon Boil. Some recipes call for boiling the bourbon to cook off the alcohol. I don’t do that here. The bourbon bakes into the filling, and the alcohol evaporates during baking, leaving behind that gorgeous, smoky flavor. If you’re worried about the alcohol content, you can simmer the bourbon in a small saucepan for 2-3 minutes before adding it to the filling. I’ve done both, and I prefer the raw version—it’s more complex.
Timing is Everything. Multitask while the crust is baking. Whisk the filling together and measure out your pecans. This way, you can pour the filling over the hot crust as soon as it comes out. The heat helps the filling meld with the crust, preventing a soggy bottom.
Consistency Check. The filling should be slightly jiggly in the center when you pull it out. If it’s completely set and firm, it’s over-baked. The residual heat will finish the job as it cools. I always set a timer for 25 minutes and then start checking every 2 minutes. It’s a small thing, but it makes a huge difference.
Variations & Adaptations
This recipe is a great base for experimentation. Here are a few ways I’ve tweaked it.
- Chocolate Lovers: Sprinkle ½ cup of dark chocolate chips over the crust before adding the pecans. The chocolate melts into the filling and creates a fudgy layer. I did this for a holiday party, and it was the first thing to disappear.
- Gluten-Free: Swap the all-purpose flour with a 1:1 gluten-free baking flour blend. I’ve used Bob’s Red Mill with great results. The crust might be a little more crumbly, but the flavor is spot on.
- Bourbon-Free: If you don’t have bourbon or prefer not to use it, replace it with an equal amount of strong brewed coffee or apple cider. The coffee adds a nice depth, while the cider keeps it autumnal. I tried the cider version last Thanksgiving, and it was a hit with the kids.
- Spiced Up: Add ½ teaspoon of cinnamon and ¼ teaspoon of nutmeg to the filling. It gives the bars a chai-like warmth that’s perfect for a cold evening. I did this on a whim one night, and now I can’t go back.
Serving & Storage Suggestions
These bars are best served at room temperature, but I’ve also been known to eat one straight from the fridge—it’s denser and almost fudge-like. For a truly indulgent experience, warm a bar in the microwave for 10-15 seconds and serve with a scoop of vanilla bean ice cream or a dollop of lightly sweetened whipped cream. The cold cream against the warm, gooey bar is pure magic.
For storage, keep the bars in an airtight container at room temperature for up to 3 days. If you stack them, place a piece of parchment paper between the layers to prevent sticking. You can also refrigerate them for up to a week, but let them come to room temperature before serving for the best texture. These bars freeze beautifully. Wrap them individually in plastic wrap, then place them in a freezer-safe bag. They’ll keep for up to 3 months. To thaw, just leave them on the counter for an hour or pop them in the microwave for 20 seconds.
The flavors actually get better after a day or two. The bourbon and maple meld together, and the crust softens slightly. Honestly, I think they’re even better on day two. It’s like the bar settles into itself.
Nutritional Information & Benefits
Let’s be real—these are a treat, not a health food. But I’ve done the math for you. Per bar (based on 16 servings), you’re looking at approximately:
- Calories: 320
- Fat: 22g
- Carbohydrates: 30g
- Protein: 4g
- Sugar: 20g
On the plus side, pecans are a great source of healthy fats, fiber, and antioxidants. They’re known to support heart health and reduce inflammation. The maple syrup contains some minerals like zinc and manganese. And hey, a little bourbon is good for the soul, right? If you’re watching your sugar intake, you can reduce the brown sugar to ¼ cup, but the filling will be less gooey. These bars are not gluten-free as written, but the variation above works well. They do contain dairy, eggs, and tree nuts, so keep that in mind for allergies.
Conclusion
These Cozy Maple Bourbon Pecan Pie Bars are the kind of recipe that becomes a staple. They’re forgiving, they’re fast, and they taste like you spent hours in the kitchen. Whether you’re making them for a holiday table, a cozy night in, or just because you had a rough Tuesday, they deliver every single time. I love this recipe because it reminds me that you don’t need a perfect pie crust or a fancy technique to make something truly memorable. Sometimes, the best things come from a late-night impulse and a whole lot of butter.
I’d love to hear how these turn out for you. Did you add chocolate? Try the coffee version? Leave a comment below and let me know your twist. And if you loved them, share this post with a friend who needs a little comfort in bar form. Happy baking, friend—you’ve got this.
Frequently Asked Questions
Can I make these bars ahead of time?
Absolutely. These bars are actually better the next day. Bake them, let them cool completely, and store them in an airtight container at room temperature. They’ll keep for up to 3 days, or you can freeze them for longer storage.
Do I have to use bourbon?
Not at all. The bourbon adds a smoky depth, but you can swap it with strong coffee, apple cider, or even a splash of vanilla extract mixed with water. The bars will still be delicious.
Why is my filling runny?
This usually happens if the bars are under-baked or cut too soon. Make sure the edges are set and the center has a slight jiggle. Then, let them cool completely for at least 2 hours. The filling needs time to firm up.
Can I use a different nut?
Pecans are classic, but walnuts or a mix of pecans and almonds work great. If you’re nut-free, try roasted pumpkin seeds or sunflower seeds for a similar crunch.
How do I get clean cuts?
Use a sharp knife and wipe it clean with a damp paper towel between each cut. For the cleanest slices, chill the bars in the fridge for 30 minutes before cutting. They’ll be firmer and less sticky.
Pin This Recipe!
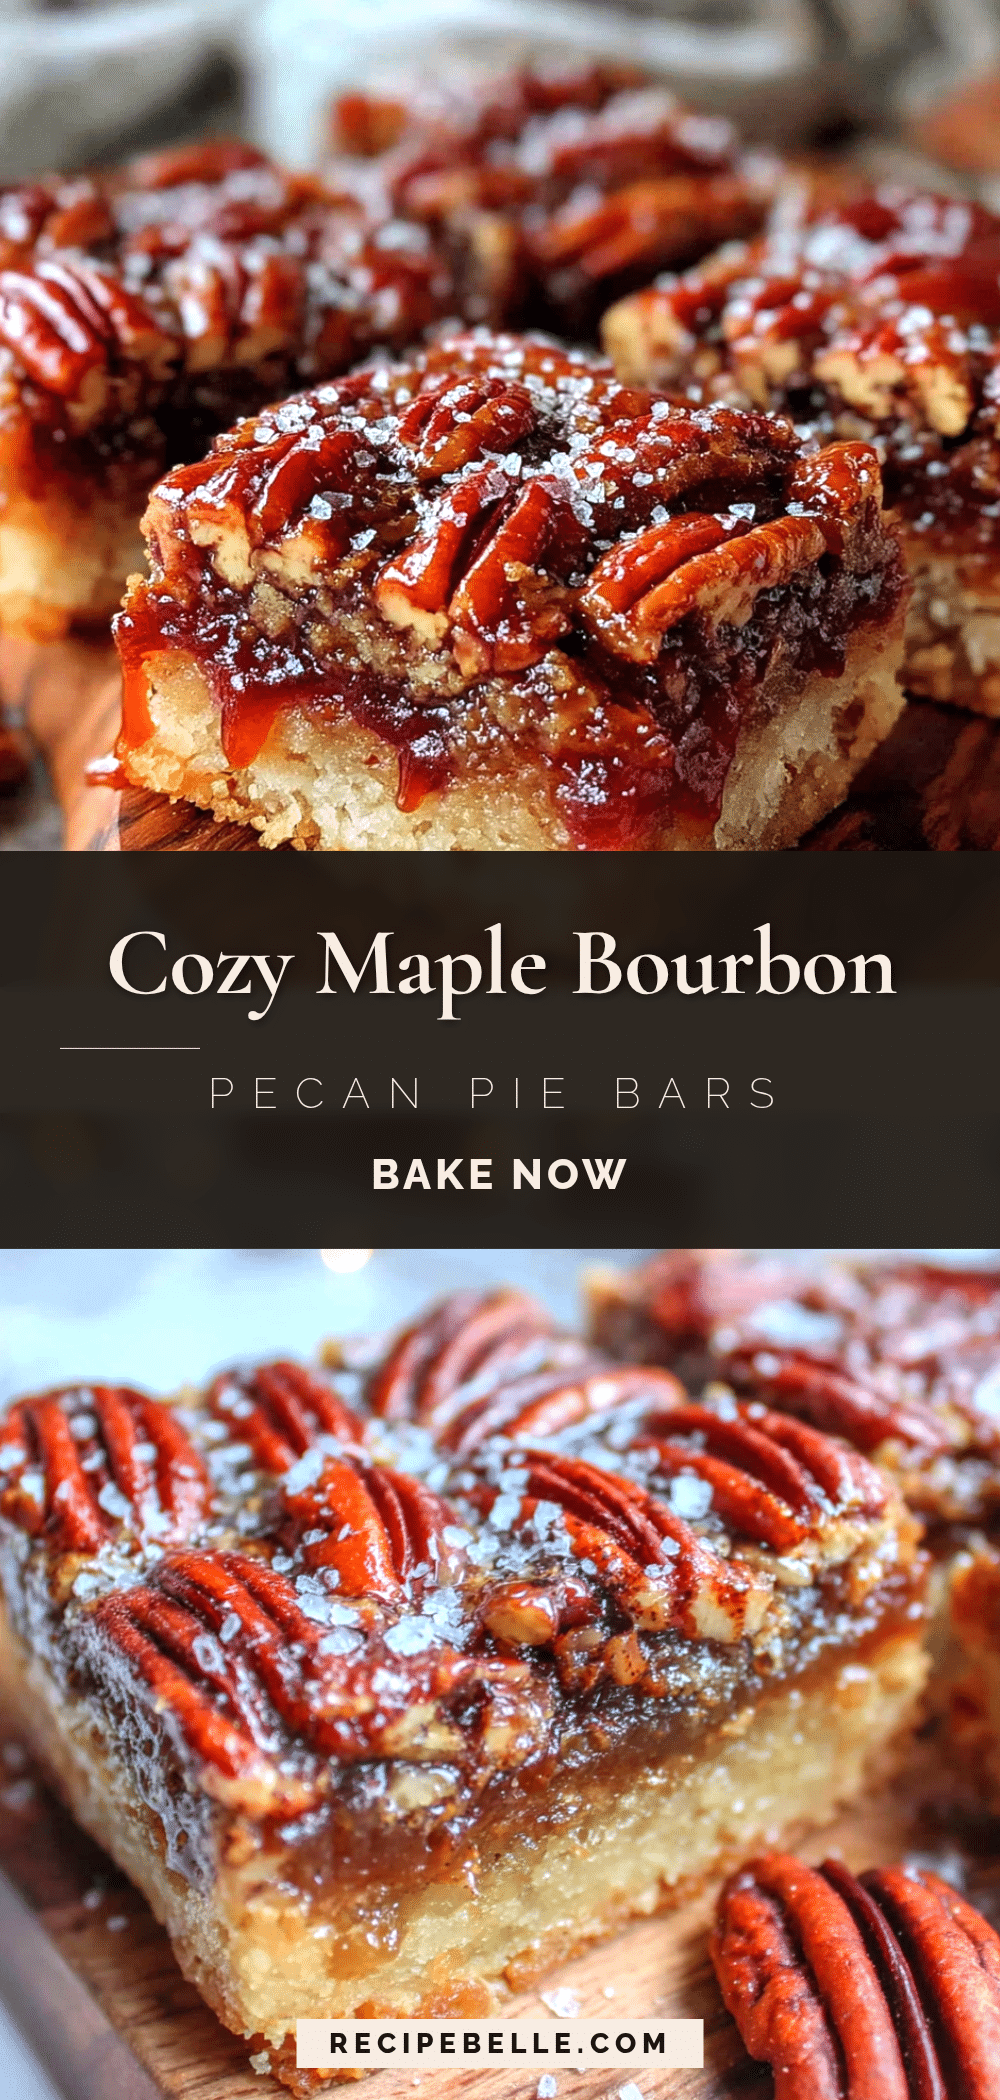
Cozy Maple Bourbon Pecan Pie Bars
These easy pecan pie bars feature a buttery shortbread crust, a rich maple bourbon filling, and a crunchy pecan topping. They deliver all the classic pecan pie flavor without the fuss of a pastry crust, ready in under an hour.
- Prep Time: 15 minutes
- Cook Time: 30 minutes
- Total Time: 45 minutes
- Yield: 16 servings 1x
- Category: Dessert
- Cuisine: American
Ingredients
- 1 ½ cups (190g) all-purpose flour
- ½ cup (100g) granulated sugar
- ½ teaspoon salt
- ¾ cup (170g) unsalted butter, cold and cut into small cubes
- ¾ cup (180ml) pure maple syrup
- ½ cup (100g) packed light brown sugar
- 2 large eggs, at room temperature
- ¼ cup (60ml) bourbon
- 2 tablespoons unsalted butter, melted
- 1 teaspoon vanilla extract
- ¼ teaspoon salt
- 2 cups (200g) pecan halves
Instructions
- Preheat your oven to 350°F (175°C). Line a 9×9-inch baking pan with parchment paper, leaving a 2-inch overhang on two sides.
- Make the crust: In a food processor, combine the flour, granulated sugar, and salt. Pulse to mix. Add the cold, cubed butter and pulse until the mixture looks like coarse meal with pea-sized butter pieces. Do not over-process.
- Press the crust mixture firmly and evenly into the prepared pan. Bake for 18-20 minutes, until the edges are just starting to turn golden. Let cool on a wire rack for 10 minutes.
- Make the filling: In a medium bowl, whisk together the maple syrup, brown sugar, eggs, bourbon, melted butter, vanilla extract, and salt until smooth and well combined.
- Sprinkle the pecan halves evenly over the warm pre-baked crust. Pour the maple bourbon filling over the pecans. Gently tilt the pan to spread the filling evenly if needed.
- Bake for 25-30 minutes, until the filling is set around the edges but still has a slight jiggle in the center. It should be bubbly and a deep golden brown.
- Let the bars cool completely in the pan on a wire rack for at least 2 hours. The filling needs this time to firm up.
- Use the parchment overhang to lift the entire block out onto a cutting board. Using a sharp knife, cut into 16 squares. Wipe the knife with a damp paper towel between slices for clean cuts. Serve at room temperature or slightly warm.
Notes
For the maple syrup, use Grade A Dark Amber for the most robust flavor. If you don’t have bourbon, substitute with strong brewed coffee or apple cider. Toast pecans lightly in a dry pan for 3-4 minutes before using to enhance their flavor. The bars are even better the next day. For clean cuts, chill the bars in the fridge for 30 minutes before slicing.
Nutrition
- Serving Size: 1 bar
- Calories: 320
- Sugar: 20
- Fat: 22
- Carbohydrates: 30
- Protein: 4
Keywords: pecan pie bars, maple bourbon, easy dessert, Thanksgiving, fall baking, shortbread crust, comfort food



