There used to be a little farm-to-table spot tucked away on Main Street in our town called The Harvest Table. They made a Thanksgiving stuffing that was honestly life-changing—golden, tender, packed with herbs, and somehow both light and deeply satisfying. When they closed after the pandemic, I literally stood in their parking lot staring at the “For Lease” sign like I’d lost a friend. That first Thanksgiving without their stuffing, I tried to recreate it from memory. Let me tell you, the result was… sad. Dry in some spots, mushy in others, and my kids wouldn’t touch it. After seven tries—seven, people—and one particularly memorable disaster involving burnt sage and tears, I finally cracked the code. This kid-approved gluten-free herb Thanksgiving stuffing is the exact recreation of that magic, and honestly, it might even be better.
I remember the Tuesday afternoon it finally worked. My daughter walked into the kitchen, sniffed the air, and said, “Mom, it smells like Thanksgiving.” She grabbed a fork and ate half the pan before dinner. That’s when I knew I had to share this. If you’ve been searching for a gluten-free stuffing that doesn’t taste like cardboard and actually gets the kids excited, you’re in the right place. This recipe is the one that ended our search, and I think it’ll end yours too.
Why You’ll Love This Recipe
Let me be honest with you—finding a gluten-free stuffing that actually tastes like the real deal is a journey. I’ve tried boxed mixes that crumbled into dust and homemade versions that turned into glue. But this kid-approved gluten-free herb Thanksgiving stuffing? It’s the one that changed everything.
- Kid-Tested and Approved: My three kids, ages 6, 9, and 12, devoured this. The 6-year-old asked for seconds. The 12-year-old asked if we could have it for Christmas too. That’s a win in my book.
- Budget-Friendly Ingredients: No fancy gluten-free bread that costs $8 a loaf. I use a specific brand that’s affordable and works perfectly. Your wallet will thank you.
- Make-Ahead Magic: You can prep this the day before and just pop it in the oven. Thanksgiving morning just got a whole lot less stressful.
- Picky Eater Approved: The herbs are present but not overwhelming. The texture is soft but not mushy. It’s the Goldilocks of stuffing—just right for little palates.
- Reheats Like a Dream: Leftovers the next day? Even better. The flavors meld together overnight, and a quick reheat brings back that golden, buttery goodness.
What makes this recipe different from every other gluten-free stuffing out there is the bread-to-broth ratio. I spent weeks testing different combinations until I found the sweet spot where the bread soaks up just enough liquid to stay tender but not soggy. Plus, I add a secret ingredient—a splash of apple cider—that adds a subtle sweetness kids love without tasting fruity. This isn’t just another version of gluten-free stuffing. It’s the version that made my husband say, “Wait, this is gluten-free?” And that’s when you know you’ve nailed it.
What Ingredients You Will Need
This recipe uses simple, wholesome ingredients that you can find at any regular grocery store. No specialty health food store runs required. The beauty of this kid-approved gluten-free herb Thanksgiving stuffing is that everything comes together with pantry staples and a few fresh ingredients.
For the Stuffing Base
- 1 large loaf (about 16 ounces) gluten-free bread, cut into 1-inch cubes – I recommend Canyon Bakehouse or Schar brand for the best texture. Avoid super dense gluten-free breads; you want something with a light, airy crumb.
- 4 tablespoons unsalted butter, plus more for greasing the dish – Adds richness and helps the top get golden and crispy.
- 1 medium yellow onion, finely diced – About 1½ cups. The smaller you dice, the more evenly it distributes.
- 3 celery stalks, finely diced – About 1 cup. Celery adds that classic stuffing crunch and freshness.
- 3 cloves garlic, minced – Because garlic makes everything better.
- 2 cups low-sodium chicken or vegetable broth – Low-sodium is key so you can control the salt level.
- 1 large egg, lightly beaten – This is the secret to binding the stuffing without it falling apart.
- 2 tablespoons fresh parsley, chopped – Adds a pop of color and fresh flavor.
- 1 tablespoon fresh sage, finely chopped – The star herb of Thanksgiving. Don’t skip it.
- 1 tablespoon fresh thyme leaves – Earthy and aromatic.
- 1 teaspoon fresh rosemary, finely chopped – Use sparingly; rosemary can be overpowering.
- 1 teaspoon salt – I use fine sea salt.
- ½ teaspoon black pepper – Freshly ground is best.
- 1 tablespoon apple cider vinegar – The secret ingredient! It brightens everything and kids love the subtle tang.
Optional Add-Ins
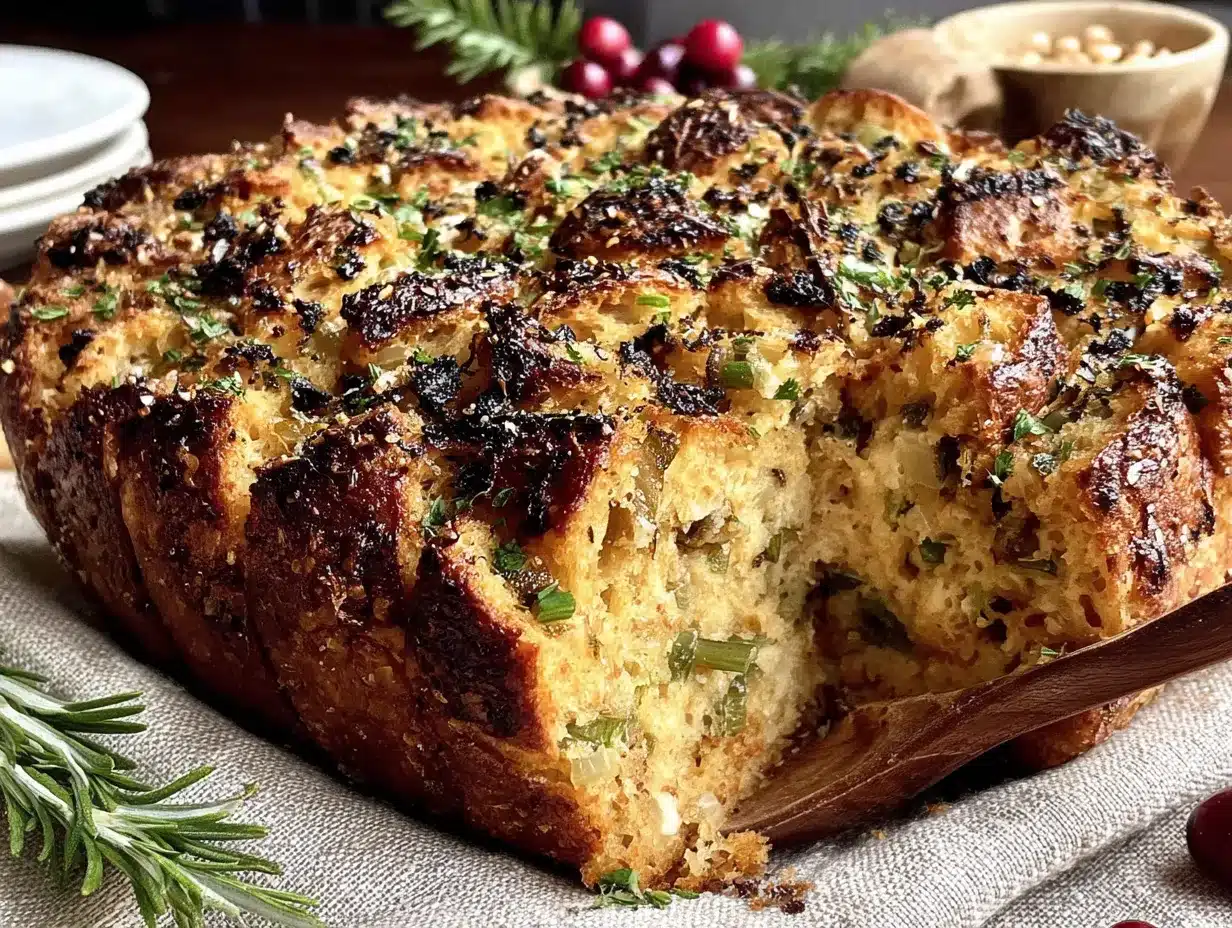
- ½ cup dried cranberries – Adds sweetness and color. My kids love these.
- ½ cup cooked and crumbled sausage – If your family likes a heartier stuffing, this is a great addition.
- ¼ cup toasted pecans or walnuts – For a little crunch.
Ingredient Selection Tip: When choosing gluten-free bread for stuffing, look for one that’s not too dense or too airy. I’ve found that breads labeled “sandwich style” work best because they have a consistent crumb that holds up to soaking. Avoid gluten-free breads that are very seedy or have large grains—they can make the stuffing texture uneven.
Equipment Needed
You don’t need a fancy kitchen to make this kid-approved gluten-free herb Thanksgiving stuffing. Here’s what you’ll need:
- Large baking dish (9×13 inches works perfectly) – Glass or ceramic is ideal for even heating.
- Large skillet or sauté pan – For sautéing the vegetables.
- Large mixing bowl – Big enough to toss everything together without spilling.
- Sharp knife and cutting board – For dicing the veggies.
- Measuring cups and spoons – Precision matters, especially with the broth.
- Aluminum foil – For covering the dish during the first part of baking.
- Spatula or wooden spoon – For mixing.
Budget-Friendly Tip: If you don’t have a 9×13 baking dish, you can use a large cast-iron skillet or even two smaller dishes. Just adjust the baking time slightly—smaller dishes will cook faster, so start checking at the 30-minute mark.
Preparation Method
This stuffing comes together in about an hour, but most of that time is hands-off baking. Let me walk you through it step by step.
- Preheat your oven to 350°F (175°C). Grease a 9×13-inch baking dish with butter or non-stick spray. Set it aside.
- Toast the bread cubes. Spread the gluten-free bread cubes on a large baking sheet in a single layer. Bake for 10-12 minutes, stirring halfway through, until they’re lightly golden and dry to the touch. This step is crucial—toasting prevents the stuffing from turning into mush. Let them cool slightly while you prep the vegetables.
- Sauté the aromatics. In a large skillet over medium heat, melt the 4 tablespoons of butter. Add the diced onion and celery. Cook for 6-8 minutes, stirring occasionally, until the onion is translucent and the celery has softened. Add the minced garlic and cook for another minute until fragrant. Your kitchen will smell incredible right about now.
- Combine the liquids. In a small bowl or measuring cup, whisk together the chicken broth, beaten egg, apple cider vinegar, salt, and pepper. Set aside.
- Mix everything together. In a large mixing bowl, combine the toasted bread cubes, sautéed vegetables, and all the fresh herbs (parsley, sage, thyme, rosemary). Toss gently with a spatula to distribute everything evenly. Pour the broth mixture over the top and fold gently until all the bread cubes are moistened. Don’t overmix—you want some texture, not a paste.
- Transfer to the baking dish. Pour the stuffing mixture into the prepared dish and spread it into an even layer. If you’re adding dried cranberries, sausage, or nuts, sprinkle them on top now and press them in gently.
- Bake covered. Cover the dish tightly with aluminum foil and bake for 25 minutes. This steams the stuffing and ensures the inside is tender and cooked through.
- Bake uncovered. Remove the foil and bake for another 15-20 minutes, until the top is golden brown and crispy around the edges. The smell at this point is absolutely intoxicating.
- Rest before serving. Let the stuffing sit for 5-10 minutes before serving. This allows it to set and makes it easier to scoop without falling apart.
Sensory Cue: When the stuffing is done, the top should be golden and slightly crunchy when you tap it with a fork. The edges will be darker and crispier—those are the best parts, honestly. If you insert a knife into the center, it should come out hot to the touch.
Cooking Tips & Techniques
I learned most of these tips the hard way—through trial and error. Let me save you some trouble.
Don’t skip toasting the bread. I know it seems like an extra step, but gluten-free bread is much softer and more absorbent than regular bread. If you skip toasting, you’ll end up with stuffing that’s more like bread pudding—delicious, but not what we’re going for. Toast it until it’s actually dry, not just warm.
Watch your liquid ratio. The first time I made this, I got overexcited and added too much broth. The result was a soggy mess that my kids politely pushed around their plates. Stick to the 2 cups—it’s the sweet spot. If your bread cubes seem particularly dry, add an extra tablespoon or two of broth, but no more than that.
Use fresh herbs if you can. Dried herbs work in a pinch, but fresh herbs make a huge difference in flavor. If you’re using dried, reduce the amount by half—dried herbs are more concentrated. My personal preference is fresh sage and thyme; they’re non-negotiable in my kitchen.
Make it ahead of time. This stuffing is perfect for make-ahead prep. Assemble everything in the baking dish, cover it, and refrigerate for up to 24 hours. When you’re ready to bake, add about 10 minutes to the covered baking time since you’re starting from cold. This was a game-changer for my Thanksgiving morning chaos.
Don’t overmix. Once you add the liquid, fold gently. Overmixing breaks down the bread cubes and gives you a dense, heavy stuffing. You want distinct pieces of bread that are held together by the vegetables and herbs.
Variations & Adaptations
One of the best things about this kid-approved gluten-free herb Thanksgiving stuffing is how adaptable it is. Here are some variations I’ve tried and loved.
Dairy-Free Version: Swap the butter for olive oil or your favorite dairy-free butter alternative. I’ve used Earth Balance with great results. The flavor changes slightly, but it’s still delicious.
Vegan Version: Use vegetable broth instead of chicken broth, and replace the egg with a flax egg (1 tablespoon ground flaxseed mixed with 3 tablespoons water, let sit for 5 minutes). The texture will be a bit more delicate, so handle gently.
Herb-Forward Variation: If your family loves herbs as much as mine, double the sage and thyme and add a tablespoon of fresh chopped chives. This version is incredibly aromatic and pairs beautifully with roasted turkey.
Stuffing Muffins: For individual servings, press the stuffing mixture into a greased muffin tin. Bake at 375°F (190°C) for 15-18 minutes. These are perfect for portion control and kids love the fun shape. Plus, they get crispy on all sides!
Slow Cooker Method: On busy days, I’ve made this in the slow cooker. Sauté the vegetables, then combine everything in the slow cooker. Cook on low for 3-4 hours or high for 1.5-2 hours. The texture will be softer, but the flavor is still spot-on.
Add Some Protein: For a heartier stuffing that can stand alone as a main dish, add 1 cup of cooked and crumbled breakfast sausage or diced cooked chicken. My husband loves this version for leftover lunches.
Serving & Storage Suggestions
This stuffing is best served warm, straight from the oven. The contrast between the crispy top and the tender interior is pure magic.
Serving Temperature: Serve it hot, but let it rest for 5-10 minutes after baking so it holds its shape. If you’re serving it alongside a full Thanksgiving spread, it stays warm for about 30 minutes if covered loosely with foil.
What to Serve With It: This stuffing is a natural partner for roast turkey, but it’s also fantastic with roasted chicken, pork chops, or even a simple holiday salad. For a complete gluten-free Thanksgiving, pair it with mashed potatoes, green bean casserole, and cranberry sauce. My kids love it alongside roasted Brussels sprouts.
Storage: Leftover stuffing keeps beautifully in an airtight container in the refrigerator for up to 4 days. The flavors actually deepen overnight, so leftovers might be even better than the first serving.
Freezing Instructions: You can freeze this stuffing for up to 3 months. Let it cool completely, then transfer to a freezer-safe container or zip-top bag. To reheat, thaw overnight in the refrigerator, then warm in a 350°F (175°C) oven for 15-20 minutes, covered with foil to prevent drying out.
Reheating Tips: For the best texture, reheat in the oven rather than the microwave. The microwave tends to make it soggy. If you’re in a hurry, you can microwave individual portions for 1-2 minutes, but the crispy top will be lost. For a quick oven reheat, spread leftovers on a baking sheet and warm at 350°F for 10 minutes.
Nutritional Information & Benefits
Here’s the estimated nutritional breakdown for one serving (about 1 cup) of this kid-approved gluten-free herb Thanksgiving stuffing:
| Nutrient | Amount per Serving |
|---|---|
| Calories | 210 |
| Total Fat | 8g |
| Saturated Fat | 4g |
| Cholesterol | 35mg |
| Sodium | 480mg |
| Total Carbohydrates | 30g |
| Dietary Fiber | 3g |
| Sugars | 4g |
| Protein | 5g |
Health Benefits: This stuffing is made with gluten-free bread, which is easier to digest for those with celiac disease or gluten sensitivity. The fresh herbs—sage, thyme, and rosemary—are packed with antioxidants and have anti-inflammatory properties. Celery provides fiber and vitamin K, while garlic supports immune health. Using low-sodium broth helps keep the salt content in check, and the apple cider vinegar adds a touch of gut-friendly acidity.
Dietary Considerations: This recipe is naturally gluten-free (when using certified gluten-free bread) and can easily be made dairy-free or vegan with the substitutions mentioned above. It contains eggs, so it’s not suitable for those with egg allergies unless you use the flax egg substitute. Always check your gluten-free bread label to ensure it’s certified gluten-free if you’re cooking for someone with celiac disease.
Conclusion
This kid-approved gluten-free herb Thanksgiving stuffing is more than just a recipe—it’s the dish that brought the joy back to our holiday table. After years of disappointing gluten-free options and my kids pushing stuffing around their plates, this one finally got the “more please” response I’d been dreaming of. It’s proof that gluten-free doesn’t mean flavor-free, and that feeding a family with dietary needs doesn’t have to be a struggle.
I want you to make this your own. Add your favorite herbs, toss in some dried fruit, or double the garlic—whatever makes your family happy. That’s the beauty of cooking, isn’t it? The recipe is just a starting point. Your love and your family’s smiles are what make it special.
If you try this stuffing, I’d love to hear about it. Drop a comment below and let me know how it turned out, what variations you tried, and most importantly—what the kids thought. Did they ask for seconds? Did someone sneak a taste before dinner? Share your story! And if you’re looking for more gluten-free holiday recipes that actually taste amazing, check out our gluten-free Thanksgiving recipes collection. Happy cooking, friends!
Frequently Asked Questions
Can I use stale gluten-free bread instead of toasting it?
Yes, you can use stale bread, but toasting is still better. Stale gluten-free bread can be unevenly dry, and some spots might still be too soft. Toasting ensures every cube is evenly dried, which gives you consistent texture throughout the stuffing. If you’re using stale bread, cut the toasting time in half—just 5-6 minutes to warm it through.
How do I keep my gluten-free stuffing from getting soggy?
The number one rule is to toast your bread thoroughly. Gluten-free bread absorbs liquid much faster than regular bread, so starting with dry cubes is essential. Also, don’t add all the broth at once—pour it in gradually and toss gently. You want the bread to be moistened, not swimming in liquid. If you’re unsure, err on the side of less broth; you can always add a splash more before baking if it looks dry.
Can I prepare this stuffing the night before Thanksgiving?
Absolutely! Assemble the stuffing completely in the baking dish, cover it tightly with foil, and refrigerate for up to 24 hours. When you’re ready to bake, add about 10 minutes to the covered baking time since it’s starting from cold. I actually prefer making it ahead because the flavors meld together beautifully overnight.
What’s the best gluten-free bread for stuffing?
I’ve tested several brands, and my top picks are Canyon Bakehouse and Schar. Both have a light, sandwich-style crumb that toasts well and holds its shape after baking. Avoid dense, seedy breads or very airy breads—they either turn into glue or disintegrate. If you’re unsure, look for a loaf labeled “sandwich bread” that feels similar in weight to regular bread.
Can I double this recipe for a crowd?
Yes! This recipe doubles beautifully. Use a large roasting pan or two 9×13 dishes. If using one large pan, increase the covered baking time by 10-15 minutes to ensure the center is heated through. I’ve made a triple batch for our extended family Thanksgiving, and it was gone before the turkey was carved. Just make sure your oven has enough space for even heat distribution.
Pin This Recipe!
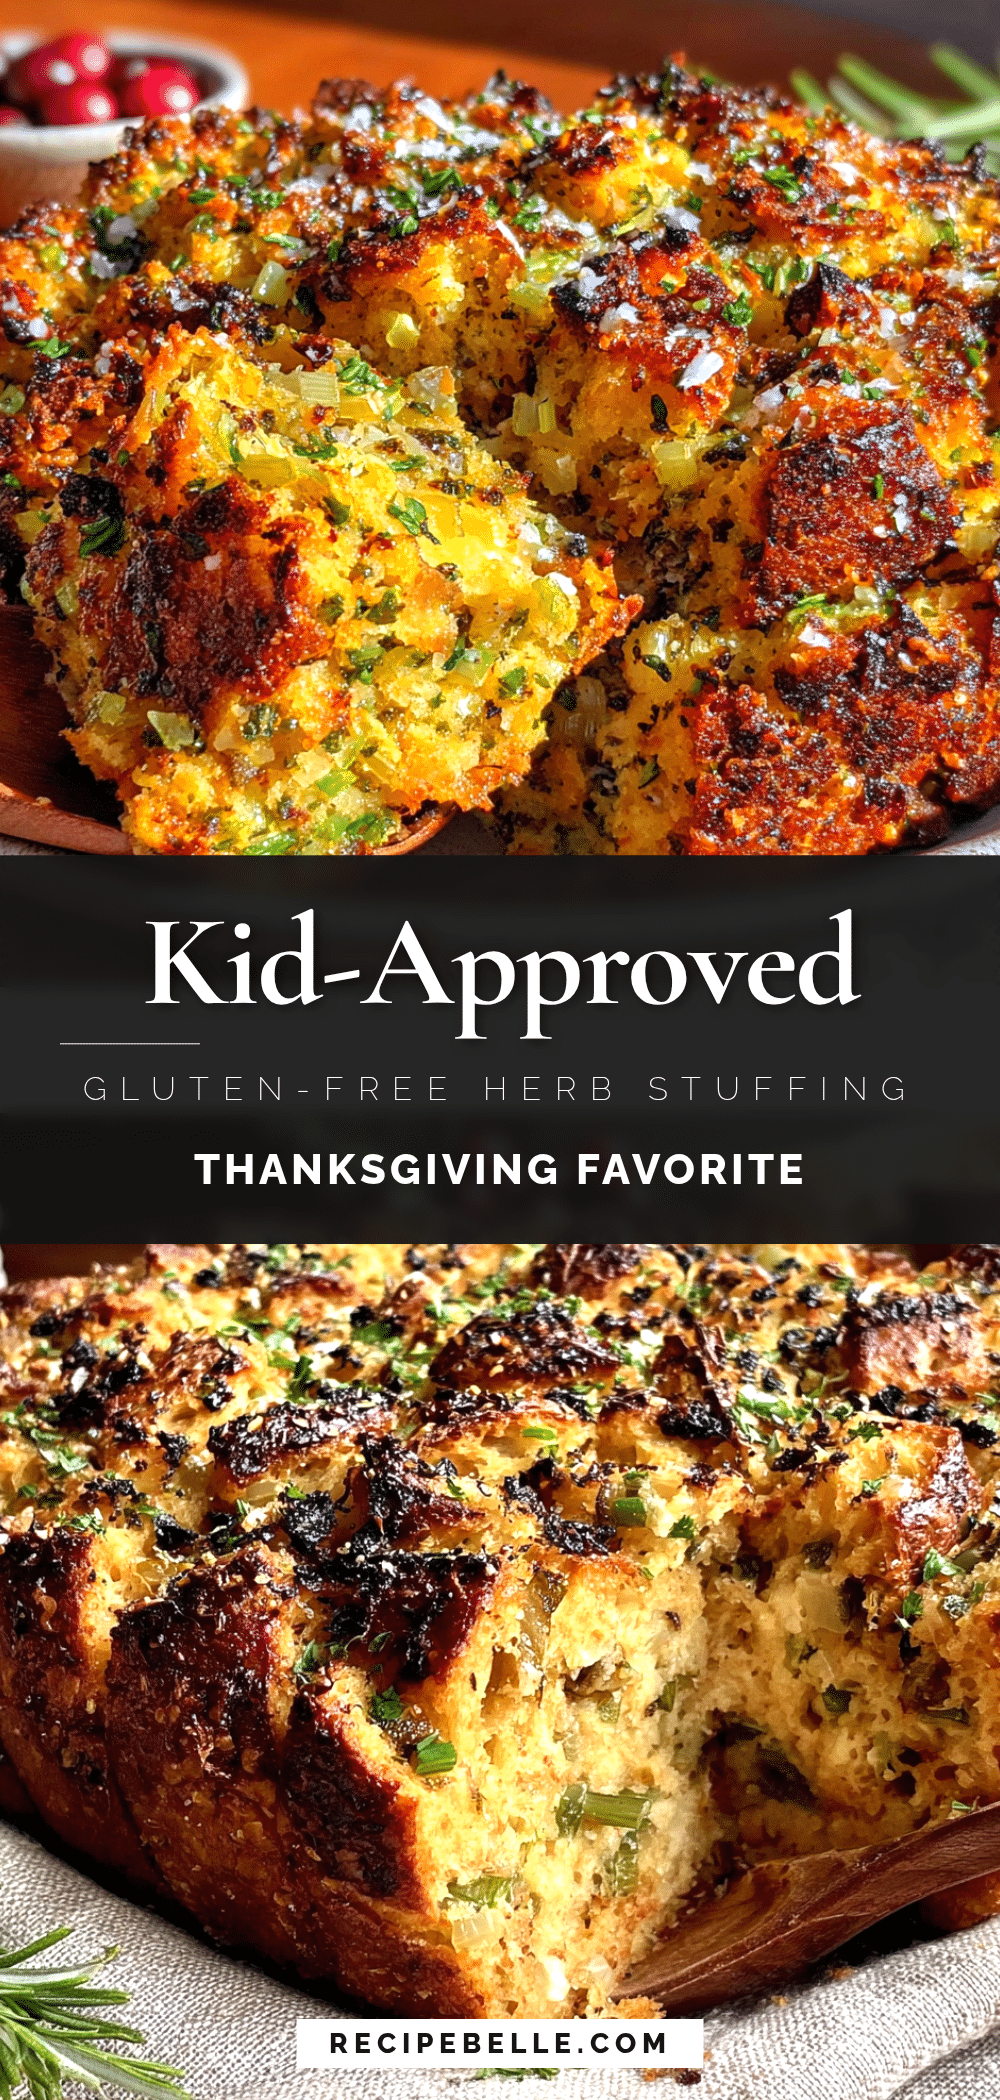
Kid-Approved Gluten-Free Herb Stuffing (Easy Thanksgiving Side!)
A golden, tender, and herb-packed gluten-free stuffing that kids love. This easy Thanksgiving side is made with simple ingredients and a secret splash of apple cider vinegar for a subtle sweetness.
- Prep Time: 20 minutes
- Cook Time: 45 minutes
- Total Time: 1 hour 5 minutes
- Yield: 8 servings 1x
- Category: Side Dish
- Cuisine: American
Ingredients
- 1 large loaf (about 16 ounces) gluten-free bread, cut into 1-inch cubes
- 4 tablespoons unsalted butter, plus more for greasing the dish
- 1 medium yellow onion, finely diced (about 1½ cups)
- 3 celery stalks, finely diced (about 1 cup)
- 3 cloves garlic, minced
- 2 cups low-sodium chicken or vegetable broth
- 1 large egg, lightly beaten
- 2 tablespoons fresh parsley, chopped
- 1 tablespoon fresh sage, finely chopped
- 1 tablespoon fresh thyme leaves
- 1 teaspoon fresh rosemary, finely chopped
- 1 teaspoon salt
- ½ teaspoon black pepper
- 1 tablespoon apple cider vinegar
- ½ cup dried cranberries (optional)
- ½ cup cooked and crumbled sausage (optional)
- ¼ cup toasted pecans or walnuts (optional)
Instructions
- Preheat your oven to 350°F (175°C). Grease a 9×13-inch baking dish with butter or non-stick spray.
- Toast the bread cubes: Spread gluten-free bread cubes on a large baking sheet in a single layer. Bake for 10-12 minutes, stirring halfway through, until lightly golden and dry. Let cool slightly.
- Sauté the aromatics: In a large skillet over medium heat, melt 4 tablespoons butter. Add diced onion and celery. Cook for 6-8 minutes until onion is translucent and celery has softened. Add minced garlic and cook for 1 minute until fragrant.
- Combine the liquids: In a small bowl, whisk together chicken broth, beaten egg, apple cider vinegar, salt, and pepper.
- Mix everything together: In a large mixing bowl, combine toasted bread cubes, sautéed vegetables, and fresh herbs (parsley, sage, thyme, rosemary). Toss gently. Pour broth mixture over the top and fold gently until all bread cubes are moistened. Do not overmix.
- Transfer to the baking dish: Pour stuffing mixture into the prepared dish and spread evenly. If adding optional ingredients (cranberries, sausage, nuts), sprinkle on top and press in gently.
- Bake covered: Cover dish tightly with aluminum foil and bake for 25 minutes.
- Bake uncovered: Remove foil and bake for another 15-20 minutes until top is golden brown and crispy around the edges.
- Rest before serving: Let stuffing sit for 5-10 minutes before serving.
Notes
Toast the bread thoroughly to prevent sogginess. Use fresh herbs for best flavor. For make-ahead, assemble and refrigerate up to 24 hours; add 10 minutes to covered baking time. For dairy-free, substitute butter with olive oil or dairy-free butter. For vegan, use vegetable broth and a flax egg (1 tablespoon ground flaxseed mixed with 3 tablespoons water).
Nutrition
- Serving Size: 1 cup
- Calories: 210
- Sugar: 4
- Sodium: 480
- Fat: 8
- Saturated Fat: 4
- Carbohydrates: 30
- Fiber: 3
- Protein: 5
Keywords: gluten-free stuffing, Thanksgiving stuffing, herb stuffing, kid-friendly stuffing, easy stuffing recipe, gluten-free Thanksgiving side



