My neighbor Carmen watched me fumbling with a hot cream cheese block one Tuesday evening, trying to get it to room temperature by… microwaving it in thirty-second bursts. I was making yet another complicated cheesecake that would take hours and leave my kitchen looking like a flour bomb went off. She didn’t say anything at first. Then she just pointed at my microwave and said, “Put that away. I’ll show you something better.”
Twenty minutes later, she was pulling these gorgeous pumpkin pie spice cheesecake bars out of her oven, and I honestly felt a little embarrassed at how simple it was. She’d used a shortcut crust, no water bath, and somehow managed to get that perfect creamy texture without any of the fuss I’d been putting myself through. “You’re overthinking it,” she said, handing me a warm square. “Sometimes the best things come together fast.”
Look, I know the struggle of wanting something homemade and special on a weeknight but having zero energy left after work. You know that feeling when you want dessert but don’t want to spend your whole evening making it? That’s exactly where these bars come in. They’ve become my go-to for everything from Tuesday night cravings to last-minute dinner parties, and honestly, I don’t think I’ve ever made a batch that didn’t disappear within hours.
Why You’ll Love These Quick Pumpkin Pie Spice Cheesecake Bars
These aren’t just another pumpkin dessert. They’re the kind of recipe that makes you look like you spent hours in the kitchen when you really didn’t. Let me break down why these bars have earned a permanent spot in my weekly rotation.
- Ready in under an hour — From start to finish, you’re looking at about 45 minutes, most of which is hands-off baking time. Perfect for those evenings when you need something sweet but also need to help with homework or finish that work email.
- No fancy equipment needed — One bowl, one pan, no mixer required. You could literally make these with a whisk and a spatula if that’s all you’ve got.
- Pantry-friendly ingredients — Chances are you already have most of what you need. The pumpkin pie spice mix is probably sitting in your cabinet right now, wondering why you keep buying pumpkin spice lattes when you could be making these.
- Crowd-pleaser guaranteed — I’ve brought these to potlucks, family gatherings, and office parties. They’re the first thing to go, every single time. Kids love them, adults love them, even my friend who claims she doesn’t like cheesecake asked for the recipe.
- That perfect texture combo — The buttery crust, the creamy cheesecake layer, and that subtle pumpkin spice warmth all come together in a way that just works. It’s comfort food that doesn’t weigh you down.
What really sets these bars apart is the technique Carmen showed me. Instead of fussing with a water bath or worrying about cracks, we use a method that gives you that silky smooth texture without the stress. The pumpkin puree actually helps stabilize the cheesecake, so you get a sliceable, creamy result every time. Plus, the pumpkin pie spice blend means you get all those warm fall flavors without having to measure out five different spices.
What Ingredients You Will Need
This recipe keeps things simple with ingredients you can find at any grocery store. I’ve tested this with different brands and substitutions, so I’ll share what works best based on my experience.
For the Crust:
- 1 ½ cups graham cracker crumbs (about 12 full sheets) — You can buy pre-crushed or crush your own in a zip-top bag with a rolling pin. I actually prefer making my own because the texture is more consistent.
- ¼ cup granulated sugar — Just regular white sugar works perfectly here.
- 6 tablespoons unsalted butter, melted — Salted butter works too, just reduce any added salt elsewhere. I’ve used both and honestly can’t tell the difference.
- Pinch of salt — If you’re using salted butter, skip this.
For the Cheesecake Filling:
- 16 ounces cream cheese, softened — Two standard blocks. Let them sit on the counter for about 30 minutes before starting. I’ve tried using reduced-fat cream cheese and it works, but the texture is slightly less creamy.
- ¾ cup granulated sugar — You can reduce this to ½ cup if you prefer less sweet desserts, but I wouldn’t go lower than that.
- 2 large eggs, room temperature — If you forgot to take them out early, place them in a bowl of warm water for 5 minutes. Works like a charm.
- 1 cup pumpkin puree — Make sure it’s pure pumpkin, not pumpkin pie filling. I recommend Libby’s for consistent results, but store brands work just fine.
- 1 teaspoon vanilla extract — Pure vanilla extract makes a difference here. The imitation stuff has a weird aftertaste in cheesecake.
- 2 tablespoons pumpkin pie spice — You can make your own with 1 tablespoon cinnamon, 1 teaspoon ginger, ½ teaspoon nutmeg, ½ teaspoon allspice, and ¼ teaspoon cloves. I usually double the batch and store the extra in a jar.
- 1 tablespoon all-purpose flour — This helps stabilize the cheesecake and prevents cracking. Cornstarch works as a substitute if you’re gluten-free.
For the Topping (optional but recommended):
- ½ cup sour cream — This gets swirled on top for that classic cheesecake look. Greek yogurt works as a substitute.
- 1 tablespoon sugar — Just a little sweetness to balance the tanginess.
- Additional pumpkin pie spice for dusting — Because more spice is always better.
Equipment Needed
The beauty of this recipe is how little equipment it requires. Here’s what you’ll need:
- 8×8-inch baking pan — This is the perfect size for these bars. A 9×9 works too, but the bars will be slightly thinner and may need 5 fewer minutes of baking time.
- Mixing bowls — One large bowl for the filling and one small for the crust ingredients. I use my grandmother’s old ceramic bowls, but any mixing bowl works.
- Hand mixer or stand mixer — While you can mix by hand with some elbow grease, a mixer makes the cream cheese much smoother. I’ve done it both ways, and the mixer version is definitely creamier.
- Spatula — For scraping down the bowl and spreading the batter evenly.
- Parchment paper — This is crucial for easy removal. Leave some overhang on two sides to create “handles.”
- Measuring cups and spoons — For accuracy, especially with the pumpkin pie spice.
If you don’t have a hand mixer, you can absolutely do this by hand. Just make sure your cream cheese is very soft, and be prepared to whisk vigorously for about 3 minutes. It’s a good arm workout, honestly.
Preparation Method
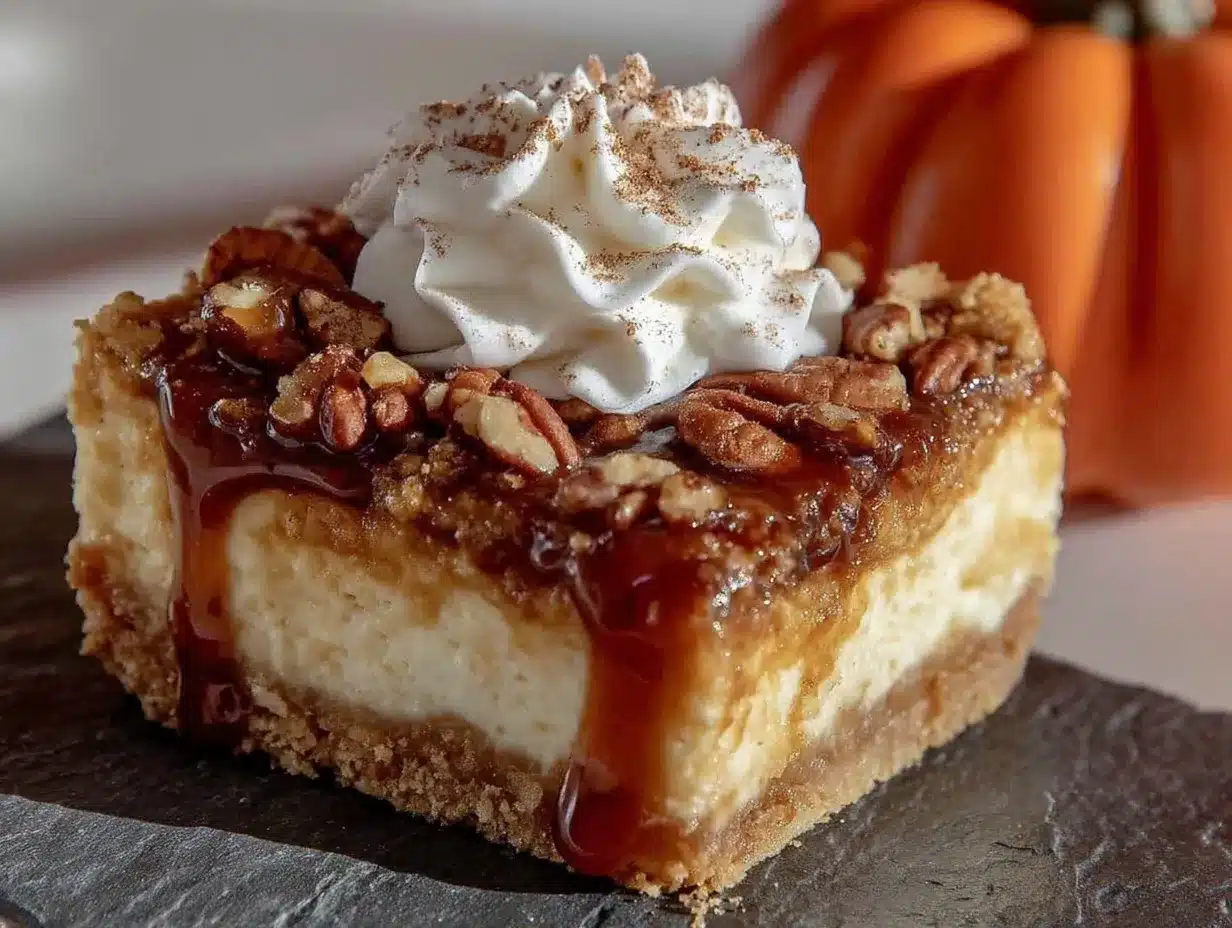
Let me walk you through this step by step. I’ve made these bars at least twenty times now, so I’ve picked up a few tricks along the way.
Step 1: Preheat and Prep
Preheat your oven to 350°F (175°C). Line your 8×8 baking pan with parchment paper, leaving about 2 inches of overhang on two opposite sides. This will be your lifeline later when you need to lift the bars out. Lightly spray the parchment with non-stick spray — just to be safe.
Step 2: Make the Crust
In a medium bowl, combine the graham cracker crumbs, sugar, and salt. Pour in the melted butter and stir with a fork until the mixture looks like wet sand. Every crumb should be coated. Press this mixture firmly into the bottom of your prepared pan. I use the bottom of a measuring cup to get it really even and compact. Bake for 8 minutes, then set aside to cool slightly. Your kitchen will smell amazing at this point.
Step 3: Start the Filling
In a large bowl, beat the softened cream cheese with an electric mixer on medium speed until it’s smooth and creamy — about 2 minutes. Scrape down the sides and bottom of the bowl with your spatula. Add the sugar and beat for another minute until well combined. You want no lumps here, so take your time.
Step 4: Add the Wet Ingredients
Add the eggs one at a time, beating on low speed after each addition just until incorporated. Overmixing at this stage can incorporate too much air, which leads to cracks. Then add the pumpkin puree, vanilla extract, and pumpkin pie spice. Mix on low until everything is combined and the mixture is a beautiful orange color. Finally, sprinkle in the flour and mix until just incorporated.
Step 5: Assemble and Bake
Pour the filling over the pre-baked crust and spread it evenly with your spatula. Give the pan a gentle tap on the counter to release any air bubbles. Bake at 350°F for 35-40 minutes. The edges should be set and slightly puffed, but the center should still jiggle slightly when you gently shake the pan. This is the sweet spot — overbaking leads to cracks and dry texture.
Step 6: Add the Topping (Optional)
While the bars are baking, mix together the sour cream and sugar. About 5 minutes before the bars are done, carefully pull the pan out of the oven and spread the sour cream mixture over the top. Return to the oven for the remaining 5 minutes. This creates that gorgeous tangy layer on top.
Step 7: Cool and Chill
Let the bars cool completely on a wire rack — about 1 hour. Then transfer to the refrigerator and chill for at least 4 hours, preferably overnight. I know the waiting is the hardest part, but this step is non-negotiable for getting clean slices. The bars need time to set properly.
Step 8: Slice and Serve
Once fully chilled, use the parchment paper handles to lift the entire block out of the pan. Place on a cutting board and slice into 16 squares using a sharp knife. For the cleanest cuts, wipe your knife clean between each slice. I usually get about 16 nice-sized bars, but you can cut them smaller if you want bite-sized pieces.
Cooking Tips & Techniques
After making these bars more times than I can count, I’ve learned a few things the hard way. Here are my best tips for perfect results every time.
Room temperature ingredients matter. I know, I know, everyone says this. But with cheesecake, it’s actually crucial. Cold cream cheese creates lumps that no amount of mixing will fix. Cold eggs can cause the batter to curdle. Trust me, I’ve made that mistake on a rushed Wednesday night, and the texture was never quite right.
Don’t overmix the batter. Once you add the eggs, mix just until they disappear into the batter. Overmixing incorporates too much air, which creates bubbles that rise to the surface and cause cracks. You want a dense, creamy texture, not a fluffy one.
The jiggle test is your friend. When you think the bars might be done, gently shake the pan. The edges should be firm, but the center should have a slight wobble. If the entire thing is firm, you’ve overbaked it. If the center is liquidy, give it another 5 minutes.
Patience with chilling pays off. I once tried to rush the chilling process by putting the bars in the freezer for an hour. They were firm enough to slice, but the texture was icy and not nearly as creamy. The slow chill in the fridge is worth the wait.
Use a sharp knife for clean slices. Run your knife under hot water, dry it, then slice. Wipe clean between each cut. This gives you those beautiful, clean edges that look professional.
Variations & Adaptations
One of the best things about this recipe is how adaptable it is. Here are some variations I’ve tried and loved.
Gluten-Free Version: Substitute the graham cracker crumbs with gluten-free graham crackers or use crushed gluten-free cookies. I’ve also used almond flour mixed with a little butter and sugar for the crust, and it turned out amazing — nutty and rich.
Dairy-Free Adaptation: Use dairy-free cream cheese (I like the Kite Hill brand) and a vegan butter substitute. The texture won’t be exactly the same, but it’s still delicious. I made this for a friend with dairy allergies and she said it was the best cheesecake she’d had in years.
Spice It Up: Add a pinch of cayenne pepper or chipotle powder to the filling for a spicy-sweet kick. This sounds weird, I know, but the heat complements the pumpkin and cream cheese beautifully. I tried this on a whim and now it’s my secret ingredient.
Chocolate Swirl: Melt ¼ cup of semi-sweet chocolate chips and drizzle it over the filling before baking. Use a knife to create swirls. The chocolate and pumpkin spice combination is surprisingly good.
Pecan Topping: Sprinkle chopped pecans over the sour cream topping before the final bake. They toast up nicely and add a lovely crunch. I did this for Thanksgiving one year and it was a hit.
Serving & Storage Suggestions
These bars are incredibly versatile when it comes to serving. Here’s how I like to enjoy them.
Serving Temperature: I prefer them straight from the fridge — cold and firm. But if you like a softer texture, let them sit at room temperature for about 15 minutes before serving. Both ways are delicious.
Presentation Ideas: Dust with a little extra pumpkin pie spice before serving. Add a dollop of whipped cream and a drizzle of caramel sauce for a more decadent presentation. For holidays, I sometimes add a few sugared cranberries on top for color.
Perfect Pairings: These bars go beautifully with a cup of hot coffee or a spiced chai latte. For a dessert board, I serve them alongside fresh apple slices, candied pecans, and a cheese like brie. It’s an unexpected combination that works.
Storage Instructions: Store any leftovers in an airtight container in the refrigerator for up to 5 days. The bars actually get better after a day or two as the flavors meld together. I’ve also frozen them successfully — wrap individual bars in plastic wrap, then place in a freezer bag. They’ll keep for up to 3 months. Thaw in the refrigerator overnight before serving.
Make-Ahead Tip: These bars are perfect for making a day ahead. In fact, I recommend it. The extra chilling time makes them easier to slice and the texture is even creamier. I often make them on Sunday for Monday night dessert.
Nutritional Information & Benefits
While these bars are definitely a treat, they do have some redeeming qualities. Here’s a rough breakdown per bar (based on 16 servings):
- Calories: Approximately 250-280
- Fat: 16-18g
- Carbohydrates: 24-26g
- Protein: 4-5g
- Fiber: 1g
- Sugar: 18-20g
Health Highlights: Pumpkin is packed with vitamin A and fiber, which supports eye health and digestion. The pumpkin pie spice blend contains cinnamon, which may help with blood sugar regulation. Cream cheese provides some calcium and protein. That said, these are still a dessert, so enjoy them in moderation. I usually stick to one bar with my afternoon coffee and feel completely satisfied.
Dietary Considerations: This recipe contains dairy, eggs, and gluten. For allergen-friendly versions, check the variations section above. The bars are naturally vegetarian.
Conclusion
These Quick Pumpkin Pie Spice Cheesecake Bars have become a staple in my kitchen for a reason. They deliver all the cozy fall flavors we crave without the fuss and time commitment of traditional cheesecake. Carmen’s simple method proved to me that you don’t need complicated techniques or fancy equipment to make something truly special.
I love that I can whip these up on a busy Tuesday and still feel like I’ve made something homemade and thoughtful. They’re forgiving enough for beginners but impressive enough for experienced bakers. Plus, that moment when you pull them out of the fridge and slice into that creamy, spiced perfection? Honestly, it never gets old.
I’d love to hear how these turn out for you! Drop a comment below and let me know if you tried any of the variations or came up with your own twist. Don’t forget to share this recipe with someone who needs a quick dessert win this week. Happy baking, friends!
Frequently Asked Questions
Can I use canned pumpkin pie filling instead of pumpkin puree?
No, I wouldn’t recommend it. Pumpkin pie filling already has sugar and spices added, which will throw off the balance of this recipe. Stick with pure pumpkin puree for the best results.
Why did my cheesecake bars crack on top?
Cracks usually happen from overbaking or overmixing. Make sure you’re using room temperature ingredients, mixing gently, and pulling the bars out while the center still has a slight jiggle. The sour cream topping also helps hide any minor cracks.
Can I make these bars in a different size pan?
Absolutely. For a 9×13 pan, double the recipe and bake for 45-50 minutes. For mini cheesecake bites, use a mini muffin tin and bake for 15-18 minutes. Just keep an eye on them and adjust the time as needed.
How do I know when the bars are done baking?
The edges should be set and slightly puffed, but the center should still jiggle when you gently shake the pan. If you insert a toothpick near the center, it should come out with a few moist crumbs attached — not wet batter.
Can I freeze these cheesecake bars?
Yes! Wrap individual bars tightly in plastic wrap, then place them in a freezer-safe bag or container. They’ll keep for up to 3 months. Thaw in the refrigerator overnight before serving. The texture remains surprisingly creamy after freezing.
Pin This Recipe!
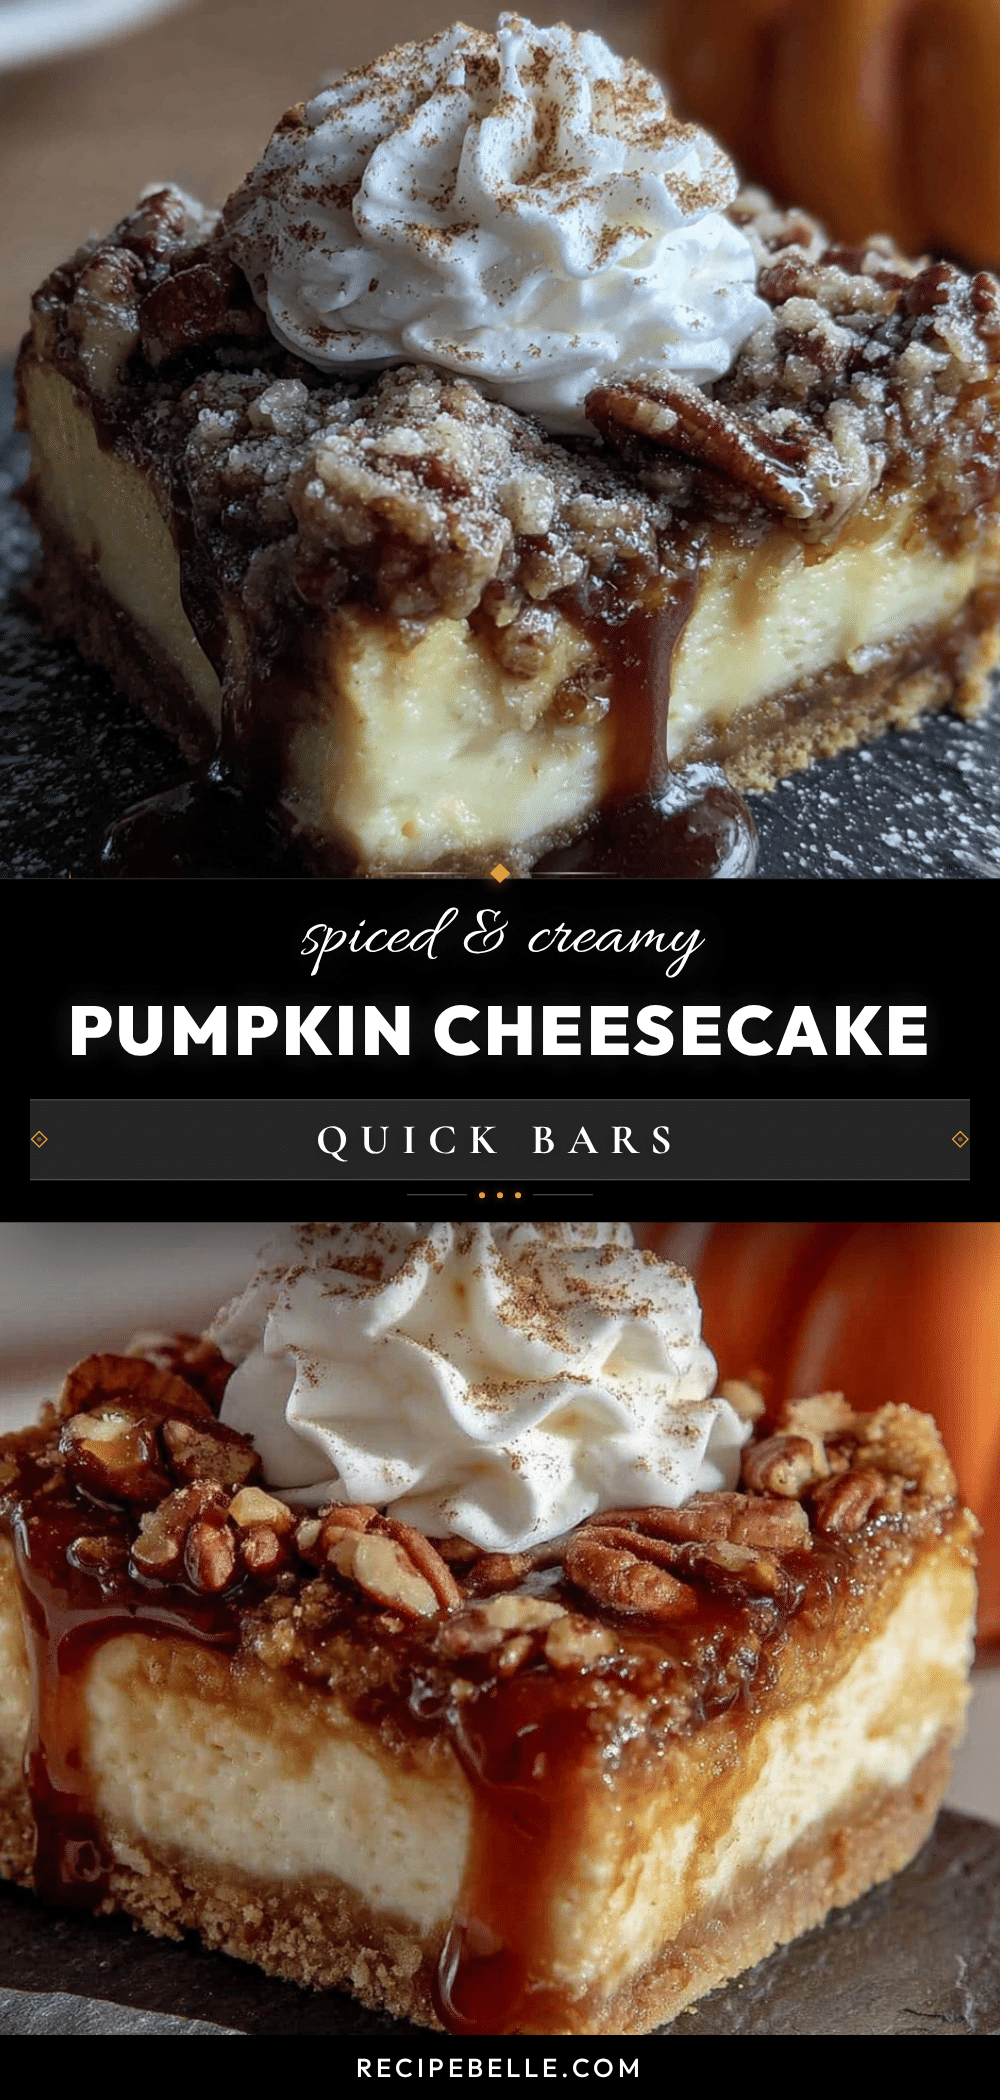
Easy Pumpkin Pie Spice Cheesecake Bars
These quick and easy pumpkin pie spice cheesecake bars deliver all the cozy fall flavors without the fuss of traditional cheesecake. Ready in under an hour with no water bath needed, they’re perfect for weeknight cravings or last-minute gatherings.
- Prep Time: 15 minutes
- Cook Time: 35-40 minutes
- Total Time: 45 minutes (plus 4 hours chilling)
- Yield: 16 servings 1x
- Category: Dessert
- Cuisine: American
Ingredients
- 1 ½ cups graham cracker crumbs (about 12 full sheets)
- ¼ cup granulated sugar
- 6 tablespoons unsalted butter, melted
- Pinch of salt
- 16 ounces cream cheese, softened
- ¾ cup granulated sugar
- 2 large eggs, room temperature
- 1 cup pumpkin puree
- 1 teaspoon vanilla extract
- 2 tablespoons pumpkin pie spice
- 1 tablespoon all-purpose flour
- ½ cup sour cream (for topping)
- 1 tablespoon sugar (for topping)
- Additional pumpkin pie spice for dusting
Instructions
- Preheat your oven to 350°F (175°C). Line an 8×8-inch baking pan with parchment paper, leaving about 2 inches of overhang on two opposite sides. Lightly spray the parchment with non-stick spray.
- In a medium bowl, combine the graham cracker crumbs, ¼ cup sugar, and salt. Pour in the melted butter and stir with a fork until the mixture looks like wet sand. Press this mixture firmly into the bottom of the prepared pan. Bake for 8 minutes, then set aside to cool slightly.
- In a large bowl, beat the softened cream cheese with an electric mixer on medium speed until smooth and creamy, about 2 minutes. Scrape down the sides and bottom of the bowl. Add ¾ cup sugar and beat for another minute until well combined.
- Add the eggs one at a time, beating on low speed after each addition just until incorporated. Add the pumpkin puree, vanilla extract, and pumpkin pie spice. Mix on low until combined. Sprinkle in the flour and mix until just incorporated.
- Pour the filling over the pre-baked crust and spread evenly. Give the pan a gentle tap on the counter to release air bubbles. Bake at 350°F for 35-40 minutes. The edges should be set and slightly puffed, but the center should still jiggle slightly when shaken.
- Optional: About 5 minutes before the bars are done, mix together the sour cream and 1 tablespoon sugar. Carefully pull the pan out of the oven and spread the sour cream mixture over the top. Return to the oven for the remaining 5 minutes.
- Let the bars cool completely on a wire rack, about 1 hour. Then transfer to the refrigerator and chill for at least 4 hours, preferably overnight.
- Once fully chilled, use the parchment paper handles to lift the entire block out of the pan. Place on a cutting board and slice into 16 squares using a sharp knife. Wipe the knife clean between each slice for clean cuts.
Notes
Room temperature ingredients are crucial for a smooth texture. Don’t overmix the batter once eggs are added to prevent cracks. The jiggle test is key: edges should be set but center should wobble slightly. Chilling overnight yields the best texture and cleanest slices. For gluten-free, use gluten-free graham crackers or almond flour crust. For dairy-free, use dairy-free cream cheese and vegan butter.
Nutrition
- Serving Size: 1 bar
- Calories: 265
- Sugar: 19
- Sodium: 200
- Fat: 17
- Saturated Fat: 10
- Carbohydrates: 25
- Fiber: 1
- Protein: 4.5
Keywords: pumpkin cheesecake bars, pumpkin pie spice, easy cheesecake, fall dessert, quick dessert, no water bath, graham cracker crust



