I was in the middle of a full-blown kitchen meltdown. You know that feeling when you’ve got three different pots going, the smoke alarm is eyeing you suspiciously, and the chicken is still raw in the middle? That was me last Tuesday. I’d planned this elaborate stir-fry, but I’d forgotten to buy broccoli, the rice cooker was on the fritz, and I was this close to ordering pizza. Honestly, I was ready to throw in the towel.
Then my neighbor, a quiet retired pharmacist named Harold who I’d only ever seen tending his rose bushes, knocked on the door. He wasn’t there for sugar. He was holding a cast-iron skillet and a small jar of honey from his own beehives. “You look like you need this,” he said, handing them over. “Just throw some chicken thighs in the pan, drizzle that honey, add some garlic, and let the oven do the work. It’ll fix everything.” I blinked at him. Harold? The guy who wears cardigans in July? He was giving me cooking advice?
I was skeptical, let me tell you. But I was also desperate. So I took his skillet, grabbed some chicken thighs from the freezer, and followed his simple instruction. Twenty minutes later, my kitchen smelled like a warm hug. The honey had caramelized into a sticky, golden glaze, the garlic was fragrant and sweet, and the chicken was so tender it practically fell apart. I didn’t even miss the stir-fry. That night, eating at my counter with the window cracked open to let out the steam, I realized Harold’s simple recipe was a keeper. It wasn’t just dinner—it was a rescue mission. And now, every time I make these Cozy One-Pan Honey Garlic Chicken Thighs, I think of him, his bees, and that moment of unexpected kindness. Maybe you’ve been there too—needing a meal that feels like a deep breath. This is that meal.
Why You’ll Love This Recipe
Let me be honest with you—I’ve tested a lot of chicken thigh recipes over the years. Some are too fussy, some dry out, and some just don’t have that “wow” factor. This one is different. It’s the kind of recipe that makes you look like a kitchen pro even when you’re barely trying. Here’s why it works so well:
- Quick & Easy: From start to finish, this comes together in about 30 minutes. Perfect for those nights when you’re staring at the clock and wondering how it’s already 6 PM.
- Simple Ingredients: You probably have everything you need right now. Honey, garlic, chicken thighs, and a few pantry staples. No fancy grocery trips required.
- Perfect for Busy Weeknights or Cozy Dinners: Whether you’re feeding a hungry family after soccer practice or just want a quiet, comforting meal for yourself, this fits the bill.
- Crowd-Pleaser: I’ve served this to picky kids, dinner guests, and even my dad who “doesn’t like sweet food.” Everyone goes back for seconds.
- Unbelievably Delicious: The honey caramelizes into this sticky, savory-sweet glaze that coats every bite. The chicken stays juicy, and the garlic gets soft and almost jammy. It’s next-level comfort food.
What really sets this recipe apart is the one-pan method. Instead of searing the chicken, then making a separate sauce, then cleaning a million dishes, everything happens in one skillet. The chicken cooks in its own juices, the honey and garlic create a natural glaze, and you’re left with a pan full of flavor that’s perfect for spooning over rice or sopping up with bread. I’ve tried versions with complicated marinades and multiple steps, but honestly, this simple approach gives you the best results with the least effort. It’s comfort food reimagined—faster, easier, but with the same soul-soothing satisfaction that makes you close your eyes after the first bite.
What Ingredients You Will Need
This recipe uses simple, wholesome ingredients to deliver bold flavor and satisfying texture without the fuss. Most of these are pantry staples, which makes this dish perfect for those nights when you need dinner on the table fast.
For the Chicken
- 4-6 bone-in, skin-on chicken thighs (about 1.5 lbs / 680g) — The skin gets beautifully crispy, and the bone keeps the meat incredibly moist. If you only have boneless thighs, that works too, just reduce the cooking time by about 5-7 minutes.
- 1 teaspoon salt — I prefer kosher salt for its clean taste and easy pinch-ability.
- ½ teaspoon black pepper — Freshly ground is always better, but pre-ground works in a pinch.
- 1 tablespoon olive oil (or avocado oil) — This helps the skin get golden and crispy. Use an oil with a high smoke point for best results.
For the Honey Garlic Glaze
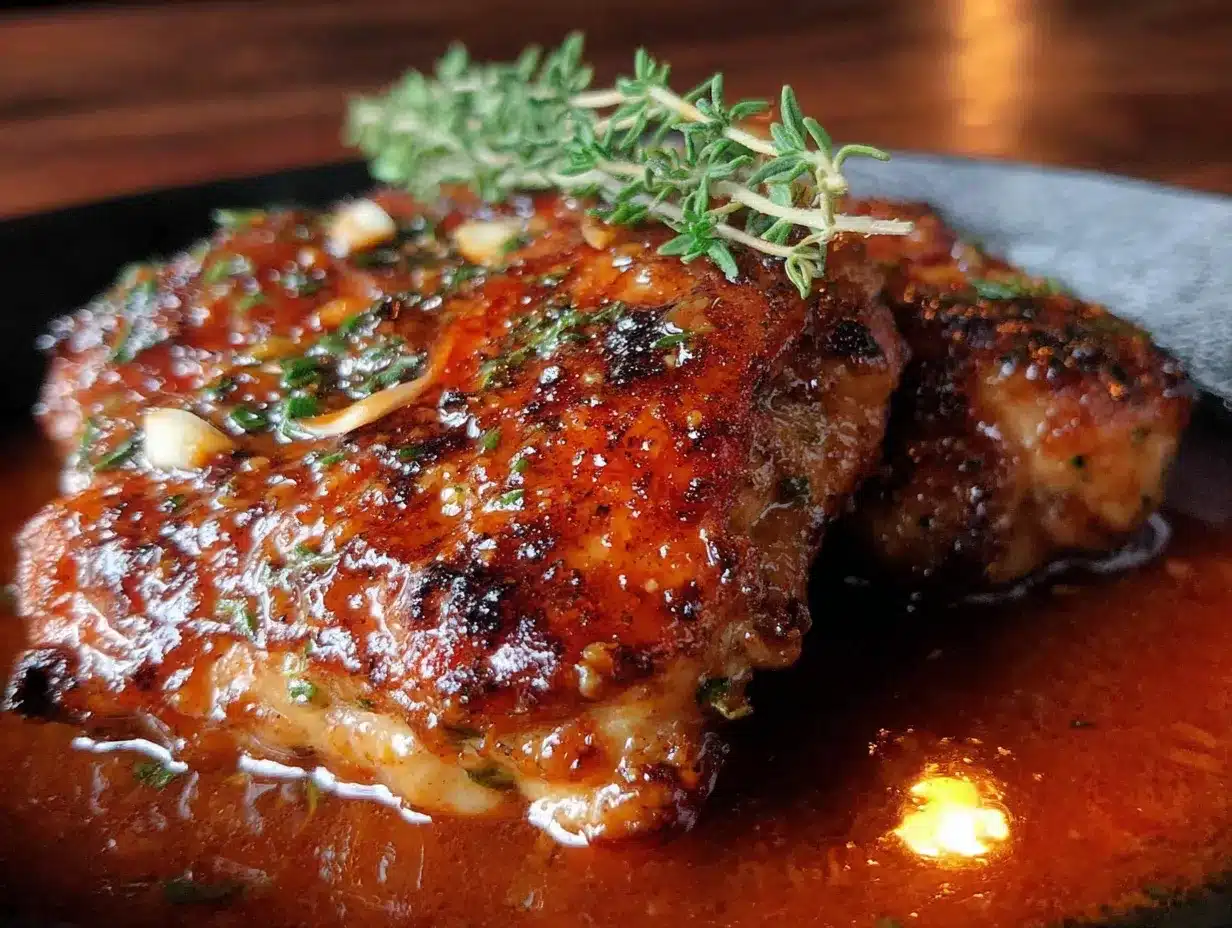
- ⅓ cup honey (about 110g) — Use a good-quality honey here. I love local raw honey for its floral notes, but any honey works. If your honey is crystallized, just warm it gently before using.
- 4-5 cloves garlic, minced (about 2 tablespoons) — Fresh garlic is non-negotiable here. Pre-minced jarred garlic can be bitter when caramelized. Trust me on this one.
- 2 tablespoons soy sauce (low sodium preferred) — This adds that savory umami balance to the sweet honey. For a gluten-free option, use tamari or coconut aminos.
- 1 tablespoon apple cider vinegar (or rice vinegar) — A little acidity cuts through the sweetness and keeps the dish from being cloying.
- 1 tablespoon butter (optional, but recommended) — Adds richness and helps the sauce get glossy. Use dairy-free butter if needed.
- ½ teaspoon red pepper flakes (optional) — For a tiny kick of heat that plays beautifully with the honey.
For Serving (Optional)
- Fresh parsley or cilantro, chopped — For color and freshness.
- Sesame seeds — Adds a nice nutty crunch.
- Cooked rice, quinoa, or crusty bread — To soak up all that glorious sauce.
Ingredient Tips from My Kitchen: I always recommend using bone-in, skin-on chicken thighs for this recipe. The skin gets incredibly crispy in the oven, and the bone keeps the meat from drying out. If you’re in a hurry, boneless thighs work, but keep an eye on the cooking time—they’ll cook faster. For the honey, I’ve tried this with both clover honey and wildflower honey, and both are delicious. The wildflower honey gives a slightly more complex flavor. And please, please use fresh garlic. It makes a world of difference in the final dish.
Equipment Needed
One of the best things about this recipe is how little equipment you need. Here’s what you’ll need to pull this together:
- Large oven-safe skillet (10-12 inches / 25-30 cm) — Cast iron is my absolute favorite for this recipe. It holds heat beautifully and gives you that perfect crispy skin. A stainless steel or oven-safe nonstick skillet works too. Just make sure it’s oven-safe up to 400°F (200°C).
- Tongs — For flipping the chicken without tearing the skin. I’ve used forks in a pinch, but tongs are so much easier.
- Small bowl — For mixing the glaze ingredients.
- Measuring spoons — For accuracy, though I’m guilty of eyeballing it sometimes.
- Instant-read thermometer (optional but recommended) — To ensure your chicken reaches a safe internal temperature of 165°F (74°C). This takes the guesswork out of cooking.
Budget-Friendly Tip: Don’t have a cast-iron skillet? No problem! You can sear the chicken in any oven-safe pan, then transfer everything to a baking dish to finish in the oven. It’s one extra dish, but it still works beautifully. Also, if you don’t have an instant-read thermometer, you can check doneness by cutting into the thickest part of the thigh—the juices should run clear and the meat should no longer be pink.
Preparation Method
Alright, let’s get cooking! This comes together faster than you think, so let me walk you through it step by step.
- Preheat your oven to 400°F (200°C). This ensures the oven is nice and hot when the chicken goes in, which helps the skin get crispy.
- Pat the chicken thighs dry with paper towels. This is a crucial step, I can’t stress it enough. Moisture is the enemy of crispy skin. Take a few extra seconds to really dry them off. Season both sides generously with salt and pepper.
- Heat your oven-safe skillet over medium-high heat. Add the olive oil and let it get shimmering hot—about 2 minutes. You want that sizzle when the chicken hits the pan.
- Place the chicken thighs skin-side down in the hot skillet. Don’t crowd them—give each piece a little space. If your skillet is too small, work in batches. Let them cook undisturbed for 5-7 minutes. The skin should turn a deep golden brown and release easily from the pan. If it sticks, give it another minute—it’ll release when it’s ready.
- While the chicken is searing, make the glaze. In a small bowl, whisk together the honey, minced garlic, soy sauce, apple cider vinegar, and red pepper flakes if using. Set it aside.
- Flip the chicken thighs using tongs. Cook for another 2 minutes on the second side just to lightly brown it. The skin should be beautifully crispy now.
- Pour the honey garlic glaze over the chicken. Tilt the pan to distribute it evenly. Add the butter if using, letting it melt into the sauce. Don’t stir too much—just let it settle around the chicken.
- Transfer the skillet to the preheated oven. Roast for 15-20 minutes, or until the chicken reaches an internal temperature of 165°F (74°C) at the thickest part. The sauce will bubble and caramelize into a gorgeous sticky glaze.
- Remove from the oven and let rest for 5 minutes. This is important—it lets the juices redistribute and the sauce thicken slightly. Spoon some of the pan sauce over the chicken before serving.
- Garnish with fresh parsley or cilantro and sesame seeds if desired. Serve immediately with rice, quinoa, or crusty bread to soak up every last drop of that honey garlic sauce.
My Personal Tips: I’ve made this recipe more times than I can count, and here’s what I’ve learned. First, don’t skip the searing step. That crispy skin is half the magic. Second, if you want extra sauce (and who doesn’t?), double the glaze ingredients. It’s that good. And third, if the sauce starts to burn in the pan during roasting (this can happen with very high sugar content), add a splash of water or chicken broth to deglaze the pan. The sauce will thin out slightly but still be delicious.
Cooking Tips & Techniques
Over the years, I’ve had my share of kitchen mishaps. I’ve burned the garlic, I’ve undercooked the chicken, and I’ve even dropped a whole skillet of honey glaze on the floor (that was a sad day). Here are some tips to help you avoid my mistakes:
- Don’t rush the sear. I know it’s tempting to move the chicken around, but let it sit. That golden crust is what gives the dish so much flavor. If you try to flip it too early, the skin will tear.
- Watch your garlic. Garlic burns quickly, especially in a hot oven. If you notice the garlic getting too dark during roasting, tent the pan loosely with foil. This will protect the garlic while still allowing the chicken to cook through.
- Use a thermometer. Seriously, this is the best investment you can make for your kitchen. Chicken thighs are forgiving, but you still want to hit that 165°F (74°C) mark for safety. Plus, it takes the guesswork out of “is it done yet?”
- Multitasking tip: While the chicken is searing, start your rice or prep any side dishes. The oven time is perfect for getting everything else ready. I usually start my rice right when the chicken goes in the oven—they finish around the same time.
- For extra sticky glaze: After removing the chicken from the oven, transfer it to a plate and put the skillet back on the stovetop over medium heat. Let the sauce bubble and reduce for 2-3 minutes until it’s thick and syrupy. Pour it back over the chicken. This is a game-changer.
A Mistake I’ll Never Make Again: The first time I made this, I used a nonstick skillet that wasn’t oven-safe. Let’s just say the handle melted, the smoke alarm went off, and I had to air out my apartment for an hour. Always check that your pan is oven-safe before you start! Cast iron is your safest bet.
Variations & Adaptations
One of the things I love about this recipe is how adaptable it is. Here are some ways to make it your own:
- Spicy Honey Garlic Chicken: Add an extra teaspoon of red pepper flakes or a minced fresh chili (like serrano or Thai bird chili) to the glaze. The heat pairs beautifully with the sweet honey.
- Lemon Herb Version: Swap the apple cider vinegar for lemon juice and add a teaspoon of dried thyme or rosemary to the glaze. This gives it a brighter, more Mediterranean flavor profile.
- Dietary Adaptations: For a gluten-free version, use tamari or coconut aminos instead of soy sauce. For a dairy-free version, skip the butter or use a plant-based alternative. The recipe still works beautifully without it.
- Sheet Pan Version: If you don’t have an oven-safe skillet, you can sear the chicken in a regular pan, then transfer everything to a lined baking sheet. Add some chopped vegetables like broccoli, bell peppers, or green beans around the chicken for a complete meal. Roast for 20-25 minutes.
- Slow Cooker Adaptation: Sear the chicken as directed, then transfer it to a slow cooker with the glaze. Cook on low for 4-6 hours or high for 2-3 hours. The skin won’t be crispy, but the meat will be fall-apart tender. You can crisp the skin under the broiler for a few minutes before serving.
My Personal Favorite Variation: I once added a tablespoon of Dijon mustard to the glaze on a whim, and it was incredible. The mustard adds a tangy depth that cuts through the sweetness. It’s now my go-to version when I’m feeling fancy.
Serving & Storage Suggestions
This dish is incredibly versatile when it comes to serving. Here’s how I like to enjoy it:
- Serving Temperature: Serve the chicken hot, straight from the oven. The sauce is at its best when it’s warm and glossy. Let it rest for 5 minutes after roasting so the juices settle.
- What to Serve With It: The honey garlic sauce is practically begging for something to soak it up. Steamed jasmine rice or fluffy white rice is my top pick. Quinoa, couscous, or even creamy mashed potatoes work beautifully too. For vegetables, I love roasted broccoli, green beans, or a simple side salad with a tangy vinaigrette to cut through the sweetness.
- Presentation Tip: Arrange the chicken thighs on a platter, spoon the pan sauce over the top, and garnish with fresh parsley and sesame seeds. It looks gorgeous and tastes even better.
- Storage: Store leftover chicken in an airtight container in the refrigerator for up to 4 days. The flavors actually deepen overnight, making it even more delicious the next day.
- Reheating: The best way to reheat this is in a skillet over medium-low heat with a splash of water or chicken broth. Cover the pan and let it warm through for 5-7 minutes. This helps the sauce re-liquefy without drying out the chicken. You can also reheat it in the oven at 350°F (175°C) for 10 minutes. Avoid the microwave if you can—it tends to make the skin soggy.
- Freezing: This recipe freezes beautifully. Let the chicken cool completely, then transfer it to a freezer-safe container with the sauce. It will keep for up to 3 months. Thaw overnight in the refrigerator and reheat as directed above.
Flavor Development Note: I’ve noticed that the honey garlic sauce gets even better after a day in the fridge. The flavors meld together, and the garlic mellows out. If you’re meal prepping, this is a great candidate for making ahead.
Nutritional Information & Benefits
While this is definitely a comfort food dish, it also has some surprising nutritional benefits. Here’s a rough breakdown per serving (based on 4 servings, using bone-in, skin-on thighs):
- Calories: Approximately 420-480 calories per serving
- Protein: 28-32g — Chicken thighs are a great source of lean protein, which helps keep you full and supports muscle health.
- Fat: 22-26g — Mostly from the chicken skin and olive oil. Don’t be afraid of healthy fats—they’re essential for nutrient absorption.
- Carbohydrates: 24-28g — Primarily from the honey. It’s a natural sweetener with antioxidants and antibacterial properties.
- Fiber: 0g — Serve with vegetables or a side of roasted veggies to add fiber.
Health Benefits of Key Ingredients: Honey is a natural source of antioxidants and has been used for centuries for its soothing properties. Garlic is packed with compounds that support immune health and may help lower blood pressure. Chicken thighs are rich in B vitamins, which are important for energy metabolism. While this dish is higher in sugar due to the honey, it’s a treat meant to be enjoyed in moderation as part of a balanced diet.
Dietary Considerations: This recipe is naturally gluten-free if you use tamari or coconut aminos instead of soy sauce. It’s also dairy-free if you skip the butter. For a lower-carb option, serve it with cauliflower rice or zucchini noodles instead of traditional rice.
Conclusion
So there you have it—my new favorite weeknight dinner, courtesy of a quiet neighbor and his backyard bees. These Cozy One-Pan Honey Garlic Chicken Thighs are everything I want in a meal: quick, simple, deeply satisfying, and just a little bit special. The honey caramelizes into a sticky, savory-sweet glaze, the garlic gets soft and fragrant, and the chicken stays juicy and tender. It’s the kind of dish that makes you slow down and actually enjoy your dinner, even on the busiest nights.
I hope you give this recipe a try. Feel free to customize it based on what you have in your pantry or what sounds good to you. Add more spice, swap in lemon, or throw in some vegetables—it’s hard to go wrong with this one. And if you do make it, I’d love to hear how it turns out. Leave a comment below, tag me in your photos, or share your own twist on the recipe. Honestly, that’s my favorite part of this whole food blogging thing—seeing how you make these recipes your own.
Now go on, preheat that oven, and make yourself something cozy. You deserve it.
Frequently Asked Questions
Can I use chicken breasts instead of thighs?
Yes, you can! Chicken breasts will work, but they cook faster and can dry out more easily. Use boneless, skinless breasts and reduce the oven time to 12-15 minutes. I recommend checking the internal temperature after 12 minutes to avoid overcooking.
How do I prevent the honey glaze from burning?
Honey has a high sugar content, which means it can burn if the oven is too hot or if it’s left in too long. Keep your oven at 400°F (200°C) and don’t exceed 20 minutes of roasting. If you notice the sauce getting too dark, tent the pan with foil for the last 5 minutes.
Can I make this recipe ahead of time?
Absolutely! You can sear the chicken and prepare the glaze up to a day in advance. Store them separately in the refrigerator. When you’re ready to cook, pour the glaze over the chicken and roast as directed. You may need to add 5 extra minutes of oven time since the chicken will be cold.
What’s the best way to reheat leftovers?
The best method is in a skillet over medium-low heat with a splash of water or chicken broth. Cover the pan and warm for 5-7 minutes. This helps the sauce re-liquefy without drying out the chicken. The oven at 350°F (175°C) for 10 minutes also works well. I’d avoid the microwave if possible—it can make the skin soggy.
Can I double this recipe for a crowd?
Yes, this recipe scales beautifully. For a larger crowd, use a larger skillet or divide the chicken between two pans. Make sure not to overcrowd the pan when searing—work in batches if needed. The oven time may increase slightly if you’re cooking more chicken, so use a thermometer to check for doneness.
Pin This Recipe!
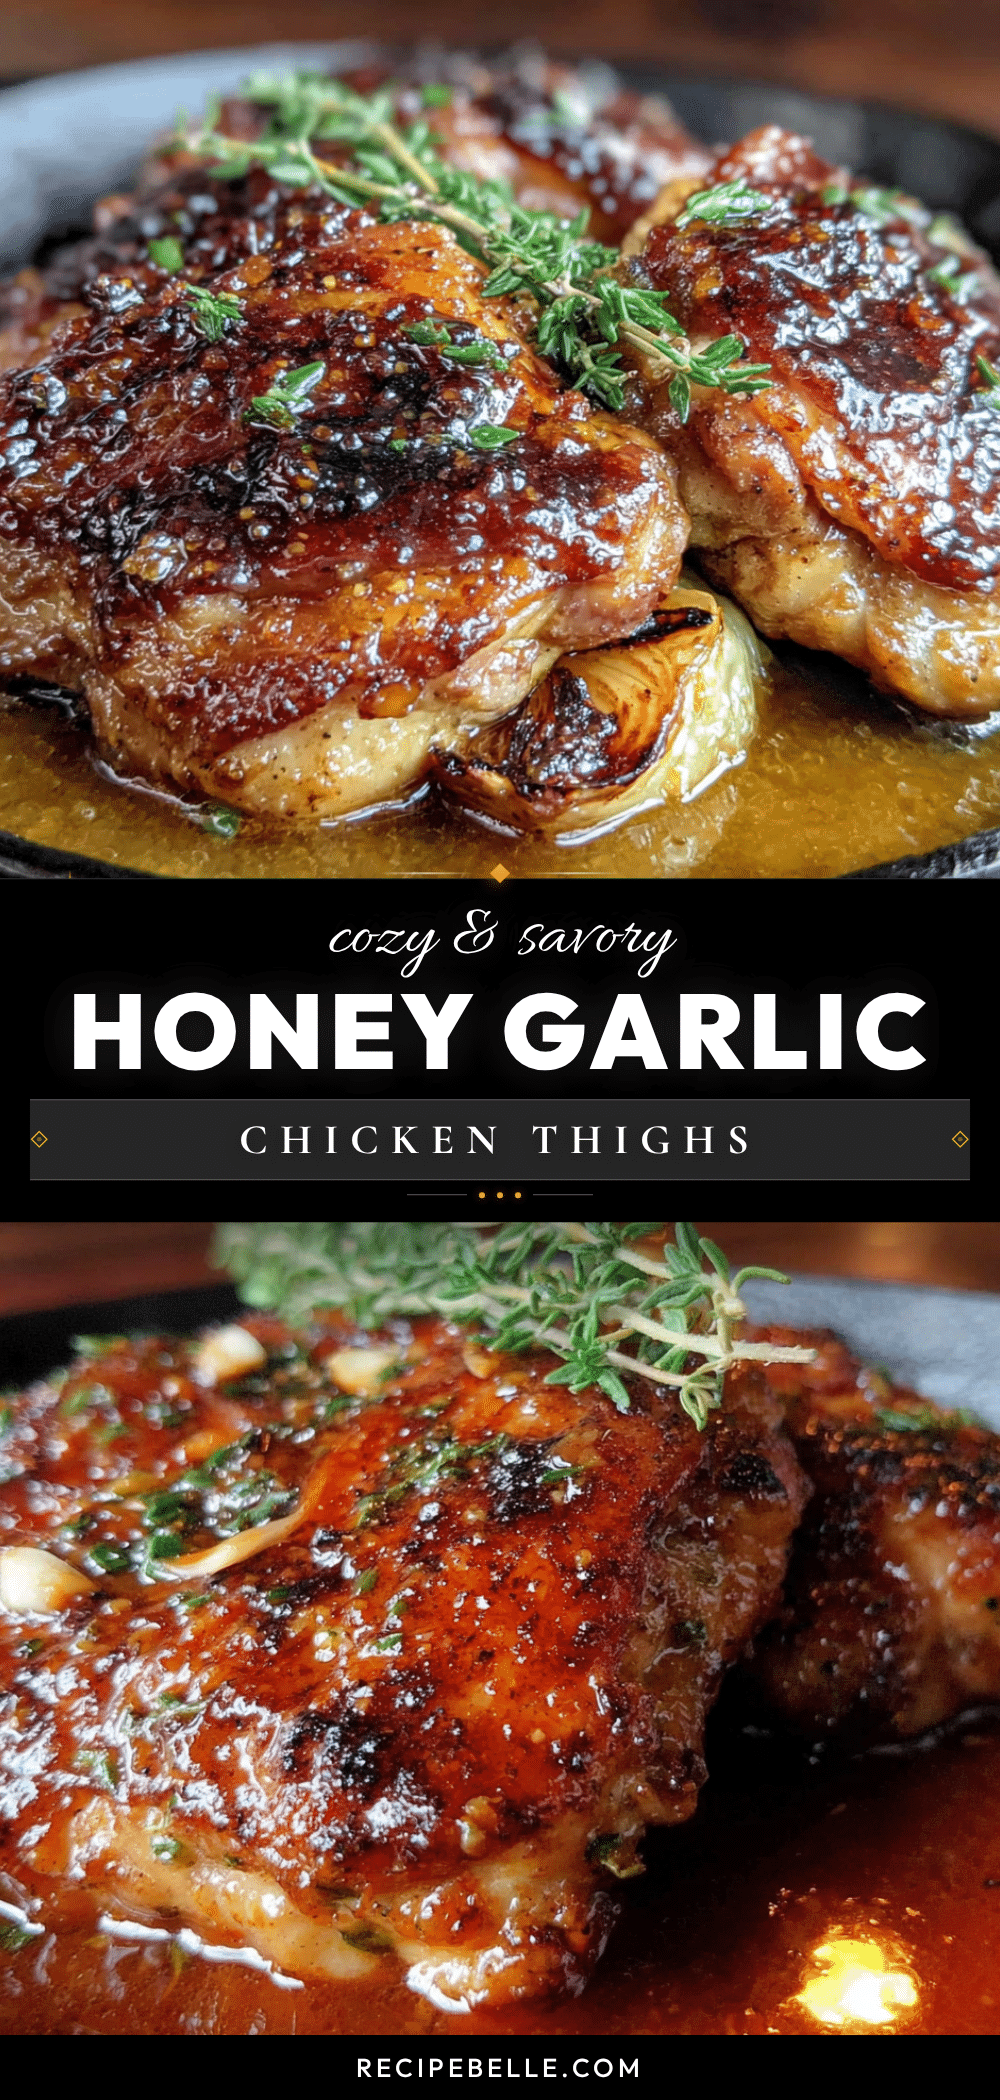
Cozy One-Pan Honey Garlic Chicken Thighs: Easy Dinner Recipe

These honey garlic chicken thighs are a quick and easy one-pan dinner with a sticky, savory-sweet glaze. Perfect for busy weeknights, this recipe delivers juicy, tender chicken with minimal cleanup.
- Prep Time: 10 minutes
- Cook Time: 25 minutes
- Total Time: 35 minutes
- Yield: 4 servings 1x
- Category: Main Course
- Cuisine: American
Ingredients
- 4–6 bone-in, skin-on chicken thighs (about 1.5 lbs / 680g)
- 1 teaspoon salt
- ½ teaspoon black pepper
- 1 tablespoon olive oil (or avocado oil)
- ⅓ cup honey (about 110g)
- 4–5 cloves garlic, minced (about 2 tablespoons)
- 2 tablespoons soy sauce (low sodium preferred)
- 1 tablespoon apple cider vinegar (or rice vinegar)
- 1 tablespoon butter (optional, but recommended)
- ½ teaspoon red pepper flakes (optional)
- Fresh parsley or cilantro, chopped (for garnish, optional)
- Sesame seeds (for garnish, optional)
- Cooked rice, quinoa, or crusty bread (for serving, optional)
Instructions
- Preheat your oven to 400°F (200°C).
- Pat the chicken thighs dry with paper towels. Season both sides generously with salt and pepper.
- Heat your oven-safe skillet over medium-high heat. Add the olive oil and let it get shimmering hot—about 2 minutes.
- Place the chicken thighs skin-side down in the hot skillet. Cook undisturbed for 5-7 minutes until the skin is deep golden brown.
- While the chicken is searing, make the glaze: In a small bowl, whisk together the honey, minced garlic, soy sauce, apple cider vinegar, and red pepper flakes if using.
- Flip the chicken thighs using tongs. Cook for another 2 minutes on the second side.
- Pour the honey garlic glaze over the chicken. Add the butter if using, letting it melt into the sauce.
- Transfer the skillet to the preheated oven. Roast for 15-20 minutes, or until the chicken reaches an internal temperature of 165°F (74°C).
- Remove from the oven and let rest for 5 minutes. Spoon some of the pan sauce over the chicken before serving.
- Garnish with fresh parsley or cilantro and sesame seeds if desired. Serve immediately with rice, quinoa, or crusty bread.
Notes
Don’t skip the searing step—it’s key for crispy skin. If the sauce starts to burn during roasting, add a splash of water or chicken broth to deglaze the pan. For extra sticky glaze, after removing the chicken, simmer the sauce on the stovetop for 2-3 minutes before pouring over the chicken.
Nutrition
- Serving Size: 1 chicken thigh with
- Calories: 450
- Sugar: 24
- Sodium: 800
- Fat: 24
- Saturated Fat: 7
- Carbohydrates: 26
- Protein: 30
Keywords: honey garlic chicken, one-pan chicken, chicken thighs, easy dinner, weeknight dinner, comfort food



