The woman at the party store watched me stare at a roll of white gauze for way too long. I was standing there, three bags of candy corn already in my cart, trying to figure out how to make a Halloween appetizer that didn’t involve another pumpkin-shaped cheese ball. She just pointed at the gauze and said, “You’re overthinking it. Wrap it around something people already love.”
Honestly, she wasn’t wrong. I had been scrolling through Pinterest for hours, convinced I needed some elaborate, multi-step recipe to impress at our annual neighborhood Halloween get-together. But the truth is, when people show up to a party, they don’t want a science project. They want something familiar, comforting, and maybe just a little bit spooky. That’s when it hit me—why not take a classic taco dip, something everyone already devours, and give it a mummy makeover?
So I grabbed the gauze, skipped the cheese ball, and went home to experiment. The first attempt was a bit of a mess, I’ll be honest. The “bandages” slipped off, the eyes looked more confused than spooky, and I may have used way too much hot sauce. But by the second try, something clicked. The black beans added this earthy richness that balanced the creamy layers perfectly, and the mummy wrapping actually stayed put. My neighbor, the same one who lent me her slow cooker last year, took one bite and asked for the recipe before I could even set the platter down.
That’s the thing about this Black Bean Mummy Taco Dip. It looks like you spent hours crafting something clever, but really, it’s just a crowd-favorite dip dressed up for the occasion. Maybe you’ve been there too—wanting to bring something fun to a Halloween party but running out of time and energy. This recipe is for you. It’s the appetizer that makes people smile, grab a chip, and come back for seconds before they even ask what’s in it.
Why You’ll Love This Recipe
Let me tell you why this dip has become my go-to for every Halloween gathering. I’ve tested it at three different parties now, and it disappears every single time. There’s something about the combination of familiar taco flavors with that playful mummy presentation that just works.
- Quick & Easy: This comes together in under 20 minutes. No baking, no complicated steps, just layering and wrapping. Perfect for those last-minute Halloween plans or when you’re juggling costume prep and appetizers.
- Simple Ingredients: You probably have most of these in your kitchen right now. Canned black beans, cream cheese, taco seasoning—nothing fancy required. I use whatever brand of tortilla chips I find on sale, and it still tastes amazing.
- Perfect for Halloween Parties: The mummy design is such a conversation starter. Kids love it because it’s fun, adults love it because it’s delicious. It works for potlucks, classroom parties, or just a spooky movie night at home.
- Crowd-Pleaser: I’ve watched people who “don’t like beans” go back for thirds. The black beans blend so well with the creamy layers that even picky eaters enjoy it. My friend’s daughter, who usually survives on chicken nuggets, ate half the platter last year.
- Unbelievably Delicious: The texture is what gets me every time. You’ve got the cool, creamy base, the hearty black beans, and then that crunch from the chips. It’s comfort food that feels a little bit special.
What makes this recipe different from all the other Halloween dips out there? It’s the balance. I spent time figuring out the right ratio of cream cheese to sour cream so it’s not too heavy. The black beans add this subtle earthiness that cuts through the richness without overpowering everything else. And the mummy wrapping? I learned the hard way that you need to chill the dip first so the “bandages” stay in place. Little tricks like that make this version foolproof.
This isn’t just another recipe you’ll forget about after Halloween. It’s the kind that makes you close your eyes after the first bite because it’s exactly what you wanted. It’s comfort food reimagined—spooky on the outside, familiar and satisfying on the inside. Perfect for impressing guests without the stress, or turning a simple snack into something memorable.
What Ingredients You Will Need
This recipe uses simple, wholesome ingredients to deliver bold flavor and satisfying texture without the fuss. Most of these are pantry staples, which means you can whip this up even when the stores are packed with last-minute Halloween shoppers.
- Cream cheese, softened (16 ounces) – This forms the creamy base of the dip. I prefer Philadelphia brand for its smooth texture, but any full-fat cream cheese works well. Let it sit at room temperature for about 20 minutes so it blends easily.
- Sour cream (1 cup) – Adds tanginess and lightens up the cream cheese. You can use Greek yogurt if you want a slightly healthier option, but sour cream gives that classic taco dip flavor.
- Refried black beans (15 ounce can) – The star ingredient! I like using refried black beans instead of whole because they spread smoothly and create a solid base layer. Look for brands with simple ingredients—just beans, water, and spices.
- Canned black beans, drained and rinsed (15 ounce can) – These add texture and visual contrast. The whole beans peek through the creamy layers and give each bite a little pop. I always rinse them well to remove excess sodium.
- Taco seasoning (1 packet or 3 tablespoons homemade) – Use your favorite brand. I actually prefer making my own with chili powder, cumin, garlic powder, and smoked paprika because I can control the salt level. But store-bought works great in a pinch.
- Shredded Mexican blend cheese (2 cups) – The gooey, melty layer that holds everything together. I shred my own from a block when I have time—it melts so much better than pre-shredded. But honestly, the bagged stuff works fine for this recipe.
- Sliced black olives (1/2 cup) – These become the mummy’s eyes! Make sure to get the pre-sliced kind to save time. You’ll need two olives per “eye” to create that cute, slightly goofy mummy face.
- Refrigerated crescent roll dough (1 can, 8 ounces) – This is your mummy wrapping. The dough bakes up flaky and golden, creating those perfect bandage strips. I use Pillsbury because it’s widely available and consistently good.
- Fresh cilantro, chopped (for garnish) – Optional, but adds a pop of color and fresh flavor. Some people skip it, but I think it makes the mummy look more festive.
- Tortilla chips, for serving – Go with a sturdy chip that can handle the dip. I like restaurant-style chips or scoop-shaped ones for easy dipping.
Ingredient Selection Tips: When choosing your black beans, look for cans without BPA lining if you’re concerned about that. For the cream cheese, avoid the low-fat version—it doesn’t melt as smoothly and can make the dip grainy. If you’re feeding a crowd with dietary restrictions, use dairy-free cream cheese and sour cream alternatives. The flavor will be slightly different, but still delicious.
Substitution Guidance: Need a gluten-free option? Check your taco seasoning label—some brands contain wheat flour. You can also skip the crescent roll dough and use gluten-free puff pastry instead, or just arrange the dip without the mummy wrapping for a simpler presentation. For a vegetarian version, you’re already there! This dip is naturally meat-free.
Equipment Needed
You don’t need a fancy kitchen to make this dip. Here’s what I use every time:
- 9-inch pie plate or round baking dish – This creates the perfect mummy shape. I use a glass pie plate because I can see how the layers are building up. A ceramic dish works too, just make sure it’s oven-safe.
- Electric hand mixer or stand mixer – For blending the cream cheese and sour cream until smooth. You can do this by hand with a wooden spoon, but it takes some elbow grease. I learned that the hard way when my mixer was in the dishwasher.
- Sharp knife or pizza cutter – For cutting the crescent roll dough into strips. A pizza cutter makes cleaner lines, but a regular knife works perfectly fine.
- Rubber spatula – For spreading the layers evenly. The flexibility helps you get into all the corners without disturbing the layer underneath.
- Small bowl – For mixing the taco seasoning into the black bean mixture. I use a cereal bowl, nothing fancy.
- Measuring cups and spoons – Essential for getting the ratios right. I’ve eyeballed it before, and the texture just wasn’t the same.
- Baking sheet – Place the pie plate on this to catch any drips. Crescent roll dough can release butter as it bakes, and you don’t want that all over your oven floor.
Budget-Friendly Options: If you don’t have a pie plate, use a small cast-iron skillet. It gives the dip a rustic look and holds heat well. No hand mixer? A fork works for mashing the cream cheese, though it takes a few extra minutes. I’ve made this in a college dorm kitchen with just a butter knife and a microwave-safe bowl, and it still turned out great.
Maintenance Tip: After using your pie plate for this dip, let it soak in warm, soapy water for about 10 minutes before washing. The cream cheese residue comes off much easier that way.
Preparation Method
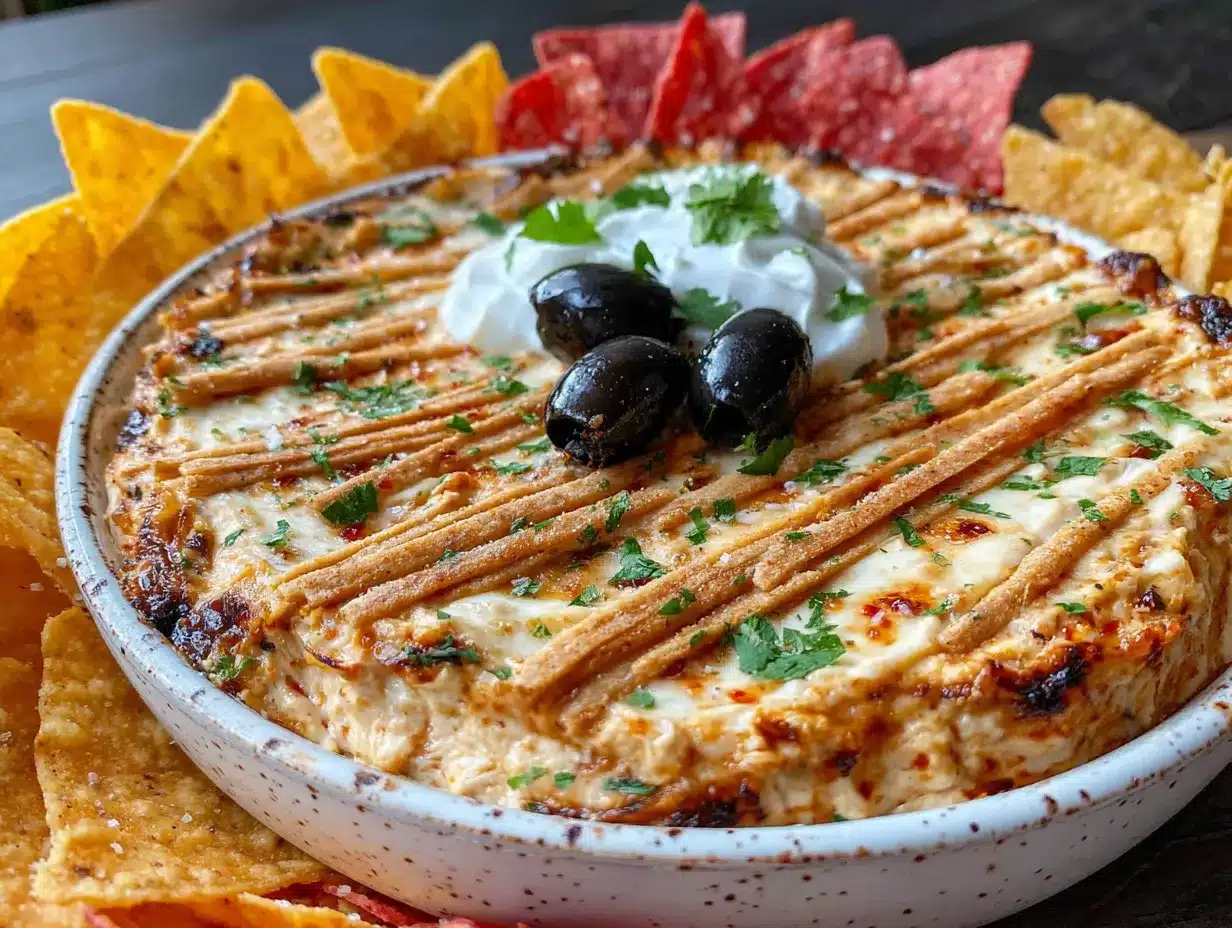
Let me walk you through this step by step. I’ve made this dip so many times that I’ve got the process down to a science. Trust me, following these steps exactly will save you from the mistakes I made the first time.
- Preheat your oven to 375°F (190°C). While it’s heating up, take your cream cheese out of the fridge and let it soften on the counter. This is crucial—cold cream cheese creates lumps that are nearly impossible to smooth out. I usually set a timer for 20 minutes and prep the other ingredients while I wait.
- In a medium mixing bowl, combine the softened cream cheese and sour cream. Use your hand mixer on medium speed and beat until the mixture is completely smooth and fluffy. This takes about 2 minutes. Scrape down the sides of the bowl with your spatula halfway through. The mixture should look like thick, creamy frosting—no lumps allowed.
- Add the refried black beans, drained canned black beans, and taco seasoning to the cream cheese mixture. Stir everything together with your spatula until the seasoning is evenly distributed. Don’t overmix—you want some of the whole black beans to remain intact for texture. The mixture will turn a lovely dark color from the beans and spices. Taste it at this point and adjust the seasoning if needed. I sometimes add an extra pinch of cumin if I’m feeling adventurous.
- Spread the black bean mixture evenly into your pie plate. Use the back of your spatula to create a smooth, even layer. Make sure it reaches all the way to the edges. The surface should be flat and level—this helps the cheese layer stick properly later.
- Sprinkle 1 cup of the shredded Mexican cheese over the black bean layer. Distribute it evenly, covering the entire surface. Don’t press it down; just let it fall naturally. This first cheese layer acts as a glue for the mummy wrapping.
- Now for the fun part—creating the mummy. Open your can of crescent roll dough and unroll it on a cutting board. You’ll see it’s perforated into triangles. Pinch the seams together to create one large rectangle of dough. Using your pizza cutter or knife, cut the dough into strips about 1/2 inch wide. You should get around 12 to 15 strips.
- Lay the dough strips across the dip in a crisscross pattern. Start from the center and work your way outward, leaving small gaps between each strip so some of the cheese and bean mixture shows through. The strips should look like bandages wrapping around a mummy. Don’t worry about being perfect—the slightly messy look adds to the mummy effect. I learned this after my first attempt looked more like a grid than a mummy.
- Bake the dip for 15 to 18 minutes, or until the crescent roll strips are golden brown and puffed. The cheese underneath should be melted and bubbly. Place the pie plate on a baking sheet before putting it in the oven—trust me on this. I once had butter from the dough drip onto the oven floor and smoke up the whole kitchen.
- Remove from the oven and let it cool for 5 minutes. This is important—the dip needs to set slightly so it doesn’t slide apart when you add the eyes. Use this time to arrange your black olive “eyes.” Place two olive slices near the top of the mummy, leaving space between them for the “face.” You can add small dollops of sour cream in the center of each olive for a creepy pupil effect if you want.
- Sprinkle the remaining 1 cup of cheese over the top. The heat from the dip will melt it slightly. Add your chopped cilantro around the edges for a festive touch. Serve immediately with tortilla chips arranged around the platter.
Sensory Cues: When the dip is ready, you’ll smell the warm taco seasoning and toasted dough. The crescent roll strips should be a deep golden brown, and you’ll see the cheese bubbling around the edges. If you tap the pie plate gently, the dip should feel firm but jiggly in the center.
Cooking Tips & Techniques
After making this dip more times than I care to count, I’ve picked up a few tricks that make a real difference. Let me share what I’ve learned so you don’t make the same mistakes I did.
Keep the cream cheese at room temperature. I cannot stress this enough. Cold cream cheese creates lumps that no amount of mixing will fix. If you forget to take it out ahead of time, cut it into small cubes and microwave it in 10-second bursts until soft. But honestly, the texture is better when it softens naturally.
Don’t skip the refried black beans. I tried using only whole black beans once, and the dip was too loose. The refried beans act as a binder, giving the dip that perfect scoopable consistency. They also add a creamy texture that balances the acidity of the sour cream.
Chill the dip before adding the dough strips. This is a trick I discovered after my first attempt when the dough sank into the warm bean mixture. If you spread the layers and pop the pie plate in the fridge for 10 minutes, the dough stays on top where it belongs. The strips bake up flakier too.
Cut the dough strips evenly. I learned this the hard way when I had one giant strip and several tiny ones. Use a ruler if you need to, or just eyeball it carefully. Even strips bake at the same rate, so you won’t end up with some burnt and others doughy.
Watch the oven closely during the last 5 minutes. Crescent roll dough can go from golden to burnt very quickly. Set a timer for 12 minutes, then check every minute after that. The dip is done when the strips are puffed and the cheese is bubbling around the edges.
Let it rest before serving. I know it’s tempting to dig in right away, but letting the dip sit for 5 minutes allows the layers to set. If you serve it too soon, the dip will slide apart and your mummy will look more like a sad puddle. Patience pays off here.
Variations & Adaptations
One of the best things about this recipe is how customizable it is. I’ve tried several variations over the years, and each one brings something new to the table.
Spicy Mummy Dip: If you like heat, add a diced jalapeño or two to the black bean mixture. You can also use hot taco seasoning or mix in a teaspoon of chipotle powder. My brother-in-law, who eats habaneros like candy, loved this version. Just warn your guests before they dive in.
Chicken Mummy Dip: For a heartier version, mix in 1 cup of shredded cooked chicken with the black bean mixture. Rotisserie chicken works great here—just shred it finely so it blends in evenly. This turns the dip into more of a meal, perfect for a Halloween dinner party.
Vegan Mummy Dip: Use dairy-free cream cheese and sour cream, and skip the shredded cheese or use a vegan alternative. The black beans are already plant-based, so this adaptation is easier than you’d think. I made this for a friend who’s vegan, and she said it was the best Halloween dip she’d ever had.
Low-Carb Mummy Dip: Skip the crescent roll dough entirely and just serve the dip with cucumber slices or bell pepper strips. The mummy look won’t be as dramatic, but the flavor is still amazing. You can also use almond flour tortillas cut into strips as a lower-carb wrapping option.
Breakfast Mummy Dip: This might sound strange, but hear me out. Use the same black bean base, top it with scrambled eggs and cheese, then wrap with crescent dough. Bake as directed. It’s a fun Halloween morning surprise that my kids absolutely love.
Serving & Storage Suggestions
This dip is best served warm, right out of the oven. I like to arrange the tortilla chips around the platter so they look like they’re surrounding the mummy. It makes for a great presentation—people can just grab a chip and scoop.
Complementary Dishes: This dip pairs beautifully with a simple side of fresh salsa or guacamole. I also like to serve it alongside a platter of veggie sticks for a lighter option. If you’re hosting a full Halloween spread, this dip goes great with chili or a simple taco bar.
Beverage Pairings: For adults, a cold Mexican lager or a margarita complements the flavors perfectly. For kids, apple cider or a fun Halloween punch works well. I always have a pitcher of water with cucumber slices nearby too—the dip can be a bit rich.
Storage Instructions: If you have leftovers (which is rare in my house), let the dip cool completely, then cover the pie plate with plastic wrap or transfer the dip to an airtight container. It will keep in the refrigerator for up to 3 days. The crescent roll strips will soften, but the flavor is still great.
Reheating Methods: To reheat, pop the dip in a 350°F oven for about 10 minutes, or until warmed through. You can also microwave individual portions for 30 to 45 seconds, but the texture won’t be as good. I don’t recommend freezing this dip—the cream cheese and sour cream separate when thawed, and the dough becomes soggy.
Flavor Development: Interestingly, the flavors actually meld together and deepen after a day in the fridge. Some people prefer the dip cold, straight from the refrigerator. It firms up nicely and has a different, almost spread-like texture. Try it both ways and see which you prefer.
Nutritional Information & Benefits
While this dip is certainly a treat, it does offer some nutritional benefits worth mentioning. Here’s a rough breakdown per serving (about 1/8 of the dip, not including chips):
- Calories: Approximately 320
- Protein: 12 grams
- Fat: 22 grams
- Carbohydrates: 18 grams
- Fiber: 6 grams
- Sugar: 4 grams
Health Benefits of Key Ingredients: Black beans are packed with fiber and plant-based protein, which help keep you full and support digestive health. They’re also rich in antioxidants and minerals like iron and magnesium. The cream cheese and sour cream provide calcium, though they’re higher in fat. Using reduced-fat versions can lower the calorie count without sacrificing too much flavor.
Dietary Considerations: This recipe is naturally vegetarian and can be made gluten-free by checking your taco seasoning and using a gluten-free crescent dough alternative. For a lower-calorie version, use Greek yogurt instead of sour cream and reduce the cheese by half. The dip is also nut-free, making it safe for school parties.
Allergen Notes: This recipe contains dairy (cream cheese, sour cream, shredded cheese) and wheat (crescent roll dough). If you’re serving a crowd with allergies, label the dish clearly or provide a separate allergen-free option.
Personal Wellness Perspective: I believe in balance, especially during holidays. This dip is a fun, indulgent treat that brings people together. I don’t stress about the nutritional numbers—I focus on the joy of sharing food with loved ones. One serving won’t derail your health goals, and the fiber from the black beans actually helps with satiety.
Conclusion
This Black Bean Mummy Taco Dip has become a Halloween tradition in my house, and I have a feeling it will become one in yours too. It’s the perfect combination of playful presentation and genuinely delicious flavor—the kind of recipe that makes people smile before they even take a bite.
What I love most about this dip is how adaptable it is. You can make it as spicy or mild as you want, add protein or keep it plant-based, dress it up with extra toppings or keep it simple. The mummy design is forgiving enough that even a messy wrapper looks intentional. And honestly, the slightly imperfect ones have the most character.
I encourage you to make this recipe your own. Maybe you’ll add extra olives for a mummy with more eyes, or use different colored bell peppers for a festive twist. The beauty of cooking is that every version tells a different story. I’d love to hear how your mummy dip turns out—share your photos and variations in the comments below. Did you add a secret ingredient? Did your kids help with the wrapping? Tell me all about it.
Thank you for stopping by and giving this recipe a try. Halloween is about creativity, community, and a little bit of spooky fun. This dip delivers all three. Now go grab your ingredients and make some mummy magic. Happy Halloween, and happy dipping!
Frequently Asked Questions
Can I make this dip ahead of time?
Yes! You can assemble the dip completely (including the dough strips) up to 24 hours in advance. Just cover it with plastic wrap and store it in the refrigerator. When you’re ready to serve, bake it straight from the fridge—you may need to add 3 to 5 minutes to the baking time.
Can I use a different type of bean?
Absolutely. Pinto beans or kidney beans work well in place of black beans. If you use whole beans instead of refried, mash them slightly with a fork to help them hold together. The flavor will be slightly different, but still delicious.
How do I prevent the dough from getting soggy?
The key is to chill the dip before adding the dough strips. This firms up the layers so the dough stays on top instead of sinking in. Also, make sure your oven is fully preheated before baking—the high heat helps the dough puff up quickly.
Can I use homemade taco seasoning?
Definitely! Mix together 1 tablespoon chili powder, 1 teaspoon cumin, 1 teaspoon garlic powder, 1 teaspoon onion powder, 1/2 teaspoon smoked paprika, 1/2 teaspoon oregano, and salt to taste. This blend has less sodium than store-bought packets and lets you control the flavor.
What if I don’t have a pie plate?
No problem! Use an 8×8 baking dish, a small cast-iron skillet, or even a disposable aluminum pan. Just make sure whatever you use is oven-safe. The shape might be slightly different, but the mummy effect still works beautifully.
Pin This Recipe!
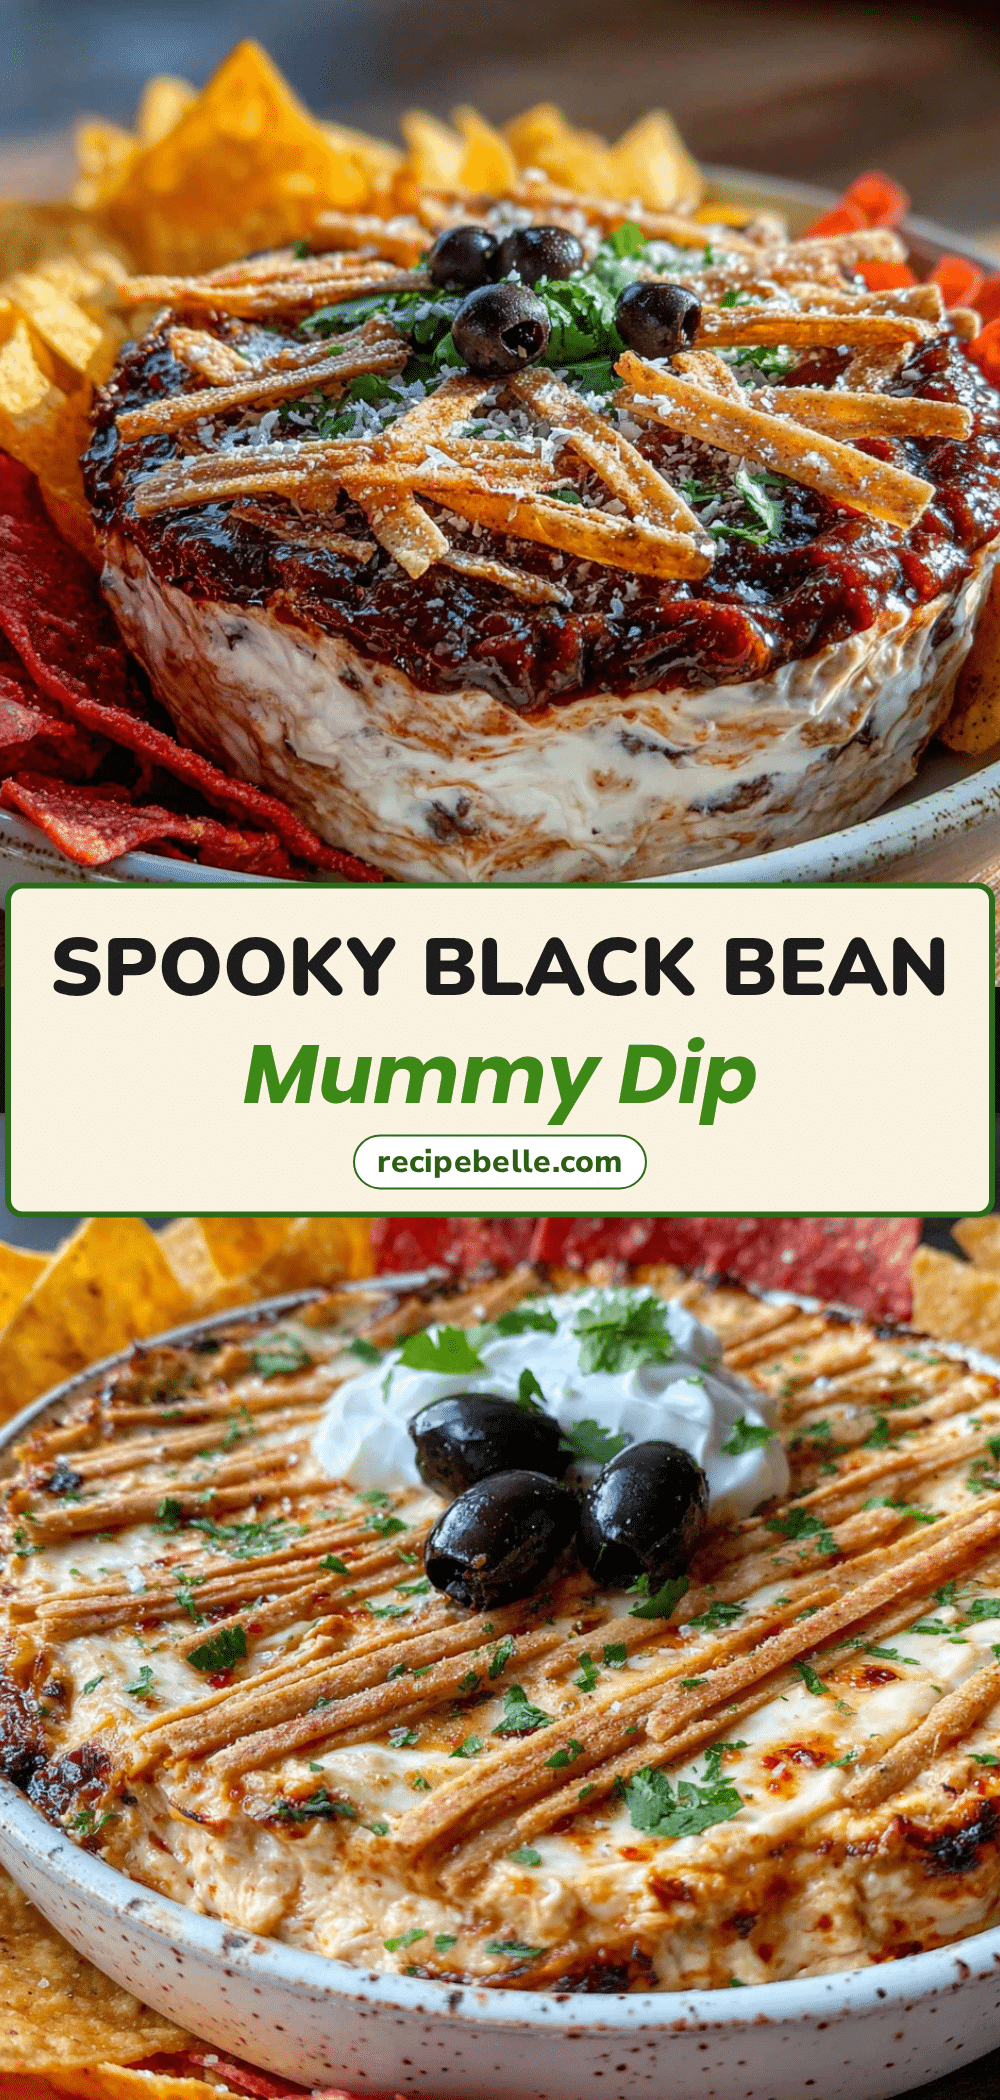
Black Bean Mummy Taco Dip

A fun and easy Halloween appetizer that transforms classic taco dip into a spooky mummy. Creamy black bean layers are wrapped in crescent roll ‘bandages’ and baked until golden, creating a crowd-pleasing dish that’s perfect for parties.
- Prep Time: 15 minutes
- Cook Time: 18 minutes
- Total Time: 33 minutes
- Yield: 8 servings 1x
- Category: Appetizer
- Cuisine: Mexican-American
Ingredients
- 16 ounces cream cheese, softened
- 1 cup sour cream
- 15 ounce can refried black beans
- 15 ounce can black beans, drained and rinsed
- 1 packet (3 tablespoons) taco seasoning
- 2 cups shredded Mexican blend cheese
- 1/2 cup sliced black olives
- 1 can (8 ounces) refrigerated crescent roll dough
- Fresh cilantro, chopped (for garnish)
- Tortilla chips, for serving
Instructions
- Preheat your oven to 375°F (190°C). Let cream cheese soften at room temperature for about 20 minutes.
- In a medium mixing bowl, combine the softened cream cheese and sour cream. Beat with a hand mixer on medium speed until smooth and fluffy, about 2 minutes. Scrape down the sides of the bowl.
- Add the refried black beans, drained canned black beans, and taco seasoning to the cream cheese mixture. Stir until evenly distributed, leaving some whole beans intact for texture.
- Spread the black bean mixture evenly into a 9-inch pie plate or round baking dish, smoothing the top with a spatula.
- Sprinkle 1 cup of shredded Mexican cheese over the black bean layer.
- Unroll the crescent roll dough on a cutting board and pinch the seams together to form a rectangle. Cut the dough into strips about 1/2 inch wide (about 12 to 15 strips).
- Lay the dough strips across the dip in a crisscross pattern, leaving small gaps between strips to resemble mummy bandages.
- Place the pie plate on a baking sheet and bake for 15 to 18 minutes, until the crescent roll strips are golden brown and puffed, and the cheese is melted and bubbly.
- Remove from the oven and let cool for 5 minutes. Arrange two olive slices near the top of the mummy for eyes. Optionally, add small dollops of sour cream in the center of each olive for pupils.
- Sprinkle the remaining 1 cup of cheese over the top. Garnish with chopped cilantro around the edges. Serve immediately with tortilla chips.
Notes
Chill the dip for 10 minutes before adding dough strips to prevent them from sinking. For best results, use full-fat cream cheese and shred cheese from a block. Let dip rest 5 minutes before serving to allow layers to set.
Nutrition
- Serving Size: 1/8 of dip (without
- Calories: 320
- Sugar: 4
- Sodium: 680
- Fat: 22
- Saturated Fat: 12
- Carbohydrates: 18
- Fiber: 6
- Protein: 12
Keywords: Halloween, mummy, taco dip, black bean, appetizer, party food, easy, spooky



