I’m not supposed to play favorites with recipes, but let’s be honest—we all have that one treat that makes us feel like a kid again. For me, it’s these Easy Monster Eyeball Rice Krispie Treats. The first time I made them, I was standing in my kitchen on a rainy Tuesday afternoon, trying to convince myself that Halloween prep wasn’t just for the weekend. I had a box of Rice Krispies, a bag of marshmallows, and a wild idea that maybe, just maybe, I could make something that looked terrifying but tasted like pure nostalgia.
The smell of melted butter and marshmallows filled the air, and honestly, it hit me right in the childhood feels. I mean, there’s something about that sweet, gooey aroma that just makes everything better. I made a mess—marshmallow stuck to the counter, butter on my sleeve, and edible googly eyes rolling across the floor. But when I cut into those golden squares and saw those spooky eyeballs staring back at me, I knew I had something special. These Easy Monster Eyeball Rice Krispie Treats are the kind of recipe that makes you feel like a kitchen wizard without any of the stress. Maybe you’ve been there—wanting to impress the kids or party guests but not wanting to spend hours in the kitchen. Trust me, this is your answer.
What I love most is how these treats capture the spirit of Halloween without being complicated. They’re crunchy, chewy, and just the right amount of creepy. Every time I make them, I remember that rainy Tuesday and how a simple idea turned into my go-to Halloween dessert. You’re going to love how easy these are, and the best part? They disappear faster than you can say “trick or treat.”
Why You’ll Love This Recipe
Let me tell you why these Easy Monster Eyeball Rice Krispie Treats have become my absolute favorite Halloween recipe. I’ve tested this in my own kitchen more times than I can count, and it’s the kind of treat that makes you look like a pro with almost zero effort.
- Quick & Easy: This comes together in under 20 minutes. Seriously, from start to finish, you’ll have a batch of spooky treats ready to go. Perfect for those last-minute Halloween parties or when the kids suddenly announce they need treats for school tomorrow.
- Simple Ingredients: You probably already have everything in your pantry. Rice Krispies, marshmallows, butter, and some candy eyeballs. No fancy grocery trips or specialty stores needed.
- Perfect for Halloween: These are the ultimate crowd-pleaser for Halloween parties, classroom celebrations, or just a fun night in. Kids go absolutely wild for the eyeballs, and adults can’t resist the nostalgia.
- Crowd-Pleaser: I’ve brought these to potlucks and neighborhood gatherings, and they always get rave reviews. Even people who say they don’t like sweets end up grabbing a second one.
- Unbelievably Delicious: The texture is that perfect combination of crispy and chewy. The marshmallow-to-cereal ratio is spot on, and the candy eyeballs add a fun crunch that makes every bite exciting.
What makes these different from every other Rice Krispie treat recipe out there? It’s the method. I use a little extra butter and a pinch of salt to balance the sweetness, and I press the mixture into the pan while it’s still warm, so the eyeballs stay perfectly in place. Plus, I’ve figured out the trick to getting those googly eyes to look straight and creepy instead of sliding all over the place. This isn’t just another version—it’s your best version.
Honestly, this recipe is the kind that makes you close your eyes after the first bite. It’s comfort food at its finest—simple, satisfying, and full of Halloween spirit. Perfect for impressing guests without any stress, or turning a regular Tuesday into something memorable.
What Ingredients You Will Need
This recipe uses simple, wholesome ingredients to deliver bold flavor and satisfying texture without any fuss. Everything you need is probably already in your kitchen, which makes these treats perfect for spontaneous Halloween fun.
For the Rice Krispie Base
- 6 cups Rice Krispies cereal (I recommend the original Kellogg’s for best texture)
- 10 oz (about 40 large) marshmallows, regular or mini (I prefer Jet-Puffed for consistent melting)
- 3 tablespoons unsalted butter, cut into small pieces (adds richness and helps prevent sticking)
- 1/4 teaspoon salt (balances the sweetness and enhances flavor)
- 1 teaspoon vanilla extract (optional, but adds a lovely warmth to the flavor)
For the Monster Eyeball Decoration
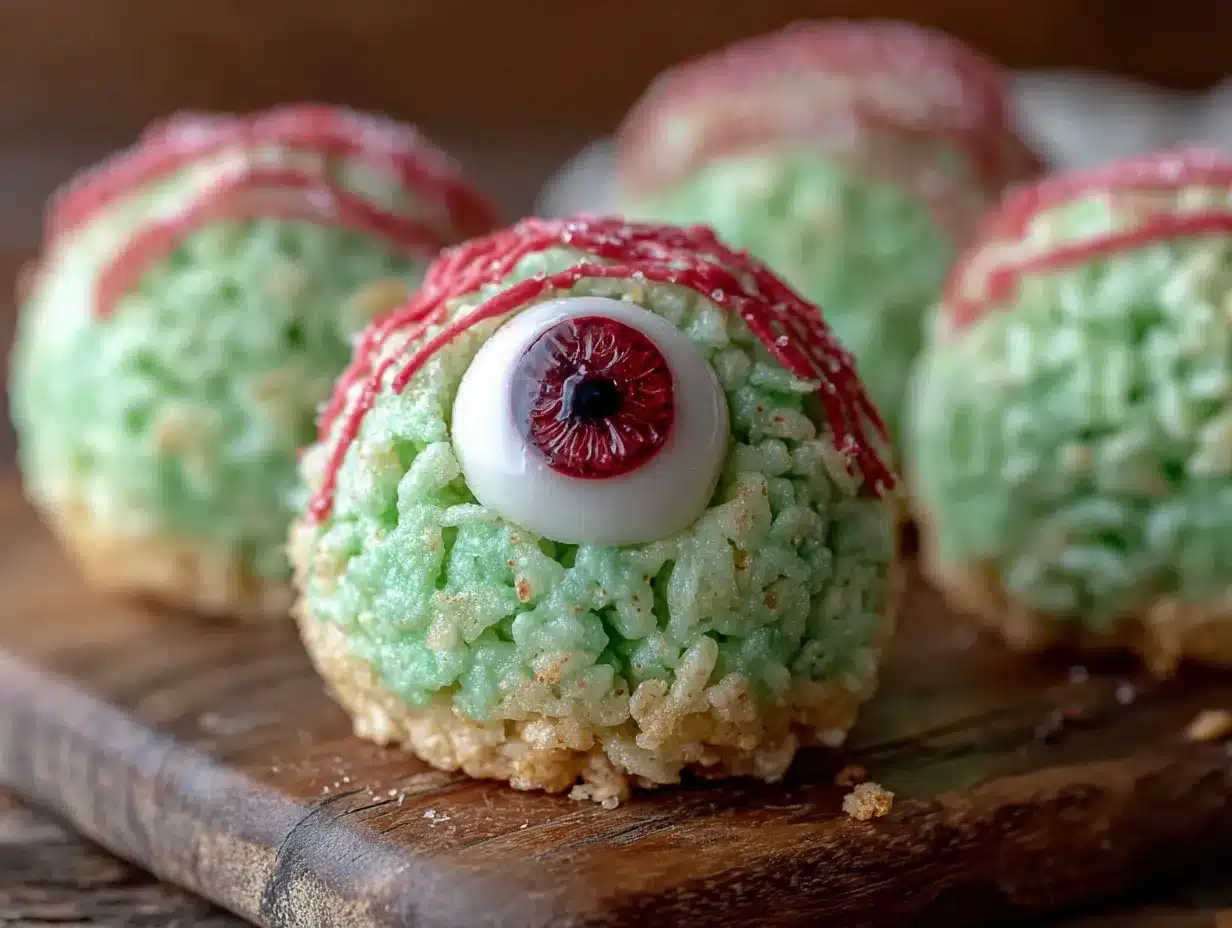
- 1/2 cup candy eyeballs (the white and black ones work best; I get mine at craft stores or online)
- 1/4 cup white chocolate chips or candy melts (for attaching the eyeballs)
- 1 tablespoon coconut oil or vegetable shortening (helps thin the chocolate for easier dipping)
- Green or purple food coloring (optional, for a spooky tint, but I keep mine classic)
Ingredient Tips & Substitutions
- Cereal: You can use generic crispy rice cereal, but the texture might be a bit different. I’ve tried store brands, and they work fine, just expect a slightly softer crunch.
- Marshmallows: Mini marshmallows melt faster and more evenly. If you only have large ones, just cut them into smaller pieces before melting.
- Butter: Use unsalted butter so you can control the salt level. If you only have salted, reduce or skip the added salt.
- Candy Eyeballs: These are available at most craft stores, party supply shops, or online. Look for the ones that are round and have a flat back for easy sticking. I like the Wilton brand for consistency.
- White Chocolate: Use good quality white chocolate chips or candy melts. The melting wafers work best because they set up harder and hold the eyeballs in place better.
Pro tip: If you want to make these extra spooky, add a few drops of green food coloring to the marshmallow mixture before adding the cereal. It gives the treats a monster-like tint that kids absolutely love.
Equipment Needed
You don’t need anything fancy for these Easy Monster Eyeball Rice Krispie Treats. I’ve made them in all kinds of kitchens, and the basic tools work perfectly.
- Large Pot or Dutch Oven: You need something big enough to stir the marshmallows and cereal together without spilling. A 5-quart pot works great. I use my trusty enameled cast iron dutch oven, but any heavy-bottomed pot will do.
- 9×13-inch Baking Pan: This is the perfect size for a standard batch. If you don’t have one, a 9×9 pan will give you thicker treats—just adjust the cooking time slightly.
- Spatula or Wooden Spoon: A silicone spatula is my go-to because it doesn’t scratch the pot and makes scraping the marshmallow mixture easy. A wooden spoon works too, just be prepared for a bit of sticking.
- Parchment Paper or Wax Paper: Line your pan with parchment paper, leaving some overhang for easy removal. This is a game-changer—I learned this after a sticky disaster with my first batch.
- Small Microwave-Safe Bowl: For melting the white chocolate. You can also use a double boiler if you prefer.
- Measuring Cups and Spoons: Accurate measurements matter here. Too much cereal and the treats will be dry; too little and they’ll be sticky.
Budget-friendly tip: You can skip the candy eyeballs and use mini chocolate chips or M&Ms instead. They won’t look as spooky, but they’ll still be delicious. Also, if you don’t have parchment paper, grease the pan generously with butter or cooking spray.
Preparation Method
Follow these steps carefully, and you’ll have perfect monster eyeball treats every time. I’ve included all the little details I wish someone had told me when I first started making these.
Step 1: Prepare Your Pan
Line your 9×13-inch baking pan with parchment paper, leaving about 2 inches of overhang on two opposite sides. This makes lifting the treats out later so much easier. Lightly grease the parchment paper with butter or cooking spray. Set the pan aside.
Step 2: Melt the Butter and Marshmallows
Place your large pot over medium-low heat and add the 3 tablespoons of butter. Let it melt slowly—don’t rush this or the butter might brown. Once it’s fully melted, add all 10 ounces of marshmallows and the 1/4 teaspoon of salt. Stir constantly with your spatula until the marshmallows are completely melted and smooth. This should take about 5 minutes. The mixture will be glossy and stretchy. Remove the pot from heat immediately—overcooking makes the treats hard and tough.
Step 3: Add Vanilla and Cereal
If you’re using vanilla extract, stir it in now. Then add the 6 cups of Rice Krispies cereal all at once. Fold the cereal into the marshmallow mixture gently but thoroughly. You want every piece of cereal coated, but don’t overmix or the cereal will crush. The mixture will be warm and sticky. Work quickly because the marshmallow sets fast.
Step 4: Press Into the Pan
Transfer the mixture to your prepared pan. Using a piece of wax paper or a silicone spatula lightly greased with butter, press the mixture evenly into the pan. Don’t press too hard—you want the treats to be compact but not dense. Aim for an even layer that reaches all corners. Let the mixture cool for about 10 minutes at room temperature.
Step 5: Prepare the Eyeball Glue
While the treats are cooling, place the 1/4 cup white chocolate chips and 1 tablespoon coconut oil in a small microwave-safe bowl. Microwave in 20-second intervals, stirring between each, until fully melted and smooth. This usually takes about 60 seconds total. Be careful not to overheat the chocolate, or it will seize up.
Step 6: Attach the Eyeballs
Using a toothpick or the tip of a small spoon, dab a tiny amount of melted white chocolate onto the back of each candy eyeball. Press the eyeball gently onto the surface of the still-warm Rice Krispie treats. Arrange them in a random pattern—some looking straight ahead, some slightly tilted for a more chaotic monster vibe. Work quickly before the chocolate sets. I usually do about 20-25 eyeballs per pan, spacing them evenly.
Step 7: Let Them Set
Allow the treats to cool completely at room temperature, about 30 minutes. The white chocolate will harden and hold the eyeballs in place. Once set, use the parchment paper overhang to lift the entire block out of the pan. Place it on a cutting board.
Step 8: Cut and Serve
Use a sharp knife to cut the treats into squares. I like to cut them into 2-inch squares, which gives you about 24 treats. The knife will stick a little—wipe it clean between cuts for neat edges. Serve immediately or store for later.
Sensory cue: When you cut into them, you should hear a slight crackle from the crispy cereal and feel the soft, chewy center. The eyeballs should stay firmly attached.
Cooking Tips & Techniques
I’ve made these treats more times than I can count, and I’ve learned a few things the hard way. Here are my best tips to ensure your Easy Monster Eyeball Rice Krispie Treats turn out perfect every time.
Don’t Overheat the Marshmallows: This is the number one mistake I see. If you cook the marshmallows too long or over high heat, the sugar crystallizes and your treats will be rock hard. Keep the heat on medium-low and remove the pot as soon as everything is smooth. Trust me, I’ve made hockey pucks before, and it’s not fun.
Use Room Temperature Ingredients: Your butter and marshmallows will melt more evenly if they’re at room temperature. I know it’s tempting to use cold butter straight from the fridge, but it will take longer to melt and might cause the marshmallows to scorch.
Grease Your Hands: If you prefer to press the mixture into the pan with your hands (which gives you more control), rub a little butter or cooking spray on your palms first. The mixture is sticky, and this trick saves you from a messy cleanup.
Work Fast with the Eyeballs: The white chocolate sets quickly, so have all your eyeballs ready before you start melting the chocolate. I lay them out on a plate so I can grab them one by one without fumbling.
Storage Secrets: These treats stay fresh for up to 3 days in an airtight container at room temperature. Don’t refrigerate them—the fridge dries them out and makes the cereal lose its crunch. If you need to store them longer, freeze them in a single layer on a baking sheet, then transfer to a freezer bag for up to 2 months.
My Biggest Failure: I once tried to double the recipe in a pot that was too small. The marshmallow mixture overflowed, stuck to the burner, and created a smoky mess that smelled like burnt sugar for days. Learn from my mistake—use a large enough pot, and if you’re doubling, use two separate batches.
Timing Strategy: Make these the day before your Halloween party. They actually taste better the next day because the flavors meld together, and you’ll have one less thing to worry about on the day of the event.
Variations & Adaptations
One of the best things about this recipe is how easy it is to customize. Here are some of my favorite variations that I’ve tried over the years.
Monster Color Swirl
Add a few drops of green or purple food coloring to the marshmallow mixture before adding the cereal. I like to use gel food coloring because it’s more concentrated and doesn’t change the texture. For a fun swirl effect, add the color after you’ve mixed in the cereal and fold just two or three times—don’t mix it all the way through. The result is a marbled monster look that kids go crazy for.
Chocolate Monster Eyeballs
If you’re a chocolate lover, swap the white chocolate for dark or milk chocolate chips. The chocolate pairs beautifully with the sweet marshmallow and adds a richer flavor. I’ve also used peanut butter chips for a nutty twist, and it was a huge hit at my nephew’s birthday party.
Spider Web Drizzle
After attaching the eyeballs, melt a little extra white chocolate and drizzle it over the top in a zigzag pattern. It looks like spider webs and adds an extra layer of creepiness. I do this when I want to impress at adult Halloween parties—it looks way more complicated than it is.
Gluten-Free Option
Rice Krispies are naturally gluten-free, but check the label to be sure. Some generic brands might contain malt flavoring, which has gluten. I use the original Kellogg’s, which is gluten-free in the US. The rest of the ingredients are naturally gluten-free, so this recipe is safe for most gluten-sensitive folks.
Vegan Adaptation
Use vegan marshmallows (like Dandies) and plant-based butter. The texture will be slightly different, but still delicious. I’ve tested this with my vegan friend, and she said they were the best treats she’d had in years. Just note that vegan marshmallows take a bit longer to melt, so be patient.
Mini Treats for Party Favors
Instead of cutting into squares, press the mixture into a mini muffin tin to create individual bite-sized treats. Grease the tin well, press the mixture in, and attach one eyeball to each. These are perfect for Halloween goodie bags or classroom parties.
Serving & Storage Suggestions
These Easy Monster Eyeball Rice Krispie Treats are best served at room temperature. The texture is perfect—crispy on the outside, chewy on the inside. I like to arrange them on a platter with some fake spider webs or plastic spiders around them for a spooky presentation. For a Halloween party, I put them on a cake stand so they’re the center of attention.
Complementary Dishes: These treats pair wonderfully with a glass of cold milk or a warm cup of apple cider. If you’re serving them at a party, set them next to a bowl of popcorn balls or pumpkin-shaped cookies for a full dessert spread. I once served them alongside my crispy chocolate pumpkin seed bark, and it was a hit.
Storage Instructions: Store the treats in an airtight container at room temperature for up to 3 days. Layer them with parchment paper between each layer to prevent sticking. Do not refrigerate—the cold air makes the cereal lose its crunch and the marshmallow becomes hard and chewy in a bad way.
Freezing Tips: You can freeze these treats for up to 2 months. Place them in a single layer on a baking sheet and freeze for 1 hour, then transfer to a freezer-safe bag or container. To thaw, leave them at room temperature for about 30 minutes. The texture won’t be quite as fresh as day one, but they’re still delicious.
Reheating Method: If your treats have been stored and feel a bit firm, pop them in the microwave for 5-10 seconds. This softens the marshmallow and restores some of the chewy texture. Just don’t overheat them, or they’ll become sticky and messy.
Flavor Development: These treats actually taste better the next day. The marshmallow flavor mellows out, and the cereal absorbs just enough moisture to create a perfect balance of textures. I often make them a day ahead for this reason.
Nutritional Information & Benefits
I’ll be honest—these are a treat, not a health food. But that doesn’t mean they can’t fit into a balanced lifestyle. Here’s a rough estimate per serving (based on 24 treats):
| Nutrient | Amount per Serving |
|---|---|
| Calories | 145 |
| Total Fat | 4g |
| Saturated Fat | 2.5g |
| Carbohydrates | 27g |
| Sugar | 14g |
| Protein | 1g |
| Sodium | 115mg |
Health Benefits of Key Ingredients: Rice Krispies are made from rice, which is a gluten-free grain and provides quick energy. Marshmallows contain gelatin, which has some protein, but let’s be real—we’re here for the taste. The butter adds a small amount of vitamin A and healthy fats. If you want to boost the nutritional profile, you can add a handful of chopped nuts or seeds to the mixture before pressing it into the pan.
Dietary Considerations: This recipe is naturally nut-free (check your candy eyeballs for nut warnings) and can be made gluten-free and vegan with simple substitutions. It contains dairy from the butter and white chocolate, but you can use dairy-free alternatives. The main allergen to watch for is milk in the white chocolate and butter.
My Personal Perspective: I believe in enjoying treats in moderation. These are perfect for special occasions like Halloween, birthday parties, or holiday gatherings. They bring joy and nostalgia, and sometimes that’s exactly what we need. Plus, making them with kids is a wonderful way to create memories—the mess is worth it for the smiles.
Conclusion
These Easy Monster Eyeball Rice Krispie Treats are more than just a Halloween dessert—they’re a little piece of childhood magic that you can create in your own kitchen. They’re quick, simple, and guaranteed to bring smiles to faces of all ages. Whether you’re hosting a spooky party, looking for a fun activity with the kids, or just want to treat yourself to something sweet and nostalgic, this recipe is your answer.
I encourage you to make these your own. Add your favorite colors, experiment with different candy decorations, or try one of the variations I shared. The best recipes are the ones that evolve with you. And honestly, there’s nothing quite like the feeling of watching someone’s face light up when they see those creepy eyeballs staring back at them from a plate of homemade treats.
I’d love to hear how yours turn out! Drop a comment below and let me know if you tried any fun variations or if these became a hit at your Halloween party. Don’t forget to share this recipe with your friends—spooky season is better when we all get to enjoy it together. Happy Halloween, and happy snacking!
Frequently Asked Questions
Can I use mini marshmallows instead of large ones?
Absolutely! Mini marshmallows actually melt faster and more evenly, which makes the process smoother. If you’re using mini marshmallows, you’ll need about 6 cups (which is roughly the same weight as 10 ounces). Just keep an eye on them as they melt—they can go from melted to scorched quickly.
How do I keep the eyeballs from falling off?
The key is using melted white chocolate as the “glue” and pressing the eyeballs onto the treats while they’re still slightly warm. The warmth helps the chocolate adhere better. Also, make sure the back of the candy eyeball is flat—some have a rounded back that doesn’t stick as well. If you’re having trouble, add a little more melted chocolate to create a stronger bond.
Can I make these ahead of time?
Yes! These treats are perfect for making a day or two in advance. Store them in an airtight container at room temperature, and they’ll stay fresh for up to 3 days. In fact, I think they taste even better the next day because the flavors have time to meld together. Just wait to attach the eyeballs until the day you plan to serve them, or the white chocolate might soften and slide off.
What if I don’t have candy eyeballs?
No problem! You can use M&Ms, chocolate chips, or even small candies like Skittles to create a fun monster face. For a quick alternative, use a tube of black decorating gel to draw eyes directly onto the treats. It won’t look as polished, but kids will still love the spooky effect. I’ve even used halved grapes in a pinch—just be aware they’ll make the treats soggy if left out too long.
How do I prevent the treats from getting too hard?
The secret is not overcooking the marshmallows. Once they’re fully melted and smooth, remove the pot from the heat immediately. Also, don’t press the mixture into the pan too firmly—gentle pressure is all you need. Over-pressing makes the treats dense and hard. Finally, store them in an airtight container to keep them soft and chewy.
Pin This Recipe!
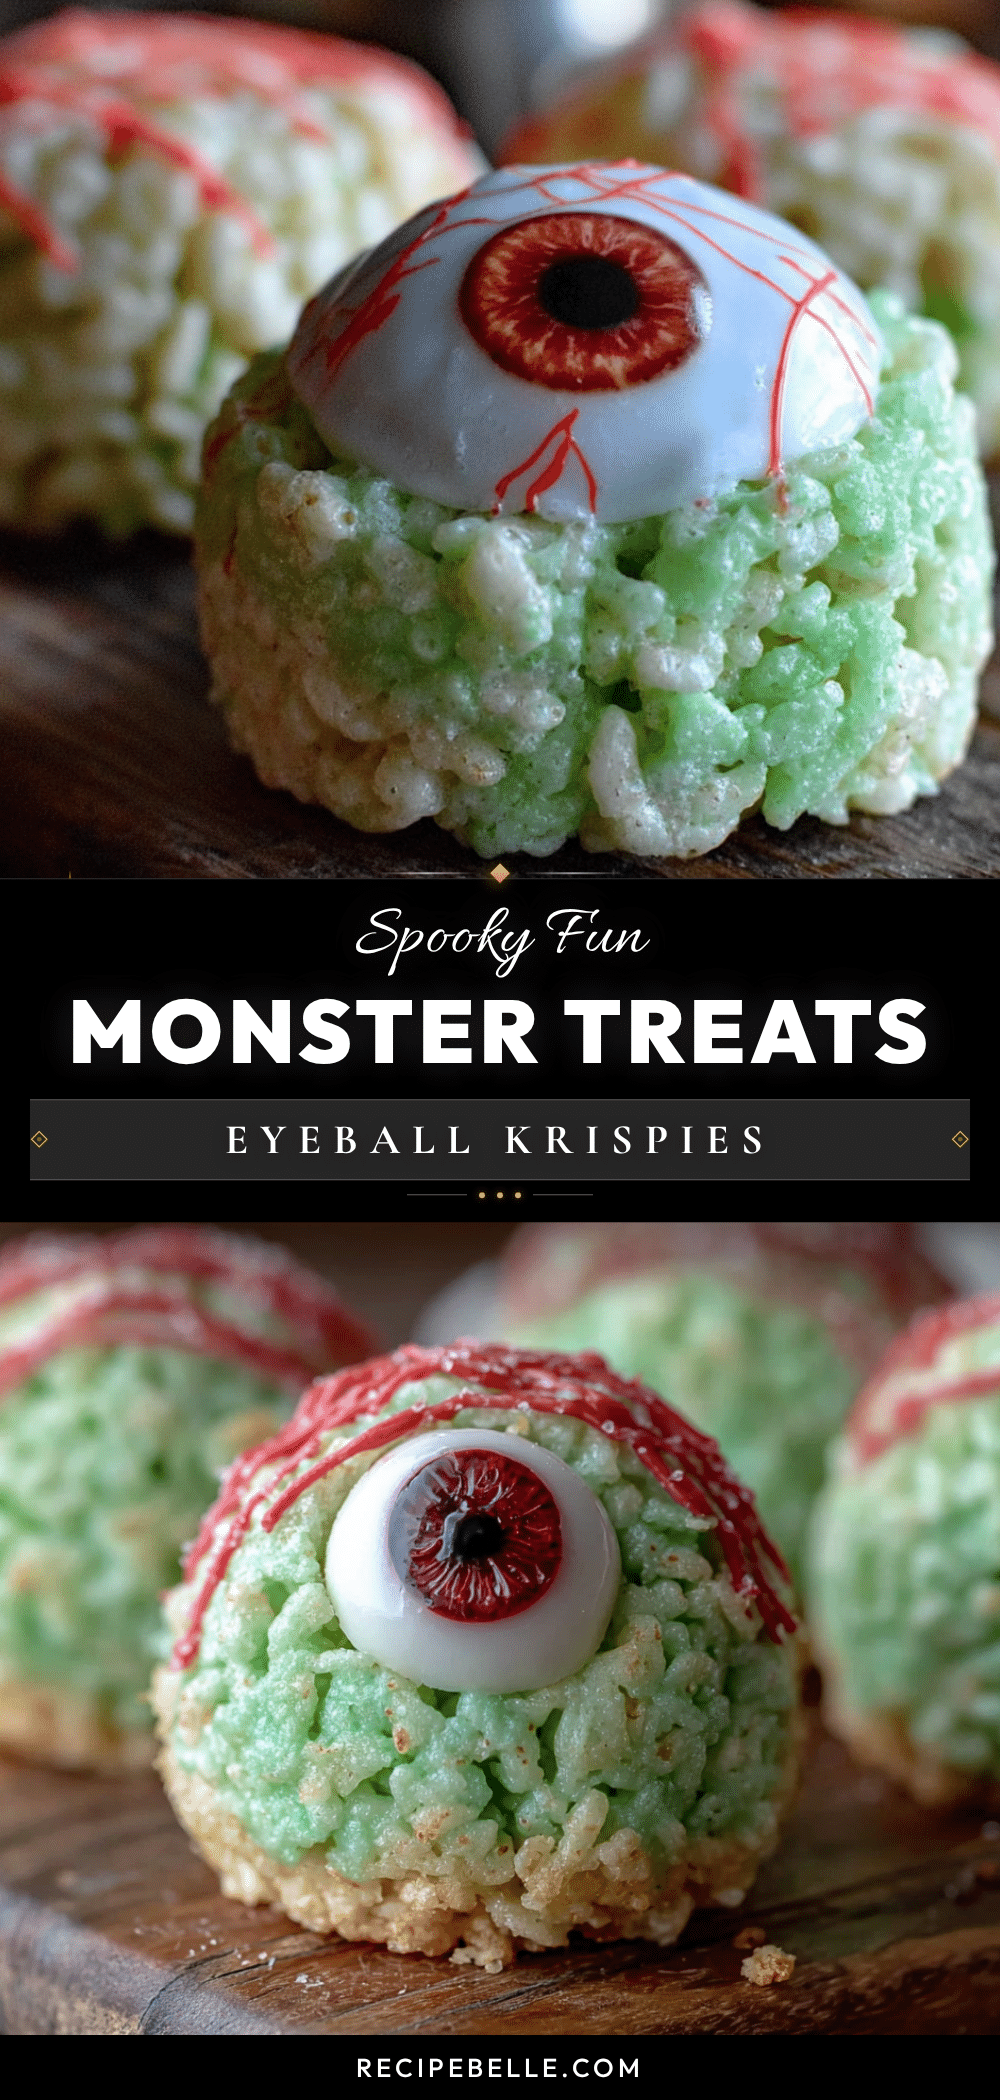
Easy Monster Eyeball Rice Krispie Treats: Best Halloween Dessert
These Easy Monster Eyeball Rice Krispie Treats are a quick and fun Halloween dessert that combines the nostalgic crunch of Rice Krispies with spooky candy eyeballs. Perfect for parties, they come together in under 20 minutes with simple pantry ingredients.
- Prep Time: 10 minutes
- Cook Time: 10 minutes
- Total Time: 20 minutes
- Yield: 24 servings 1x
- Category: Dessert
- Cuisine: American
Ingredients
- 6 cups Rice Krispies cereal
- 10 oz (about 40 large) marshmallows, regular or mini
- 3 tablespoons unsalted butter, cut into small pieces
- 1/4 teaspoon salt
- 1 teaspoon vanilla extract (optional)
- 1/2 cup candy eyeballs
- 1/4 cup white chocolate chips or candy melts
- 1 tablespoon coconut oil or vegetable shortening
- Green or purple food coloring (optional)
Instructions
- Line a 9×13-inch baking pan with parchment paper, leaving overhang on two sides. Lightly grease the parchment with butter or cooking spray.
- In a large pot over medium-low heat, melt 3 tablespoons of butter. Add 10 oz marshmallows and 1/4 teaspoon salt. Stir constantly until completely melted and smooth, about 5 minutes. Remove from heat immediately.
- If using, stir in 1 teaspoon vanilla extract. Add 6 cups Rice Krispies cereal and fold gently until all cereal is coated. Work quickly.
- Transfer the mixture to the prepared pan. Using greased wax paper or a spatula, press evenly into the pan without pressing too hard. Let cool for 10 minutes.
- In a small microwave-safe bowl, combine 1/4 cup white chocolate chips and 1 tablespoon coconut oil. Microwave in 20-second intervals, stirring between, until melted and smooth (about 60 seconds total).
- Using a toothpick or small spoon, dab a tiny amount of melted white chocolate onto the back of each candy eyeball. Press gently onto the surface of the still-warm treats in a random pattern. Work quickly.
- Let the treats cool completely at room temperature, about 30 minutes, until the white chocolate hardens.
- Use the parchment overhang to lift the block out of the pan. Cut into 2-inch squares (about 24 treats) using a sharp knife, wiping the blade clean between cuts. Serve immediately or store.
Notes
Don’t overcook the marshmallows or the treats will become hard. Use room temperature butter and marshmallows for even melting. Grease your hands with butter or cooking spray if pressing the mixture by hand. The treats taste even better the next day. Store in an airtight container at room temperature for up to 3 days; do not refrigerate. Freeze for up to 2 months.
Nutrition
- Serving Size: 1 treat (2-inch squa
- Calories: 145
- Sugar: 14
- Sodium: 115
- Fat: 4
- Saturated Fat: 2.5
- Carbohydrates: 27
- Protein: 1
Keywords: Halloween, Rice Krispie treats, monster eyeball, easy dessert, no-bake, kid-friendly, spooky treats



