Louise wasn’t trying to impress anyone. I’d stopped by her place to grab a garden stake I’d lent her last spring, and the smell hit me before I even got past the screen door. Something warm, something with cinnamon and butter and something sweet that made my stomach actually growl. She looked up from the counter, flour on her cheek, and just said, “Oh, it’s just that apple bread I throw together when the apples start going soft.”
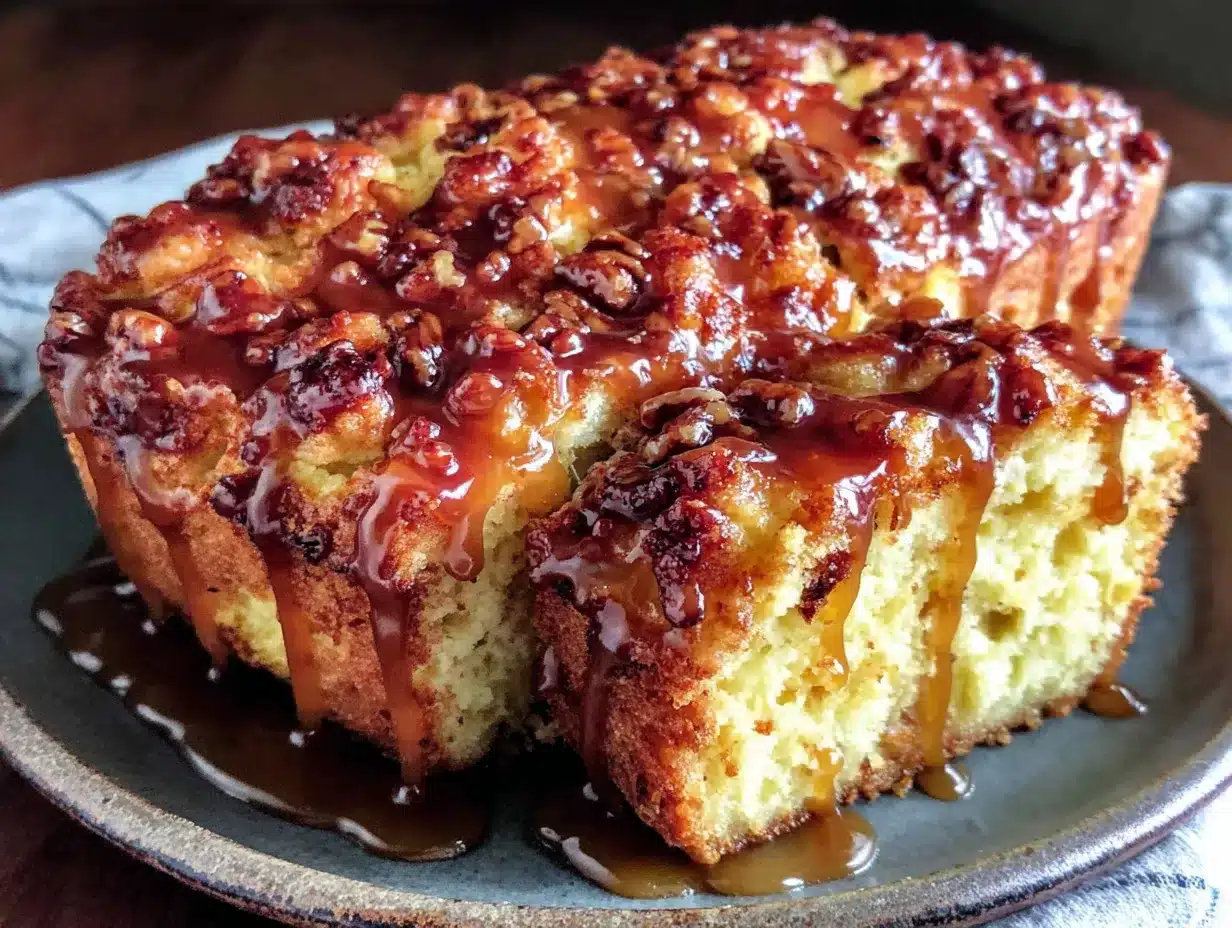
Just apple bread. That’s what she called it. But let me tell you, there was nothing “just” about it. The loaf was sitting on the wire rack, still warm, with this gorgeous maple glaze dripping down the sides in thick, uneven streaks. She cut me a slice without asking, and I bit into it right there in her kitchen—standing up, no plate, just a paper towel underneath. And honestly? I almost said something embarrassing out loud. The texture was perfect, not too dense, not too crumbly, with soft chunks of apple that had basically melted into the batter. And that maple glaze on top? It wasn’t just sweet—it had this deep, almost buttery flavor that made you close your eyes for a second.
Louise just shrugged and said she’d been making it for years. She couldn’t even remember where she got the recipe. Maybe you’ve been there, standing in someone else’s kitchen, eating something they think is completely ordinary, and you just know you’re going to be thinking about it for days. That was me. I asked for the recipe before I left, and she scribbled it on a sticky note while I held the garden stake under my arm. I’ve made it maybe a dozen times since then, tweaking it just a little, and now it’s the thing I bring to every fall gathering, every Sunday brunch, every time I need something that feels like a hug.
Why You’ll Love This Recipe
This Easy Maple Glazed Apple Fritter Bread is the kind of recipe that makes you look like you spent hours in the kitchen when you really didn’t. I’ve tested this thing inside and out, and here’s why it works so well for busy people who still want something special.
- Quick & Easy: From start to finish, you’re looking at about an hour. Most of that is baking time, so you can unload the dishwasher or just sit down for a minute while your kitchen starts smelling amazing.
- Simple Ingredients: You probably have most of this stuff already. Apples, flour, sugar, butter, eggs, maple syrup. Nothing weird, nothing that requires a special trip to some fancy grocery store.
- Perfect for Weeknights: This isn’t a “save it for Sunday” recipe. You can make this on a Tuesday after work and still have time to eat dinner at a normal hour. It’s that fast.
- Crowd-Pleaser: I’ve brought this to work, to family dinners, to neighbor hangouts. Every single time, someone asks for the recipe. Kids love it, adults love it, even people who say they don’t like sweets love it.
- Unbelievably Delicious: The combination of soft, tender bread, sweet apple chunks, and that thick maple glaze is honestly next-level. It’s comfort food that doesn’t weigh you down.
What makes this different from all the other apple breads out there? It’s the texture. Most apple breads come out either too dry or too wet. This one hits that sweet spot where the bread is moist but not soggy, with little pockets of soft apple that almost melt into the crumb. And that maple glaze isn’t just a drizzle—it’s a proper thick glaze that soaks into the top of the bread just enough to make every bite special. This isn’t just another version. It’s the version you’ll come back to.
I mean, honestly, this is the kind of bread that makes you close your eyes after the first bite. It’s comfort food reimagined—simpler, faster, but with the same soul-soothing satisfaction that makes you want to curl up on the couch with a second slice and a hot cup of coffee.
What Ingredients You Will Need
This recipe uses simple, wholesome ingredients to deliver bold flavor and satisfying texture without the fuss. Most of these are pantry staples, so you can probably make this right now without a grocery run.
For the Apple Fritter Bread
- All-purpose flour, 2 cups (240g) — gives the bread structure without making it heavy
- Granulated sugar, 3/4 cup (150g) — just enough sweetness to balance the tart apples
- Brown sugar, 1/2 cup (100g), packed — adds moisture and a deeper, caramel-like flavor
- Baking powder, 2 teaspoons — helps the bread rise nice and tall
- Salt, 1/2 teaspoon — brings out all the flavors
- Ground cinnamon, 2 teaspoons — because apple and cinnamon are best friends
- Unsalted butter, 1/2 cup (113g), melted — I use Land O’Lakes, but any good butter works
- Large eggs, 2, room temperature — helps everything bind together smoothly
- Vanilla extract, 1 teaspoon — pure vanilla, not imitation, if you can swing it
- Buttermilk, 1/2 cup (120ml) — makes the bread incredibly tender; you can substitute with regular milk plus 1 teaspoon lemon juice
- Apples, 2 medium, peeled and diced — I prefer Granny Smith for tartness, but Honeycrisp or Fuji work great too
For the Maple Glaze
- Powdered sugar, 1 cup (120g), sifted — gives the glaze that smooth, thick texture
- Pure maple syrup, 3 tablespoons — use the real stuff, not pancake syrup; Grade A dark amber is my go-to
- Milk, 1-2 tablespoons — just enough to get the right drizzling consistency
- Vanilla extract, 1/2 teaspoon — rounds out the maple flavor nicely
For the apples, look for ones that are firm and not mealy. If you’re using a sweeter apple like Gala or Fuji, you might want to cut back on the sugar just a touch, but honestly, it’s fine either way. You can also leave the peel on if you’re feeling lazy—it adds a little color and texture, and nobody will complain.
If you don’t have buttermilk, just put a teaspoon of lemon juice or white vinegar in a measuring cup, fill it to the half-cup line with regular milk, and let it sit for five minutes. Works like a charm every time.
Equipment Needed
You don’t need a fancy kitchen to make this bread. Here’s what you’ll need:
- 9×5-inch loaf pan — standard size works perfectly; if you only have an 8×4, just bake it a few minutes longer
- Parchment paper — makes lifting the bread out so much easier, and cleanup is a breeze
- Mixing bowls — one large, one medium
- Whisk — for combining dry ingredients
- Rubber spatula — for folding everything together without overmixing
- Measuring cups and spoons — accuracy matters, especially with the flour
- Chef’s knife and cutting board — for dicing those apples
- Cooling rack — helps the bread cool evenly so the glaze doesn’t just slide off
- Small saucepan or microwave-safe bowl — for melting butter
If you don’t have a cooling rack, you can just use the rack from your oven, or even a couple of chopsticks laid across a baking sheet. I’ve done that in a pinch and it works fine. Also, if you don’t have parchment paper, just grease the pan really well with butter and dust it with flour. It’s a little messier, but the bread will still come out.
Preparation Method
Alright, let’s get to it. Here’s how to make this Easy Maple Glazed Apple Fritter Bread, step by step.
- Preheat your oven to 350°F (175°C). While it’s heating up, line your 9×5-inch loaf pan with parchment paper, leaving some overhang on the long sides. This makes lifting the bread out later super easy. If you’re not using parchment, grease the pan well with butter and dust it with flour, tapping out the excess.
- Peel and dice your apples. You want them in small cubes, about half an inch each. Not too big or they’ll sink to the bottom, not too small or they’ll disappear into the batter. I usually do this while the oven is preheating. Set the diced apples aside in a small bowl and toss them with about a tablespoon of flour—this helps keep them suspended in the batter instead of sinking.
- Mix the dry ingredients. In a large bowl, whisk together the all-purpose flour, granulated sugar, brown sugar, baking powder, salt, and cinnamon. Make sure everything is evenly distributed. I sometimes give it an extra whisk just to break up any brown sugar clumps.
- Mix the wet ingredients. In a separate medium bowl, whisk together the melted butter (make sure it’s not too hot), eggs, vanilla extract, and buttermilk. Whisk until everything is smooth and well combined. The mixture should look pale and a little creamy.
- Combine wet and dry. Pour the wet ingredients into the dry ingredients and stir with a rubber spatula until just combined. Do not overmix—a few lumps are totally fine. Overmixing will make the bread tough, and nobody wants tough bread. Fold gently until you don’t see any more dry flour.
- Fold in the apples. Add the diced apples to the batter and fold them in gently. Make sure they’re evenly distributed throughout the batter. The batter will be thick, almost like a muffin batter, which is exactly what you want.
- Pour the batter into the prepared loaf pan. Use your spatula to spread it evenly, making sure it reaches all the corners. Give the pan a gentle tap on the counter to release any air bubbles.
- Bake for 50-60 minutes. Place the pan in the center of the oven and bake until the top is golden brown and a toothpick inserted into the center comes out clean or with just a few moist crumbs. If the top is browning too quickly (around the 40-minute mark), tent the pan loosely with aluminum foil.
- Cool in the pan. Let the bread cool in the pan on a wire rack for about 15 minutes. Then use the parchment overhang to lift it out and transfer it to the rack to cool completely. Don’t rush this—if you glaze it while it’s still warm, the glaze will just melt and run off.
- Make the maple glaze. While the bread is cooling, make the glaze. In a small bowl, whisk together the sifted powdered sugar, maple syrup, vanilla extract, and 1 tablespoon of milk. Whisk until smooth. If it’s too thick, add another tablespoon of milk. If it’s too thin, add a little more powdered sugar. You want it thick enough to coat the back of a spoon but still pourable.
- Glaze the bread. Once the bread is completely cool, pour the maple glaze over the top. Use a spoon or spatula to spread it evenly, letting it drip down the sides naturally. Let the glaze set for about 10 minutes before slicing.
- Slice and serve. Use a serrated knife for clean slices. Wipe the knife between cuts for the prettiest presentation.
A quick note: If your apples are really juicy, you might get a little extra moisture in the batter. That’s okay—just bake it a few minutes longer if needed. The bread is done when the edges pull away from the pan slightly and the top springs back when you touch it.
Cooking Tips & Techniques
I’ve made this bread more times than I can count, and I’ve learned a few things along the way. Here are some tips to help you get it right the first time.
Don’t overmix the batter. This is probably the most common mistake. Mix until the flour just disappears, then stop. Overmixing develops the gluten and makes the bread dense and rubbery. A few lumps are your friend.
Room temperature ingredients matter. Cold eggs and cold buttermilk will seize up the melted butter and give you a lumpy batter. Take them out of the fridge about 30 minutes before you start. If you forgot, you can put the eggs in a bowl of warm water for 5 minutes and microwave the buttermilk for about 10 seconds.
Use a kitchen scale if you have one. Measuring flour by volume can be inconsistent. One cup can be anywhere from 120 to 150 grams depending on how you scoop it. A scale gives you consistent results every time. If you’re using measuring cups, spoon the flour into the cup and level it off with a knife—don’t scoop directly from the bag.
Check for doneness early. Ovens vary, so start checking at the 50-minute mark. Insert a toothpick into the center. If it comes out clean or with just a few moist crumbs, it’s done. If it’s still wet, give it another 5 minutes and check again.
Let it cool completely before glazing. I know it’s tempting, but warm bread will turn that beautiful maple glaze into a puddle. Patience pays off here. If you’re in a hurry, you can pop the bread in the fridge for 15 minutes to speed up the cooling process.
Use real maple syrup. I learned this the hard way. Pancake syrup is mostly corn syrup and artificial flavoring. It makes the glaze taste weird and overly sweet. Real maple syrup gives you that deep, complex flavor that makes this bread special. Grade A dark amber has the strongest maple flavor, which I prefer.
One time I forgot to add the sugar. I know, right? The bread came out tasting like a bland biscuit. I ended up crumbling it into a bowl and pouring warm maple syrup over it like a makeshift bread pudding. It was actually pretty good, but definitely not the same. So double-check your ingredients before you start mixing.
Variations & Adaptations
This recipe is pretty forgiving, so feel free to play around with it. Here are some variations I’ve tried and loved.
Gluten-Free Version
Substitute the all-purpose flour with a good 1:1 gluten-free flour blend that contains xanthan gum. I’ve used Bob’s Red Mill and King Arthur with great results. The texture will be slightly more tender, but the flavor is still amazing. Add an extra tablespoon of buttermilk if the batter seems too thick.
Dairy-Free Version
Use melted coconut oil or a plant-based butter instead of regular butter. For the buttermilk, mix 1/2 cup of unsweetened almond milk or oat milk with 1 teaspoon of lemon juice and let it sit for 5 minutes. The glaze can be made with a dairy-free milk like oat milk or coconut milk. It works perfectly.
Spiced-Up Version
Add 1/2 teaspoon of ground nutmeg, 1/4 teaspoon of ground cloves, and a pinch of ground ginger to the dry ingredients. This gives the bread a warm, chai-like flavor that’s incredible in the fall. I made this version for Thanksgiving one year and it disappeared before the turkey even hit the table.
Nutty Version
Fold in 1/2 cup of chopped pecans or walnuts along with the apples. Toast the nuts first in a dry skillet for about 3 minutes to bring out their flavor. The crunch adds a nice contrast to the soft bread. I’ve also sprinkled extra nuts on top of the glaze for presentation.
Caramel Apple Version
Swap the maple glaze for a homemade caramel sauce. You can make one by melting 1/2 cup of brown sugar with 2 tablespoons of butter and 1/4 cup of heavy cream. Drizzle it over the cooled bread and sprinkle with a little sea salt. It’s over-the-top in the best way.
If you’re feeling adventurous, try using pears instead of apples. They’re a little softer, so dice them slightly larger. The maple glaze pairs beautifully with pears too. I did this once when I had pears that were about to go bad, and it was a happy accident.
Serving & Storage Suggestions
This bread is amazing served warm or at room temperature. If you want to warm it up, pop a slice in the microwave for about 15 seconds, or toast it lightly in a toaster oven. The glaze gets a little melty, and the edges get slightly crisp. It’s pure heaven with a pat of butter on top.
For serving, I like to arrange the slices on a wooden board or a simple white plate. A dusting of powdered sugar and a few fresh apple slices on the side make it look fancy without any extra effort. It’s perfect for brunch, coffee breaks, or dessert after a simple weeknight dinner.
Complementary Pairings: This bread loves a hot cup of coffee or a mug of spiced chai. For a more indulgent treat, serve it with a scoop of vanilla ice cream or a dollop of whipped cream. It also goes great with a glass of cold milk—especially if you’re serving it to kids.
Storage: Store the bread in an airtight container at room temperature for up to 3 days. The glaze will stay shiny and beautiful. If your kitchen is warm, you can store it in the fridge, but bring it to room temperature before serving for the best texture.
Freezing: This bread freezes beautifully. Wrap the unglazed loaf tightly in plastic wrap, then in a layer of aluminum foil. Freeze for up to 3 months. When you’re ready to eat it, thaw it overnight in the fridge, then bring it to room temperature. Make the glaze fresh and pour it over the thawed bread. It tastes just like the day you baked it.
Make-Ahead Tip: You can prep the dry ingredients and the diced apples (toss them with lemon juice to prevent browning) the night before. In the morning, just mix the wet ingredients, combine everything, and bake. Fresh bread for breakfast with minimal morning effort.
The flavors actually develop over time. Day two is even better than day one, in my opinion. The maple glaze soaks into the top layer of the bread just a little, and the apple flavor gets more pronounced. If you can resist eating it all on day one, you’re in for a treat.
Nutritional Information & Benefits
Here’s the approximate nutritional breakdown for one slice of this Easy Maple Glazed Apple Fritter Bread (based on 10 slices):
| Nutrient | Amount Per Slice |
|---|---|
| Calories | 290 |
| Total Fat | 12g |
| Saturated Fat | 7g |
| Cholesterol | 55mg |
| Sodium | 210mg |
| Total Carbohydrates | 43g |
| Dietary Fiber | 2g |
| Sugars | 26g |
| Protein | 4g |
This bread isn’t health food, but it does have some redeeming qualities. The apples provide a good dose of fiber and vitamin C, especially if you leave the peel on. Cinnamon has anti-inflammatory properties and can help regulate blood sugar. And real maple syrup contains antioxidants and minerals like zinc and manganese.
If you’re watching your sugar intake, you can reduce the granulated sugar to 1/2 cup and use a sugar-free maple syrup for the glaze. The texture will be slightly less tender, but it’s still delicious. For a lower-fat option, substitute half the butter with unsweetened applesauce. It works surprisingly well.
Conclusion
This Easy Maple Glazed Apple Fritter Bread is the kind of recipe that makes you look forward to fall all year long. It’s simple enough for a Tuesday night, special enough for a holiday brunch, and so good that people will think you spent hours on it. The soft, tender crumb, the sweet apple chunks, and that thick maple glaze coming together in one perfect slice—honestly, it doesn’t get much better than this.
I love this recipe because it reminds me of that afternoon at Louise’s house, standing in her kitchen, eating something she thought was nothing special. But it was special. It was the kind of food that makes you feel taken care of, even if you’re the one who baked it. And now it’s the recipe I turn to when I need that feeling again.
So go ahead and make it. Use whatever apples you have, don’t stress about the glaze being perfect, and eat a slice while it’s still warm. You deserve it. And when you do make it, come back and tell me how it turned out. I’d love to hear about your version, your tweaks, and your own little story of how this bread found its way into your kitchen.
Happy baking, friends!
Frequently Asked Questions
Can I use a different type of apple?
Absolutely. Granny Smith is my go-to for its tartness, but Honeycrisp, Fuji, Gala, or Braeburn all work great. Sweeter apples will make the bread a little sweeter, but it’s still delicious. Just avoid Red Delicious—they tend to get mealy when baked.
Can I make this without a loaf pan?
Yes! You can bake the batter in a 9-inch round cake pan or an 8×8 square pan. Just adjust the baking time—start checking at 35 minutes. You can also make muffins with this batter. Fill a muffin tin about 3/4 full and bake for 18-22 minutes. The glaze drizzled over muffins is amazing.
Why did my bread sink in the middle?
This usually happens for one of two reasons: the batter was overmixed, or the oven door was opened too often during baking. Overmixing creates too much gluten, which can cause the bread to rise quickly and then collapse. Try mixing just until combined, and resist the urge to peek until the 50-minute mark.
Can I skip the glaze?
You can, but I wouldn’t recommend it. The maple glaze is what makes this bread special. Without it, you just have a good apple bread. With it, you have something memorable. That said, if you’re cutting sugar, you can dust the top with powdered sugar and a little cinnamon instead. It’s still good, just not as show-stopping.
How do I know when the bread is done?
Insert a toothpick or a thin knife into the center of the loaf. If it comes out clean or with just a few moist crumbs attached, it’s done. If there’s wet batter on the toothpick, give it another 5-10 minutes. The top should also be golden brown and the edges should be pulling away from the pan slightly. A thermometer inserted into the center should read about 200°F (93°C).
Pin This Recipe!
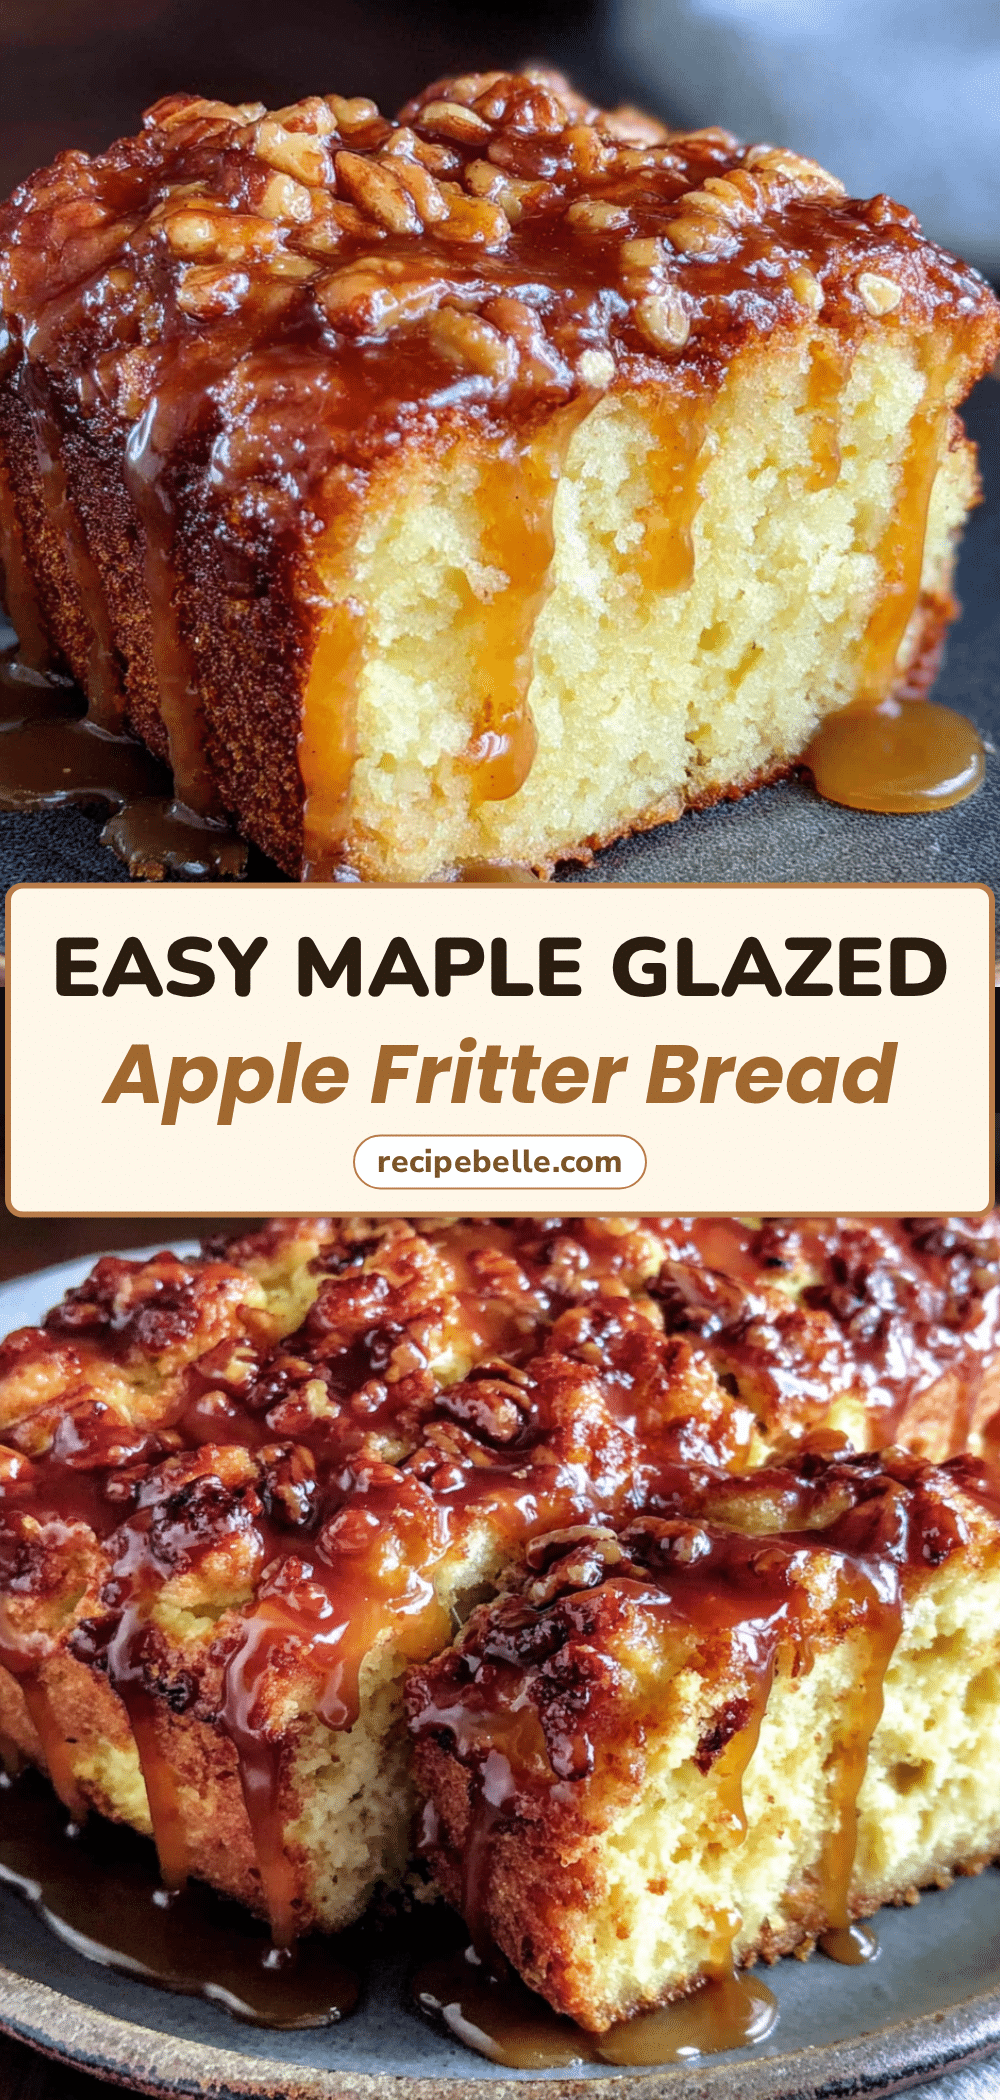
Easy Maple Glazed Apple Fritter Bread
This Easy Maple Glazed Apple Fritter Bread is a simple, quick recipe that delivers a moist, tender loaf with soft apple chunks and a thick, buttery maple glaze. Perfect for weeknights or fall gatherings, it’s comfort food that feels like a hug.
- Prep Time: 15 minutes
- Cook Time: 50-60 minutes
- Total Time: 1 hour 15 minutes
- Yield: 10 servings 1x
- Category: Dessert
- Cuisine: American
Ingredients
- 2 cups (240g) all-purpose flour
- 3/4 cup (150g) granulated sugar
- 1/2 cup (100g) packed brown sugar
- 2 teaspoons baking powder
- 1/2 teaspoon salt
- 2 teaspoons ground cinnamon
- 1/2 cup (113g) unsalted butter, melted
- 2 large eggs, room temperature
- 1 teaspoon vanilla extract
- 1/2 cup (120ml) buttermilk
- 2 medium apples, peeled and diced (Granny Smith, Honeycrisp, or Fuji)
- 1 cup (120g) powdered sugar, sifted
- 3 tablespoons pure maple syrup
- 1–2 tablespoons milk
- 1/2 teaspoon vanilla extract
Instructions
- Preheat your oven to 350°F (175°C). Line a 9×5-inch loaf pan with parchment paper, leaving overhang on the long sides. Alternatively, grease and flour the pan.
- Peel and dice the apples into small cubes (about 1/2 inch). Toss with 1 tablespoon of flour to prevent sinking.
- In a large bowl, whisk together the all-purpose flour, granulated sugar, brown sugar, baking powder, salt, and cinnamon.
- In a separate medium bowl, whisk together the melted butter, eggs, vanilla extract, and buttermilk until smooth and creamy.
- Pour the wet ingredients into the dry ingredients and stir with a rubber spatula until just combined. Do not overmix; a few lumps are fine.
- Fold in the diced apples gently until evenly distributed. The batter will be thick.
- Pour the batter into the prepared loaf pan and spread evenly. Tap the pan gently on the counter to release air bubbles.
- Bake for 50-60 minutes, until the top is golden brown and a toothpick inserted into the center comes out clean or with a few moist crumbs. If browning too quickly, tent with foil at the 40-minute mark.
- Cool the bread in the pan on a wire rack for 15 minutes. Then lift it out using the parchment overhang and cool completely on the rack.
- While the bread cools, make the glaze: In a small bowl, whisk together the sifted powdered sugar, maple syrup, vanilla extract, and 1 tablespoon of milk until smooth. Add more milk if too thick, or more powdered sugar if too thin.
- Once the bread is completely cool, pour the glaze over the top, spreading evenly and letting it drip down the sides. Let set for 10 minutes before slicing.
- Slice with a serrated knife and serve.
Notes
Use real maple syrup for the best flavor. Room temperature ingredients are important for a smooth batter. Do not overmix to avoid a dense bread. Let the bread cool completely before glazing to prevent the glaze from melting off. For a dairy-free version, use plant-based butter and milk with lemon juice. For a gluten-free version, use a 1:1 gluten-free flour blend.
Nutrition
- Serving Size: 1 slice
- Calories: 290
- Sugar: 26
- Sodium: 210
- Fat: 12
- Saturated Fat: 7
- Carbohydrates: 43
- Fiber: 2
- Protein: 4
Keywords: apple fritter bread, maple glazed apple bread, easy apple bread, fall baking, apple dessert, quick bread



