This was supposed to be roasted butternut squash soup. I had the squash cubed, the onions diced, the stock warming on the stove. But somewhere between answering a work email and helping my kid find a missing shoe, I got distracted. The butter went into the pan and sat there a little too long. By the time I looked back, it had turned that deep amber color—not burnt, but definitely past the point of no return for soup. I was already running late for dinner, the kitchen was a mess, and honestly? I almost just ordered pizza. But I tossed the squash in that brown butter anyway, added a splash of maple syrup I found hiding in the back of the fridge, and cranked the heat. What came out was nothing like the plan—and better. The edges were caramelized and crispy, the centers were tender and sweet, and that nutty, toasty butter flavor soaked into every single piece. I stood at the counter eating it straight from the pan, and I knew I’d stumbled onto something I’d be making for years. Maybe you’ve had one of those nights where the recipe you planned just isn’t happening. This one is for those nights.
This quick caramelized maple brown butter squash recipe is exactly what weeknight cooking should be—fast, forgiving, and so good you’ll forget it was an accident. It takes about 25 minutes from start to finish, uses one pan, and turns a humble vegetable into the kind of side dish that steals the show. I’ve made it for Thanksgiving, for random Tuesdays, and for dinner guests who asked for the recipe before they finished their plate. It’s simple enough for a busy parent and impressive enough for company. Let me show you how it’s done.
Why You’ll Love This Recipe
Let me be honest with you—I’ve tested a lot of squash recipes over the years. Some are too fussy, some take forever, and some just don’t deliver on flavor. This one is different. I’ve made it at least two dozen times now, tweaking the timing and the ratios, and I can tell you with confidence that this version is the one. Here’s why it works:
- Quick & Easy: This comes together in under 25 minutes, start to finish. No peeling, no chopping into perfect cubes, no complicated steps. You can have it on the table before the rest of your dinner is even ready.
- Simple Ingredients: You need squash, butter, maple syrup, salt, and pepper. That’s it. No fancy grocery store trips, no obscure spices you’ll never use again.
- Perfect for Weeknights: This is the kind of side dish that makes a simple dinner feel special. Pair it with roasted chicken, pork chops, or even a quick grain bowl, and you’ve got a meal that feels like you tried harder than you did.
- Crowd-Pleaser: I’ve served this to kids who “don’t like squash” and adults who asked for seconds. The caramelized edges and sweet maple flavor win everyone over.
- Unbelievably Delicious: The brown butter adds this deep, nutty richness that you just can’t get any other way. Combined with the caramelized maple coating, every bite is a little piece of fall heaven.
What makes this recipe different from all the other squash recipes out there is the technique. Most recipes roast squash at a low temperature for a long time. This one uses high heat and a hot pan to get those crispy, caramelized edges in minutes. The brown butter isn’t just a flavor—it’s the cooking medium that makes the whole thing work. I’ve tested it with regular butter, and it’s good. But brown butter? That’s the game-changer. This isn’t just another version of roasted squash. It’s the best version.
This recipe is the kind that makes you close your eyes after the first bite. It’s comfort food reimagined—healthier, faster, but with the same soul-soothing satisfaction. Perfect for impressing guests without stress, or turning a simple weeknight meal into something memorable.
What Ingredients You Will Need
This recipe uses simple, wholesome ingredients to deliver bold flavor and satisfying texture without the fuss. Most of these are pantry staples, and the ones that aren’t are easy to find at any grocery store.
- Butternut squash (1 medium, about 2 pounds, peeled, seeded, and cut into 1-inch cubes) – I prefer butternut squash here because it holds its shape well and has that sweet, nutty flavor that pairs perfectly with brown butter. Look for squash that feels heavy for its size with smooth, unblemished skin. You can also use delicata squash (no need to peel!) or acorn squash in a pinch.
- Unsalted butter (3 tablespoons) – This is the star of the show. I use unsalted butter so I can control the salt level. Kerrygold is my go-to brand because it has a higher fat content and browns more evenly, but any good-quality unsalted butter will work. If you only have salted butter, just reduce the added salt by half.
- Pure maple syrup (2 tablespoons) – Please use real maple syrup, not pancake syrup. The flavor is so much richer and more complex. Grade A dark amber is my favorite for this recipe because it has a stronger maple flavor that stands up to the brown butter. If you’re out of maple syrup, honey works in a pinch, but the flavor will be different.
- Kosher salt (½ teaspoon) – I use Diamond Crystal kosher salt. If you’re using fine table salt, reduce to ¼ teaspoon. The salt is crucial here—it balances the sweetness and brings out the nutty flavor of the brown butter.
- Freshly ground black pepper (¼ teaspoon) – Don’t skip this. The pepper adds a subtle warmth that complements the sweetness. I like to use a coarse grind for texture.
- Optional: Fresh thyme or rosemary (1 teaspoon, chopped) – I add this about half the time, depending on my mood. The herbs add an earthy note that makes the squash taste even more complex. If you’re using dried herbs, use about ½ teaspoon and add them with the salt.
- Optional: Pinch of cayenne pepper or red pepper flakes – If you like a little heat, this is a great addition. Just a tiny pinch will do—you want a hint of warmth, not spicy squash.
For the squash, I recommend buying pre-cut cubes from the store if you’re really short on time. They’re not always perfectly uniform, but they work in a pinch. Just know that fresh-cut squash browns more evenly. And if you’re using pre-cut, pat the cubes dry with a paper towel before cooking to remove excess moisture.
Equipment Needed
One of the things I love about this recipe is how little equipment it requires. Here’s what you’ll need:
- Large skillet or frying pan (12-inch, preferably non-stick or cast iron) – A non-stick skillet makes cleanup a breeze, but cast iron gives you better browning. I use my 12-inch cast iron skillet for this recipe because it holds heat well and creates those beautiful caramelized edges. If you only have stainless steel, that works too—just be prepared for a little more sticking, which you can deglaze with a splash of water or broth.
- Sharp chef’s knife – You’ll need this to peel and cube the squash. A dull knife makes this job frustrating and dangerous. I use a 8-inch chef’s knife that I sharpen regularly.
- Vegetable peeler – A good peeler makes quick work of removing the squash skin. I like the Y-shaped peelers for this task.
- Cutting board – Use a large, stable cutting board. I prefer wood, but plastic works fine too.
- Wooden spoon or silicone spatula – For stirring the squash as it cooks. Wooden spoons are gentle on non-stick pans, and silicone spatulas are great for scraping up any browned bits.
- Measuring spoons – For the maple syrup, salt, and pepper. I use metal measuring spoons that I’ve had for years.
- Paper towels – For drying the squash cubes before cooking. This step is important for getting good browning.
If you don’t have a large skillet, you can use a 10-inch skillet, but you’ll need to cook the squash in batches to avoid overcrowding. Overcrowding leads to steaming instead of browning, and you won’t get those crispy edges. Trust me on this one—I learned the hard way.
Preparation Method
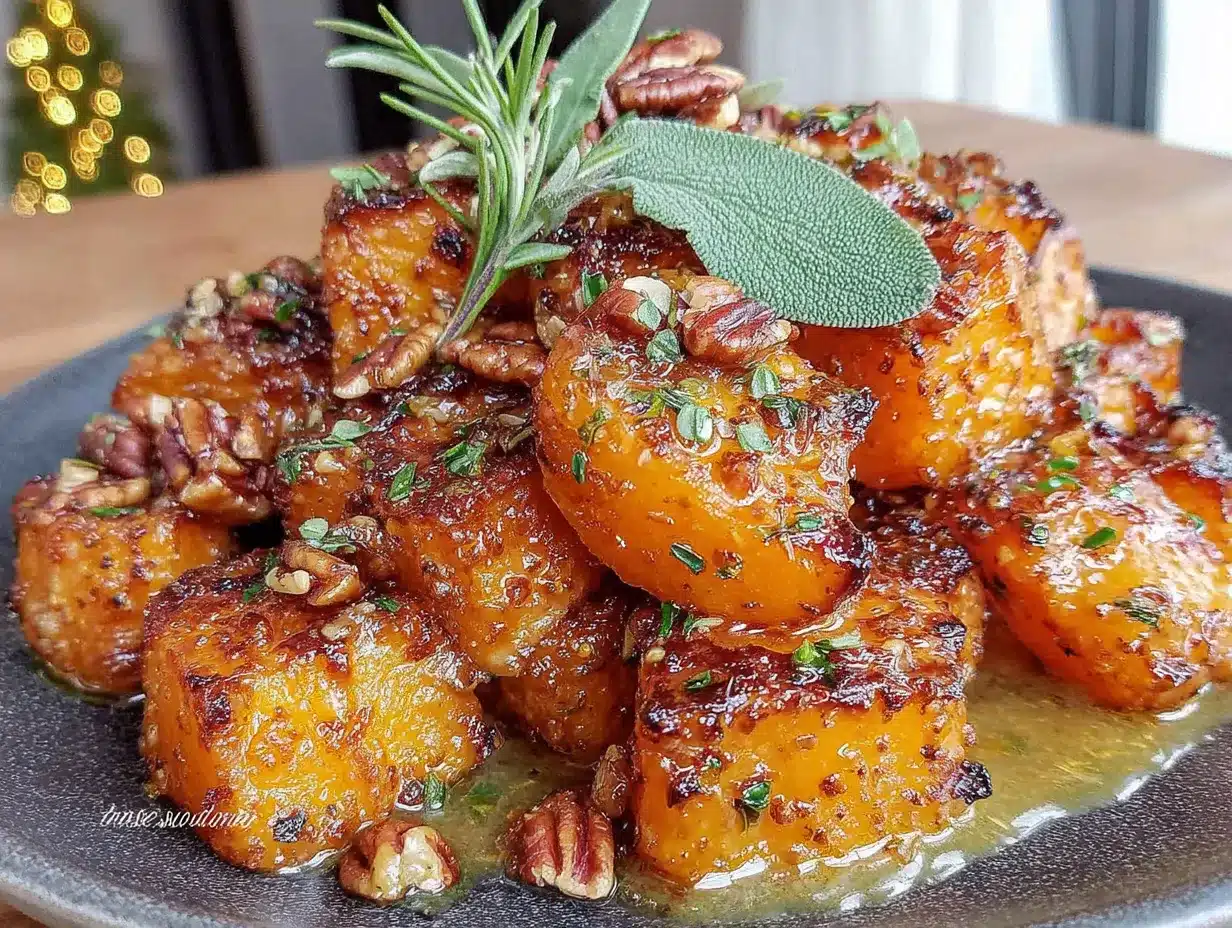
Let me walk you through this step by step. I’ve made this recipe so many times that I’ve got it down to a science, and I’ll share all my little tricks along the way.
- Prep the squash (5 minutes): Start by peeling the butternut squash with a vegetable peeler. Cut off the top and bottom, then slice it in half lengthwise. Scoop out the seeds with a spoon (you can save them for roasting if you want!). Cut the squash into 1-inch cubes. Try to make them as uniform as possible so they cook evenly. Don’t worry about being perfect—I’ve made this with wildly uneven cubes and it still turned out great. Pat the cubes dry with paper towels. This is a step you don’t want to skip. Wet squash won’t brown properly.
- Start the brown butter (3 minutes): Place your large skillet over medium heat. Add the butter and let it melt, swirling the pan occasionally. The butter will start to foam and bubble—that’s normal. Keep swirling until the foam subsides and you see little brown specks forming at the bottom of the pan. The butter will smell nutty and toasty. This usually takes about 2-3 minutes. Watch it carefully—brown butter can go from perfect to burnt in seconds. When it’s done, immediately add the squash cubes to the pan.
- Sear the squash (8-10 minutes): Spread the squash cubes in a single layer in the skillet. Don’t stir them for the first 3 minutes. I know it’s tempting, but let them sit and develop that golden-brown crust. After 3 minutes, give them a good stir and let them cook for another 3 minutes without stirring. Repeat one more time. The squash should be tender when pierced with a fork and have deep caramelized spots on the edges. If your squash is browning too quickly, reduce the heat to medium-low. If it’s not browning enough, crank it up a notch.
- Add the maple syrup (1 minute): Drizzle the maple syrup over the squash and stir to coat. Let it cook for about 1 minute, stirring constantly. The syrup will bubble up and start to caramelize on the squash. This is where the magic happens. The combination of the brown butter and maple syrup creates this incredible glaze that coats every piece.
- Season and finish (1 minute): Sprinkle the salt and pepper over the squash and stir to combine. If you’re using herbs or cayenne, add them now. Taste a piece and adjust the seasoning if needed. I usually add a pinch more salt at this point because I like the contrast with the sweet glaze.
- Serve immediately: Transfer the squash to a serving dish and enjoy it hot. The caramelized edges are at their crispiest right out of the pan, so don’t let it sit around too long.
One thing I’ve learned: if your squash isn’t browning as nicely as you’d like, it might be because the pan is too crowded. Cook it in two batches if you need to. It takes a few extra minutes, but the results are worth it. Also, if you’re using a non-stick pan, you might need to cook the squash a little longer to get the same level of browning as cast iron. Just be patient and let it do its thing.
Cooking Tips & Techniques
I’ve made every mistake in the book with this recipe, so you don’t have to. Here are my best tips for getting it right every time:
Don’t skip drying the squash. This is the number one mistake I see people make. Wet squash steams instead of sears, and you’ll end up with soft, pale cubes instead of crispy, caramelized ones. Pat them dry with paper towels before they hit the pan. I even let them sit on a paper towel-lined plate for a few minutes while I make the brown butter.
Use a hot pan. The pan needs to be hot enough that the squash sizzles when it hits the butter. If the pan isn’t hot enough, the squash will absorb the butter and get greasy instead of crispy. I test by adding one cube of squash to the pan—if it sizzles immediately, I’m good to go.
Don’t overcrowd the pan. This is the second most common mistake. If you pile the squash in, it will steam and you’ll lose all that beautiful browning. Cook in batches if you need to. I’ve done it with a full recipe in one 12-inch skillet, but it’s tight. If your skillet is smaller, definitely do two batches.
Watch the brown butter like a hawk. Brown butter can go from perfect to burnt in about 30 seconds. The moment you see those brown specks and smell that nutty aroma, add the squash immediately. I’ve burned more batches of brown butter than I care to admit. It happens to everyone. If you do burn it, just start over—it’s not worth trying to salvage.
Let the squash sit. I know it’s hard to resist stirring, but letting the squash sit undisturbed for a few minutes is what creates those crispy edges. Stirring too often prevents browning. Set a timer for 3 minutes and walk away. Trust the process.
Timing is everything. I like to start the squash first, then work on the rest of my dinner while it cooks. It takes about 10 minutes of active cooking time, so it’s perfect for multitasking. Just keep an eye on it so it doesn’t burn.
Variations & Adaptations
This recipe is incredibly versatile. Here are some of my favorite ways to change it up:
Spicy Maple Squash: Add ¼ teaspoon of cayenne pepper or a pinch of red pepper flakes along with the salt and pepper. The heat contrasts beautifully with the sweet maple and nutty brown butter. I make this version when I want something with a little kick. My husband loves it, and he’s not usually a fan of sweet-and-spicy combos.
Herb-Infused Brown Butter: Add a sprig of fresh rosemary or a few fresh sage leaves to the butter as it browns. The herbs infuse the butter with their flavor, and you can remove them before adding the squash. I’ve also used fresh thyme, which is more subtle but equally delicious. This version feels extra fancy and is perfect for holiday dinners.
Garlic Lover’s Squash: Add 2-3 minced garlic cloves to the pan during the last minute of browning the squash. The garlic gets fragrant and slightly crispy, adding another layer of flavor. Just be careful not to burn the garlic—it can turn bitter quickly. I add it right before the maple syrup.
Roasted Method Variation: If you prefer to use the oven, toss the squash cubes with melted brown butter and maple syrup, spread them on a baking sheet, and roast at 425°F for 20-25 minutes, flipping halfway through. This method is great for feeding a crowd because you can use multiple baking sheets. The edges won’t be quite as crispy as the stovetop version, but it’s still delicious.
Air Fryer Version: For an even faster version, toss the squash with the brown butter and maple syrup, then cook in an air fryer at 400°F for 12-15 minutes, shaking the basket halfway through. This gives you incredibly crispy edges in less time. I’ve tested this with my air fryer and it works beautifully.
Vegan Adaptation: Substitute the butter with a high-quality vegan butter or coconut oil. The flavor won’t be exactly the same, but it’s still really good. I’ve used Miyoko’s vegan butter and it browns surprisingly well. Use maple syrup as usual.
Seasonal Twist: In the fall, add a pinch of pumpkin pie spice or cinnamon along with the salt. In the summer, swap the maple syrup for honey and add fresh lemon zest at the end. The honey version is brighter and lighter, perfect for a summer side dish.
Serving & Storage Suggestions
This squash is best served hot, straight from the pan. The caramelized edges are at their crispiest right away, and the glaze is glossy and gorgeous. I like to transfer it to a warm serving dish and sprinkle a little flaky sea salt on top for extra crunch. Fresh thyme leaves or chopped parsley make a beautiful garnish if you’re feeling fancy.
This squash pairs beautifully with so many main dishes. It’s a natural match for roasted chicken, pork chops, or steak. I’ve served it alongside a simple roast chicken and it was the star of the plate. It’s also fantastic with grilled salmon or seared scallops. For a vegetarian meal, serve it over a bed of quinoa or farro with a handful of arugula and a drizzle of balsamic glaze. I’ve even added it to salads—it’s amazing with goat cheese, candied pecans, and a simple vinaigrette.
As for beverages, this squash loves a crisp white wine like Sauvignon Blanc or a dry Riesling. For non-alcoholic options, sparkling apple cider or a ginger beer with lime are both excellent choices.
Storage: Leftover squash can be stored in an airtight container in the refrigerator for up to 4 days. The texture will soften as it sits, but the flavor is still amazing. I actually love it cold straight from the fridge—it’s like a sweet, savory snack.
Reheating: The best way to reheat this squash is in a hot skillet over medium-high heat for 2-3 minutes. This helps restore some of the crispy edges. You can also reheat it in the oven at 400°F for 5-7 minutes, or in the air fryer at 375°F for 3-4 minutes. I don’t recommend the microwave—it makes the squash soft and soggy.
Freezing: This squash freezes surprisingly well. Let it cool completely, then transfer to a freezer-safe container or bag. It will keep for up to 3 months. To reheat, thaw in the refrigerator overnight, then reheat in a skillet or oven. The texture won’t be quite as crispy as fresh, but it’s still delicious.
The flavors actually continue to develop as the squash sits. The maple and brown butter meld together even more, and the salt penetrates deeper. I’ve made this a day ahead for Thanksgiving and it was just as good—maybe even better—the next day.
Nutritional Information & Benefits
This recipe is surprisingly nutritious for how decadent it tastes. Here’s the estimated nutritional breakdown per serving (based on 4 servings):
- Calories: 210
- Total Fat: 9g
- Saturated Fat: 5.5g
- Carbohydrates: 34g
- Fiber: 6g
- Sugar: 14g (naturally occurring from squash and maple syrup)
- Protein: 3g
- Vitamin A: 457% of the Daily Value
- Vitamin C: 52% of the Daily Value
- Potassium: 896mg
Butternut squash is packed with vitamin A, which is essential for eye health and immune function. It’s also a great source of fiber, which helps keep you full and supports digestive health. The maple syrup adds natural sweetness without refined sugar, and the brown butter provides a small amount of healthy fats that help your body absorb the fat-soluble vitamins in the squash.
This recipe is naturally gluten-free and can easily be made vegan by swapping the butter. It’s also low in sodium if you watch your salt. The only potential allergen is dairy from the butter, but that’s easily substituted.
I love that this recipe feels indulgent but is actually really good for you. It’s the kind of side dish that makes you feel like you’re treating yourself while still nourishing your body. That’s my favorite kind of cooking.
Conclusion
This quick caramelized maple brown butter squash started as a happy accident, but it’s become one of my most-requested recipes. It’s the perfect example of how a few simple ingredients and a little technique can transform something ordinary into something extraordinary. Whether you’re making it for a busy weeknight dinner or a holiday feast, it never disappoints.
I hope you’ll give this recipe a try. Don’t be afraid to make it your own—add your favorite herbs, adjust the sweetness, or throw in some spice. That’s the beauty of cooking. And if you do make it, I’d love to hear how it turned out. Leave a comment below and let me know if you made any changes, or tag me in your photos on social media. Your feedback helps me create better recipes for all of us.
Thanks for stopping by, and happy cooking! Remember, some of the best recipes come from the moments when things don’t go according to plan. Embrace the accidents—they might just become your favorites.
Frequently Asked Questions
Can I use frozen squash for this recipe?
I don’t recommend frozen squash for this recipe. Frozen squash has a lot of moisture, which will cause it to steam instead of caramelize. If you’re in a pinch, you can thaw and pat it very dry, but fresh squash will give you much better results.
How do I know when the brown butter is done?
Watch for the butter to turn a golden-amber color with brown specks forming at the bottom of the pan. It will smell nutty and toasty. This usually takes 2-3 minutes over medium heat. The moment you see those brown specks and smell that nutty aroma, add the squash immediately to stop the cooking.
Can I make this recipe ahead of time?
Yes! You can make this squash up to 2 days ahead. Store it in an airtight container in the refrigerator, then reheat in a hot skillet for 2-3 minutes to restore some of the crispy edges. The flavor actually gets better as it sits.
What’s the best type of squash to use?
Butternut squash is my favorite for this recipe because it holds its shape well and has a sweet, nutty flavor. Delicata squash is a great alternative because you don’t need to peel it. Acorn squash also works, but it’s a little more fibrous. Avoid spaghetti squash—it doesn’t caramelize well.
Is this recipe suitable for meal prep?
Absolutely. This squash is great for meal prep. Make a batch on Sunday and use it throughout the week in salads, grain bowls, or as a quick side dish. It’s also delicious cold, straight from the fridge, as a snack.
Pin This Recipe!
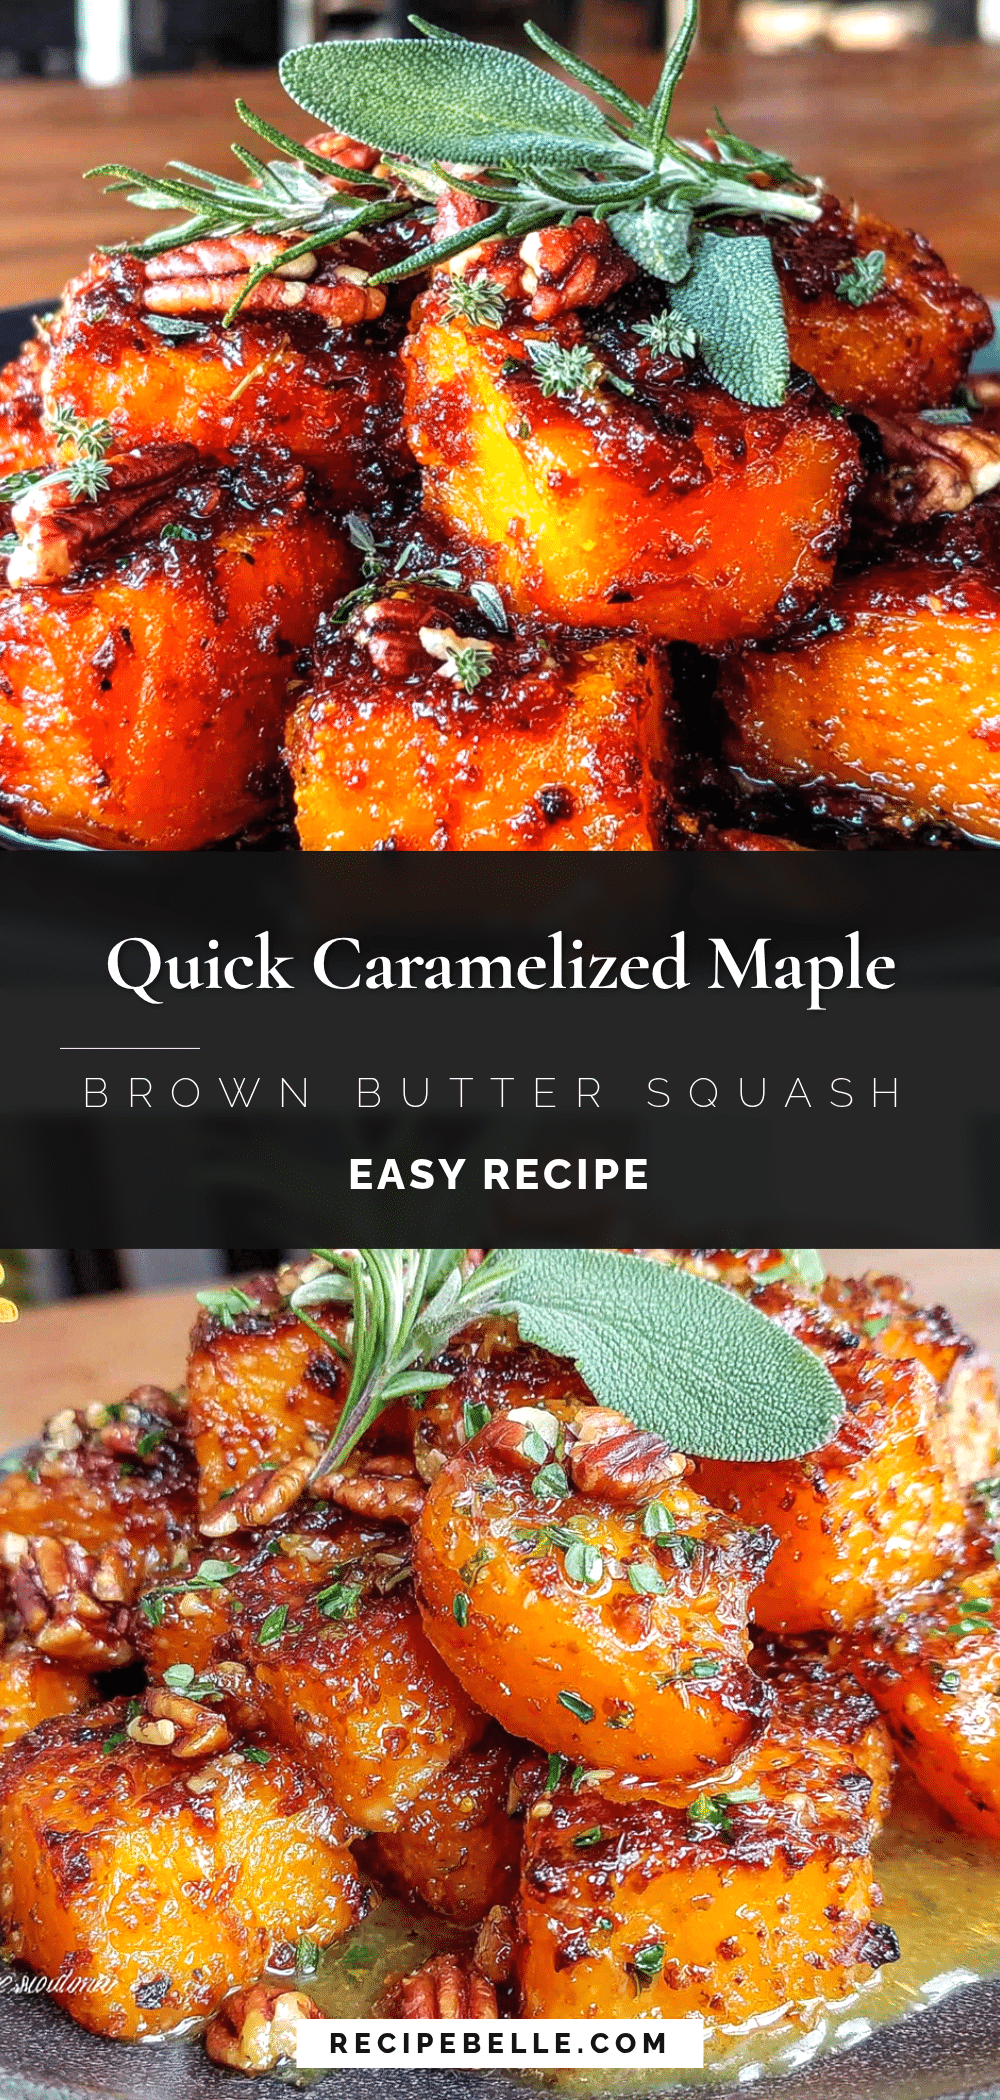
Best Easy Caramelized Maple Brown Butter Squash Recipe
This quick caramelized maple brown butter squash recipe is exactly what weeknight cooking should be—fast, forgiving, and so good you’ll forget it was an accident. It takes about 25 minutes from start to finish, uses one pan, and turns a humble vegetable into the kind of side dish that steals the show.
- Prep Time: 5 minutes
- Cook Time: 15 minutes
- Total Time: 20 minutes
- Yield: 4 servings 1x
- Category: Side Dish
- Cuisine: American
Ingredients
- 1 medium butternut squash (about 2 pounds), peeled, seeded, and cut into 1-inch cubes
- 3 tablespoons unsalted butter
- 2 tablespoons pure maple syrup
- ½ teaspoon kosher salt (use ¼ teaspoon if using fine table salt)
- ¼ teaspoon freshly ground black pepper
- 1 teaspoon fresh thyme or rosemary, chopped (optional)
- Pinch of cayenne pepper or red pepper flakes (optional)
Instructions
- Prep the squash: Peel the butternut squash with a vegetable peeler. Cut off the top and bottom, slice in half lengthwise, and scoop out the seeds. Cut into 1-inch cubes. Pat the cubes dry with paper towels.
- Start the brown butter: Place a large skillet over medium heat. Add the butter and let it melt, swirling occasionally. The butter will foam and bubble. Continue swirling until the foam subsides and brown specks form at the bottom, and it smells nutty and toasty (about 2-3 minutes). Immediately add the squash cubes.
- Sear the squash: Spread the squash in a single layer in the skillet. Do not stir for the first 3 minutes. After 3 minutes, stir and let cook for another 3 minutes without stirring. Repeat one more time until the squash is tender and has deep caramelized spots (total 8-10 minutes).
- Add the maple syrup: Drizzle the maple syrup over the squash and stir to coat. Cook for about 1 minute, stirring constantly, until the syrup bubbles and caramelizes.
- Season and finish: Sprinkle the salt and pepper over the squash and stir. If using herbs or cayenne, add them now. Taste and adjust seasoning if needed.
- Serve immediately: Transfer to a serving dish and enjoy hot, while the caramelized edges are at their crispiest.
Notes
Don’t skip drying the squash—wet squash steams instead of sears. Use a hot pan and don’t overcrowd it. Watch the brown butter carefully as it can go from perfect to burnt in seconds. Let the squash sit undisturbed for a few minutes to develop crispy edges. For best results, serve immediately.
Nutrition
- Serving Size: 1 serving (about 1 c
- Calories: 210
- Sugar: 14
- Sodium: 300
- Fat: 9
- Saturated Fat: 5.5
- Carbohydrates: 34
- Fiber: 6
- Protein: 3
Keywords: caramelized squash, maple brown butter squash, easy squash recipe, butternut squash side dish, quick vegetable side, fall side dish, one-pan squash



