It was 11:47 PM on a rainy Tuesday, and I had a bag of spotty bananas staring at me from the counter. I didn’t have the energy for my usual banana bread routine—you know, the one that requires creaming butter and sugar, then dirtying a second bowl for dry ingredients. But I had a stick of butter I could brown in five minutes and a sudden, stubborn idea: what if I just threw everything into one bowl and let the browned butter do the heavy lifting?
Honestly, I was skeptical. I mean, banana bread is already pretty forgiving, but skipping the whole “mix dry ingredients separately” step felt like tempting fate. But I was tired, the kitchen was warm from the rain, and that little voice in my head said, “Just try it.” So I melted that butter until it smelled like toasted nuts, dumped all the other ingredients into the same bowl, and stirred until it looked like a batter. I poured it into the pan, slid it into the oven, and crossed my fingers.
An hour later, I pulled out the most beautiful loaf I’d ever made. The top was domed and crackled, the edges were perfectly caramelized, and the smell—that nutty browned butter mixed with sweet banana—was absolutely intoxicating. I cut a slice while it was still warm (burned my tongue, totally worth it) and stood there in the dark kitchen, grinning. It was moist, tender, and had this deep, almost butterscotch flavor that regular banana bread just doesn’t have.
Maybe you’ve been there—staring at overripe fruit, too tired for a complicated recipe but craving something homemade. This one-bowl banana bread with browned butter is the answer. It’s the recipe I keep coming back to, rain or shine, because it delivers every single time with almost no effort. And trust me, once you try it, you’ll never go back.
Why You’ll Love This Recipe
Let me tell you why this banana bread is different from every other recipe you’ve seen. I’ve tested this version over a dozen times, tweaking the butter-to-banana ratio and the mixing method until it was absolutely perfect. This isn’t just another banana bread—it’s the one that will become your go-to.
- One Bowl, Zero Fuss: No need to dirty a separate bowl for dry ingredients. Everything comes together in a single mixing bowl, which means less cleanup and more time enjoying your bread. Perfect for those nights when you just can’t face a pile of dishes.
- Browned Butter Magic: This is the secret weapon. Taking just 5 extra minutes to brown the butter transforms the flavor from ordinary to extraordinary. It adds a nutty, caramel-like depth that makes this bread taste like you spent hours on it—even though you didn’t.
- Perfectly Moist Every Time: The combination of browned butter and ripe bananas creates an incredibly tender crumb that stays moist for days. No dry, crumbly banana bread here—just pure, pillowy perfection.
- Simple Pantry Ingredients: You probably already have everything you need. Bananas, butter, sugar, eggs, flour, baking soda, and salt. That’s it. No fancy extracts, no specialty flours, no trips to the store.
- Foolproof for Beginners: If you’ve never made banana bread before, this is the recipe to start with. The one-bowl method is incredibly forgiving, and the browned butter adds a layer of flavor that makes you look like a pro.
This recipe is the kind that makes you close your eyes after the first bite. It’s comfort food reimagined—faster, easier, but with the same soul-soothing satisfaction. Perfect for lazy Sunday mornings, unexpected guests, or those late-night baking urges we all get.
What Ingredients You Will Need
This recipe uses simple, wholesome ingredients to deliver bold flavor and satisfying texture without any fuss. Most of these are pantry staples, which is exactly why this recipe works so well for spontaneous baking sessions.
For the Banana Bread
- Unsalted butter – ½ cup (1 stick / 113g). You’ll be browning this, so don’t use margarine. I prefer using a good quality butter like Kerrygold for the richest flavor, but any unsalted butter works beautifully.
- Ripe bananas – 3 medium, about 1½ cups mashed (360g). The riper, the better. Look for bananas with lots of brown spots—they’re sweeter and easier to mash. If your bananas aren’t ripe enough, you can speed things up by baking them at 300°F for 15 minutes until they’re soft and spotty.
- Granulated sugar – ¾ cup (150g). Regular white sugar works perfectly. You can substitute with coconut sugar for a deeper flavor, but the texture will be slightly denser.
- Large eggs – 2, at room temperature. Room temperature eggs incorporate more easily into the batter, creating a smoother texture. If you forgot to take them out early, place them in a bowl of warm water for 5 minutes.
- Vanilla extract – 1 teaspoon. Pure vanilla extract adds warmth and depth. Imitation vanilla will work in a pinch, but the flavor won’t be as rich.
- All-purpose flour – 1½ cups (190g). Spoon and level your flour for the most accurate measurement—scooping directly from the bag can pack in too much flour and make your bread dry.
- Baking soda – 1 teaspoon. This is our leavening agent. Make sure it’s fresh—test it by dropping a little into vinegar; if it fizzes vigorously, it’s still active.
- Salt – ½ teaspoon. I use fine sea salt. Salt balances the sweetness and enhances all the other flavors.
Optional Add-Ins
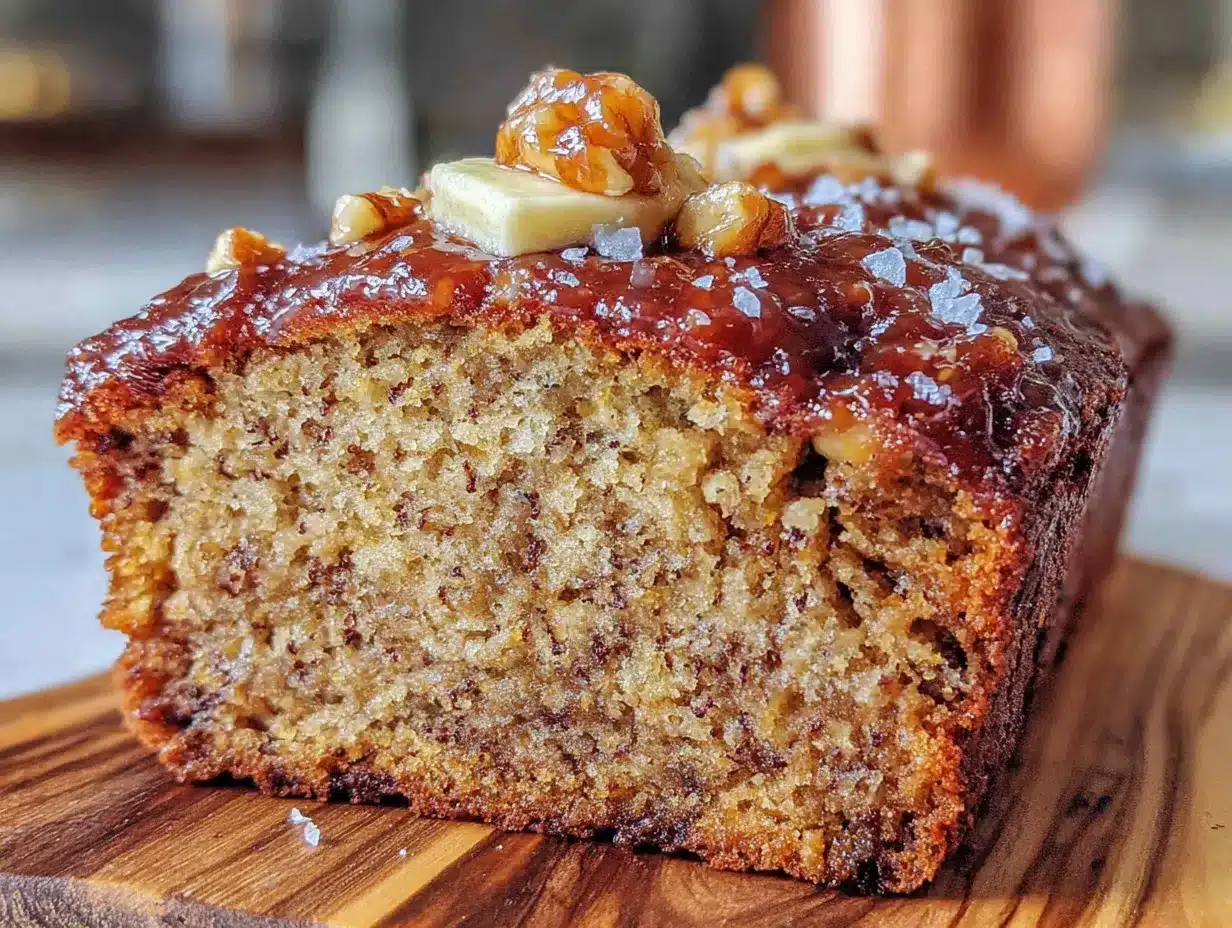
- Chopped walnuts or pecans – ½ cup (60g). Toast them first for extra crunch and flavor. Fold them in at the end with a spatula.
- Chocolate chips – ½ cup (90g). Semi-sweet or dark chocolate chips pair beautifully with the nutty browned butter. I like using mini chips so they distribute more evenly.
- Cinnamon – 1 teaspoon. Adds warmth and complements the bananas perfectly. Add it along with the flour.
For the best results, I recommend using a kitchen scale to weigh your ingredients—it’s more accurate than measuring cups and ensures consistent results every time. But if you don’t have one, the spoon-and-level method works just fine.
Equipment Needed
The beauty of this recipe is that you don’t need any fancy equipment. Here’s what you’ll need:
- One large mixing bowl – Any bowl works, but a wide, shallow bowl makes mixing easier. I use a standard 4-quart ceramic bowl.
- A 9×5-inch loaf pan – This is the standard size for banana bread. If you only have an 8×4-inch pan, your bread will take a few minutes longer to bake and will have a higher dome.
- A whisk and a rubber spatula – The whisk for combining wet ingredients, the spatula for folding in the flour. A wooden spoon works too, but a spatula helps you scrape every bit of batter into the pan.
- A light-colored saucepan – This is crucial for browning the butter. A light-colored pan lets you see the color change as the butter browns. Dark pans make it hard to tell when it’s done, and you might end up with burnt butter.
- Parchment paper – Not strictly necessary, but it makes removing the bread from the pan so much easier. I cut a strip that hangs over the long sides of the pan as handles.
- Cooling rack – Allows air to circulate around the pan, preventing the bottom from getting soggy. If you don’t have one, you can use the grates from your oven—just make sure they’re clean.
If you don’t have a hand mixer or stand mixer, don’t worry—you don’t need one. Everything in this recipe is mixed by hand, which means less equipment and more control over the texture.
Preparation Method
Let’s walk through this step by step. I promise, it’s easier than you think.
- Preheat your oven to 350°F (175°C). Position the rack in the center of the oven. While the oven heats up, line your 9×5-inch loaf pan with parchment paper, leaving a 2-inch overhang on the long sides. Lightly grease the exposed sides with butter or non-stick spray.
- Brown the butter. Place the ½ cup (113g) of unsalted butter in a light-colored saucepan over medium heat. Stir occasionally with a rubber spatula or wooden spoon. After about 3-4 minutes, the butter will start to foam and crackle. Keep stirring—this is when the magic happens. The butter will turn from pale yellow to a golden amber color, and you’ll see tiny brown specks forming at the bottom of the pan. The smell will change from buttery to nutty and toasty. As soon as it reaches a deep amber color (think the color of a penny), remove it from the heat immediately and pour it into your large mixing bowl to stop the cooking process. Let it cool for 5 minutes—you don’t want it hot enough to cook the eggs later.
- Mash the bananas. While the butter cools, peel your 3 ripe bananas and place them in a separate small bowl. Mash them with a fork until they’re mostly smooth with a few small lumps remaining. You want some texture, not baby food. Measure out 1½ cups (360g) of mashed banana and add it to the bowl with the cooled browned butter.
- Mix the wet ingredients. To the bowl with the browned butter and mashed bananas, add ¾ cup (150g) of granulated sugar, 2 large eggs (room temperature), and 1 teaspoon of vanilla extract. Whisk everything together until smooth and well combined. The mixture should look glossy and slightly thick.
- Add the dry ingredients. Directly on top of the wet mixture, add 1½ cups (190g) of all-purpose flour, 1 teaspoon of baking soda, and ½ teaspoon of salt. If you’re using cinnamon or any other spices, add them now. Use a rubber spatula to gently fold the dry ingredients into the wet. Stir just until you no longer see streaks of flour—about 10-12 strokes. A few small lumps are perfectly fine. Overmixing will develop the gluten and make your bread tough, so stop as soon as it comes together.
- Fold in any add-ins. If you’re using nuts, chocolate chips, or both, gently fold them in with the spatula. Don’t overmix—just 3-4 folds to distribute them evenly.
- Pour the batter into the prepared pan. Use your spatula to scrape every last bit of batter into the pan. Smooth the top gently—it doesn’t need to be perfect. The batter will be thick, which is exactly what you want.
- Bake for 50-60 minutes. Place the pan on the center rack and bake until a toothpick inserted into the center comes out clean or with just a few moist crumbs attached. The top should be deep golden brown and cracked. If the top is browning too quickly (after about 40 minutes), tent the pan loosely with aluminum foil.
- Cool in the pan for 10 minutes. This allows the bread to set and makes it easier to remove. After 10 minutes, use the parchment paper handles to lift the bread out of the pan and transfer it to a cooling rack. Let it cool completely before slicing—about 1 hour. I know it’s hard to wait, but slicing too early will result in gummy, crumbly slices.
Pro tip: For the most even rise, let the batter rest in the pan for 10 minutes before baking. This allows the baking soda to start working and gives you a taller, more domed loaf.
Cooking Tips & Techniques
I’ve learned a few things the hard way so you don’t have to. Here are my best tips for perfect banana bread every time.
Don’t skip the browned butter step. I know it adds an extra 5 minutes, but it’s absolutely worth it. The first time I tried this recipe, I was in a hurry and just melted the butter without browning it. The bread was fine, but it was missing that deep, nutty flavor that makes this recipe special. Browning the butter concentrates its flavor and adds complexity that regular melted butter just can’t match.
Watch the butter like a hawk. Butter goes from perfectly browned to burnt very quickly. Once it starts foaming, don’t walk away. Swirl the pan constantly and watch for that amber color. When you see the brown specks forming and smell that nutty aroma, pull it off the heat immediately. Pour it into your mixing bowl right away—the residual heat from the pan can continue to cook the butter if you leave it in the saucepan.
Use overripe bananas. This is non-negotiable. The bananas should be so spotty they almost look brown. Green or yellow bananas won’t give you the same sweetness or moisture. If your bananas aren’t ripe enough, you can bake them at 300°F for 15-20 minutes until they’re soft and the skins have darkened. Let them cool before mashing.
Measure your flour correctly. This is the most common mistake in baking. Scooping your measuring cup directly into the flour bag can pack in up to 25% more flour than intended. Instead, fluff the flour with a spoon, then spoon it into your measuring cup and level it off with a knife. Or better yet, use a kitchen scale for the most accurate results.
Don’t overmix. I can’t stress this enough. Overmixing develops gluten, which makes your banana bread tough and dense. Mix just until the flour disappears. A few lumps are perfectly fine—they’ll disappear during baking.
Check for doneness the right way. A toothpick inserted in the center should come out clean or with a few moist crumbs. If it comes out with wet batter, it needs more time. But here’s the trick: if the top is already deeply browned and the center isn’t done yet, tent the pan with foil and continue baking. This prevents the top from burning while the center finishes cooking.
I once forgot to add the sugar to my banana bread batter. I realized it halfway through baking, and let me tell you, that was a sad loaf of bread. Learn from my mistake—double-check your ingredients before you put the pan in the oven!
Variations & Adaptations
This recipe is wonderfully versatile. Here are some of my favorite variations that I’ve tested and loved.
Gluten-Free Banana Bread
Substitute the all-purpose flour with a 1:1 gluten-free baking flour blend. I’ve had great results with Bob’s Red Mill 1-to-1 Baking Flour. Add 1 teaspoon of xanthan gum if your blend doesn’t already include it. The texture will be slightly more tender, but the flavor is just as amazing.
Vegan Banana Bread
Replace the 2 eggs with 2 flax eggs (2 tablespoons ground flaxseed mixed with 6 tablespoons water, let sit for 5 minutes). Use a vegan butter stick for the browned butter—I like Miyoko’s or Earth Balance. The texture will be a bit denser, but the flavor is still wonderful.
Chocolate Swirl Banana Bread
After pouring the batter into the pan, drop 2 tablespoons of unsweetened cocoa powder mixed with 2 tablespoons of warm water into the center. Use a knife to gently swirl it through the batter. You’ll get beautiful ribbons of chocolate throughout the bread. This is my personal favorite variation.
Spiced Banana Bread
Add 1 teaspoon of cinnamon, ½ teaspoon of nutmeg, and ¼ teaspoon of cloves along with the flour. This gives the bread a warm, cozy flavor that’s perfect for fall. I also like to add a pinch of cardamom for an extra layer of complexity.
Mini Loaves or Muffins
For mini loaves, divide the batter among 4 mini loaf pans and bake for 25-30 minutes. For muffins, divide among a 12-cup muffin tin lined with paper liners and bake for 18-22 minutes. Both options are great for gift-giving or portion control. Just watch the baking time closely—smaller portions bake much faster.
Serving & Storage Suggestions
This banana bread is delicious in so many ways. Here’s how I like to serve and store it.
Serving: I love this bread warm, with a generous pat of salted butter melting into the slice. It’s also incredible toasted—just pop a slice in the toaster or under the broiler for 2-3 minutes until the edges are crispy and the center is warm. For a special treat, serve it with a dollop of whipped cream or a scoop of vanilla ice cream. It’s also perfect alongside a cup of coffee or a glass of cold milk.
Storage: Store the bread in an airtight container at room temperature for up to 4 days. Wrap it in plastic wrap or aluminum foil to keep it from drying out. The flavors actually improve after the first day as the browned butter and banana meld together.
Freezing: This bread freezes beautifully. Let it cool completely, then wrap it tightly in plastic wrap, followed by a layer of aluminum foil. Freeze for up to 3 months. To thaw, leave it at room temperature for 2-3 hours, or unwrap and microwave individual slices for 20-30 seconds. You can also freeze individual slices for quick grab-and-go breakfasts.
Reheating: For that fresh-from-the-oven taste, reheat slices in a 350°F oven for 5-7 minutes, or in a toaster oven. The microwave works in a pinch, but it won’t give you the same crispy edges.
One thing I love about this banana bread is that it gets better over the first couple of days. The moisture from the bananas continues to distribute through the bread, making it even more tender. So don’t worry if it doesn’t all disappear on day one—it’s actually better on day two!
Nutritional Information & Benefits
Here’s the estimated nutritional breakdown for one slice (based on 10 slices per loaf):
| Nutrient | Amount per Slice |
|---|---|
| Calories | 285 |
| Total Fat | 11g |
| Saturated Fat | 6g |
| Cholesterol | 55mg |
| Sodium | 280mg |
| Total Carbohydrates | 43g |
| Dietary Fiber | 2g |
| Sugars | 22g |
| Protein | 4g |
Bananas are a great source of potassium, vitamin B6, and vitamin C. They also provide natural sweetness, which means we can use less refined sugar. The browned butter adds healthy fats that help you feel satisfied. This recipe is vegetarian-friendly and can easily be adapted for gluten-free or vegan diets. It contains dairy, eggs, and gluten (unless modified), so please adjust accordingly for any allergies.
While this is definitely a treat, it’s made with real, whole ingredients—no preservatives, no artificial flavors, just honest food that tastes amazing. I believe in enjoying life’s simple pleasures, and a slice of this banana bread is one of the best.
Conclusion
This easy one-bowl banana bread with browned butter is the recipe I turn to again and again. It’s simple enough for a weekday morning, special enough for a holiday brunch, and forgiving enough for a beginner baker. The browned butter adds a depth of flavor that makes this bread taste like it came from a fancy bakery, but the one-bowl method means you can have it on the table with minimal effort.
I love that this recipe has become a staple in my kitchen. It’s the one I make when I need comfort, when I want to impress someone, or when I just can’t let those spotty bananas go to waste. It’s become my signature, and I hope it becomes yours too.
Now I want to hear from you! Have you tried this recipe? Did you add any fun variations? Drop a comment below and let me know how it turned out. And if you loved it, share it with a friend who needs a little banana bread in their life. Happy baking, friends!
Frequently Asked Questions
Can I use salted butter instead of unsalted?
Yes, you can use salted butter. Just reduce the added salt in the recipe to ¼ teaspoon. The browned butter will still work beautifully with salted butter.
Why did my banana bread sink in the middle?
This usually happens when the bread is underbaked. Make sure your oven is at the correct temperature (an oven thermometer helps) and bake until a toothpick comes out clean. Also, don’t open the oven door too often during baking—the temperature fluctuation can cause the bread to collapse.
Can I use frozen bananas?
Absolutely! Thaw frozen bananas completely, then drain off any excess liquid before mashing. Frozen bananas are actually sweeter than fresh ones, so your bread will be even more flavorful.
How do I know when the butter is properly browned?
Look for three signs: the color turns from pale yellow to a deep amber (like a penny), you’ll see tiny brown specks forming at the bottom of the pan, and the smell changes from buttery to nutty and toasty. As soon as you see and smell these changes, remove it from the heat immediately.
Can I make this recipe without browning the butter?
You can, but it won’t be the same. If you’re short on time, simply melt the butter and use it as is. The bread will still be good, but it will lack that deep, nutty, caramel-like flavor that makes this recipe so special. I promise the extra 5 minutes are worth it!
Pin This Recipe!
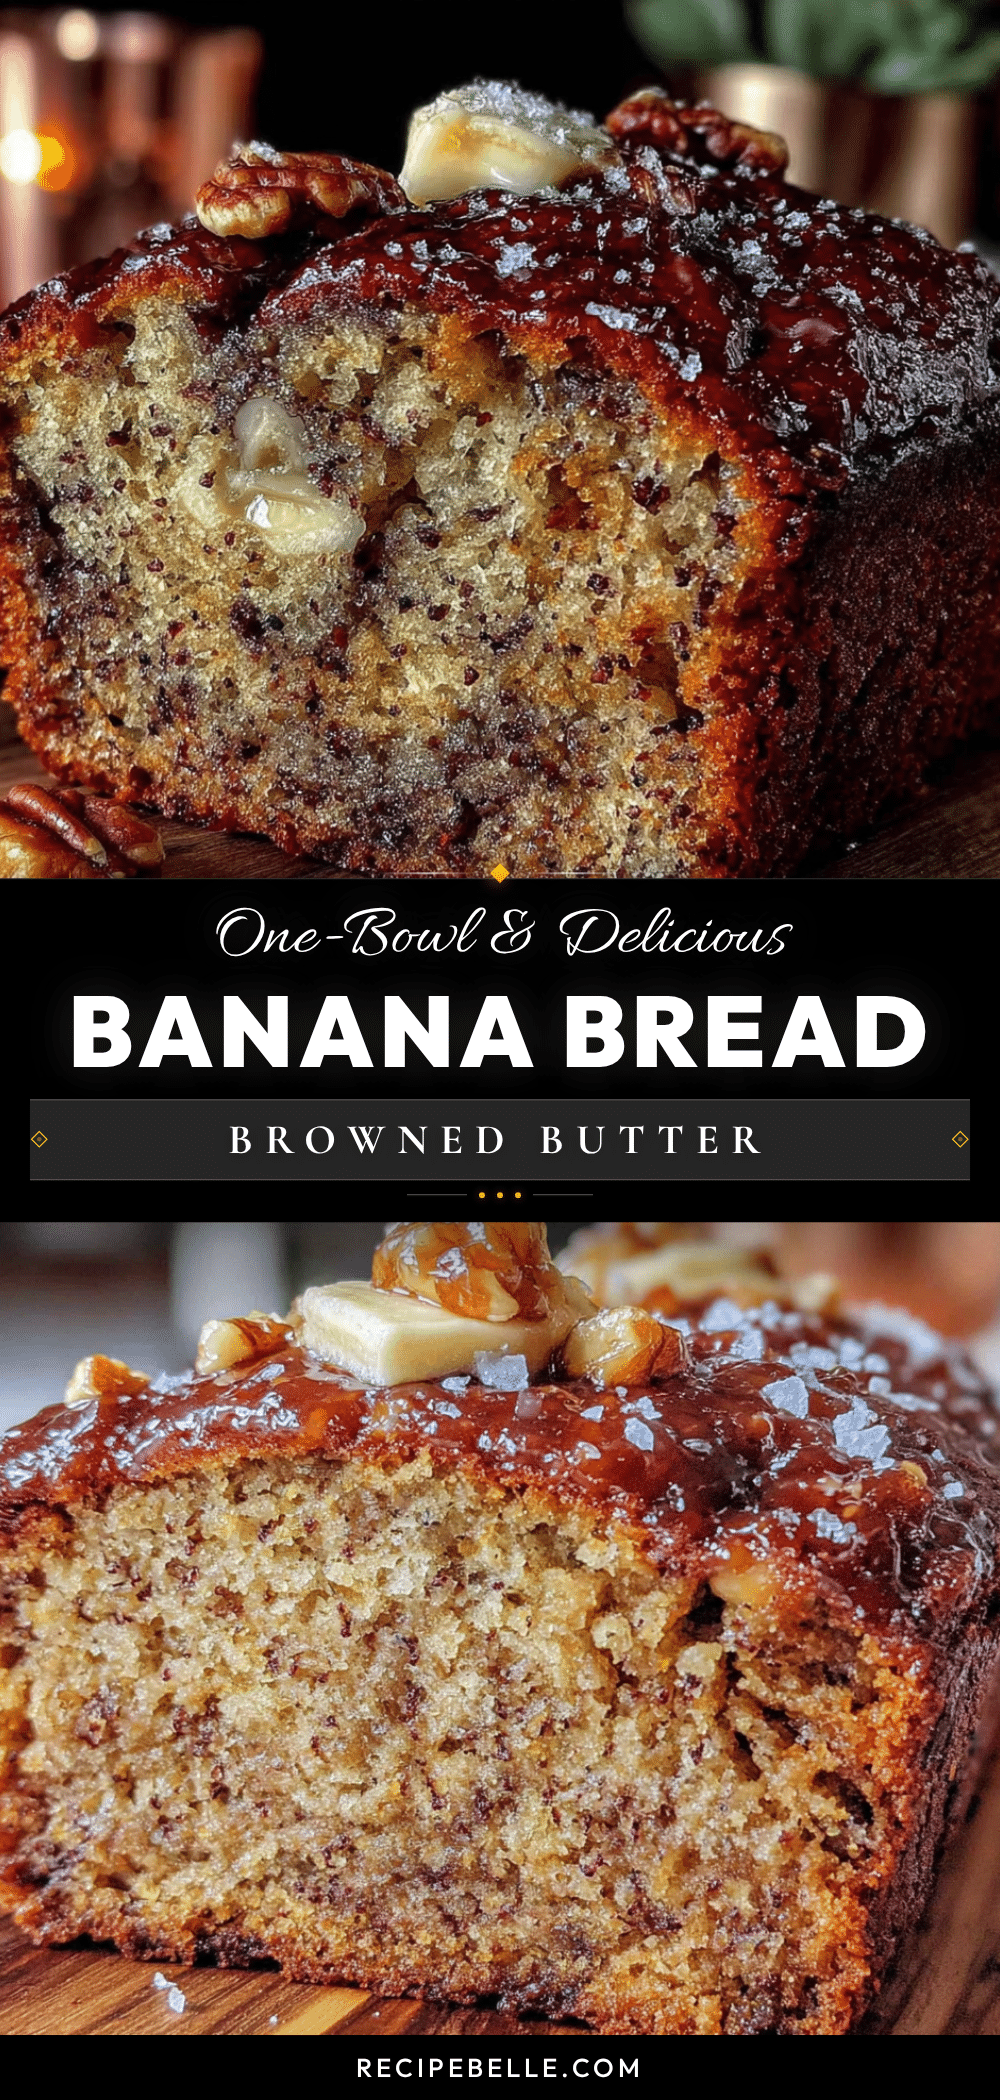
Best Easy One-Bowl Banana Bread with Browned Butter
This one-bowl banana bread with browned butter is incredibly moist, tender, and packed with nutty, caramel-like flavor. It’s the perfect easy recipe for using up overripe bananas with minimal cleanup.
- Prep Time: 15 minutes
- Cook Time: 55 minutes
- Total Time: 1 hour 10 minutes
- Yield: 10 servings 1x
- Category: Dessert
- Cuisine: American
Ingredients
- ½ cup (1 stick / 113g) unsalted butter
- 3 medium ripe bananas (about 1½ cups / 360g mashed)
- ¾ cup (150g) granulated sugar
- 2 large eggs, at room temperature
- 1 teaspoon vanilla extract
- 1½ cups (190g) all-purpose flour
- 1 teaspoon baking soda
- ½ teaspoon fine sea salt
- ½ cup (60g) chopped walnuts or pecans (optional)
- ½ cup (90g) semi-sweet or dark chocolate chips (optional)
- 1 teaspoon cinnamon (optional)
Instructions
- Preheat your oven to 350°F (175°C). Line a 9×5-inch loaf pan with parchment paper, leaving a 2-inch overhang on the long sides. Lightly grease the exposed sides with butter or non-stick spray.
- Brown the butter: Place the ½ cup unsalted butter in a light-colored saucepan over medium heat. Stir occasionally. After 3-4 minutes, the butter will foam and crackle. Continue stirring until it turns a deep amber color and smells nutty, with brown specks forming at the bottom. Immediately pour into a large mixing bowl to stop cooking. Let cool for 5 minutes.
- Mash the bananas: In a small bowl, mash the bananas with a fork until mostly smooth with a few lumps. Measure out 1½ cups (360g) and add to the bowl with the cooled browned butter.
- Mix the wet ingredients: Add the sugar, eggs, and vanilla extract to the bowl. Whisk until smooth and glossy.
- Add the dry ingredients: Sprinkle the flour, baking soda, and salt over the wet mixture. If using cinnamon, add it now. Gently fold with a rubber spatula until just combined—about 10-12 strokes. Do not overmix.
- Fold in any add-ins: If using nuts or chocolate chips, gently fold them in with a few more strokes.
- Pour the batter into the prepared pan and smooth the top. Let the batter rest for 10 minutes for a taller rise.
- Bake for 50-60 minutes, until a toothpick inserted in the center comes out clean or with a few moist crumbs. If the top browns too quickly, tent with foil after 40 minutes.
- Cool in the pan for 10 minutes, then use the parchment handles to lift the bread onto a cooling rack. Cool completely before slicing (about 1 hour).
Notes
For the best flavor, use overripe bananas with lots of brown spots. Watch the butter carefully while browning—it can go from perfect to burnt quickly. Let the batter rest for 10 minutes before baking for a taller, more domed loaf. Store in an airtight container at room temperature for up to 4 days, or freeze for up to 3 months.
Nutrition
- Serving Size: 1 slice
- Calories: 285
- Sugar: 22
- Sodium: 280
- Fat: 11
- Saturated Fat: 6
- Carbohydrates: 43
- Fiber: 2
- Protein: 4
Keywords: banana bread, browned butter, one bowl, easy banana bread, moist banana bread, quick bread



