I wasn’t expecting baking advice from my accountant, but there I was, waiting for my tax appointment to start, watching him pull a pan of perfectly golden pumpkin bars out of the office break room microwave. “Those are the ones I told you about last year,” he said, slicing one and handing it to me on a napkin. “The pumpkin cheesecake bars that saved my Thanksgiving.” I had completely forgotten our conversation twelve months earlier, but he hadn’t. And honestly, neither had my taste buds after that first bite.
The crust was buttery and slightly salty, the filling was impossibly smooth, and the whole thing came together in less time than it takes me to decide what to watch on Netflix. I scribbled the recipe on the back of an old receipt while he walked me through it between phone calls. “No water bath, no springform pan, no fuss,” he said, shrugging. “I’ve got two kids and a wife who works nights. I don’t have time for fussy desserts.”
That’s the thing about these quick pumpkin cheesecake bars with graham crust. They’re the kind of recipe you stumble into when you least expect it, and then you wonder how you ever managed fall baking without them. Maybe you’ve been there, standing in your kitchen at 8 p.m. on a Tuesday, craving something seasonal but running on empty. That’s exactly where this recipe lives. It’s not trying to win a baking competition. It’s trying to get a warm, spiced, creamy dessert on your table before your evening winds down. And it does that beautifully.
I’ve made these bars at least twenty times since that tax appointment. I’ve brought them to potlucks, made them for book club, and even shipped a batch to my sister who swore she couldn’t bake to save her life. She texted me a photo of the pan, empty except for crumbs, with the caption: “I’m a baker now.” That’s the power of a recipe that respects your time and your energy. These pumpkin cheesecake bars don’t ask for much, but they give back everything.
Why You’ll Love This Recipe
Let me tell you why these quick pumpkin cheesecake bars with graham crust have become my go-to fall dessert, and why they’ll probably become yours too. I’ve tested this recipe more times than I care to admit, and every single batch has delivered the same creamy, spiced, perfectly balanced result. That’s not luck. That’s a recipe that’s been worked over until it’s bulletproof.
- Ready in under an hour: From start to finish, you’re looking at about 45 minutes of active time plus chilling. That’s faster than a trip to the bakery, and way more satisfying.
- No fancy equipment needed: You don’t need a stand mixer, a springform pan, or a water bath. A regular 8×8 baking dish and a hand mixer will do the job beautifully.
- Perfect for busy weeknights: When you’re tired and hungry but still want something that tastes like autumn, these bars deliver. No complicated steps, no stress.
- Kid-approved and adult-adored: I’ve yet to meet someone who doesn’t go back for seconds. The creamy cheesecake layer and spiced pumpkin layer are a match made in dessert heaven.
- Simple ingredients you already have: Canned pumpkin, cream cheese, graham crackers, butter, and basic pantry spices. No hunting down obscure ingredients at specialty stores.
What makes these bars different from every other pumpkin cheesecake recipe out there? It’s the texture. Most recipes use a water bath to prevent cracking, but I’ve found a better way. By layering the cheesecake and pumpkin mixtures and baking at a slightly lower temperature, you get a silky, crack-free top every single time. No stress, no fuss, just perfect results. Plus, the graham crust has a secret ingredient that takes it from good to unforgettable. You’ll see what I mean when we get to the ingredients.
These bars are the kind of dessert that makes you close your eyes after the first bite. It’s comfort food at its finest, but without the hours of work. Whether you’re impressing guests or just treating yourself on a random Wednesday night, this recipe delivers every time.
What Ingredients You Will Need
This recipe uses simple, straightforward ingredients to create something truly special. I’ve tested every single one of these components multiple times, and I can tell you exactly what works and why. Let’s break it down.
For the Graham Crust
- 1 ½ cups graham cracker crumbs (about 12 full sheets, crushed finely) – I prefer to crush them myself in a zip-top bag with a rolling pin. It gives you more control over the texture, and honestly, it’s a great way to work out some frustration after a long day.
- ¼ cup granulated sugar – Just enough to sweeten the crust without making it candy-like.
- 6 tablespoons unsalted butter, melted – This is where the magic happens. I use salted butter sometimes when that’s all I have, and it works fine. Just reduce the salt in the crust if you go that route.
- ¼ teaspoon salt – Don’t skip this. The salt balances the sweetness and makes the crust taste like something from a fancy bakery.
- ½ teaspoon cinnamon – This is my secret addition. It ties the crust to the filling and makes the whole bar taste more cohesive. You can skip it, but I wouldn’t.
For the Cheesecake Layer
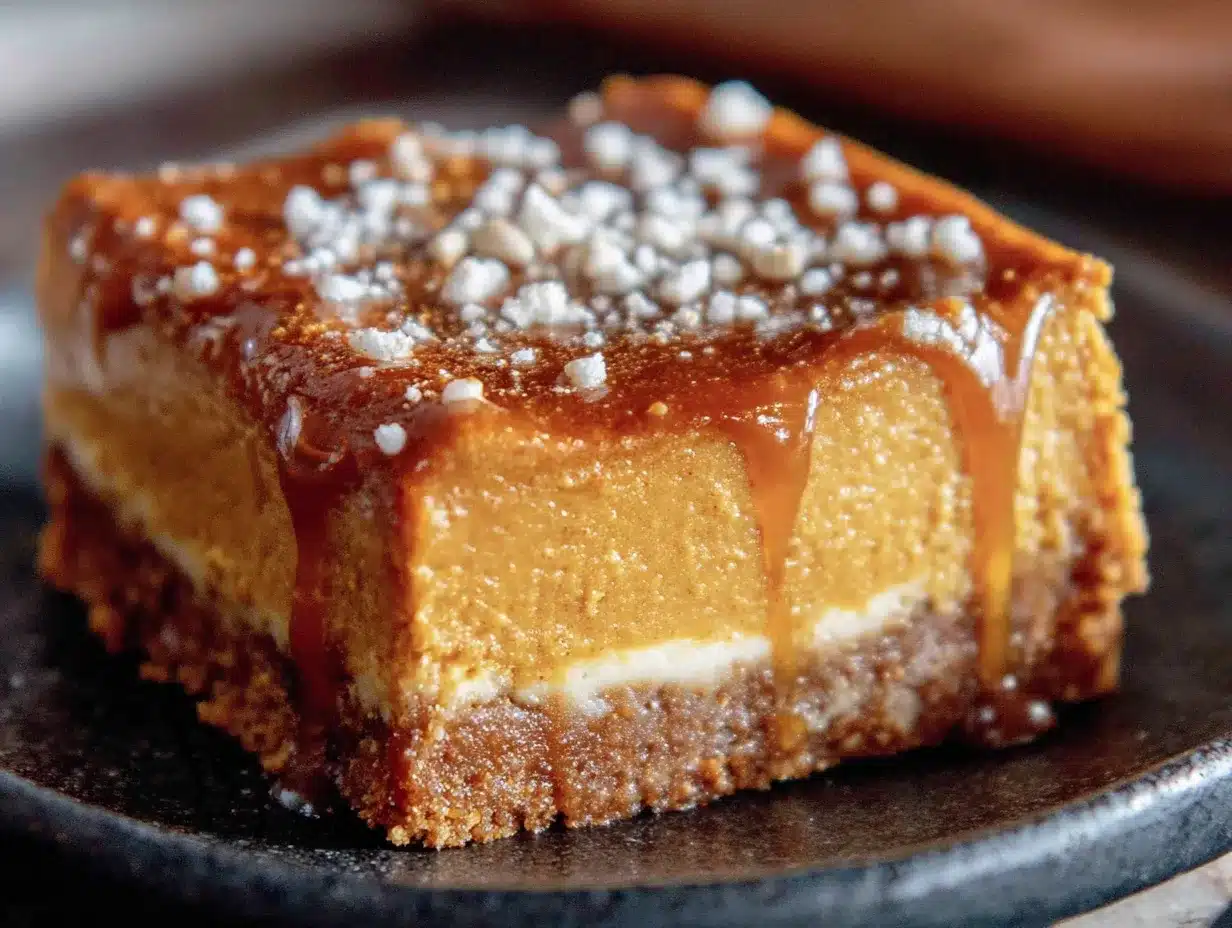
- 16 ounces cream cheese, softened to room temperature – This is non-negotiable. Cold cream cheese will leave you with lumpy filling. I take mine out of the fridge about an hour before I start baking. If you forget, you can microwave it in 10-second bursts, but be careful not to melt it.
- ½ cup granulated sugar – Just enough sweetness to balance the tang of the cream cheese.
- 2 large eggs, room temperature – Room temperature eggs incorporate more smoothly into the batter. If you’re in a hurry, place them in a bowl of warm water for 5 minutes.
- 1 teaspoon vanilla extract – Pure vanilla extract makes a difference here. The artificial stuff has a chemical aftertaste that stands out in a simple recipe like this.
For the Pumpkin Layer
- 1 cup canned pumpkin puree – Make sure you’re buying pumpkin puree, not pumpkin pie filling. They’re different, and the pie filling has added sugar and spices that will throw off the balance. Libby’s is my go-to brand.
- ¼ cup granulated sugar – The pumpkin layer needs its own sweetness to stand up to the cheesecake.
- ¼ cup brown sugar, packed – Brown sugar adds depth and a hint of molasses that complements the pumpkin beautifully.
- 1 large egg – This helps bind the pumpkin mixture and gives it structure.
- 1 teaspoon pumpkin pie spice – If you don’t have pumpkin pie spice, you can make your own with ½ teaspoon cinnamon, ¼ teaspoon ginger, ¼ teaspoon nutmeg, and a pinch of cloves.
- ½ teaspoon cinnamon – Extra cinnamon because, honestly, can you ever have too much?
- ¼ teaspoon salt – Salt enhances all the warm spices and prevents the bars from tasting flat.
For the Swirl (Optional but Recommended)
- 2 tablespoons cream cheese, softened – This creates the beautiful marbled effect on top.
- 1 tablespoon powdered sugar – Just enough to sweeten the swirl without making it grainy.
One thing I’ve learned through trial and error: don’t overmix the cheesecake layer. Overmixing incorporates too much air, which can cause cracks during baking. Mix just until smooth, then stop. Your bars will thank you.
Equipment Needed
One of the best things about these quick pumpkin cheesecake bars with graham crust is that they don’t require a kitchen full of fancy equipment. Here’s what you’ll need:
- 8×8-inch baking pan – This is the perfect size for this recipe. If you only have a 9×9, that works too, but your bars will be slightly thinner and may need a few minutes less baking time.
- Hand mixer or stand mixer – A hand mixer is totally fine here. I actually prefer it because there’s less to clean. If you’re feeling strong, you can mix by hand with a wooden spoon, but the cream cheese needs to be really soft for that to work.
- Mixing bowls – You’ll need at least two medium bowls. One for the crust, one for the cheesecake layer, and one for the pumpkin layer. I use glass bowls because they’re easy to clean and don’t hold onto odors.
- Rolling pin or food processor – For crushing the graham crackers. A rolling pin and a zip-top bag work perfectly. A food processor is faster but means more dishes.
- Rubber spatula – For scraping every last bit of filling into the pan. Trust me, you don’t want to waste any of this.
- Parchment paper – Lining the pan with parchment paper makes removal so much easier. Leave an overhang on two sides to use as handles.
I bought my 8×8 pan at a discount store for eight dollars, and it’s been going strong for years. You don’t need expensive equipment to make great food. Just good ingredients and a little bit of patience.
Preparation Method
Let’s get baking. I’ve broken this down into clear steps with all the little details I’ve learned from making these bars more times than I can count. Follow along, and you’ll have perfect pumpkin cheesecake bars every time.
Step 1: Prepare the Crust
Preheat your oven to 350°F (175°C). Line your 8×8 baking pan with parchment paper, leaving an overhang on two opposite sides. This will make lifting the bars out later a breeze.
In a medium bowl, combine the graham cracker crumbs, sugar, salt, and cinnamon. Pour in the melted butter and stir with a fork until the mixture looks like wet sand and all the crumbs are evenly coated. Press the mixture firmly into the bottom of your prepared pan. I use the bottom of a measuring cup to really pack it down tight. A loose crust will crumble when you cut the bars, so take your time here.
Bake the crust for 8 minutes, then set it aside to cool slightly while you make the fillings. Keep the oven on.
Step 2: Make the Cheesecake Layer
In a large bowl, beat the softened cream cheese with an electric mixer on medium speed until smooth and creamy, about 2 minutes. Scrape down the sides of the bowl with a rubber spatula. Add the sugar and beat for another minute until well combined.
Add the eggs one at a time, beating on low speed after each addition just until incorporated. Overmixing at this stage can cause cracks, so resist the urge to keep going. Stir in the vanilla extract by hand with a spatula. Set the mixture aside.
Here’s a tip I learned the hard way: if your cream cheese is still a little cold and the mixture looks lumpy, don’t panic. Keep beating on low speed, and it will smooth out. Just don’t turn up the speed, or you’ll incorporate too much air.
Step 3: Make the Pumpkin Layer
In a separate bowl, whisk together the pumpkin puree, granulated sugar, brown sugar, egg, pumpkin pie spice, cinnamon, and salt until smooth. The mixture should be thick and fragrant, like autumn in a bowl. Taste it if you want, but be warned, it’s addictive even before it’s baked.
Step 4: Layer the Fillings
Pour the cheesecake mixture over the pre-baked crust and spread it into an even layer with a spatula. It should cover the crust completely.
Now, carefully spoon the pumpkin mixture over the cheesecake layer in dollops. Don’t just dump it all in one spot. Spreading it out in spoonfuls makes it easier to swirl later. Use a butter knife or a skewer to gently swirl the two layers together. I like to create figure-eight patterns, but honestly, any pattern works. Just don’t over-swirl, or you’ll lose the distinct layers.
Step 5: Add the Cream Cheese Swirl (Optional)
If you’re making the optional cream cheese swirl, mix the softened cream cheese and powdered sugar in a small bowl until smooth. Drop small spoonfuls on top of the pumpkin layer and swirl gently with a toothpick or skewer. This creates those beautiful marbled patterns that make these bars look bakery-worthy.
Step 6: Bake and Cool
Bake at 350°F (175°C) for 35 to 40 minutes, or until the edges are set and the center is just slightly jiggly. It will continue to set as it cools, so don’t overbake it. A slight jiggle in the center is exactly what you want.
Let the bars cool completely on a wire rack. This takes about an hour. Then, transfer the pan to the refrigerator and chill for at least 3 hours, preferably overnight. I know it’s hard to wait, but this step is crucial. Chilling sets the bars so you can cut clean slices without them falling apart.
Once chilled, lift the bars out using the parchment paper overhang. Place them on a cutting board and use a sharp knife to cut into squares. Wipe the knife clean between cuts for the neatest edges.
Cooking Tips & Techniques
I’ve made every mistake you can imagine with this recipe so you don’t have to. Here’s what I’ve learned:
Room temperature ingredients really matter. I know it’s tempting to skip this step, especially when you’re hungry and tired. But cold cream cheese creates lumpy batter, and cold eggs can cause the mixture to curdle. Take the extra 30 minutes to let everything come to room temperature. Your bars will be smoother and bake more evenly.
Don’t overmix the cheesecake batter. This was my biggest mistake when I first started making these bars. I thought more mixing meant a smoother texture. It doesn’t. Overmixing incorporates air bubbles that expand during baking and cause cracks. Mix just until everything comes together, then stop.
Use a water bath alternative. Traditional cheesecake recipes call for a water bath to prevent cracking. But for these bars, I’ve found that baking at 350°F and not overmixing is enough. If you’re worried about cracks, place a shallow pan of hot water on the bottom rack of your oven while the bars bake. The steam helps keep the surface moist.
Let them chill completely before cutting. I cannot stress this enough. Cutting warm bars is a disaster. The layers haven’t set, the crust crumbles, and you end up with a delicious but ugly mess. Patience pays off here. Give them the full chilling time, and you’ll get clean, beautiful squares.
Use a hot knife for cleaner cuts. Run your knife under hot water, dry it off, and then make your cuts. The heat helps the knife glide through the bars without dragging the filling. Wipe the knife clean between each cut for the best results.
One more thing: if your bars do crack, don’t stress. A dollop of whipped cream or a dusting of powdered sugar hides a multitude of sins. Nobody will know but you.
Variations & Adaptations
This recipe is wonderfully adaptable. Here are some of my favorite variations:
Gluten-free version: Swap the graham crackers for gluten-free graham crackers or use crushed gluten-free shortbread cookies. The rest of the ingredients are naturally gluten-free, so this is an easy swap. I’ve tested this with several brands, and they all work well.
Dairy-free option: Use dairy-free cream cheese and a plant-based butter substitute. I’ve had good results with Kite Hill cream cheese and Miyoko’s butter. The texture is slightly softer, so chill the bars for an extra hour before cutting.
Pumpkin spice variation: Add a teaspoon of orange zest to the pumpkin layer for a bright, citrusy twist. The orange and pumpkin flavors are a classic combination that works beautifully here.
Nutty crust: Replace half a cup of the graham cracker crumbs with finely chopped pecans or walnuts. Toast the nuts first for extra flavor. This adds a wonderful crunch and pairs perfectly with the creamy filling.
Chocolate swirl: Melt a quarter cup of semi-sweet chocolate chips and drizzle it over the pumpkin layer before swirling. Chocolate and pumpkin is an underrated combination, and it adds a rich, decadent element to these bars.
Mini version: Press the crust into a mini muffin tin and fill with the cheesecake and pumpkin mixtures. Bake for 15 to 18 minutes. These bite-sized bars are perfect for parties or holiday cookie trays.
I tried the pecan crust variation last Thanksgiving, and it was such a hit that I’ve made it three times since. The toasted nuts add a warmth that complements the pumpkin spice beautifully. It’s now my go-to version for holiday gatherings.
Serving & Storage Suggestions
These quick pumpkin cheesecake bars with graham crust are best served chilled, straight from the refrigerator. The cold temperature keeps the layers firm and the crust crisp. If you prefer a softer texture, let them sit at room temperature for about 10 minutes before serving.
For presentation, I like to dust the bars with a light sprinkle of cinnamon or powdered sugar just before serving. A dollop of whipped cream and a drizzle of caramel sauce takes them over the top, but they’re equally delicious on their own.
These bars pair beautifully with a cup of hot coffee, a chai latte, or a glass of cold milk. For a holiday dessert table, serve them alongside apple crisp, pecan pie, or a simple vanilla panna cotta.
Storage: Store the bars in an airtight container in the refrigerator for up to 5 days. Place a sheet of parchment paper between layers to prevent sticking. The flavors actually deepen after a day or two, so don’t be afraid to make them ahead.
Freezing: These bars freeze beautifully. Wrap individual squares tightly in plastic wrap, then place them in a freezer-safe container. They’ll keep for up to 3 months. To thaw, transfer a bar to the refrigerator overnight or let it sit at room temperature for about 30 minutes.
Reheating: I don’t recommend reheating these bars. They’re meant to be served cold or at room temperature. If you want a warm dessert, try serving them with warm caramel sauce or hot fudge. The contrast between the cold bars and warm sauce is absolutely divine.
One thing I love about these bars is how the flavors develop over time. The spices meld together, the crust softens slightly, and everything becomes more cohesive. They’re actually better on day two than day one, which makes them perfect for make-ahead dessert planning.
Nutritional Information & Benefits
Each bar (based on 16 servings) contains approximately:
- Calories: 245
- Fat: 16g
- Carbohydrates: 22g
- Protein: 4g
- Fiber: 1g
- Sugar: 16g
These numbers are estimates and will vary based on the specific brands and ingredients you use. If you’re watching your sugar intake, you can reduce the sugar in the cheesecake layer by a couple of tablespoons without affecting the texture too much.
Pumpkin is packed with vitamin A, which supports eye health and immune function. It’s also a good source of fiber and antioxidants. Cream cheese provides calcium and protein, making these bars a slightly more balanced dessert option than many other fall treats.
For those with dietary restrictions, this recipe can be adapted for gluten-free and dairy-free diets as mentioned in the variations section. The bars are nut-free as written, but the pecan crust variation does contain tree nuts.
I’m not a nutritionist, but I believe in balance. These bars are a treat, and they’re meant to be enjoyed. I don’t stress about the numbers when I’m making them for a special occasion. Life’s too short to count calories in cheesecake.
Conclusion
These quick pumpkin cheesecake bars with graham crust have become a staple in my kitchen for good reason. They’re easy enough for a Tuesday night, impressive enough for a holiday gathering, and delicious enough to make you forget about all the other pumpkin desserts out there. The creamy layers, the buttery crust, the warm spices, they all come together in a way that feels both familiar and special.
I love that this recipe doesn’t demand perfection. It works with your schedule, not against it. It doesn’t require a trip to a specialty store or hours of your time. It’s just good, honest baking that delivers every single time.
I hope you give these bars a try. Customize them however you like, make them your own, and share them with people you love. That’s what baking is all about, isn’t it?
If you do make them, I’d love to hear how they turned out. Drop a comment below and let me know what variations you tried or how you served them. And if you’re looking for more easy fall desserts, check out my easy apple crisp recipe or these pumpkin chocolate chip cookies. Happy baking, friends!
Frequently Asked Questions
Can I use fresh pumpkin instead of canned?
Yes, you can use fresh pumpkin puree. Just make sure to drain it well after blending, because fresh pumpkin tends to be more watery than canned. Spread the puree on a paper towel-lined plate and let it sit for a few minutes to absorb excess moisture. Otherwise, your bars might turn out too soft.
Why did my cheesecake layer crack?
Cracks usually happen from overmixing the batter or overbaking. Mix just until the ingredients come together, and pull the bars out of the oven when the center is still slightly jiggly. If cracks do appear, don’t worry. A dusting of powdered sugar or a layer of whipped cream covers them perfectly.
Can I make these bars ahead of time?
Absolutely. In fact, they’re better when made a day ahead. The flavors meld together as they chill, and the texture becomes even creamier. Make them up to two days in advance and store them in the refrigerator until you’re ready to serve.
How do I get clean cuts when slicing the bars?
Use a sharp knife and wipe it clean between each cut. For the cleanest slices, run your knife under hot water, dry it off, and make your cuts while the knife is still warm. Chilling the bars for at least 3 hours before cutting is essential.
Can I use a different crust?
Yes, this recipe works well with many different crusts. Try crushed ginger snaps for a spicier kick, shortbread cookies for a buttery flavor, or vanilla wafers for a lighter texture. Just keep the ratio of crumbs to butter the same, and you’ll be good to go.
Pin This Recipe!
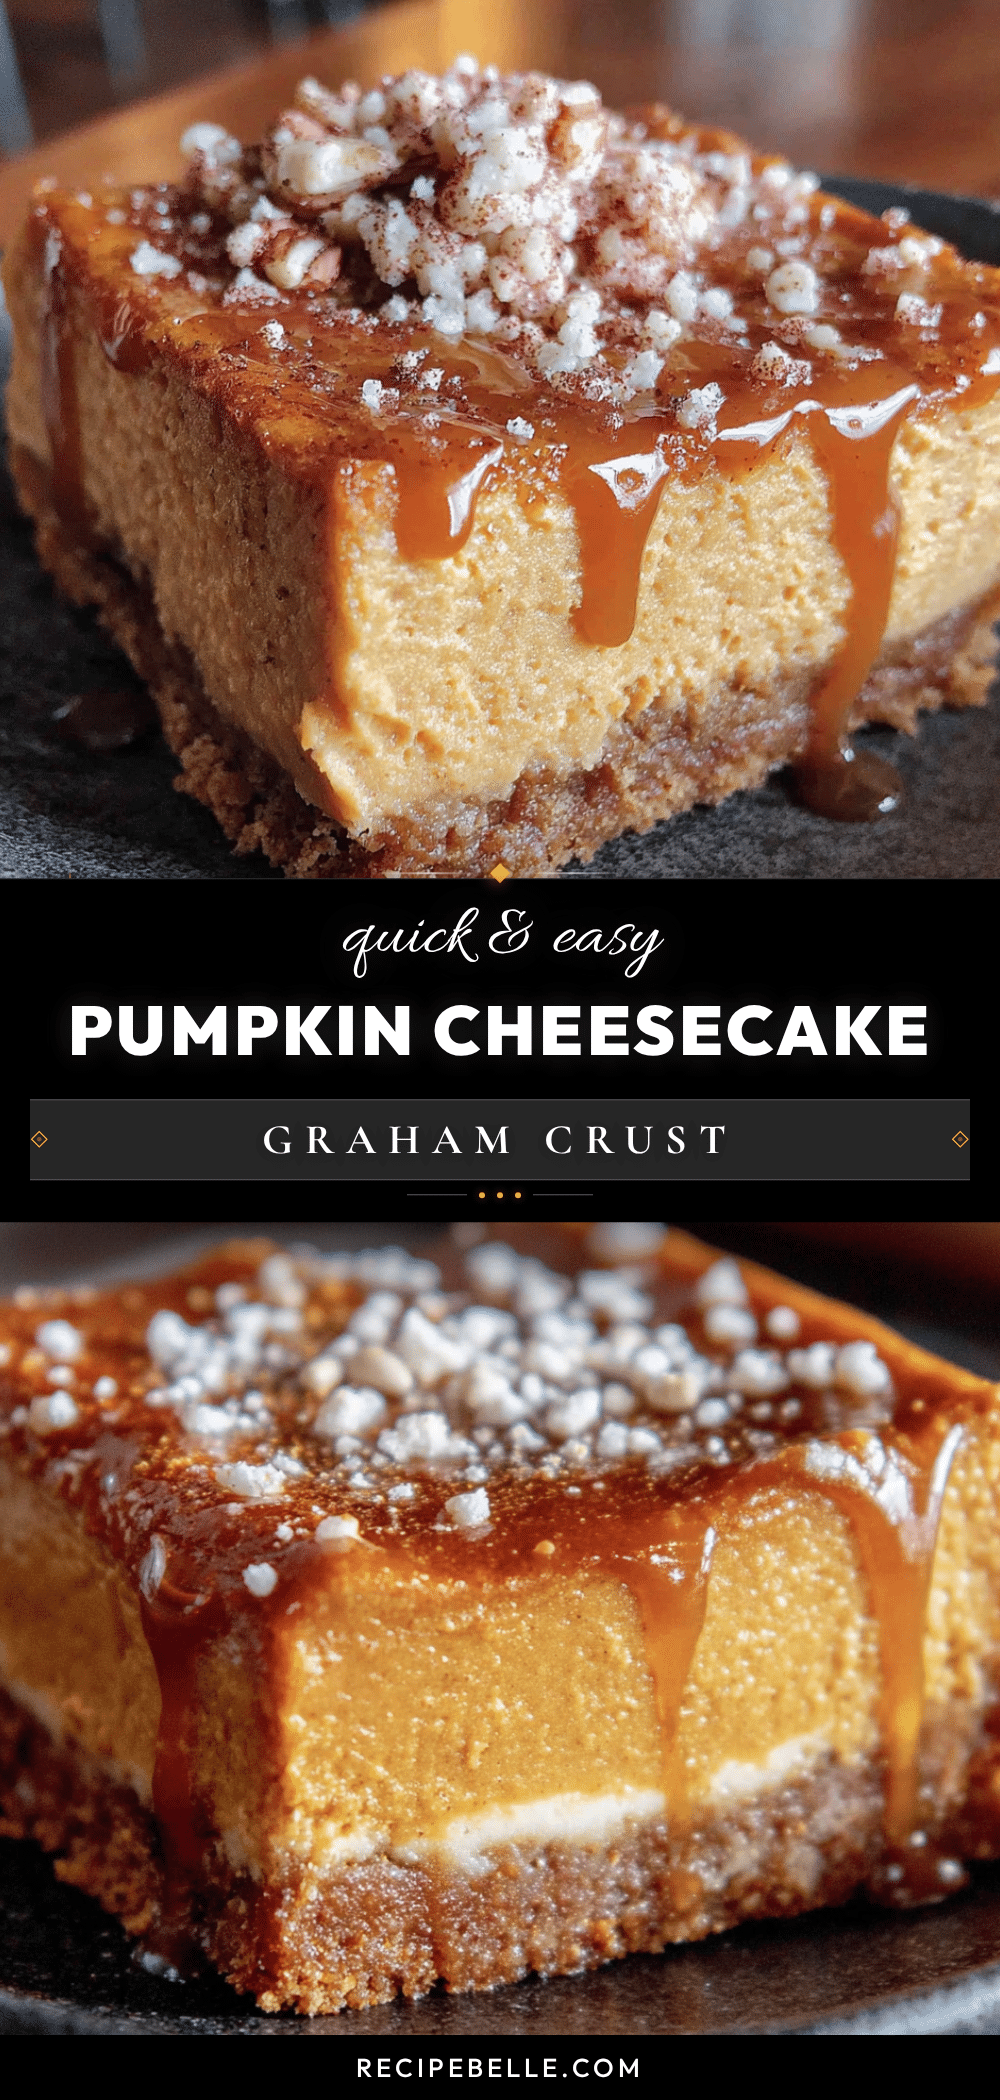
Best Easy Pumpkin Cheesecake Bars with Graham Crust
These quick pumpkin cheesecake bars with graham crust are creamy, spiced, and ready in under an hour. No water bath, no springform pan, no fuss—just a delicious fall dessert that’s perfect for busy weeknights and holiday gatherings.
- Prep Time: 15 minutes
- Cook Time: 35 minutes
- Total Time: 50 minutes
- Yield: 16 servings 1x
- Category: Dessert
- Cuisine: American
Ingredients
- 1 ½ cups graham cracker crumbs (about 12 full sheets, crushed finely)
- ¼ cup granulated sugar
- 6 tablespoons unsalted butter, melted
- ¼ teaspoon salt
- ½ teaspoon cinnamon
- 16 ounces cream cheese, softened to room temperature
- ½ cup granulated sugar
- 2 large eggs, room temperature
- 1 teaspoon vanilla extract
- 1 cup canned pumpkin puree
- ¼ cup granulated sugar
- ¼ cup brown sugar, packed
- 1 large egg
- 1 teaspoon pumpkin pie spice
- ½ teaspoon cinnamon
- ¼ teaspoon salt
- 2 tablespoons cream cheese, softened (for optional swirl)
- 1 tablespoon powdered sugar (for optional swirl)
Instructions
- Preheat oven to 350°F (175°C). Line an 8×8-inch baking pan with parchment paper, leaving an overhang on two opposite sides.
- In a medium bowl, combine graham cracker crumbs, ¼ cup granulated sugar, ¼ teaspoon salt, and ½ teaspoon cinnamon. Pour in melted butter and stir until mixture resembles wet sand. Press firmly into the bottom of the prepared pan using the bottom of a measuring cup.
- Bake the crust for 8 minutes. Set aside to cool slightly. Keep the oven on.
- In a large bowl, beat softened cream cheese with an electric mixer on medium speed until smooth, about 2 minutes. Scrape down sides. Add ½ cup granulated sugar and beat for another minute.
- Add eggs one at a time, beating on low speed just until incorporated. Stir in vanilla extract by hand with a spatula. Set aside.
- In a separate bowl, whisk together pumpkin puree, ¼ cup granulated sugar, brown sugar, 1 egg, pumpkin pie spice, ½ teaspoon cinnamon, and ¼ teaspoon salt until smooth.
- Pour cheesecake mixture over the pre-baked crust and spread evenly. Spoon pumpkin mixture over the cheesecake layer in dollops. Use a butter knife or skewer to gently swirl the two layers together, creating figure-eight patterns. Do not over-swirl.
- If making the optional cream cheese swirl, mix 2 tablespoons softened cream cheese and 1 tablespoon powdered sugar until smooth. Drop small spoonfuls on top and swirl gently with a toothpick.
- Bake at 350°F (175°C) for 35 to 40 minutes, until edges are set and center is slightly jiggly. Cool completely on a wire rack (about 1 hour), then refrigerate for at least 3 hours, preferably overnight.
- Lift bars out using parchment overhang. Place on a cutting board and cut into squares with a sharp knife, wiping the knife clean between cuts.
Notes
Room temperature ingredients are crucial for a smooth texture. Do not overmix the cheesecake batter to avoid cracks. Chill bars completely before cutting for clean slices. For a water bath alternative, place a shallow pan of hot water on the bottom rack of the oven while baking. If bars crack, cover with whipped cream or powdered sugar.
Nutrition
- Serving Size: 1 bar
- Calories: 245
- Sugar: 16
- Sodium: 220
- Fat: 16
- Saturated Fat: 9
- Carbohydrates: 22
- Fiber: 1
- Protein: 4
Keywords: pumpkin cheesecake bars, easy pumpkin dessert, fall baking, graham crust, quick dessert, Thanksgiving dessert



