This was supposed to be a simple pumpkin bread. A loaf, you know, the kind you slice up for breakfast with a smear of butter. I had my favorite recipe memorized—the one my grandmother used to make, written on a stained index card that’s practically disintegrating. But somewhere between grabbing the baking soda instead of the baking powder (honestly, they look the same in the dark) and getting distracted by a phone call from my sister, things went sideways. The batter was too thin, it spread out into a sad, flat puddle on the sheet pan, and I was already late for a dinner party. I almost threw the whole thing out.
Let me tell you, I was not in a patient mood. I was frustrated, the kitchen was a mess, and I had a pumpkin-flavored pancake situation on my hands. But then I saw the cream cheese in the fridge, and a crazy idea popped into my head. What if I just… rolled it? I mean, it was thin enough. I spread the softened cream cheese over the warm, flat cake, held my breath, and rolled it up like a sleeping bag. It was a mess. It cracked in a few places, and some of the filling oozed out the sides. But I wrapped it in plastic wrap anyway, put it in the fridge, and ran out the door.
At the party, I confessed my kitchen disaster to a friend. “It’s a pumpkin… thing,” I said, unwrapping it. I sliced into it, expecting a crumbly disaster. But the knife went through cleanly, revealing that perfect spiral of orange cake and white cream cheese. The first bite was quiet vindication. The cake was incredibly moist, the filling was tangy and sweet, and that accidental thinness? It made the whole thing light and delicate. Everyone asked for the recipe. I didn’t have the heart to tell them it was a mistake. Maybe you’ve been there, staring at a failed recipe, ready to give up. That’s why I keep making this pumpkin roll. It’s a reminder that sometimes the best things in life come from our biggest messes.
Why You’ll Love This Recipe
This isn’t just another pumpkin dessert. It’s the one that will have people asking for the recipe before they even finish their first slice. I’ve tested this version over and over, tweaking the flour ratio and the baking time until it rolls without cracking every single time. It’s a recipe born from that initial happy accident, but perfected through a whole lot of trial and error in my own kitchen.
- Impressive But Simple: It looks like you spent hours in a fancy bakery, but the process is surprisingly straightforward. It’s a great way to wow guests without breaking a sweat.
- Perfectly Spiced: We’re not just talking about a pinch of cinnamon. This recipe uses a blend of warm spices that scream “autumn” and pair perfectly with the tangy cream cheese.
- Make-Ahead Magic: This roll actually tastes better the next day. The flavors meld together, and the cake gets even more tender. It’s the perfect stress-free dessert for holidays or dinner parties.
- Classic Comfort: There’s something deeply satisfying about a pumpkin roll. It’s nostalgic, cozy, and feels like a warm hug on a plate. It’s the kind of dessert that makes a cold evening feel special.
- Foolproof Filling: The cream cheese filling is simple, but the technique makes it incredibly smooth and fluffy. No lumps, no graininess—just pure, dreamy deliciousness.
This recipe is different because of the method. Most recipes have you roll the cake while it’s hot, but I’ve found a specific cooling technique that prevents cracking and ensures a tight, beautiful spiral. It’s a small tweak that makes a huge difference, and it’s the secret to getting that perfect, bakery-worthy look every time. Honestly, the first time you pull it off, you’ll feel like a total pro.
What Ingredients You Will Need
This recipe uses simple, humble ingredients to create something truly special. Most of these are pantry staples, especially if you do a lot of fall baking. The quality of your pumpkin and spices will really shine here, so don’t be afraid to use your favorites.
For the Pumpkin Cake
- All-purpose flour (¾ cup / 95g) – The base of our cake. For the best texture, spoon it into your measuring cup and level it off with a knife. Don’t scoop directly from the bag or you might pack in too much.
- Baking powder (1 teaspoon) – This gives the cake its lift. Make sure it’s fresh for the best rise.
- Baking soda (½ teaspoon) – Works with the acidity of the pumpkin for a tender crumb.
- Ground cinnamon (2 teaspoons) – The star of the show. I prefer a good quality cinnamon like Saigon or Ceylon for a warmer, more complex flavor.
- Ground ginger (1 teaspoon) – Adds a little warmth and zing.
- Ground nutmeg (½ teaspoon) – For that classic pumpkin pie spice note. Freshly grated is amazing if you have it.
- Salt (½ teaspoon) – Balances the sweetness and enhances all the other flavors.
- Large eggs (3, at room temperature) – They help bind the cake and give it structure. Room temperature eggs whip up fluffier, which is key for a light cake.
- Granulated sugar (1 cup / 200g) – For sweetness and moisture.
- Pumpkin puree (⅔ cup / 165g) – Use 100% pure pumpkin puree, not pumpkin pie filling. I often use Libby’s, but any brand of pure pumpkin works great. Make sure to blot it with a paper towel to remove any excess water.
- Vanilla extract (1 teaspoon) – Adds depth of flavor.
- Powdered sugar (for dusting) – Essential for rolling and a non-stick surface.
For the Cream Cheese Filling
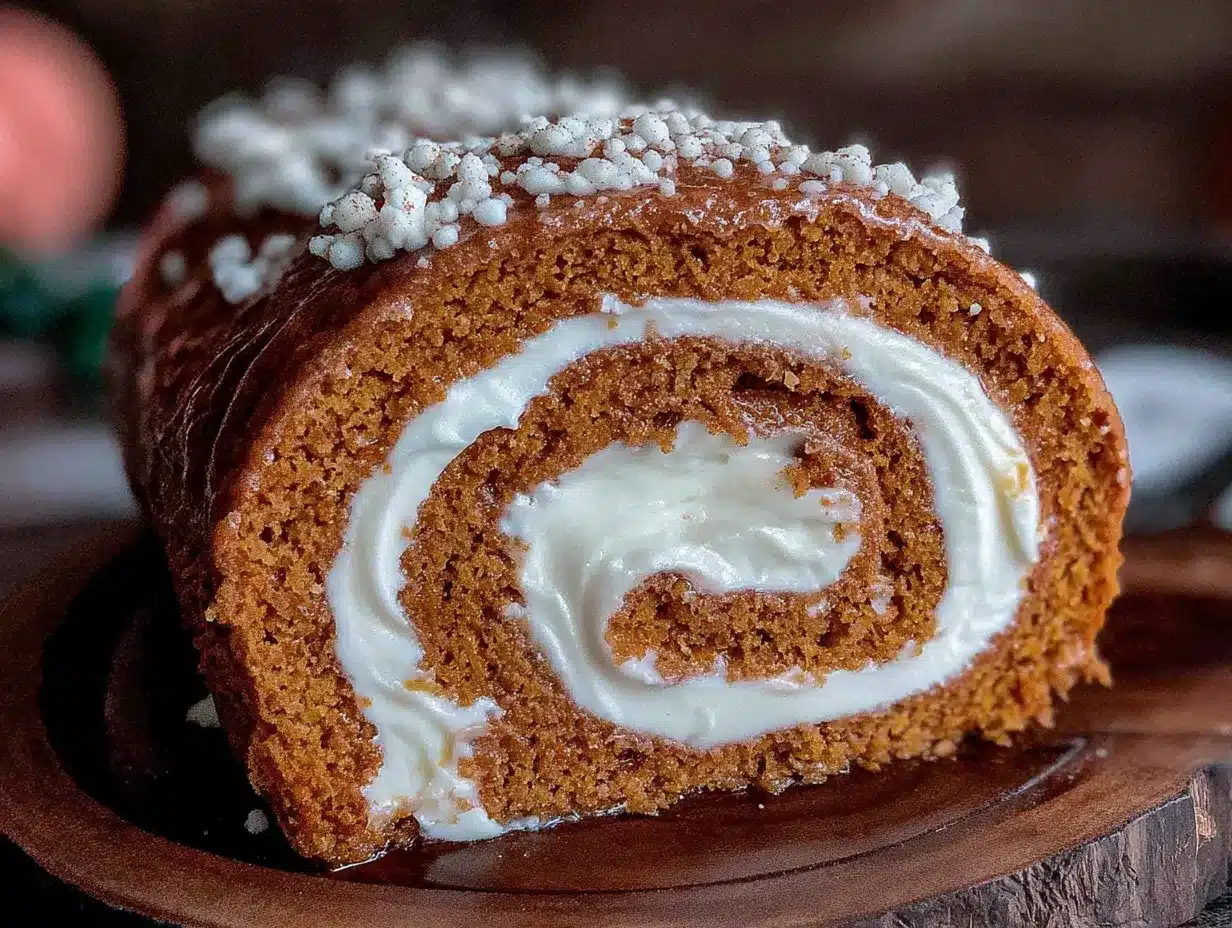
- Cream cheese (8 ounces / 226g, softened) – This is the heart of the filling. Use full-fat, block-style cream cheese for the best flavor and texture. Let it sit out for at least 30 minutes to soften.
- Unsalted butter (¼ cup / 57g, softened) – Adds richness and a smooth, creamy texture. I always use unsalted so I can control the salt level.
- Powdered sugar (1 cup / 120g, sifted) – Sifting is crucial here to avoid lumps in your filling.
- Vanilla extract (1 teaspoon) – A must for any cream cheese filling.
Equipment Needed
You don’t need a lot of fancy tools for this recipe, which is part of its charm. A few key pieces will make the process much smoother, though.
- 15x10x1-inch Jelly Roll Pan: This is the non-negotiable piece of equipment. It gives the cake the perfect thin, even layer for rolling. If you don’t have one, you can try a half-sheet pan, but the cake will be thinner and might dry out faster.
- Parchment Paper: Don’t skip this! It’s essential for lining the pan and lifting the cake out cleanly. The recipe won’t work without it.
- Electric Mixer: A hand mixer or stand mixer will make whipping the eggs and creaming the filling a breeze. You can do it by hand with a whisk, but your arm will get a serious workout.
- Clean Kitchen Towel: A thin, lint-free cotton or linen towel is perfect for rolling the cake. Avoid terry cloth, as it will stick to the cake.
- Spatula: An offset spatula is ideal for spreading the batter and filling evenly, but a regular rubber spatula works too.
- Fine-Mesh Sieve: For sifting the powdered sugar. It makes a huge difference in the smoothness of your filling and the final dusting on top.
Preparation Method
Making a pumpkin roll might seem intimidating, but I promise it’s easier than you think. Just follow these steps, and you’ll be rolling like a pro in no time. Take a deep breath, and let’s get started.
Step 1: Prep the Pan and Oven
Preheat your oven to 375°F (190°C). Line your 15x10x1-inch jelly roll pan with parchment paper, leaving a little overhang on the two long sides. This will act as handles to lift the cake out later. Lightly spray the parchment with non-stick cooking spray. This is a little insurance policy so the cake doesn’t stick.
Step 2: Make the Cake Batter
In a small bowl, whisk together the flour, baking powder, baking soda, cinnamon, ginger, nutmeg, and salt. Set this aside. In a large mixing bowl, beat the eggs and granulated sugar with an electric mixer on high speed for about 3-4 minutes. You want it to be thick, pale, and fluffy—when you lift the beaters, the batter should fall in a thick ribbon. This is called the “ribbon stage” and it’s crucial for a light cake.
Reduce the mixer speed to low and beat in the pumpkin puree and vanilla extract until just combined. Don’t overmix here. Now, gently fold the dry ingredients into the wet mixture using a rubber spatula. Fold just until you can’t see any more streaks of flour. A few lumps are okay; overmixing will make the cake tough.
Step 3: Bake the Cake
Pour the batter into the prepared pan and use your spatula to spread it evenly into all the corners. It will be a very thin layer, which is exactly what we want. Bake for 13-15 minutes, or until the top of the cake springs back when you gently touch it. The edges will be just starting to pull away from the pan. Don’t overbake it, or it will crack when you try to roll it.
Step 4: The First Roll (The Tricky Part)
As soon as the cake comes out of the oven, run a knife around the edges to loosen it. Lay a clean kitchen towel on your counter and dust it generously with powdered sugar. Carefully lift the cake out of the pan using the parchment paper overhang and flip it onto the sugared towel. Gently peel off the parchment paper.
Now, while the cake is still warm, start at one of the short ends and carefully roll the cake and the towel together into a tight log. The towel will be rolled up inside the cake. This initial roll is what “trains” the cake to hold its shape later. Let it cool completely on a wire rack, still rolled up. This takes about an hour. Don’t rush this step!
Step 5: Make the Filling
While the cake is cooling, make the filling. In a medium bowl, beat the softened cream cheese and butter together with an electric mixer until smooth and creamy. Add the sifted powdered sugar and vanilla extract, and beat on low speed until combined, then increase to high speed and beat for another 2-3 minutes until it’s light and fluffy. Set it aside.
Step 6: Unroll, Fill, and Re-Roll
Once the cake is completely cool, carefully unroll it. It will want to curl back up, which is a good sign! Spread the cream cheese filling evenly over the entire surface of the cake, leaving a small border around the edges. Now, re-roll the cake tightly, this time without the towel. Use the towel to help you if you need to.
Step 7: Chill and Serve
Wrap the finished roll tightly in plastic wrap and refrigerate for at least 2 hours, or overnight. This allows the filling to set and the flavors to meld. When you’re ready to serve, trim the ends for a clean look, dust the top with more powdered sugar, and slice into beautiful spirals.
Cooking Tips & Techniques
I’ve made this recipe more times than I can count, and I’ve learned a few things the hard way. Here are my best tips to ensure your pumpkin roll is a total success.
- The “Blot” is Key: Pumpkin puree has a lot of water. If you don’t remove some of it, your cake can be gummy and heavy. After you measure it, spread the puree on a few layers of paper towels, place another paper towel on top, and press gently to absorb the excess moisture. It makes a world of difference.
- Don’t Overmix the Batter: Once you add the flour, you are in charge of the gluten development. Mixing too much will make the cake tough and less pliable, leading to cracks. Fold gently and stop as soon as the flour disappears.
- Roll While Warm: This is the most important tip. A warm cake is flexible. A cool cake is brittle. You must roll it in the towel as soon as it’s cool enough to handle, usually within a minute of coming out of the oven. This is not the time to answer the doorbell!
- Use a Thin Towel: A thick, fluffy towel will create a loose roll and can leave a pattern on the cake. A thin, smooth kitchen towel or even a clean, lint-free dishcloth works best.
- Patience is a Virtue: The hardest part is waiting for the cake to cool completely. If you try to fill it while it’s still warm, the cream cheese filling will melt and turn into a soupy mess. Give it the full hour.
- Chill for Clean Slices: For the prettiest slices, use a very sharp, thin-bladed knife and wipe it clean between cuts. A chilled roll is much easier to slice neatly than a room-temperature one.
Variations & Adaptations
This pumpkin roll is a fantastic base recipe that’s easy to adapt to your own tastes or dietary needs. I love playing around with different flavor combinations, and here are a few of my favorites.
- Chocolate Pumpkin Roll: Replace ¼ cup of the all-purpose flour with ¼ cup of unsweetened cocoa powder. The rich chocolate pairs beautifully with the pumpkin spice and cream cheese filling. It’s a showstopper for chocolate lovers.
- Maple Pecan Twist: Add 1 teaspoon of maple extract to the cake batter along with the vanilla. For the filling, beat in 2 tablespoons of pure maple syrup. After spreading the filling, sprinkle ½ cup of finely chopped, toasted pecans over the top before rolling.
- Gluten-Free Version: Substitute the all-purpose flour with a good quality 1-to-1 gluten-free baking flour blend that contains xanthan gum. I’ve had great success with the King Arthur brand. Make sure to let the cake cool completely before rolling, as gluten-free cakes can be a bit more fragile.
- Spice It Up: If you like a little heat, add ¼ teaspoon of cayenne pepper or a pinch of ground cloves to the spice mix. It adds a subtle warmth that’s really lovely on a cold day.
- Lighter Filling: For a less rich filling, you can substitute half of the cream cheese with a thick, plain Greek yogurt. The texture will be a bit softer, but it’s still delicious and tangy.
Serving & Storage Suggestions
A perfectly chilled pumpkin roll is a beautiful thing. Here’s how to serve it and keep it at its best.
For serving, I like to take the roll out of the fridge about 15 minutes before slicing. This takes the chill off just enough so the cake is tender and the filling is creamy, but it’s still firm enough to cut cleanly. Dust the top with a generous snowfall of powdered sugar right before serving. You can also drizzle it with a simple caramel sauce or a maple glaze for extra decadence. A dollop of lightly sweetened whipped cream on the side is never a bad idea.
This pumpkin roll is perfect for Thanksgiving, Christmas, or any fall gathering. It pairs wonderfully with a hot cup of coffee, spiced apple cider, or even a glass of cold milk. The flavors are classic and comforting, and it always looks so pretty on a cake stand.
For storage, wrap the roll tightly in plastic wrap and keep it in the refrigerator. It will stay fresh and delicious for up to 5 days. The cake actually gets more moist and the flavors meld together beautifully over time. You can also freeze it for up to 3 months. To freeze, wrap the chilled, un-sliced roll tightly in a layer of plastic wrap, then a layer of aluminum foil. Thaw it overnight in the refrigerator before dusting with powdered sugar and serving. The texture remains excellent.
Nutritional Information & Benefits
Let’s be real—this is a dessert, and it’s meant to be enjoyed. But it’s not without its redeeming qualities! Pumpkin is a fantastic source of Vitamin A, which is great for your eyes and immune system. It’s also packed with fiber and antioxidants. The eggs provide high-quality protein, and the cinnamon is known for its anti-inflammatory properties.
Of course, the sugar, cream cheese, and butter bring the calories and fat, but that’s part of what makes it so satisfying. One slice (based on 10 servings) is a perfectly reasonable indulgence. It’s the kind of dessert that feels luxurious and special, so a little piece goes a long way. It’s a wonderful treat to share with the people you love, and a little slice of comfort on a chilly evening.
Estimated Nutritional Information (per serving, based on 10 servings):
| Nutrient | Amount |
|---|---|
| Calories | ~320 kcal |
| Fat | ~16g |
| Carbohydrates | ~42g |
| Protein | ~5g |
| Sugar | ~32g |
Note: These values are estimates and can vary based on specific ingredients used.
Conclusion
This pumpkin roll is more than just a recipe—it’s a little story of a happy accident that turned into a beloved tradition. It’s proof that you don’t need to be perfect in the kitchen to create something amazing. Sometimes, the best things come from a bit of chaos and a whole lot of cream cheese.
I love this recipe because it’s forgiving, it’s beautiful, and it tastes like pure autumn comfort. It’s the dessert I bring to every Friendsgiving and the one my family requests for every holiday. I hope you give it a try and make it your own. Don’t be afraid of the rolling part—you’ve got this! The first crack is just a mark of character.
I’d love to hear how yours turns out! Did you try a fun variation? Did your family love it? Leave a comment below and share your experience. And if you loved this recipe, please share it with a friend who needs a little cozy dessert in their life. Happy baking!
Frequently Asked Questions
Why did my pumpkin cake crack when I rolled it?
This is the most common issue! It usually happens for two reasons: the cake was overbaked (making it dry and brittle) or you let it cool down too much before doing the initial roll in the towel. Make sure you roll it while it’s still warm, and set a timer for 13 minutes to check for doneness.
Can I use pumpkin pie filling instead of pumpkin puree?
No, I wouldn’t recommend it. Pumpkin pie filling is pre-sweetened and spiced, which will throw off the balance of the recipe. It also has a different consistency that can make the cake too wet or dense. Stick with 100% pure pumpkin puree for the best results.
My cream cheese filling is lumpy. What did I do wrong?
Lumpy filling usually means your cream cheese or butter wasn’t soft enough. They need to be at room temperature so they can blend together smoothly. Also, make sure to sift your powdered sugar. Tiny clumps in the sugar can cause lumps that are hard to beat out.
Can I make this pumpkin roll ahead of time?
Absolutely! In fact, I highly recommend it. The pumpkin roll needs to chill for at least 2 hours before serving, but you can make it a day or two in advance. It stores beautifully in the refrigerator and actually tastes better as the flavors meld together.
How do I get clean, perfect slices?
The key is a sharp knife and a cold cake. Use a long, thin, serrated knife and chill the roll for the full 2 hours (or longer). Before each slice, wipe the knife blade clean with a damp paper towel. This prevents the cream cheese filling from smearing across the cut surface.
Pin This Recipe!
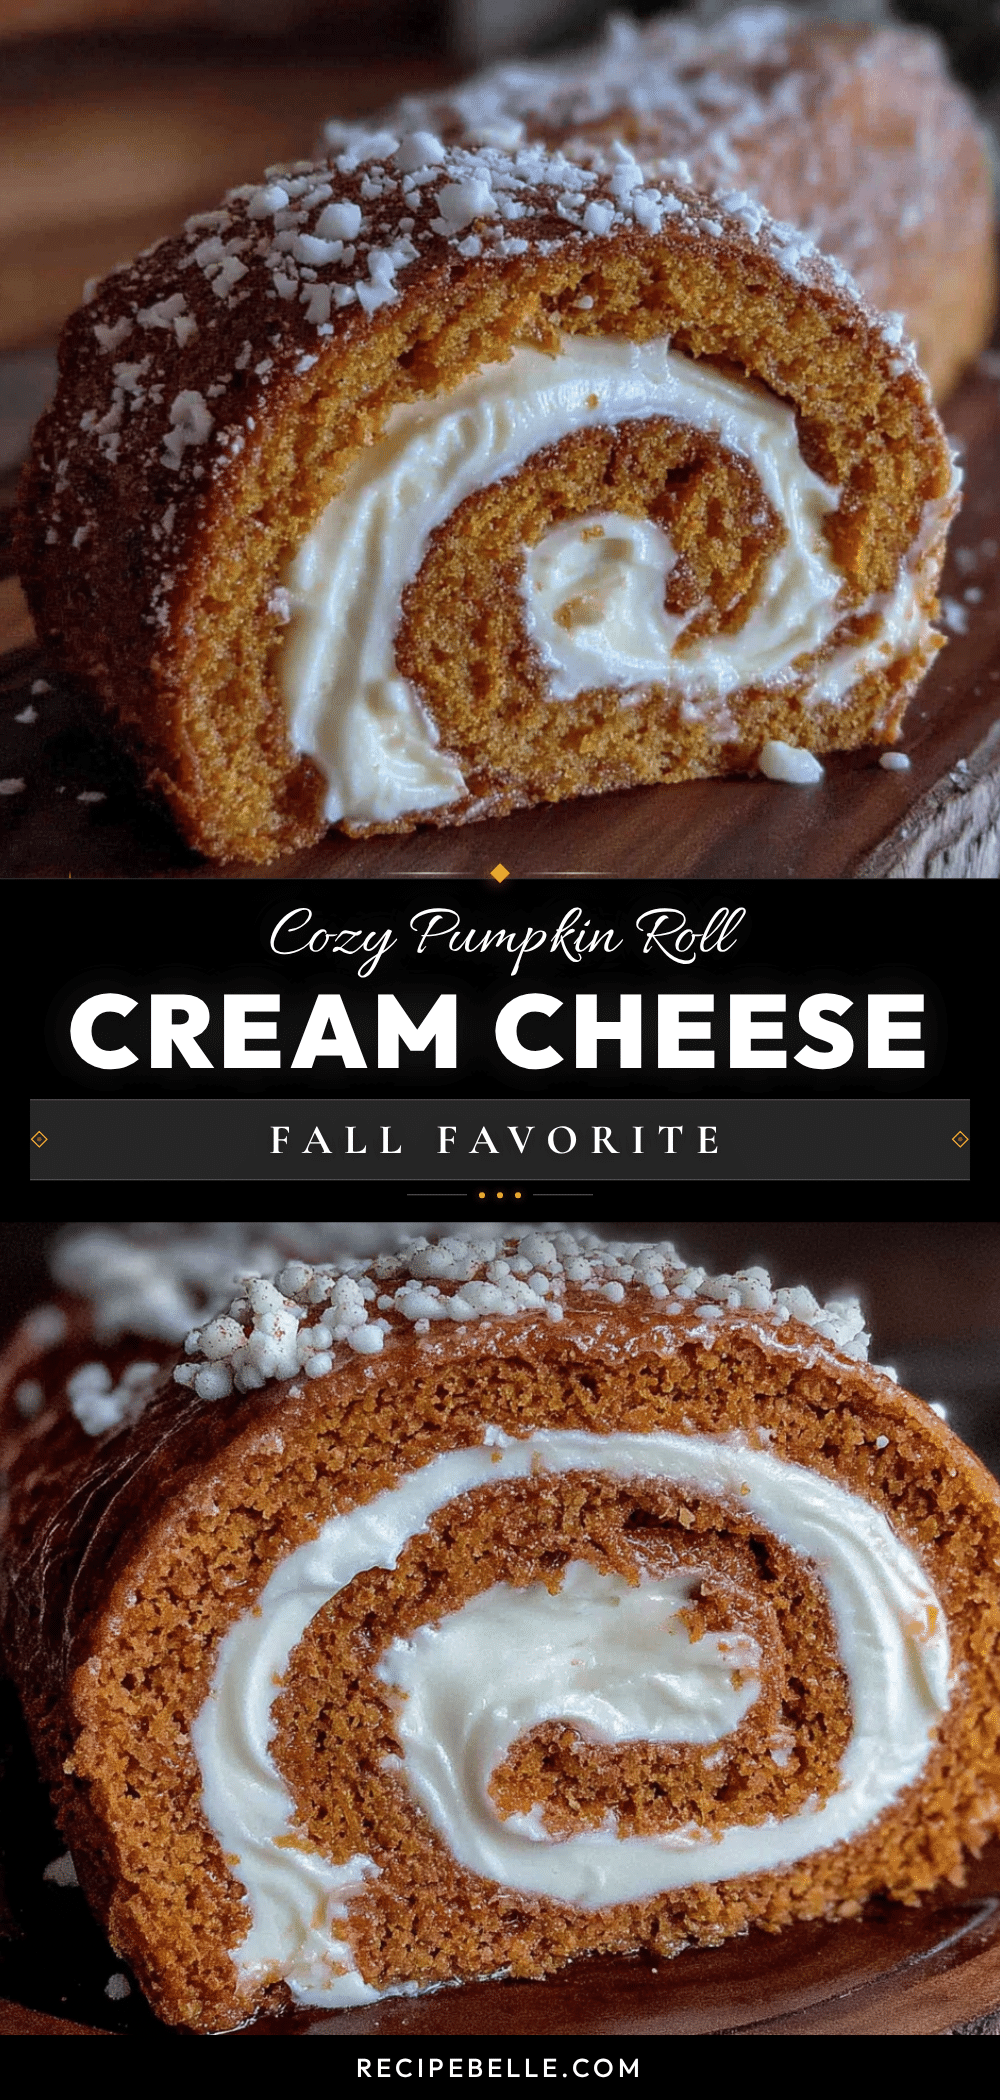
Best Easy Pumpkin Roll with Cream Cheese Filling

A moist and perfectly spiced pumpkin cake rolled with a tangy cream cheese filling. This impressive dessert is surprisingly simple to make and tastes even better the next day.
- Prep Time: 30 minutes
- Cook Time: 15 minutes
- Total Time: 3 hours 45 minutes (includes cooling and chilling)
- Yield: 10 servings 1x
- Category: Dessert
- Cuisine: American
Ingredients
- ¾ cup (95g) all-purpose flour
- 1 teaspoon baking powder
- ½ teaspoon baking soda
- 2 teaspoons ground cinnamon
- 1 teaspoon ground ginger
- ½ teaspoon ground nutmeg
- ½ teaspoon salt
- 3 large eggs, at room temperature
- 1 cup (200g) granulated sugar
- ⅔ cup (165g) pumpkin puree, blotted dry
- 1 teaspoon vanilla extract
- Powdered sugar, for dusting
- 8 ounces (226g) cream cheese, softened
- ¼ cup (57g) unsalted butter, softened
- 1 cup (120g) powdered sugar, sifted
- 1 teaspoon vanilla extract
Instructions
- Preheat oven to 375°F (190°C). Line a 15x10x1-inch jelly roll pan with parchment paper, leaving overhang on the long sides. Lightly spray parchment with non-stick cooking spray.
- In a small bowl, whisk together flour, baking powder, baking soda, cinnamon, ginger, nutmeg, and salt. Set aside.
- In a large mixing bowl, beat eggs and granulated sugar with an electric mixer on high speed for 3-4 minutes until thick, pale, and fluffy (ribbon stage).
- Reduce mixer speed to low and beat in pumpkin puree and vanilla extract until just combined.
- Gently fold dry ingredients into wet mixture using a rubber spatula until no streaks of flour remain. Do not overmix.
- Pour batter into prepared pan and spread evenly. Bake for 13-15 minutes, until top springs back when touched and edges start to pull away from pan.
- As soon as cake comes out of oven, run a knife around edges to loosen. Lay a clean kitchen towel on counter and dust generously with powdered sugar. Carefully lift cake out of pan using parchment overhang and flip onto sugared towel. Gently peel off parchment paper.
- While cake is still warm, start at one short end and carefully roll cake and towel together into a tight log. Let cool completely on a wire rack, still rolled up (about 1 hour).
- While cake cools, make filling: In a medium bowl, beat softened cream cheese and butter together until smooth and creamy. Add sifted powdered sugar and vanilla extract, beat on low until combined, then increase to high and beat for 2-3 minutes until light and fluffy.
- Once cake is completely cool, carefully unroll it. Spread cream cheese filling evenly over entire surface, leaving a small border around edges. Re-roll cake tightly without the towel.
- Wrap finished roll tightly in plastic wrap and refrigerate for at least 2 hours, or overnight.
- When ready to serve, trim ends for a clean look, dust top with more powdered sugar, and slice into spirals.
Notes
Blot pumpkin puree with paper towels to remove excess moisture. Roll cake while warm to prevent cracking. Chill roll for at least 2 hours for clean slices. Can be made up to 2 days ahead and stored in refrigerator. Freezes well for up to 3 months.
Nutrition
- Serving Size: 1 slice (1/10 of rol
- Calories: 320
- Sugar: 32
- Sodium: 250
- Fat: 16
- Saturated Fat: 9
- Carbohydrates: 42
- Fiber: 1
- Protein: 5
Keywords: pumpkin roll, cream cheese filling, pumpkin dessert, fall dessert, Thanksgiving dessert, easy pumpkin roll



