I was standing in my kitchen last October, staring at three overripe bananas that had seen better days, when the doorbell rang. My neighbor Carol stood there holding a pumpkin she’d grown in her garden—lopsided, dusty, and absolutely perfect. “I have too many,” she said, thrusting it into my hands. “Make something good.” I laughed and told her about my sad bananas. She just shrugged and said, “Why not both?”
Honestly, I almost didn’t try it. Pumpkin and banana together felt like a gamble—two strong flavors fighting for attention. But I had nothing to lose, and the bananas were practically begging to be used. So I roasted that pumpkin, mashed it up, and started experimenting. The first loaf came out okay. The second was better. By the third try, I knew I had something special.
This Moist One-Bowl Pumpkin Banana Bread is the result of that accidental kitchen collaboration. It’s the kind of recipe that makes you wonder why nobody thought of it sooner. The pumpkin keeps it incredibly tender while the banana brings natural sweetness and that unmistakable flavor we all love. Plus, it all comes together in one bowl—because who wants extra dishes?
Maybe you’ve been there, staring at ripe bananas and wondering what to do besides the usual banana bread. Or maybe you have a can of pumpkin lingering in your pantry from last fall. Either way, this recipe is your answer. It’s become my go-to for fall baking, neighbor gifts, and those mornings when you want something cozy with your coffee. Let me show you how easy it is.
Why You’ll Love This Recipe
I’ve tested this recipe more times than I care to admit, and every single loaf has disappeared fast. Here’s what makes it stand out from every other quick bread you’ve tried:
- One Bowl Wonder: No need to cream butter and sugar separately or dirty multiple mixing bowls. Everything goes into one bowl, which means less cleanup and more time enjoying your bread.
- Perfectly Moist Every Time: The combination of pumpkin puree and mashed banana creates a texture that’s almost pudding-like in its tenderness. You won’t get dry, crumbly bread here—just slice after slice of moist perfection.
- Simple Pantry Ingredients: Chances are you already have most of these ingredients in your kitchen. No specialty flours or hard-to-find extracts needed.
- Fall Flavors Year-Round: While this bread screams autumn, it’s delicious any time of year. The pumpkin adds moisture without overwhelming the banana flavor.
- Freezer-Friendly: Make two loaves and freeze one for later. It thaws beautifully and tastes just as fresh as the day you baked it.
What makes this recipe different from the dozens of pumpkin breads and banana breads out there? It’s the balance. The banana doesn’t overpower the pumpkin, and the pumpkin doesn’t hide the banana. They work together in a way that feels intentional, not accidental. I’ve had friends who swore they didn’t like pumpkin bread ask for seconds of this one.
This is the kind of bread that makes you close your eyes after the first bite. It’s comfort food at its finest—warm, spiced, and deeply satisfying. Perfect for lazy Sunday mornings, holiday brunches, or just because it’s Tuesday and you deserve something good.
What Ingredients You Will Need
This recipe uses simple, wholesome ingredients that work together to create something truly special. Most of these are pantry staples, which makes this bread perfect for those spontaneous baking cravings.
- All-purpose flour, 1 ¾ cups (210g) – The foundation of our bread. I’ve tested this with whole wheat pastry flour too, and it works great if you want a heartier texture.
- Baking soda, 1 teaspoon – This is our leavening agent. Make sure it’s fresh—old baking soda won’t give you the rise you need.
- Baking powder, ½ teaspoon – A little extra lift never hurt anyone. Together with the baking soda, it creates the perfect crumb.
- Salt, ½ teaspoon – Don’t skip this! Salt enhances all the other flavors and balances the sweetness.
- Ground cinnamon, 1 ½ teaspoons – The star spice in this bread. It complements both pumpkin and banana beautifully.
- Ground nutmeg, ½ teaspoon – Adds warmth and depth. Freshly grated is amazing if you have it.
- Ground ginger, ¼ teaspoon – A subtle kick that makes the flavors pop. You can skip it if you don’t have it, but I really recommend it.
- Granulated sugar, ½ cup (100g) – Provides sweetness and helps with browning.
- Brown sugar, ½ cup (100g), packed – Adds moisture and a deeper, caramel-like sweetness. I use light brown sugar, but dark works too.
- Vegetable oil, ½ cup (120ml) – Keeps the bread incredibly moist. Canola or melted coconut oil work well too.
- Large eggs, 2, at room temperature – They bind everything together and add richness. Let them sit out for 30 minutes if you can.
- Vanilla extract, 2 teaspoons – Enhances all the flavors. I use pure vanilla extract, not imitation.
- Pumpkin puree, 1 cup (240g) – Not pumpkin pie filling! Make sure you’re getting 100% pure pumpkin puree. I like Libby’s brand for consistent results.
- Ripe bananas, 1 cup mashed (about 2-3 medium bananas) – The riper, the better. Those spotty brown bananas are perfect here.
Optional add-ins: ½ cup chopped walnuts or pecans for crunch, or ½ cup chocolate chips if you’re feeling indulgent. I’ve done both, and they’re equally delicious.
Equipment Needed
You don’t need fancy equipment for this recipe, which is part of its charm. Here’s what you’ll need:
- Large mixing bowl – Any big bowl will do. I use a ceramic one that’s been in my family for years.
- 9×5-inch loaf pan – Standard size works perfectly. Glass, metal, or ceramic all work, but metal gives the best browning.
- Whisk – For mixing the dry ingredients together before adding the wet ones.
- Wooden spoon or rubber spatula – For folding everything together. Don’t overmix, so a gentle hand is key.
- Measuring cups and spoons – For accuracy. I cannot stress this enough—baking is science.
- Potato masher or fork – For mashing those bananas. A fork works in a pinch, but a masher is faster.
- Cooling rack – Essential for even cooling. If you don’t have one, you can use the oven grates (just make sure they’re clean).
- Parchment paper – Optional but helpful for easy removal. I always line my pans with it.
If you don’t have a loaf pan, you can bake this in an 8×8-inch square pan for about 30-35 minutes. Just keep an eye on it.
Preparation Method
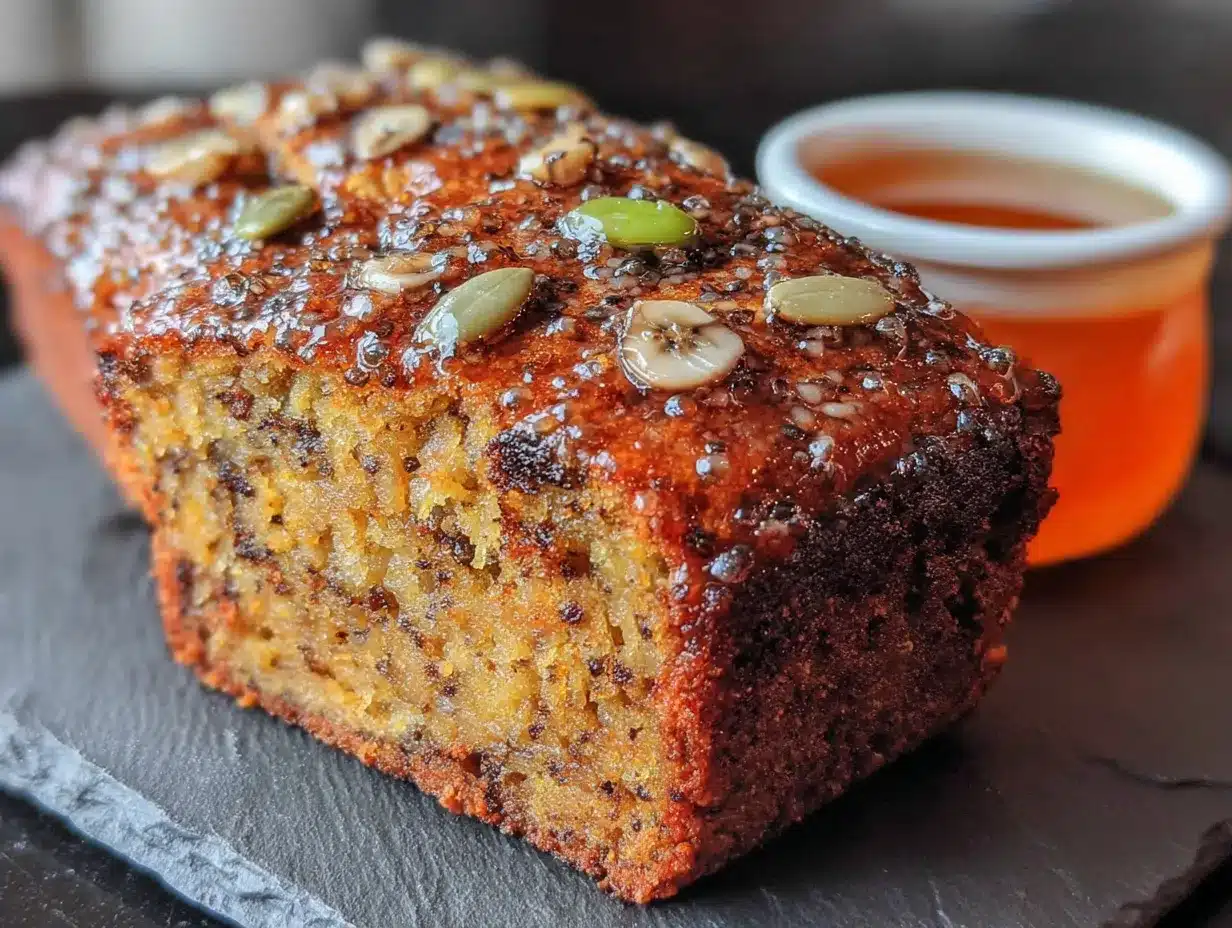
Ready to bake? Let’s walk through this step by step. I promise it’s easier than you think.
- Preheat your oven to 350°F (175°C). Position the rack in the center of the oven. While it’s heating, grease your loaf pan with butter or non-stick spray, or line it with parchment paper leaving some overhang on the sides for easy lifting.
- Mash your bananas. In your large mixing bowl, mash the ripe bananas with a fork or potato masher until smooth. A few small lumps are totally fine—they add texture. You should have about 1 cup of mashed banana.
- Add the wet ingredients. To the same bowl with the mashed bananas, add the pumpkin puree, vegetable oil, eggs, and vanilla extract. Whisk everything together until smooth and well combined. The mixture should look uniform and slightly glossy.
- Add the sugars. Pour in the granulated sugar and packed brown sugar. Whisk again until the sugars are fully incorporated and the mixture looks slightly thicker. Don’t worry if you see a few tiny sugar granules—they’ll dissolve during baking.
- Mix the dry ingredients separately. In a separate small bowl (I know, I said one bowl, but this is worth it), whisk together the flour, baking soda, baking powder, salt, cinnamon, nutmeg, and ginger. This ensures the leavening agents and spices are evenly distributed. If you skip this step, you might end up with a pocket of baking soda in your bread—trust me, I’ve been there, and it’s not pleasant.
- Combine wet and dry ingredients. Add the dry ingredients to the wet ingredients in your large bowl. Use a rubber spatula or wooden spoon to fold everything together gently. Stir just until you no longer see streaks of flour. A few lumps are okay. Do not overmix! Overmixing develops gluten and will make your bread tough instead of tender.
- Fold in any add-ins. If you’re using nuts or chocolate chips, gently fold them in now with a few quick strokes. Don’t overwork the batter.
- Pour into prepared pan. Scrape the batter into your greased loaf pan and spread it evenly with the spatula. Give the pan a gentle tap on the counter to release any air bubbles.
- Bake for 55-65 minutes. Place the pan in the preheated oven and bake until a toothpick inserted into the center comes out clean or with just a few moist crumbs. The top should be golden brown and cracked in that beautiful way quick breads do. If the top is browning too quickly (around the 40-minute mark), tent loosely with aluminum foil.
- Cool properly. Let the bread cool in the pan on a wire rack for 15 minutes. Then, carefully lift it out using the parchment paper overhang (or invert it onto the rack) and let it cool completely before slicing. I know it’s tempting to cut into it warm, but it will crumble if you do. Patience, my friend.
Cooking Tips & Techniques
After making this bread more times than I can count, I’ve picked up a few tricks that make a real difference. Let me share them with you.
Use room temperature ingredients. Cold eggs can seize up your batter and create an uneven texture. Let your eggs sit on the counter for 30 minutes before starting. If you forget, place them in a bowl of warm water for 5 minutes.
Don’t overmix the batter. This is the number one mistake I see with quick breads. Mix until the flour just disappears. Those few streaks of flour are fine—they’ll work themselves out. Overmixing develops gluten and gives you a dense, rubbery bread.
Check for doneness properly. A toothpick test is reliable, but also look for the edges pulling away from the pan slightly. The top should spring back when gently pressed. If it feels squishy, it needs more time.
Let it cool completely. I learned this the hard way. Cutting into warm bread releases steam too quickly, leaving you with a gummy texture. Wait the full cooling time, and you’ll be rewarded with clean slices that hold their shape.
Toast leftover slices. Day-old pumpkin banana bread is amazing when toasted. Pop a slice in the toaster or under the broiler for a minute, then spread with butter. The edges get crispy while the inside stays soft. It’s a whole new experience.
Measure flour correctly. Spoon flour into your measuring cup and level it off with a knife. Scooping directly from the bag packs the flour down and can add up to 25% more flour than the recipe calls for. That extra flour is what makes dry, crumbly bread.
Variations & Adaptations
One of the best things about this recipe is how adaptable it is. Here are some variations I’ve tried and loved:
Gluten-Free Version: Substitute the all-purpose flour with a good 1:1 gluten-free baking flour blend. I’ve had great results with Bob’s Red Mill brand. Add ½ teaspoon of xanthan gum if your blend doesn’t already include it.
Dairy-Free Version: This recipe is already dairy-free since we use oil instead of butter. Just make sure your chocolate chips (if using) are dairy-free, and you’re good to go.
Vegan Version: Replace the eggs with flax eggs (1 tablespoon ground flaxseed mixed with 3 tablespoons water per egg, let sit for 5 minutes). The texture will be slightly denser but still delicious.
Spice It Up: Add ¼ teaspoon of cloves or allspice for a warmer spice profile. Or try pumpkin pie spice instead of individual spices—use 2 teaspoons total.
Chocolate Lover’s Version: Fold in ½ cup of semi-sweet chocolate chips and drizzle melted chocolate over the cooled loaf. This version disappears fastest in my house.
Streusel Topping: Mix ¼ cup flour, ¼ cup brown sugar, 2 tablespoons cold butter, and ½ teaspoon cinnamon until crumbly. Sprinkle over the batter before baking for a crunchy top.
Mini Loaves or Muffins: Divide the batter among 3 mini loaf pans (bake 35-40 minutes) or 12 muffin cups (bake 18-22 minutes). Perfect for gift-giving or portion control.
Serving & Storage Suggestions
This bread is incredibly versatile when it comes to serving. Here’s how I like to enjoy it:
Serving Temperature: Room temperature is ideal, but warm slices with a pat of butter are pure heaven. For an extra treat, spread with cream cheese or honey butter.
Perfect Pairings: Serve alongside a hot cup of coffee, chai tea, or spiced apple cider. It also makes a lovely addition to a brunch spread with fresh fruit and yogurt.
Presentation Ideas: Dust the top with powdered sugar just before serving for a pretty finish. Or drizzle with a simple glaze made from 1 cup powdered sugar mixed with 2 tablespoons milk and ½ teaspoon vanilla.
Storage Instructions: Wrap the cooled bread tightly in plastic wrap or aluminum foil and store at room temperature for up to 3 days. For longer storage, refrigerate for up to a week—just bring to room temperature before serving.
Freezer Instructions: This bread freezes beautifully. Wrap the cooled loaf (or individual slices) in plastic wrap, then foil, and place in a freezer bag. Freeze for up to 3 months. Thaw overnight in the refrigerator or at room temperature for a few hours.
Flavor Development: Here’s a little secret—this bread actually tastes better the next day. The flavors meld together overnight, creating a deeper, more complex taste. So don’t be afraid to make it a day ahead!
Nutritional Information & Benefits
While I wouldn’t call this a health food, it does have some redeeming qualities. Here’s the breakdown per slice (based on 10 slices):
- Calories: Approximately 290
- Fat: 13g
- Carbohydrates: 41g
- Fiber: 2g
- Sugar: 22g
- Protein: 4g
Health Benefits: Pumpkin is packed with vitamin A (great for eye health) and fiber. Bananas provide potassium and vitamin B6. The cinnamon may help with blood sugar regulation. Plus, using oil instead of butter keeps the saturated fat lower than traditional quick breads.
Dietary Considerations: This recipe is nut-free if you skip the walnuts, and it can easily be made gluten-free or vegan as mentioned above. It contains eggs and wheat (gluten) in its standard form.
My Wellness Perspective: I believe in balance. This bread has sugar and oil, but it also has real, whole food ingredients. It’s a treat, not an everyday breakfast. Enjoy it mindfully, share it with people you love, and don’t stress about the numbers.
Conclusion
This Moist One-Bowl Pumpkin Banana Bread has become a staple in my kitchen for good reason. It’s easy enough for a beginner baker but impressive enough to bring to any gathering. The combination of pumpkin and banana might seem unusual, but trust me—it works beautifully.
I love how forgiving this recipe is. Forget to set out your eggs? No problem. Only have one banana? Adjust the pumpkin. Baking should feel creative and fun, not stressful. This recipe gives you room to play while still delivering consistent, delicious results every time.
I’d love to hear how yours turns out! Did you add chocolate chips? Try the streusel topping? Make it gluten-free? Drop a comment below and share your version. And if you snap a photo, tag me—I love seeing your baking adventures.
Happy baking, friends. May your loaf be moist, your kitchen smell amazing, and your day be just a little bit sweeter.
Frequently Asked Questions
Can I use frozen bananas for this recipe?
Absolutely! Thaw frozen bananas completely and drain off any excess liquid before mashing. The texture will be slightly softer, but the flavor is even more concentrated. Just make sure to use them within the same day of thawing.
Why did my bread sink in the middle?
This usually happens when the bread is underbaked or the oven temperature is too low. Make sure your oven is properly preheated to 350°F. Also, avoid opening the oven door during the first 40 minutes of baking—the rush of cold air can cause the bread to collapse.
Can I use canned pumpkin pie filling instead of pumpkin puree?
I wouldn’t recommend it. Pumpkin pie filling has added sugar and spices that will throw off the balance of this recipe. Stick with 100% pure pumpkin puree for the best results. If you only have pumpkin pie filling, reduce the sugar by half and skip the added spices.
How do I know when the bread is done baking?
Insert a toothpick or skewer into the center of the loaf. If it comes out clean or with just a few moist crumbs, it’s done. The top should be golden brown and cracked, and the edges should be pulling away from the pan slightly. If the toothpick has wet batter on it, bake for another 5-10 minutes and test again.
Can I make this bread without a loaf pan?
Yes! You can bake the batter in an 8×8-inch square pan for about 30-35 minutes, or in a muffin tin for 18-22 minutes. Just adjust the baking time and keep an eye on it. Mini loaves take about 35-40 minutes. No matter what pan you use, the toothpick test is your best friend.
Pin This Recipe!
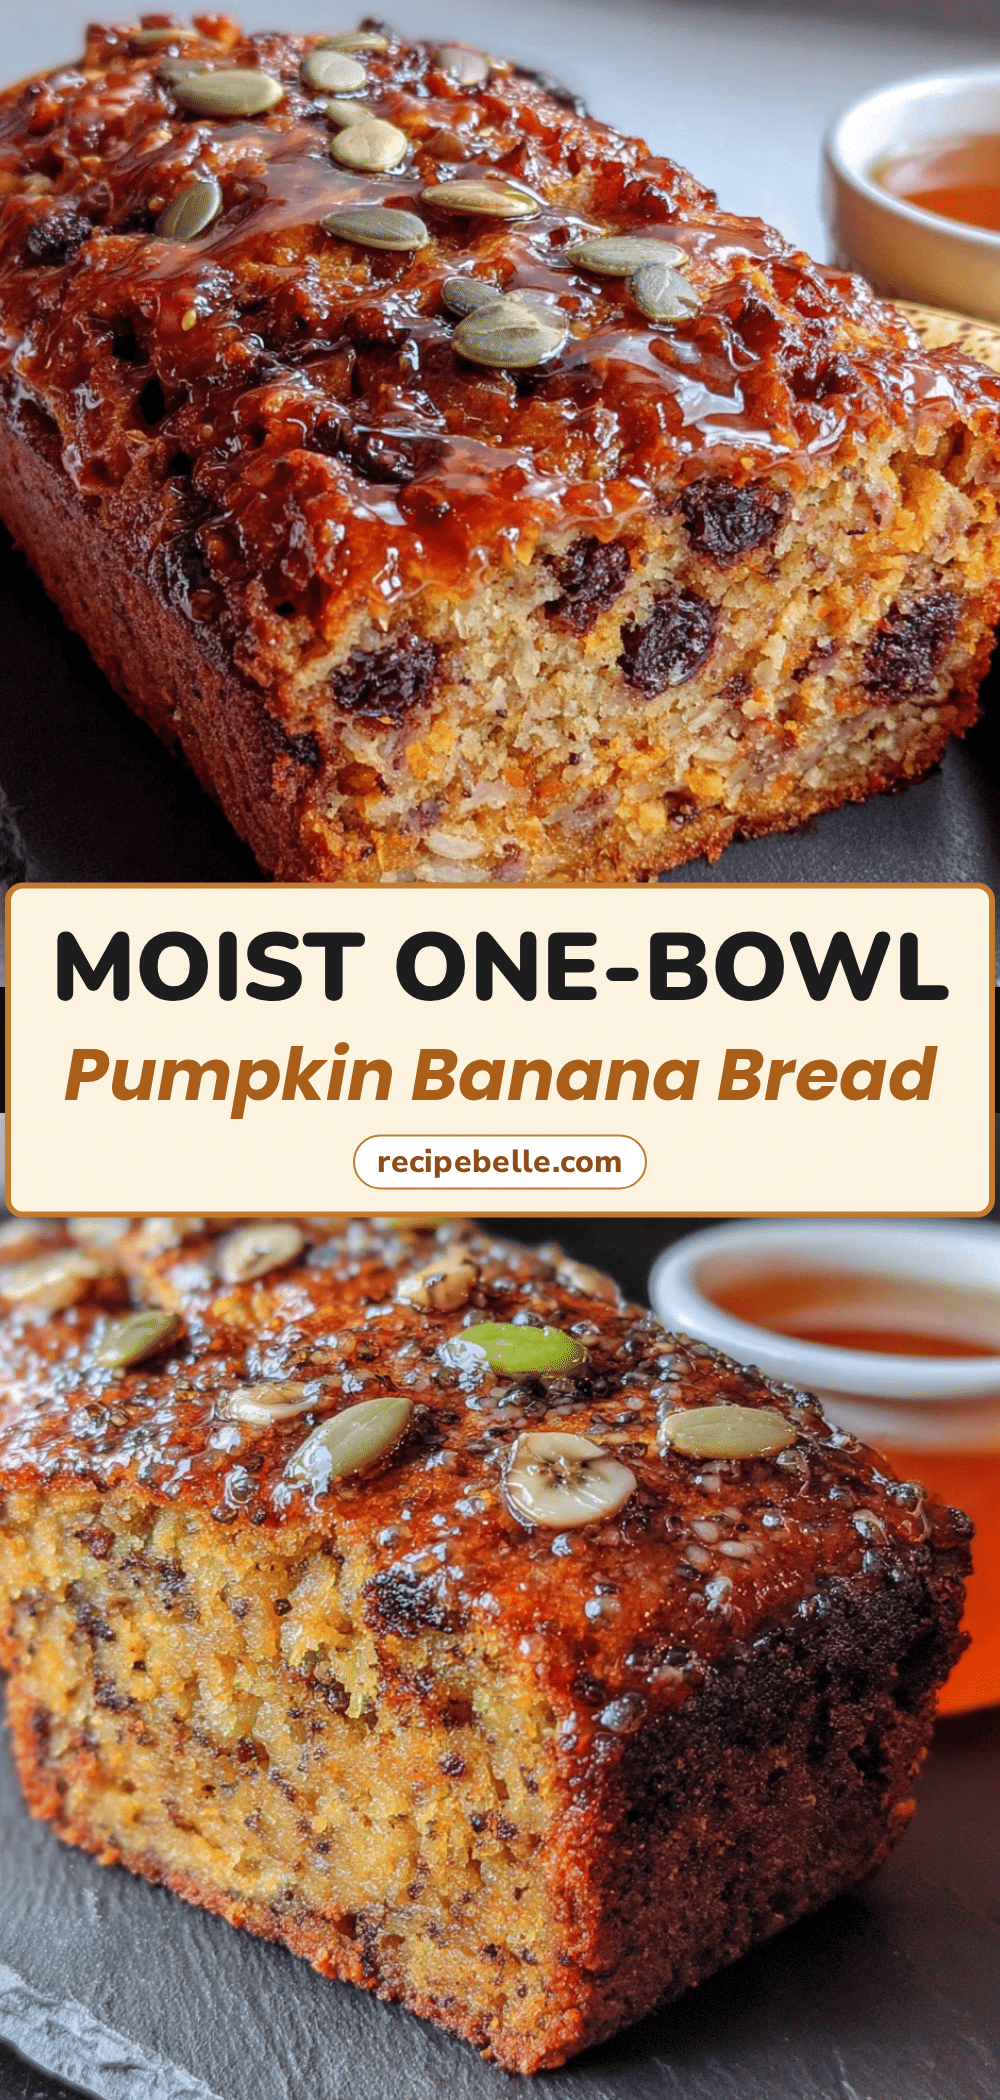
Best Moist Pumpkin Banana Bread Recipe
This Moist One-Bowl Pumpkin Banana Bread is the result of an accidental kitchen collaboration. The pumpkin keeps it incredibly tender while the banana brings natural sweetness and that unmistakable flavor we all love, all coming together in one bowl.
- Prep Time: 15 minutes
- Cook Time: 55-65 minutes
- Total Time: 1 hour 10 minutes - 1 hour 20 minutes
- Yield: 10 servings 1x
- Category: Quick Bread
- Cuisine: American
Ingredients
- 1 ¾ cups (210g) all-purpose flour
- 1 teaspoon baking soda
- ½ teaspoon baking powder
- ½ teaspoon salt
- 1 ½ teaspoons ground cinnamon
- ½ teaspoon ground nutmeg
- ¼ teaspoon ground ginger
- ½ cup (100g) granulated sugar
- ½ cup (100g) packed brown sugar
- ½ cup (120ml) vegetable oil
- 2 large eggs, at room temperature
- 2 teaspoons vanilla extract
- 1 cup (240g) pumpkin puree
- 1 cup mashed ripe bananas (about 2–3 medium bananas)
- ½ cup chopped walnuts or pecans (optional)
- ½ cup chocolate chips (optional)
Instructions
- Preheat your oven to 350°F (175°C). Position the rack in the center of the oven. Grease your loaf pan with butter or non-stick spray, or line it with parchment paper leaving some overhang on the sides for easy lifting.
- In your large mixing bowl, mash the ripe bananas with a fork or potato masher until smooth. You should have about 1 cup of mashed banana.
- To the same bowl with the mashed bananas, add the pumpkin puree, vegetable oil, eggs, and vanilla extract. Whisk everything together until smooth and well combined.
- Pour in the granulated sugar and packed brown sugar. Whisk again until the sugars are fully incorporated and the mixture looks slightly thicker.
- In a separate small bowl, whisk together the flour, baking soda, baking powder, salt, cinnamon, nutmeg, and ginger.
- Add the dry ingredients to the wet ingredients in your large bowl. Use a rubber spatula or wooden spoon to fold everything together gently. Stir just until you no longer see streaks of flour. Do not overmix!
- If you’re using nuts or chocolate chips, gently fold them in now with a few quick strokes.
- Scrape the batter into your greased loaf pan and spread it evenly with the spatula. Give the pan a gentle tap on the counter to release any air bubbles.
- Bake for 55-65 minutes until a toothpick inserted into the center comes out clean or with just a few moist crumbs. If the top is browning too quickly (around the 40-minute mark), tent loosely with aluminum foil.
- Let the bread cool in the pan on a wire rack for 15 minutes. Then, carefully lift it out using the parchment paper overhang and let it cool completely before slicing.
Notes
Use room temperature ingredients for best results. Do not overmix the batter. Let the bread cool completely before slicing to avoid crumbling. This bread tastes even better the next day as flavors meld. For gluten-free, use a 1:1 gluten-free flour blend. For vegan, replace eggs with flax eggs.
Nutrition
- Serving Size: 1 slice
- Calories: 290
- Sugar: 22
- Sodium: 280
- Fat: 13
- Saturated Fat: 2
- Carbohydrates: 41
- Fiber: 2
- Protein: 4
Keywords: pumpkin banana bread, moist banana bread, pumpkin bread, one bowl banana bread, fall baking, quick bread



