I wasn’t expecting to find my new favorite fall dessert while getting my car’s oil changed, but there I was, sitting in a sticky vinyl chair at Jiffy Lube, listening to the mechanic describe exactly how to make no-bake pumpkin cheesecake bars. His name was Dave, he had grease under his fingernails, and he talked about cream cheese with the same reverence most people reserve for their first love. Honestly, I almost laughed when he started describing the recipe. But then he got to the part about the gingersnap crust, and I found myself grabbing a pen from the receptionist’s desk to write it all down on the back of my receipt.
The funny thing is, I’d been searching for a good no-bake pumpkin cheesecake recipe for weeks. Every version I tried either came out too runny or had that weird gelatin texture that just feels wrong. You know that feeling when you bite into something that’s supposed to be creamy but it’s more like wobbly Jell-O? Yeah, not what I was going for. Dave’s version used a clever trick with cream cheese and a specific ratio of pumpkin puree that I’d never seen before. He said his wife made it every Thanksgiving, and she’d been perfecting it for fifteen years. I mean, who was I to argue with that kind of dedication?
I made the recipe that very weekend, and let me tell you, it was everything I wanted. The filling was so creamy and smooth, with just the right amount of pumpkin spice warmth. The crust had this amazing crunch that held up perfectly against the silky filling. And the best part? It took me maybe fifteen minutes of actual work. The rest was just fridge time. That first bite was the kind of moment where you just close your eyes and forget where you are for a second. I’ve been making these creamy no-bake pumpkin cheesecake bars every fall since, and they’ve become the dessert I’m most proud to bring to gatherings. There’s something special about a recipe that comes from an unexpected place, you know?
Why You’ll Love This Recipe
Let me be real with you for a second. I’ve tested a lot of pumpkin cheesecake recipes over the years, and most of them have some fatal flaw. Either the filling is too dense, the crust gets soggy, or you need to bust out a double boiler and a kitchen torch. Not this one. These creamy no-bake pumpkin cheesecake bars are the result of many, many trials, and I can honestly say they’re foolproof.
- Quick & Easy: The active prep time is about 15 minutes. That’s it. The hardest part is waiting for them to chill in the fridge, but that’s the fridge’s job, not yours.
- Simple Ingredients: You probably have most of these in your kitchen right now. No agar-agar, no gelatin sheets, no weird stabilizers. Just real ingredients that work together beautifully.
- Perfect for Fall Gatherings: Thanksgiving, Friendsgiving, potlucks, or just a random Tuesday when you need something cozy. These bars fit right in.
- Crowd-Pleaser: I’ve served these to pumpkin lovers and pumpkin skeptics alike, and the pan always comes back empty. The cream cheese and pumpkin balance each other perfectly.
- Unbelievably Delicious: The texture is what gets everyone. It’s silky and rich without being heavy, and the crust stays crunchy even after a day in the fridge. That’s the real magic trick here.
What makes this recipe different from the rest is the technique. Instead of using heavy cream or whipped cream, this recipe uses a specific ratio of cream cheese to pumpkin puree that creates a naturally thick, stable filling without any baking or gelatin. The cream cheese provides structure, the pumpkin adds body, and the spices bring all that warm fall flavor. It’s not just another version of pumpkin cheesecake bars—it’s the version that actually works every single time.
These bars are the kind of dessert that makes you look like you spent hours in the kitchen when you really just threw things in a bowl and let the fridge do the work. They’re perfect for when you want to impress people without the stress. And honestly, isn’t that the best kind of recipe?
What Ingredients You Will Need
This recipe uses simple, wholesome ingredients that come together to create something truly special. Most of these are pantry staples, especially if you do any fall baking. Let me walk you through each one so you know exactly what to look for.
For the Gingersnap Crust
- 2 cups (200g) gingersnap cookie crumbs — I recommend using store-bought gingersnaps for consistency. Pulse them in a food processor until you have fine crumbs. You can also crush them in a zip-top bag with a rolling pin if you need to work out some frustration.
- 6 tablespoons (85g) unsalted butter, melted — Salted butter works too, just reduce any added salt in the recipe. The butter binds the crumbs together and adds richness.
- 2 tablespoons (25g) granulated sugar — This is optional if your gingersnaps are already sweet. I like the extra little bit of sweetness to balance the spicy cookies.
- ¼ teaspoon salt — Only if using unsalted butter. The salt helps balance the sweetness and enhances the ginger flavor.
For the Pumpkin Cheesecake Filling
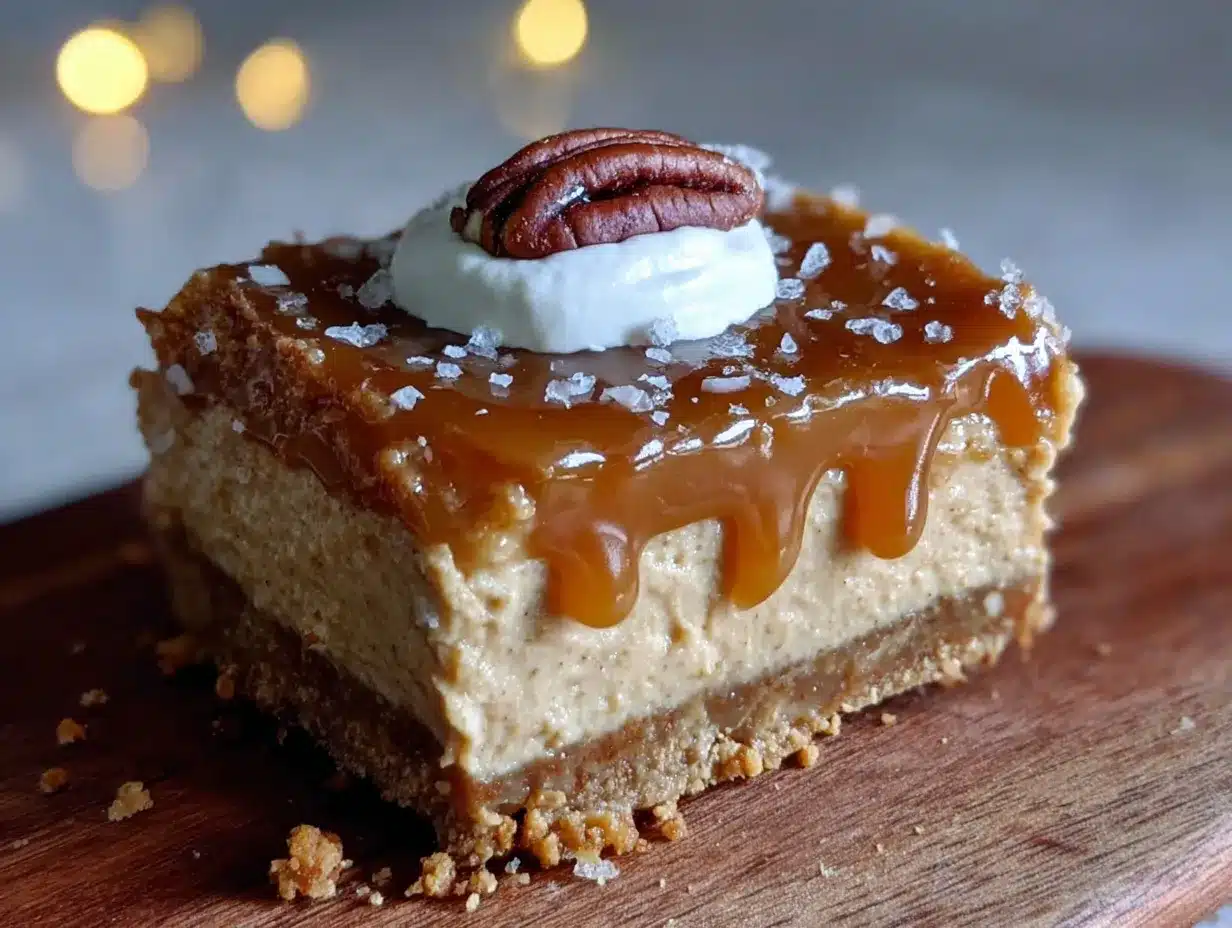
- 16 ounces (450g) cream cheese, softened to room temperature — This is crucial. Cold cream cheese will give you lumpy filling. Let it sit on the counter for at least an hour before starting. I like Philadelphia brand for its consistent texture.
- 1 cup (200g) packed light brown sugar — Brown sugar adds molasses notes that pair beautifully with pumpkin and spices. Dark brown sugar works too for a deeper flavor.
- 1 cup (240g) pumpkin puree — Not pumpkin pie filling! Make sure you grab 100% pure pumpkin puree. Libby’s is my go-to brand because it’s consistently thick and not watery.
- 1 teaspoon vanilla extract — Pure vanilla extract makes a difference here. The artificial stuff has a weird aftertaste that can throw off the whole filling.
- 1½ teaspoons pumpkin pie spice — You can use store-bought or make your own blend. I’ll share my mix in the tips section.
- ½ teaspoon ground cinnamon — Because you can never have too much cinnamon in a pumpkin dessert.
- ¼ teaspoon ground nutmeg — Freshly grated if you have it, but pre-ground works fine.
- Pinch of salt — Just a tiny bit to bring all the flavors together.
For the Whipped Topping (Optional but Recommended)
- 1 cup (240ml) heavy whipping cream — Cold from the fridge. You can also use a tub of cool whip if you’re in a hurry, but homemade is so much better.
- 2 tablespoons (15g) powdered sugar — This stabilizes the cream and adds sweetness without grittiness.
- ½ teaspoon vanilla extract — For flavor.
That’s it. No weird ingredients, no specialty items. Just good, honest ingredients that make something magical happen when they come together.
Equipment Needed
You don’t need a fancy kitchen to make these creamy no-bake pumpkin cheesecake bars. Here’s what you’ll need:
- 9×9-inch baking pan — This is the perfect size for getting nice, thick bars. An 8×8-inch pan works too, your bars will just be a little taller.
- Parchment paper — Line your pan with parchment paper, leaving some overhang on two sides. This makes lifting the bars out so much easier. Trust me on this one.
- Food processor — For crushing the gingersnaps into fine crumbs. A zip-top bag and rolling pin work too, but the food processor gives you more consistent results.
- Electric hand mixer or stand mixer — You need something to beat the cream cheese until it’s smooth. A whisk and some serious elbow grease could work, but your arm will thank you for using a mixer.
- Medium mixing bowl — For the crust ingredients.
- Large mixing bowl — For the filling. Make sure it’s big enough to avoid splatters.
- Spatula — For scraping down the bowl and spreading the filling evenly.
- Measuring cups and spoons — For accurate measurements. Baking is a science, after all.
I’ve made this recipe with both a fancy KitchenAid stand mixer and a $20 hand mixer from the grocery store. Both worked perfectly. Don’t let a lack of fancy equipment stop you from making these bars.
Preparation Method
Alright, let’s get to the good part. Here’s how to make these creamy no-bake pumpkin cheesecake bars step by step. I’ve included all the little details that make a difference.
Step 1: Prepare Your Pan
Line your 9×9-inch baking pan with parchment paper. Make sure the parchment hangs over two opposite sides by about 2 inches. This creates handles that will make lifting the bars out later so much easier. I learned this the hard way after spending ten minutes trying to pry a stuck cheesecake out of a pan. Not fun.
Step 2: Make the Gingersnap Crust
Place the gingersnap cookies in your food processor and pulse until you have fine, even crumbs. You should have about 2 cups. Pour the crumbs into a medium bowl, add the melted butter, sugar, and salt. Stir with a fork until all the crumbs are evenly moistened. The mixture should look like wet sand and hold together when you squeeze it in your fist.
Press the mixture firmly into the bottom of your prepared pan. I use the bottom of a measuring cup to really pack it down. This is important — a loose crust will fall apart when you cut the bars. Once it’s evenly pressed, pop the pan in the fridge while you make the filling. This helps the crust set up.
Step 3: Beat the Cream Cheese
In a large mixing bowl, beat the softened cream cheese with an electric mixer on medium speed until it’s completely smooth and fluffy. This takes about 2-3 minutes. Scrape down the sides and bottom of the bowl with a spatula at least once. Any lumps now will show up in the final filling, so take your time here.
Step 4: Add the Sugar and Pumpkin
Add the brown sugar and beat on medium speed until fully incorporated, about 1 minute. Then add the pumpkin puree, vanilla extract, pumpkin pie spice, cinnamon, nutmeg, and salt. Beat on medium-low speed until everything is combined and smooth. Don’t overmix at this point, or you’ll incorporate too much air into the filling, which can cause cracking as it sets.
The mixture should be thick, creamy, and a beautiful orange-brown color. Taste it at this point — I always do. Adjust the spices if you want more warmth. Just remember that flavors mellow as they chill, so go a little heavier than you think you need.
Step 5: Assemble the Bars
Take the pan with the crust out of the fridge. Spoon the pumpkin cheesecake filling over the crust and spread it into an even layer using an offset spatula or the back of a spoon. Give the pan a few gentle taps on the counter to release any air bubbles.
Step 6: Chill Until Firm
Cover the pan with plastic wrap and refrigerate for at least 6 hours, but overnight is better. I know it’s hard to wait, but this is where the magic happens. The filling needs time to set up and become sliceable. If you try to cut it too early, you’ll end up with a delicious mess. Ask me how I know.
Step 7: Make the Whipped Topping
About 30 minutes before you’re ready to serve, make the whipped topping. Pour the cold heavy cream, powdered sugar, and vanilla extract into a chilled bowl. Beat with an electric mixer on medium-high speed until soft peaks form. This takes about 3-4 minutes. Be careful not to overbeat, or you’ll end up with butter.
Step 8: Slice and Serve
Using the parchment paper handles, lift the entire cheesecake block out of the pan and onto a cutting board. Use a sharp knife to cut into 9 or 16 squares, wiping the knife clean between cuts for neat edges. Top each bar with a dollop of whipped cream and a sprinkle of cinnamon if you’re feeling fancy.
Serve cold and watch them disappear.
Cooking Tips & Techniques
I’ve made these creamy no-bake pumpkin cheesecake bars more times than I can count, and I’ve definitely made my share of mistakes along the way. Here are the tips I wish someone had told me from the start.
Room temperature cream cheese is non-negotiable. I know, I know, you’re in a hurry. But cold cream cheese will leave you with lumpy filling no matter how long you beat it. Take it out of the fridge at least an hour before you start. If you forgot, you can microwave it in short bursts — 10 seconds at a time on low power — but be careful not to melt it.
Don’t skip the parchment paper handles. This is one of those tips that seems unnecessary until you really need it. I once made this recipe in a pan without parchment, and getting the first slice out was like performing surgery. The parchment handles make everything so much easier.
Press the crust firmly. I cannot stress this enough. A loosely packed crust will crumble when you cut the bars. Use the bottom of a glass or a measuring cup to really press those crumbs down. The firmer the crust, the cleaner your slices will be.
Let the bars chill overnight if you can. Six hours is the minimum, but overnight gives the filling time to fully set and the flavors to meld together. The difference is noticeable. The bars become creamier and the spices taste more integrated.
Use a sharp knife for clean cuts. Run your knife under hot water, wipe it dry, then make your cut. Wipe the blade clean between each cut. This gives you those beautiful, Instagram-worthy edges.
One time, I was in a rush and only let the bars chill for four hours. They were still delicious, but they were more like a pudding than a sliceable bar. They didn’t hold their shape at all. So yeah, patience pays off here.
Variations & Adaptations
One of the best things about this recipe is how adaptable it is. Here are some variations I’ve tried and loved.
Gluten-Free Version: Use gluten-free gingersnap cookies for the crust. Most brands work well, just make sure to check the label. The filling is naturally gluten-free, so this is an easy swap.
Dairy-Free Version: Use dairy-free cream cheese and a vegan butter substitute. I’ve had good results with Kite Hill cream cheese and Miyoko’s butter. The texture is slightly different — a bit softer — but still delicious. Just make sure to chill the bars for the full overnight time.
Graham Cracker Crust: If you can’t find gingersnaps, graham crackers work beautifully. Use 2 cups of graham cracker crumbs, 6 tablespoons melted butter, 2 tablespoons sugar, and add 1 teaspoon of cinnamon to the crust mixture. It’s a little milder than the gingersnap version but still wonderful.
Pumpkin Pie Spice Blend: If you don’t have store-bought pumpkin pie spice, make your own. Mix 1 teaspoon cinnamon, ½ teaspoon ginger, ¼ teaspoon nutmeg, ¼ teaspoon allspice, and a pinch of cloves. This makes about 2 teaspoons, which is perfect for this recipe.
Chocolate Drizzle: Melt ½ cup of dark chocolate chips with 1 teaspoon of coconut oil and drizzle it over the finished bars. The chocolate and pumpkin combination is surprisingly good. I did this for a Halloween party and people went crazy for it.
Individual Servings: Instead of making a full pan, press the crust into the bottom of small mason jars or ramekins, then spoon the filling on top. These make adorable gifts or party favors. Just reduce the chilling time to about 4 hours since they’re smaller portions.
Serving & Storage Suggestions
These creamy no-bake pumpkin cheesecake bars are best served cold, straight from the fridge. The filling is firm but creamy, and the crust has a satisfying crunch that contrasts beautifully with the smooth filling.
For presentation, I like to arrange the bars on a white platter with a few cinnamon sticks and star anise scattered around. It looks festive without being fussy. A light dusting of cinnamon or nutmeg on top of the whipped cream adds a nice finishing touch.
These bars pair wonderfully with a hot cup of coffee or a spiced chai latte. For a dessert spread, serve them alongside apple cider donuts or a simple vanilla panna cotta. The creamy pumpkin flavor complements other fall desserts without competing with them.
Storage: Keep the bars in an airtight container in the refrigerator for up to 5 days. They actually get better after the first day as the flavors continue to meld. Just make sure to keep them covered, or they’ll pick up other odors from the fridge.
Freezing: These bars freeze beautifully. Place them on a baking sheet in a single layer and freeze until solid, about 2 hours. Then transfer them to a freezer-safe container with parchment paper between layers. They’ll keep for up to 3 months. Thaw in the refrigerator overnight before serving. The texture remains remarkably creamy after freezing.
One thing to note: the crust will soften slightly after a day or two in the fridge. That’s normal and actually kind of nice — it becomes more like a cheesecake crust you’d get from a bakery. If you want to keep it crunchier, add the whipped topping just before serving rather than ahead of time.
Nutritional Information & Benefits
Here’s the nutritional breakdown for one bar (based on 9 servings, without whipped topping):
| Nutrient | Amount Per Serving |
|---|---|
| Calories | 385 |
| Total Fat | 24g |
| Saturated Fat | 14g |
| Cholesterol | 70mg |
| Sodium | 310mg |
| Total Carbohydrates | 39g |
| Dietary Fiber | 2g |
| Sugars | 28g |
| Protein | 5g |
| Vitamin A | 120% DV |
| Calcium | 6% DV |
| Iron | 8% DV |
These bars are surprisingly rich in Vitamin A thanks to the pumpkin puree, which supports eye health and immune function. The cream cheese provides calcium and protein, while the ginger in the crust has natural anti-inflammatory properties. Of course, these are still a treat, so enjoy them in moderation. But hey, at least there’s some nutritional value hiding in that creamy, delicious filling.
If you’re watching your sugar intake, you can reduce the brown sugar to ¾ cup. The bars will be slightly less sweet but still plenty flavorful. For a lower-fat option, use reduced-fat cream cheese, but note that the texture will be slightly less creamy.
Conclusion
These creamy no-bake pumpkin cheesecake bars are the kind of recipe that becomes a tradition. They’re easy enough for a weekday treat but special enough for Thanksgiving dessert. The combination of the spicy gingersnap crust and the silky pumpkin filling is just perfect, and the fact that you don’t have to turn on the oven is a huge bonus.
I love this recipe because it reminds me that good food can come from anywhere — even a mechanic at Jiffy Lube. It’s proof that you don’t need fancy techniques or complicated steps to create something truly memorable. Sometimes the best recipes are the ones that let the ingredients shine and do the work for you.
I’d love to hear how these turn out for you! Did you add any fun variations? Did you serve them at a gathering? Drop a comment below and let me know. And if you snap a photo, tag me on Pinterest — I love seeing your creations. Happy fall baking, friends!
Frequently Asked Questions
Can I use pumpkin pie filling instead of pumpkin puree?
No, please don’t. Pumpkin pie filling has added sugar and spices, which will throw off the balance of this recipe. Stick with 100% pure pumpkin puree for the best results. The filling will be too sweet and might not set properly if you use pie filling.
Why is my filling not setting?
This usually happens for one of two reasons: either the cream cheese wasn’t softened enough, or the bars didn’t chill long enough. Make sure your cream cheese is at room temperature, and give the bars at least 6 hours in the fridge. If you’re still having trouble, your pumpkin puree might have been too watery. Pat it dry with paper towels before using it next time.
Can I make these bars vegan?
Yes, with some adjustments. Use vegan cream cheese and a plant-based butter alternative for the crust. The filling will be slightly softer, so plan on chilling the bars overnight. I’ve had good results with this approach, though the texture isn’t quite as rich as the original.
How do I get clean slices?
Use a sharp knife and wipe it clean between each cut. You can also run the knife under hot water and dry it before cutting. This helps the knife glide through the filling without dragging. Chilling the bars for the full recommended time also makes a big difference.
Can I skip the whipped topping?
Absolutely. The bars are delicious on their own, and the whipped topping is totally optional. If you want to keep things simpler, just serve the bars as is. A light dusting of cinnamon or powdered sugar is a nice alternative if you want a little something extra without the extra work.
Pin This Recipe!
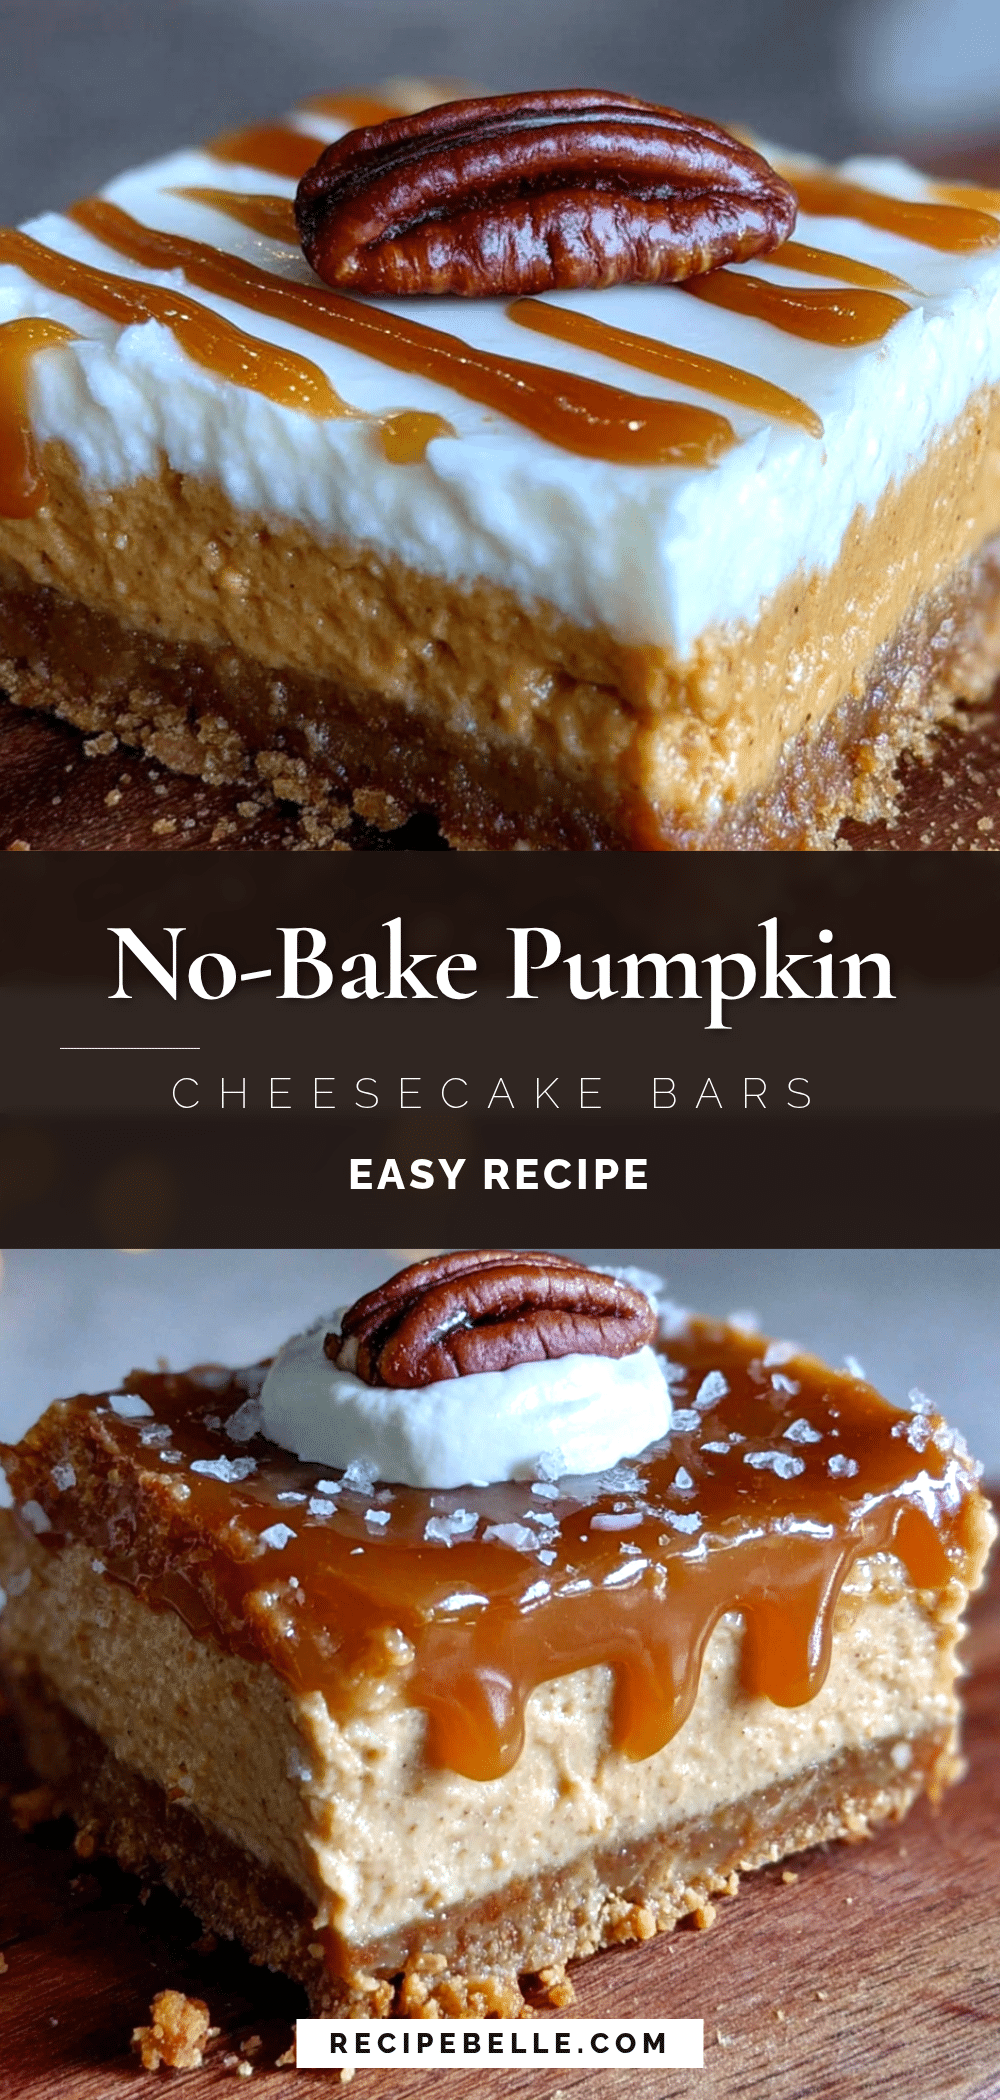
Creamy No-Bake Pumpkin Cheesecake Bars: Easy 5-Minute Prep
These creamy no-bake pumpkin cheesecake bars feature a spicy gingersnap crust and a silky pumpkin filling. With just 15 minutes of active prep, they’re the perfect easy fall dessert for any gathering.
- Prep Time: 15 minutes
- Cook Time: 0 minutes
- Total Time: 6 hours 15 minutes (includes chilling)
- Yield: 9 servings 1x
- Category: Dessert
- Cuisine: American
Ingredients
- 2 cups (200g) gingersnap cookie crumbs
- 6 tablespoons (85g) unsalted butter, melted
- 2 tablespoons (25g) granulated sugar
- ¼ teaspoon salt
- 16 ounces (450g) cream cheese, softened to room temperature
- 1 cup (200g) packed light brown sugar
- 1 cup (240g) pumpkin puree
- 1 teaspoon vanilla extract
- 1½ teaspoons pumpkin pie spice
- ½ teaspoon ground cinnamon
- ¼ teaspoon ground nutmeg
- Pinch of salt
- 1 cup (240ml) heavy whipping cream
- 2 tablespoons (15g) powdered sugar
- ½ teaspoon vanilla extract
Instructions
- Line a 9×9-inch baking pan with parchment paper, leaving overhang on two sides.
- Pulse gingersnap cookies in a food processor until fine crumbs form. In a medium bowl, combine crumbs, melted butter, sugar, and salt. Stir until moistened. Press firmly into the bottom of the prepared pan. Refrigerate while making filling.
- In a large bowl, beat softened cream cheese with an electric mixer on medium speed until smooth and fluffy, about 2-3 minutes. Scrape down sides.
- Add brown sugar and beat until incorporated, about 1 minute. Add pumpkin puree, vanilla, pumpkin pie spice, cinnamon, nutmeg, and salt. Beat on medium-low until smooth and combined.
- Remove crust from fridge. Spoon filling over crust and spread evenly. Tap pan gently to release air bubbles.
- Cover with plastic wrap and refrigerate for at least 6 hours, preferably overnight.
- About 30 minutes before serving, make whipped topping: In a chilled bowl, beat heavy cream, powdered sugar, and vanilla on medium-high until soft peaks form, about 3-4 minutes.
- Using parchment handles, lift cheesecake out of pan onto a cutting board. Cut into 9 or 16 squares, wiping knife clean between cuts. Top with whipped cream and a sprinkle of cinnamon if desired. Serve cold.
Notes
Room temperature cream cheese is essential for a smooth filling. Chill bars overnight for best texture and flavor. For clean slices, use a sharp knife wiped clean between cuts. Bars can be frozen for up to 3 months.
Nutrition
- Serving Size: 1 bar (without whipp
- Calories: 385
- Sugar: 28
- Sodium: 310
- Fat: 24
- Saturated Fat: 14
- Carbohydrates: 39
- Fiber: 2
- Protein: 5
Keywords: no-bake pumpkin cheesecake bars, pumpkin cheesecake, no-bake dessert, fall dessert, Thanksgiving dessert, gingersnap crust, easy pumpkin dessert



