Winter was bearing down and I was on my third cold of the season. Honestly, my immune system felt less like a fortress and more like a screen door on a submarine. I was scrolling through health blogs at 11 PM, desperate for something that didn’t taste like medicine or cost a fortune, when I stumbled onto the idea of homemade elderberry gummies. It sounded almost too good to be true—a sweet, chewy treat that could actually help keep the germs away? I had to try it, but I was skeptical.
The first batch I made was a disaster. I used too much gelatin, not enough honey, and the gummies turned out like rubbery, sour bricks. My kids took one bite and looked at me like I’d betrayed them. But I’m stubborn, and I knew the concept was solid. After three more attempts, I cracked the code. The texture was perfect—soft, bouncy, and just sweet enough to feel like a real treat. And you know that feeling when something actually works? I went through that whole winter without a single sniffle. My family was fighting over the last gummy from the jar. That’s when I knew this recipe was a keeper.
These homemade immune-boost elderberry gummies have become our little secret weapon. I make a batch every few weeks, and it’s honestly become a calming Sunday ritual. It’s not just about the health benefits anymore—it’s about knowing exactly what’s going into our bodies and turning something medicinal into something joyful. Maybe you’ve been there, tired of the sugary, artificial gummies at the store, looking for a real solution. Let me tell you, this recipe is it.
Why You’ll Love This Recipe
I’ve tested this recipe more times than I care to admit, tweaking the gelatin ratio and the sweetener levels until it was just right. It’s been family-approved by my picky eaters and even by my neighbor who swears by store-bought supplements. Here is why I think this will become your go-to as well:
- Quick & Easy: From start to finish, these gummies come together in about 20 minutes of active work. The hardest part is waiting for them to set in the fridge.
- Simple Ingredients: You only need a handful of ingredients—dried elderberries, water, gelatin, and a natural sweetener. No weird chemicals or preservatives.
- Perfect for Cold Season: Whether you’re prepping for flu season or just want a daily immune boost, these gummies are a gentle, effective way to support your health.
- Crowd-Pleaser: Kids actually ask for these. Adults too. They taste like a fruity candy, not a supplement.
- Unbelievably Delicious: The combination of tart elderberry and warm honey (or maple syrup) creates a flavor that is both comforting and bright. It’s next-level comfort food for your immune system.
What makes this recipe different from the rest? It’s the texture. I spent a lot of time figuring out how to avoid that tough, rubbery consistency that plagues homemade gummies. The secret is a gentle simmer and the right bloom time for the gelatin. This isn’t just another version of elderberry gummies—it’s my best version, tested and perfected. This recipe isn’t just good—it’s the kind that makes you close your eyes after the first bite, knowing you’re doing something good for yourself. It’s comfort food reimagined—healthier, faster, but with the same soul-soothing satisfaction. Perfect for impressing guests without stress, or turning a simple wellness routine into something memorable.
What Ingredients You Will Need
This recipe uses simple, wholesome ingredients to deliver a powerful immune boost without any fuss. Most of these are pantry staples or easy to find at your local grocery store.
- Dried Elderberries – ½ cup (about 60g). These are the star of the show, packed with antioxidants and vitamins. I prefer organic dried elderberries from Mountain Rose Herbs for the best quality.
- Water – 2 cups (480 ml). Filtered water works best for a clean flavor.
- Honey – 3 tablespoons (60 ml). Adds sweetness and has its own immune-supporting properties. Use raw, local honey if you can find it. For a vegan option, swap with maple syrup or agave.
- Grass-Fed Beef Gelatin – 4 tablespoons (about 40g). This gives the gummies their perfect chewy texture. I recommend Great Lakes Gelatin or Vital Proteins. Do not use collagen peptides—they won’t set properly.
- Lemon Juice – 1 tablespoon (15 ml). Freshly squeezed is best. It adds a bright tang and helps preserve the gummies naturally.
- Optional: Vitamin C Powder – 1 teaspoon (about 5g). For an extra immune boost. You can find this at health food stores or online.
- Optional: Ginger Powder – ½ teaspoon. Adds warmth and anti-inflammatory benefits. I love adding this during the winter months.
Ingredient selection is key here. Look for dried elderberries that are deep purple-black in color and have a slightly tart, earthy smell. Avoid any that look faded or dusty. For the gelatin, make sure it’s “bloomed” properly—this means sprinkling it over cold water and letting it sit for 5-10 minutes until it becomes spongy. This step is non-negotiable for the right texture. If you’re in a pinch, you can use a silicone gummy mold, but a small glass dish works just as well.
Equipment Needed
You don’t need fancy equipment for this recipe, which is part of its charm. Here is what you’ll need to get started:
- Small Saucepan – A 2-quart saucepan is perfect for simmering the elderberries. I use my old trusty stainless steel one.
- Fine-Mesh Strainer – To strain the elderberry solids from the liquid. A nut milk bag or cheesecloth also works in a pinch.
- Silicone Gummy Mold – These make the gummies look cute and professional. I got a set of bear-shaped molds on Amazon for under $10. If you don’t have one, a small 8×8 glass dish works—you’ll just cut the gummies into squares later.
- Whisk – A small whisk helps incorporate the gelatin smoothly without lumps.
- Liquid Measuring Cup – A glass one with a spout makes pouring into molds much easier and less messy.
- Dropper or Small Pipette – Optional, but helpful for filling the tiny molds without spilling.
- Refrigerator – The gummies need to set for at least 2-3 hours, so make sure you have space.
A word on budget-friendly options: you can absolutely skip the silicone mold and just use a baking dish. The gummies will look more rustic, but they taste exactly the same. I’ve done it many times when I couldn’t find my mold. Also, a dropper is nice but not necessary—you can carefully pour from the measuring cup if you have a steady hand.
Preparation Method
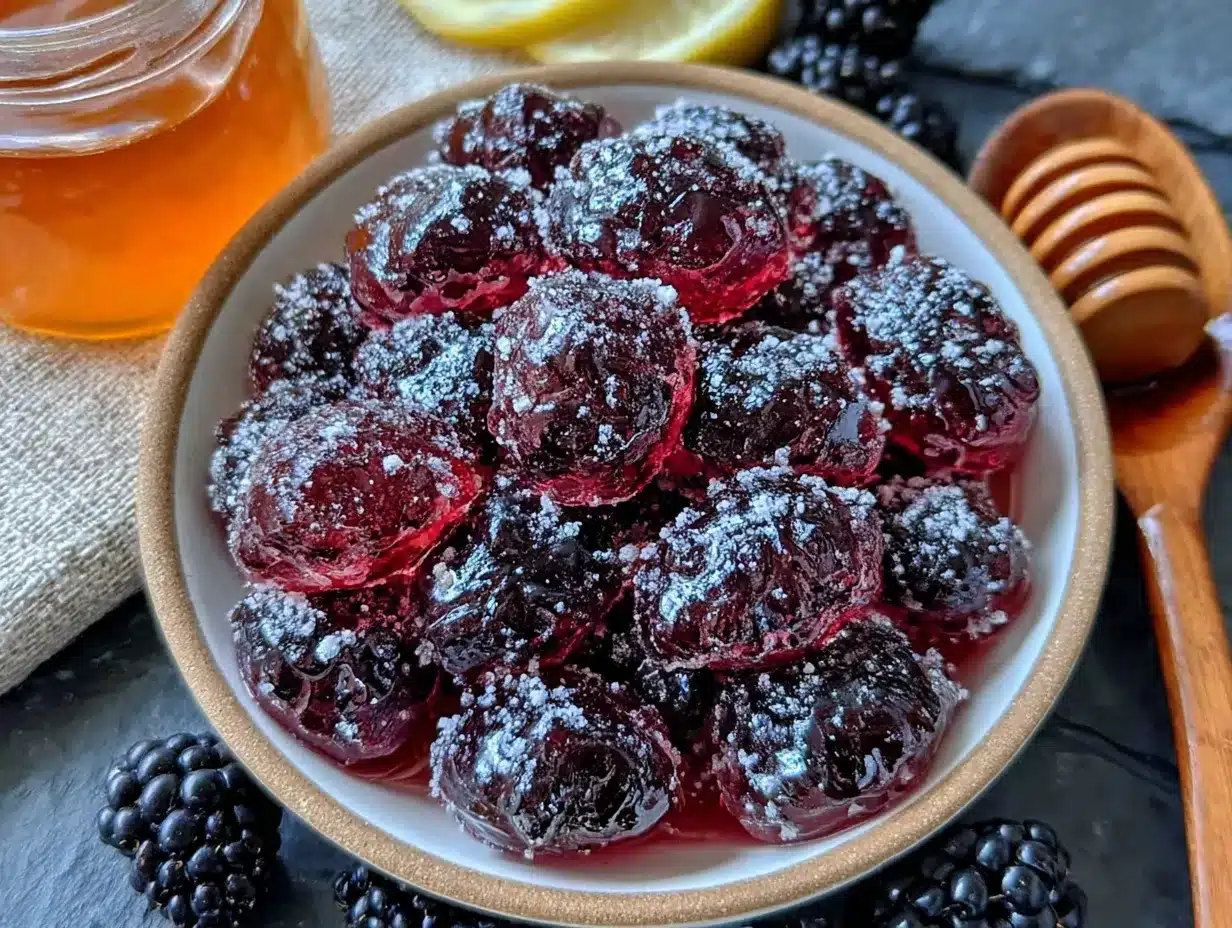
Making these gummies is straightforward, but a few little tricks make all the difference. Here is my step-by-step method, perfected over many batches.
- Simmer the Elderberries: In your small saucepan, combine the ½ cup of dried elderberries and 2 cups of water. Bring to a boil over medium-high heat, then reduce to a gentle simmer. Let it bubble away for about 20 minutes, or until the liquid has reduced by half. You’ll notice the water turning a deep, rich purple—that’s the good stuff. The smell is earthy and slightly sweet, like a forest after rain.
- Strain the Liquid: Place your fine-mesh strainer over a liquid measuring cup or a bowl. Carefully pour the elderberry mixture through the strainer, pressing on the berries with the back of a spoon to extract every last drop of that potent liquid. Discard the spent berries (or compost them). You should have about 1 cup (240 ml) of concentrated elderberry syrup. Let it cool for 5 minutes—it should be warm, not hot.
- Bloom the Gelatin: While the syrup cools, pour ¼ cup (60 ml) of cold water into a small bowl. Sprinkle the 4 tablespoons of gelatin evenly over the surface. Do not stir! Let it sit for 5-10 minutes. It will look like a thick, jiggly sponge. This step is crucial—if the water is too hot, the gelatin will clump and your gummies will be lumpy. I learned this the hard way, trust me.
- Combine Everything: Pour the warm elderberry syrup back into the saucepan. Add the honey, lemon juice, and any optional powders (vitamin C or ginger). Whisk gently to combine. Now, add the bloomed gelatin to the warm syrup. Whisk continuously over low heat for about 2-3 minutes, until the gelatin is fully dissolved and the mixture is smooth and glossy. Do not let it boil—high heat can destroy the gelatin’s setting power. The mixture should be warm to the touch, not hot.
- Pour into Molds: Carefully pour the mixture into your silicone molds or a glass dish. If using a dish, aim for a depth of about ¼ inch. Use a dropper or a steady hand for the molds. Work quickly, as the mixture will start to set as it cools. If it thickens too much, just warm it gently over low heat for a few seconds.
- Set in the Refrigerator: Place the filled molds or dish in the refrigerator. Let them set for at least 2-3 hours, or until they are firm to the touch. I usually leave them overnight for the best texture. The gummies should be bouncy and slightly firm, not sticky.
- Remove and Store: Once set, gently pop the gummies out of the molds. If you used a dish, cut them into small squares with a sharp knife or a pizza cutter. Store them in an airtight container in the refrigerator. They will keep for up to 2-3 weeks—if they last that long!
A personal tip: if your gummies are too soft, you may have not simmered the elderberries long enough, or you used too little gelatin. Next time, add an extra tablespoon of gelatin. If they are too hard, reduce the gelatin by half a tablespoon. It’s all about finding that sweet spot.
Cooking Tips & Techniques
I’ve made every mistake in the book with these gummies, so you don’t have to. Here are my best tips for perfect results every time.
- Don’t Overheat the Gelatin: This is the number one mistake. Gelatin is a protein, and high heat can break it down, preventing it from setting. Always add it to warm (not hot) liquid and whisk gently. I once got distracted and let the mixture boil—the gummies never set, and I had a jar of sweet, purple soup.
- Use a Candy Thermometer: If you want to be precise, keep the mixture between 110°F and 120°F (43°C to 49°C) when adding the gelatin. This is the sweet spot for a perfect set.
- Work Quickly: Once the gelatin is added, the clock is ticking. Have your molds ready and pour as soon as the gelatin is dissolved. If the mixture starts to set in the saucepan, just warm it gently over low heat.
- Grease Your Molds Lightly: If you’re using silicone molds, a very light spray of coconut oil can help the gummies pop out more easily. I skip this step, but it’s a good trick for stubborn molds.
- Taste as You Go: The sweetness level is personal. I like my gummies on the tart side, so I use less honey. Start with 2 tablespoons and add more to taste. Remember, the honey flavor will mellow as the gummies set.
- Multitasking Strategy: While the elderberries are simmering, I use that time to bloom the gelatin and set up my molds. This way, everything is ready to go when the syrup is done. It makes the process feel effortless.
Variations & Adaptations
One of the best things about this recipe is how easy it is to adapt. Here are some of my favorite variations.
- Vegan Version: Swap the beef gelatin for agar-agar powder. Use 2 tablespoons of agar-agar for every 4 tablespoons of gelatin. Note that agar-agar sets at room temperature and has a slightly different texture—firmer and less bouncy. You’ll also need to boil the mixture for 2 minutes to activate the agar. I’ve tried this, and while it’s different, it’s still delicious.
- Seasonal Twist: In the summer, I add a tablespoon of fresh orange juice and a teaspoon of finely grated orange zest to the mixture. It adds a bright, citrusy note that pairs beautifully with the elderberry. In the fall, I add a pinch of cinnamon and a dash of nutmeg for a warming spice blend.
- Low-Sugar Option: You can reduce the honey to 1 tablespoon or use a sugar-free sweetener like stevia or monk fruit. Start with a small amount and adjust to taste. The gummies will be less sweet but still packed with immune-boosting power.
- Extra Immune Boost: Add 1 teaspoon of echinacea powder or ½ teaspoon of turmeric powder to the mixture. I love this version when I feel a cold coming on. The turmeric gives the gummies a beautiful golden hue.
- Different Fruit Combinations: While elderberry is the star, you can mix it with other berries. Try replacing ¼ cup of the water with unsweetened cherry juice or blueberry juice for a different flavor profile. I did this once with tart cherry juice, and it was a hit with my kids.
Serving & Storage Suggestions
These gummies are best enjoyed cold, straight from the fridge. The texture is firm and bouncy, with a satisfying chew. I like to serve them as a daily treat—two or three gummies per person is a good daily dose for immune support. For kids, I usually give them one or two gummies in the morning with breakfast.
They pair wonderfully with a cup of hot tea, especially herbal blends like chamomile or ginger. You can also add them to a lunchbox as a healthy alternative to candy. For a fun presentation, arrange them on a small plate with fresh berries and a drizzle of honey.
Storage: Keep the gummies in an airtight container in the refrigerator. They will stay fresh for up to 2-3 weeks. I use a glass jar with a tight-fitting lid. Do not store them at room temperature—they will become sticky and may spoil. If you notice any mold or an off smell, discard them immediately.
Freezing: These gummies freeze beautifully. Place them in a single layer on a baking sheet lined with parchment paper and freeze for 1 hour. Then transfer them to a freezer-safe bag or container. They will keep for up to 3 months. Thaw them in the refrigerator overnight before eating. The texture might be slightly softer after freezing, but the flavor remains the same.
A note on flavor development: I find that the gummies taste even better after a day or two in the fridge. The flavors meld together, and the sweetness becomes more balanced. So don’t be discouraged if they taste a bit sharp on day one—give them time.
Nutritional Information & Benefits
These gummies are more than just a tasty treat—they are packed with nutritional benefits. Here is an estimated breakdown per serving (about 3 gummies):
- Calories: 45
- Carbohydrates: 10g
- Sugar: 8g (from honey and natural fruit sugars)
- Protein: 2g
- Vitamin C: 15mg (if using optional powder)
- Antioxidants: High (from elderberries)
Elderberries are rich in flavonoids, particularly anthocyanins, which have powerful antioxidant and anti-inflammatory properties. They are known to support the immune system by reducing the duration and severity of colds. Honey adds its own antimicrobial benefits, while lemon juice provides a dose of vitamin C. This recipe is naturally gluten-free and dairy-free. If you use maple syrup instead of honey, it is also vegan-friendly.
From a wellness perspective, I love that these gummies allow me to take control of my family’s health without relying on processed supplements. It’s a small, intentional act of care that makes a big difference during cold and flu season.
Conclusion
These homemade immune-boost elderberry gummies have become a staple in my kitchen, and I have a feeling they will become one in yours too. They are simple, effective, and genuinely delicious—a rare combination in the world of health foods. I love that I can make a batch in under 30 minutes and have a week’s worth of immune support ready to go. It’s a small act of self-care that pays off big time.
I encourage you to make this recipe your own. Adjust the sweetness, add your favorite spices, or experiment with different fruit juices. The beauty of homemade gummies is that you are in control. Don’t be afraid to mess up—I certainly did, and it was worth every failed batch to get to this perfect version.
I would love to hear how your gummies turn out! Did you add a special twist? Did your kids love them? Share your experience in the comments below, and don’t forget to pin this recipe for later. Here is to a healthy, happy season—one gummy at a time!
Frequently Asked Questions
Can I use fresh elderberries instead of dried?
Yes, you can, but you will need to adjust the amount. Use 1 cup of fresh elderberries in place of ½ cup of dried. Fresh berries have more water content, so you may need to simmer them for an extra 5-10 minutes to reduce the liquid properly. Always cook elderberries thoroughly—raw elderberries can be toxic.
Why did my gummies not set?
This usually happens for one of three reasons: the liquid was too hot when you added the gelatin, you didn’t use enough gelatin, or you didn’t let the gelatin bloom properly. Make sure your elderberry syrup is warm, not hot, and always bloom the gelatin in cold water for the full 10 minutes.
Can I use collagen peptides instead of gelatin?
No, collagen peptides will not work for this recipe. They do not have the same gelling properties as gelatin and will result in a liquid, not gummies. Stick with beef or pork gelatin for the best texture.
How many gummies should I eat per day?
For adults, 2-3 gummies per day is a good dose for immune support. For children aged 4 and up, 1-2 gummies per day is sufficient. Always consult with your healthcare provider before starting any new supplement, especially for children or if you are pregnant or nursing.
Can I make these gummies without a mold?
Absolutely! Pour the mixture into a small glass dish (like an 8×8 baking dish) lined with parchment paper. Once set, cut them into small squares with a sharp knife. They will look rustic, but they taste just as good. I often do this when I’m in a hurry.
Pin This Recipe!
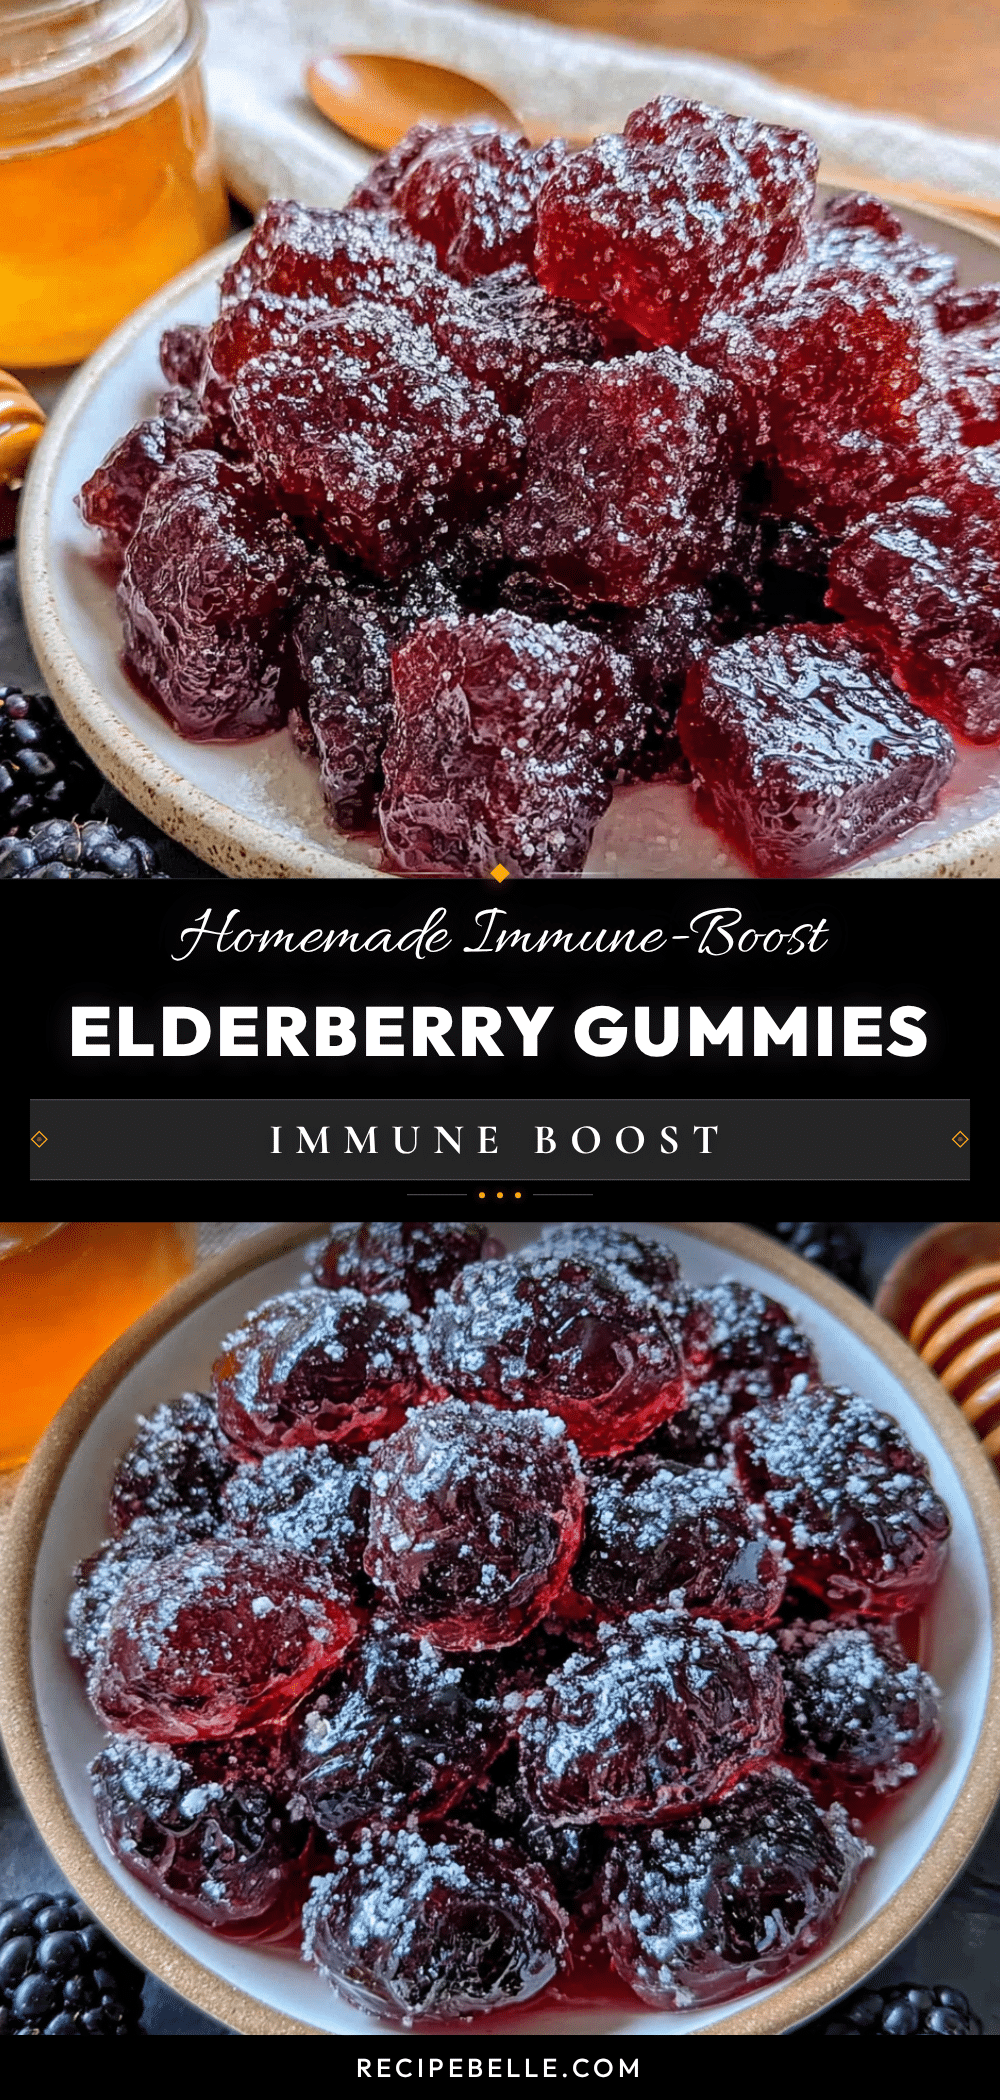
Easy Homemade Elderberry Gummies for Immune Support
These homemade immune-boost elderberry gummies are a sweet, chewy treat that helps keep the germs away. Made with simple ingredients like dried elderberries, honey, and gelatin, they are quick to prepare and perfect for cold season.
- Prep Time: 20 minutes
- Cook Time: 20 minutes
- Total Time: 40 minutes (plus 2-3 hours setting time)
- Yield: 4 servings 1x
- Category: Snack
- Cuisine: American
Ingredients
- ½ cup (about 60g) dried elderberries
- 2 cups (480 ml) water
- 3 tablespoons (60 ml) honey
- 4 tablespoons (about 40g) grass-fed beef gelatin
- 1 tablespoon (15 ml) lemon juice
- 1 teaspoon (about 5g) vitamin C powder (optional)
- ½ teaspoon ginger powder (optional)
Instructions
- Simmer the Elderberries: In a small saucepan, combine the dried elderberries and water. Bring to a boil over medium-high heat, then reduce to a gentle simmer. Let it bubble for about 20 minutes, or until the liquid has reduced by half.
- Strain the Liquid: Place a fine-mesh strainer over a liquid measuring cup or bowl. Carefully pour the elderberry mixture through the strainer, pressing on the berries with the back of a spoon to extract all the liquid. Discard the spent berries. You should have about 1 cup (240 ml) of concentrated elderberry syrup. Let it cool for 5 minutes until warm, not hot.
- Bloom the Gelatin: While the syrup cools, pour ¼ cup (60 ml) of cold water into a small bowl. Sprinkle the gelatin evenly over the surface. Do not stir. Let it sit for 5-10 minutes until it becomes a thick, jiggly sponge.
- Combine Everything: Pour the warm elderberry syrup back into the saucepan. Add the honey, lemon juice, and any optional powders (vitamin C or ginger). Whisk gently. Add the bloomed gelatin and whisk continuously over low heat for 2-3 minutes until fully dissolved and smooth. Do not let it boil.
- Pour into Molds: Carefully pour the mixture into silicone molds or a glass dish (about ¼ inch depth). Work quickly as the mixture will start to set. If it thickens, warm it gently over low heat.
- Set in the Refrigerator: Place the filled molds or dish in the refrigerator. Let them set for at least 2-3 hours, or until firm. Overnight is best for texture.
- Remove and Store: Gently pop the gummies out of the molds. If using a dish, cut into small squares. Store in an airtight container in the refrigerator for up to 2-3 weeks.
Notes
Do not overheat the gelatin; keep mixture between 110°F and 120°F (43°C to 49°C). Work quickly once gelatin is added. For vegan version, use 2 tablespoons agar-agar instead of gelatin and boil for 2 minutes. Gummies taste better after a day in the fridge. Freeze for up to 3 months.
Nutrition
- Serving Size: 3 gummies
- Calories: 45
- Sugar: 8
- Sodium: 5
- Carbohydrates: 10
- Protein: 2
Keywords: elderberry gummies, immune support, homemade gummies, elderberry recipe, healthy snacks, cold season, natural remedy



