The Halloween party was in four hours and I’d completely forgotten. My friend Maria throws this huge bash every year—the kind where people actually compete. I’m talking full-on costume contests, themed cocktails, the works. Everyone else would be bringing elaborate things like haunted gingerbread houses or those creepy crawly meatloaf things that take all day. I had a dozen eggs, some mustard, and a bag of black olives. Honestly, I almost just grabbed a bag of chips on the way over. But then I remembered these little guys I’d seen on Pinterest months ago—Jack-o-Lantern deviled eggs. I figured, how hard could it be?
So there I was, frantically boiling eggs while trying to find my vampire fangs from last year’s costume. The kitchen was a mess. I spilled paprika on my shirt and the first batch of eggs cracked in the pot. Classic me. But I pulled it together, piped the filling into those little egg whites, and carved tiny jack-o-lantern faces out of olive slices. They looked ridiculous. And kind of cute, honestly. I threw them on a platter and ran out the door.
You know that feeling when you bring the simple thing to a party and it ends up being the thing everyone talks about? That was these deviled eggs. People couldn’t stop grabbing them. Kids loved the faces, adults loved the nostalgia, and I loved that they took maybe twenty minutes of actual work. Maria texted me the next day asking for the recipe. I’ve been making them every Halloween since. Maybe you’ve been there—scrambling last minute for a party dish that doesn’t look last minute. These easy one-bite Jack-o-Lantern deviled eggs are that recipe. They’re the little underdog that wins every time.
Why You’ll Love This Recipe
Let me tell you, I’ve tested a lot of Halloween appetizers over the years. Some were gorgeous but took forever. Others were fast but looked like a sad afterthought. These Jack-o-Lantern deviled eggs hit that sweet spot where they’re actually fun to make and genuinely delicious to eat. I’ve brought them to three different parties now and they’re always the first platter to empty.
- Quick & Easy: From start to finish, you’re looking at about 30 minutes. Most of that is just waiting for the eggs to boil. Perfect for those “oh no, I forgot” moments we all have.
- Simple Ingredients: Eggs, mayo, mustard, paprika, and olives. That’s it. No weird specialty items or trips to three different stores.
- Perfect for Halloween: These are made for spooky season. Kids go wild for the little faces and adults appreciate the clever presentation. They work for parties, potlucks, or just a fun snack at home.
- Crowd-Pleaser: I’ve watched picky eaters, health-conscious friends, and people who “don’t like eggs” all reach for seconds. The creamy filling with that smoky paprika is just irresistible.
- Unbelievably Delicious: This isn’t just about the cute faces. The filling is perfectly seasoned—tangy from the mustard, rich from the yolks, with that little kick of paprika. It’s classic deviled eggs done right, just with a Halloween twist.
What makes these different from every other Halloween appetizer out there? It’s the combination of simplicity and charm. You don’t need special cookie cutters or food coloring. You don’t need to be a professional chef. The olive “carving” is so forgiving—honestly, the wonkier the faces, the cuter they look. I’ve made dozens of batches now and each one has its own personality. That’s the beauty of this recipe. It’s comfort food with a costume.
What Ingredients You Will Need
This recipe uses simple, everyday ingredients to create something that looks way more impressive than it actually is. Most of these are probably in your kitchen right now. Here’s what you’ll need and why each one matters.
For the Deviled Eggs
- 6 large eggs (use room temperature eggs for easier peeling—I learned this the hard way after losing half an egg white to the shell)
- 3 tablespoons mayonnaise (I prefer Hellmann’s or Duke’s for that creamy, tangy base. Avoid miracle whip here—it’s too sweet)
- 1 teaspoon yellow mustard (adds that classic deviled egg tang. You can use Dijon for a sharper flavor if you prefer)
- 1/2 teaspoon white vinegar (a little secret trick—brightens the flavor without making it too acidic)
- 1/4 teaspoon salt (use fine salt so it dissolves evenly into the filling)
- 1/8 teaspoon black pepper (freshly ground is best, but pre-ground works fine)
- 1/4 teaspoon smoked paprika (for garnish and that beautiful color. Regular paprika works too, but smoked adds a lovely depth)
For the Jack-o-Lantern Faces
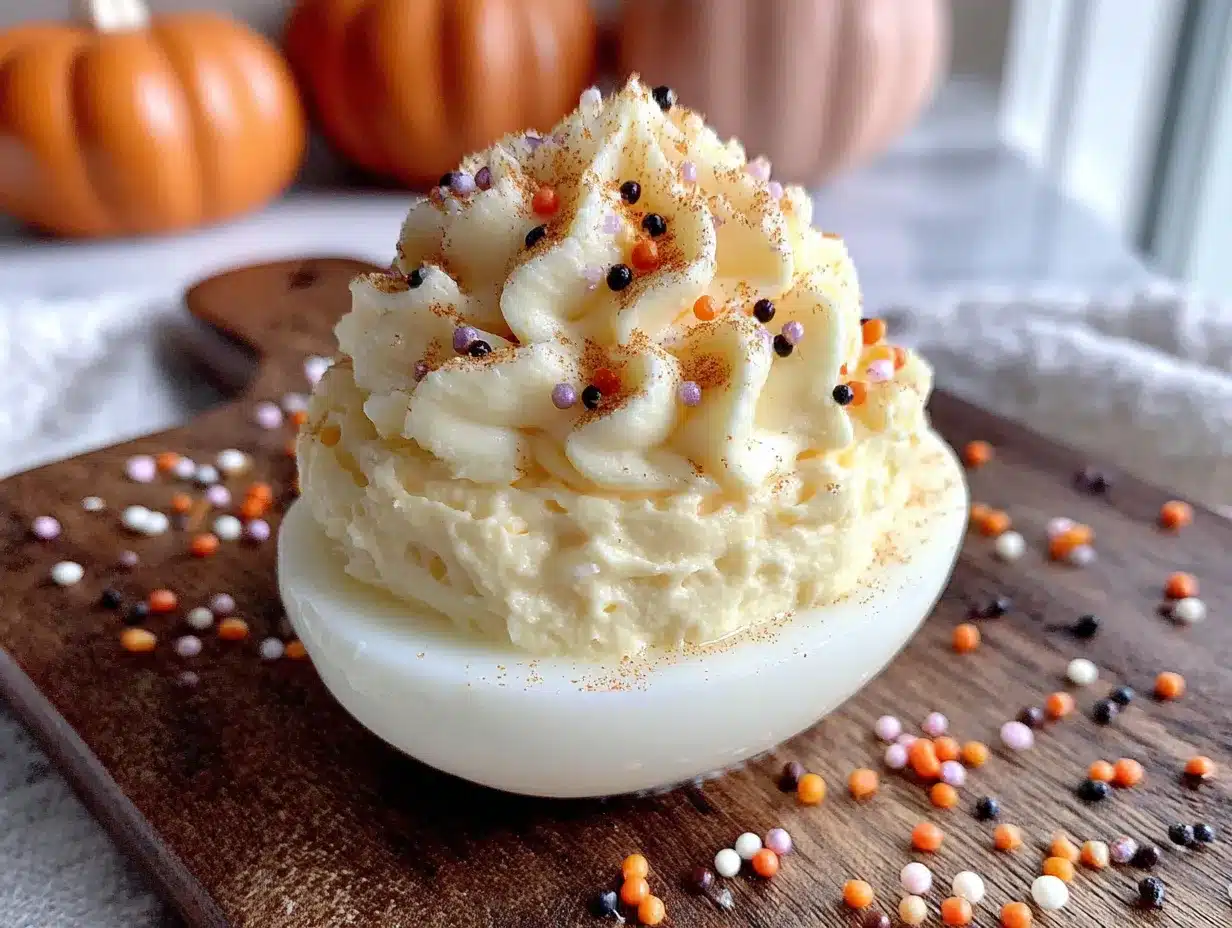
- 12 pitted black olives (look for large, firm olives—they’re easier to cut and the faces hold their shape better)
- 1 small carrot (optional, for little pumpkin stems. Just cut tiny triangles)
A few notes on ingredient selection. For the eggs, I really recommend getting the good ones if you can. I’ve used both regular and organic and honestly, the fresher the egg, the prettier the yolk color. That bright yellow filling just looks more appetizing. For the olives, I’ve tried a few brands and my go-to is Lindsay large pitted black olives. They’re consistently firm and the slices don’t fall apart when you’re carving. If you can only find sliced olives, just use whole ones—the faces are way easier to manage.
For substitutions, here’s what I’ve tested. If you’re out of mayo, full-fat Greek yogurt works surprisingly well. It’s a little tangier but still creamy. No mustard? A tiny pinch of turmeric powder gives that yellow color and a mild earthy flavor. For a dairy-free version, use vegan mayo—I’ve done it with Follow Your Heart and it was great. And if smoked paprika isn’t your thing, regular sweet paprika or even a pinch of cayenne for heat works beautifully.
Equipment Needed
You don’t need fancy equipment for these little guys, which is part of why I love them. Here’s what you’ll actually use.
- Medium saucepan (for boiling the eggs. Any size works, just make sure the eggs fit in a single layer)
- Mixing bowl (medium size for mashing the yolks)
- Fork or potato masher (I just use a fork—it gives you more control over the texture)
- Piping bag or zip-top bag (a zip-top bag with the corner snipped off works perfectly. I’ve also used a small cookie scoop in a pinch)
- Small sharp knife (for carving the olive faces. A paring knife is ideal)
- Cutting board (small one is fine)
- Serving platter (something dark colored makes the eggs pop—I use a black slate board for Halloween)
If you don’t have a piping bag, don’t stress. I’ve made these many times just using a spoon to dollop the filling. It’s not as fancy but it tastes exactly the same. For the olive carving, a regular butter knife won’t cut it—you need something sharp. A steak knife works in a pinch. And if you’re making a big batch, an egg slicer can save time, but honestly, I prefer slicing by hand so I can control the thickness.
Preparation Method
Alright, let’s get into the actual making of these little Halloween cuties. I’ve made these more times than I can count, so I’ll walk you through every step with all the little tricks I’ve picked up along the way.
Step 1: Boil the Eggs
Place your 6 large eggs in a single layer in a medium saucepan. Cover them with cold water by about an inch. Put the pot on the stove over high heat and bring the water to a full rolling boil. Once it’s boiling hard, turn off the heat, cover the pot, and let it sit for exactly 12 minutes. I set a timer on my phone because I’ve definitely gotten distracted and ended up with green-ringed yolks. Not the end of the world, but less pretty for this recipe.
Step 2: Ice Bath
While the eggs are sitting, fill a large bowl with ice and cold water. When the timer goes off, use a slotted spoon to transfer the eggs immediately into the ice bath. Let them sit for at least 10 minutes. This stops the cooking and makes peeling so much easier. I’ve skipped this step before when I was in a hurry and regretted it—half the egg whites came off with the shell. Trust me on this one.
Step 3: Peel and Slice
Gently tap each egg on the counter to crack the shell, then roll it between your palms to loosen it. Start peeling from the wider end where the air pocket is—that’s the easiest spot. Rinse the peeled eggs under cool water to remove any tiny shell fragments. Pat them dry with a paper towel. Using a sharp knife, slice each egg in half lengthwise. Gently pop out the yolks into a medium mixing bowl. Arrange the egg white halves on your serving platter, cut side up.
Step 4: Make the Filling
Add 3 tablespoons mayonnaise, 1 teaspoon yellow mustard, 1/2 teaspoon white vinegar, 1/4 teaspoon salt, and 1/8 teaspoon black pepper to the bowl with the yolks. Use a fork to mash everything together until it’s completely smooth. I like to press the mixture against the side of the bowl to get rid of any lumps. Taste it and adjust the seasoning. Sometimes I add a tiny pinch more mustard if I want extra tang. The filling should be creamy and spreadable—if it seems too thick, add another teaspoon of mayo.
Step 5: Fill the Eggs
Spoon the yolk mixture into a piping bag or a sturdy zip-top bag. If using a zip-top bag, snip off about 1/4 inch from one corner. Pipe the filling into each egg white half, dividing it evenly. You want a nice little mound—don’t flatten it. I usually get about 12 filled halves. If you don’t have a piping bag, just use a small spoon to dollop the filling. It won’t be as pretty but it still tastes amazing.
Step 6: Carve the Jack-o-Lantern Faces
This is the fun part. Take your pitted black olives and slice them into rounds about 1/4 inch thick. You’ll need one round per egg half. Using a small sharp knife, cut tiny triangles for eyes and a jagged little mouth into each olive slice. The classic jack-o-lantern face is two triangles for eyes and a crescent-shaped mouth with a few teeth. But honestly, I’ve made silly faces, angry faces, surprised faces—they all turn out adorable. Don’t stress about perfection. The wonkier they are, the more personality they have.
Step 7: Assemble and Garnish
Gently place one carved olive face on top of each filled egg half. If you’re using the carrot stems, cut tiny triangles from a carrot and press one into the top of each olive. Sprinkle the eggs lightly with smoked paprika. I use a fine mesh strainer to get an even dusting, but you can just pinch some between your fingers. The paprika gives them that beautiful orange glow and adds a smoky flavor that makes these irresistible.
Step 8: Chill and Serve
Cover the platter loosely with plastic wrap and refrigerate for at least 30 minutes before serving. This lets the flavors meld together and firms up the filling. They’re best served cold. If you’re taking them to a party, keep them chilled until the last minute. I usually make them the morning of and they’re perfect by party time.
Cooking Tips & Techniques
I’ve made a lot of mistakes with deviled eggs over the years, and I’m happy to share them so you don’t have to repeat them. Here are the things I wish someone had told me.
The perfect hard-boiled egg is all about timing. I used to boil eggs for 15 minutes and wonder why the yolks had that gray-green ring. It’s not harmful, but it’s not pretty. The 12-minute method I described above gives you perfectly cooked yolks every time. If you like your yolks slightly softer, try 11 minutes. For firmer, go 13. But don’t go over 13 or the texture gets chalky.
Peeling eggs is a skill you can actually improve. The ice bath is non-negotiable. I also find that older eggs peel more easily than super fresh ones. If your eggs are farm-fresh, let them sit in the fridge for a week before boiling. Another trick I learned from a chef friend: add a teaspoon of baking soda to the boiling water. It raises the pH and makes the shells slide off.
Don’t overmix the filling. I know it’s tempting to keep mashing until it’s perfectly smooth, but overmixing can make the filling gummy. Just mix until it’s combined and creamy. A few tiny lumps are fine—they add texture.
Pipe the filling with confidence. When I first started piping, I was so timid. The filling came out all wobbly and uneven. Now I just go for it—steady pressure, smooth motion. If you mess up, just scrape it back into the bag and try again. No one has to know.
Make the faces ahead of time. If you’re short on time the day of your party, you can carve the olive faces a day in advance. Store them in a container in the fridge. Just don’t put them on the eggs until right before serving or the olive juice can stain the filling.
Variations & Adaptations
One of the best things about this recipe is how easy it is to change up. Here are some variations I’ve tried and loved.
Spicy Jack-o-Lantern Eggs
Add 1/4 teaspoon cayenne pepper and a dash of hot sauce to the filling. The heat pairs so well with the cool, creamy texture. I made these for a grown-up Halloween party and they were a hit. For the faces, use jalapeño slices instead of olives for an extra kick—just remove the seeds first.
Avocado Deviled Eggs
Swap half the mayonnaise for mashed ripe avocado. The filling turns this beautiful pale green color and tastes fresh and creamy. I add a squeeze of lime juice to keep the avocado from browning. These are great if you’re trying to cut down on dairy or just want a healthier option. The olive faces still look amazing on the green filling.
Bacon Cheddar Jack-o-Lanterns
Add 2 tablespoons of finely shredded cheddar cheese and 2 tablespoons of crumbled cooked bacon to the filling. The smoky, salty flavor is incredible. I top each egg with a tiny piece of bacon before adding the olive face. These are definitely the most indulgent version, but so worth it for a special occasion.
Vegan Version
Use firm tofu instead of eggs. Press a block of extra-firm tofu for 30 minutes to remove excess water, then crumble it and mix with vegan mayo, mustard, and a pinch of black salt (kala namak) for that eggy flavor. The texture is surprisingly similar. For the “egg white” base, use halved mini bell peppers or cucumber rounds. The olive faces work the same way.
Serving & Storage Suggestions
These deviled eggs are best served cold, straight from the fridge. I like to arrange them on a dark-colored platter—black slate or a dark wood board makes the orange paprika and black olive faces really pop. You can also arrange them on a bed of fresh parsley or kale for a spooky “graveyard” look.
For presentation, I sometimes add a few fake spider webs around the platter or place a small pumpkin in the center. It’s silly but guests love it. If you’re serving these at a party, put them out right before guests arrive and keep them chilled until then. They don’t do well sitting out for hours—after about two hours at room temperature, it’s time to put them back in the fridge.
For storage, place any leftover deviled eggs in an airtight container and refrigerate for up to two days. The filling might absorb some of the olive juice from the faces, so if you’re storing them, remove the olive faces first and add fresh ones before serving again. I don’t recommend freezing these—the texture of the egg whites gets watery and unappealing.
As for what to serve with them, these pair beautifully with other Halloween appetizers. I like to put them out alongside a spooky spider dip and some mummy pigs in a blanket for a full Halloween spread. For drinks, a crisp white wine or a cold beer cuts through the richness nicely. For a non-alcoholic option, sparkling apple cider is perfect.
Nutritional Information & Benefits
Here’s the approximate nutritional breakdown for one deviled egg half (based on 12 servings from 6 eggs):
| Nutrient | Amount per serving |
|---|---|
| Calories | 65 |
| Protein | 5g |
| Fat | 4.5g |
| Saturated Fat | 1g |
| Carbohydrates | 1g |
| Fiber | 0g |
| Sugar | 0.5g |
| Sodium | 180mg |
Eggs are a fantastic source of high-quality protein and contain important nutrients like vitamin D, B12, and choline, which is great for brain health. The olive faces add a small amount of healthy monounsaturated fats. This recipe is naturally gluten-free and low-carb, making it a good option for keto-friendly gatherings. If you’re watching your sodium, you can reduce the salt in the filling and use low-sodium olives.
One thing I love about this recipe is that it’s portion-controlled. Each little egg half is just one satisfying bite, which makes it easy to enjoy without overdoing it. I’ve served these at parties where people go back for thirds and fourths, but because they’re so small, it doesn’t feel heavy.
Conclusion
Look, I know there are a million Halloween appetizers out there. Some are fancy, some are spooky, some are both. But these easy one-bite Jack-o-Lantern deviled eggs are the ones I keep coming back to year after year. They’re simple enough to throw together on a busy weeknight, but cute enough to steal the show at any party. The best part? They actually taste amazing. No gimmicks, no weird ingredients, just good old-fashioned deviled eggs with a fun Halloween twist.
I hope you give these a try for your next Halloween gathering. Don’t be afraid to get creative with the faces—I’ve made some truly ridiculous ones over the years and they always get the biggest laughs. And if you come up with your own variation, I’d love to hear about it. Drop a comment below and tell me how yours turned out. Or tag me in your photos—I’m always scrolling through Halloween recipes this time of year and your creations make my day.
Happy Halloween, and happy eating! You’ve got this.
Frequently Asked Questions
Can I make these deviled eggs a day ahead?
Absolutely. You can prepare the eggs and filling up to 24 hours in advance. Just store the filling in a piping bag or zip-top bag and the egg whites in a container. Assemble them a few hours before serving for the best texture. Add the olive faces right before serving so they stay fresh.
How do I keep the olive faces from sliding off?
This happened to me the first time I made them. The trick is to make sure the filling is piped high enough to create a little platform for the olive. You can also press the olive gently into the filling so it sticks. If your eggs are really slippery, dab the bottom of the olive on a paper towel to remove excess moisture.
What if I can’t find large black olives?
No worries. You can use sliced black olives and just arrange two slices together to make a face, or use green olives stuffed with pimento for a different look. I’ve even used small pieces of roasted red pepper for the faces in a pinch. The faces don’t have to be perfect—they just need to be recognizable.
Can I use a different type of mustard?
Yes, definitely. Yellow mustard gives that classic deviled egg flavor, but Dijon mustard adds a lovely sharpness that works really well. Whole grain mustard gives a nice texture and visual appeal. I’ve even used spicy brown mustard for extra kick. Just adjust the amount to your taste since different mustards have different intensity levels.
How long can these sit out at a party?
Food safety is important here. Deviled eggs should not sit at room temperature for more than two hours. If you’re serving them at a party, put them out in small batches and keep the rest chilled in the fridge. If the party is outdoors and it’s warm, that time drops to one hour. Better safe than sorry—I’ve learned this the hard way.
Pin This Recipe!
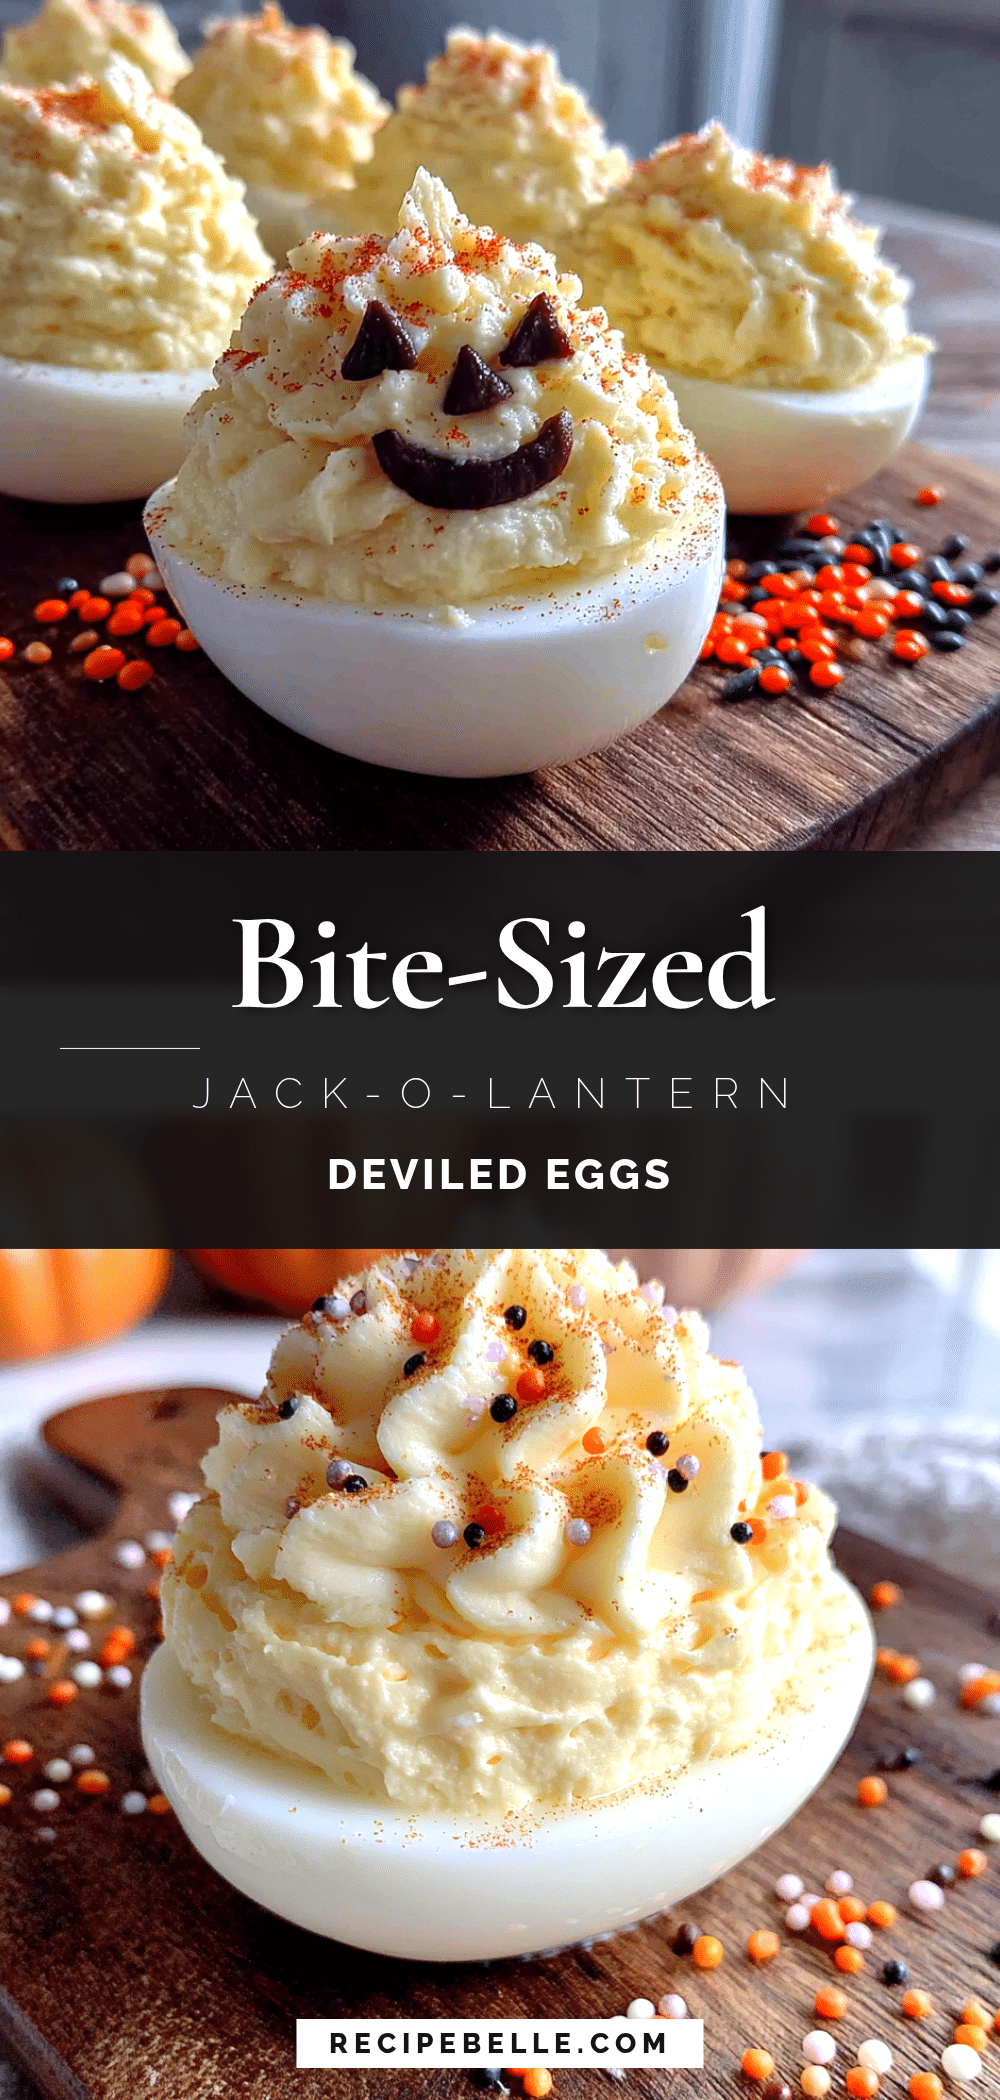
Easy One-Bite Jack-o-Lantern Deviled Eggs: Perfect Halloween Appetizer
These easy one-bite Jack-o-Lantern deviled eggs are the perfect Halloween appetizer. With a creamy, tangy filling and adorable olive faces, they’re quick to make and always a crowd-pleaser.
- Prep Time: 15 minutes
- Cook Time: 12 minutes
- Total Time: 30 minutes
- Yield: 12 deviled egg halves (6 servings) 1x
- Category: Appetizer
- Cuisine: American
Ingredients
- 6 large eggs
- 3 tablespoons mayonnaise
- 1 teaspoon yellow mustard
- 1/2 teaspoon white vinegar
- 1/4 teaspoon salt
- 1/8 teaspoon black pepper
- 1/4 teaspoon smoked paprika
- 12 pitted black olives
- 1 small carrot (optional, for pumpkin stems)
Instructions
- Place eggs in a single layer in a medium saucepan. Cover with cold water by about an inch. Bring to a full rolling boil over high heat, then turn off heat, cover, and let sit for exactly 12 minutes.
- While eggs sit, prepare an ice bath with ice and cold water. Transfer eggs to ice bath and let sit for at least 10 minutes.
- Peel eggs, rinse under cool water, and pat dry. Slice each egg in half lengthwise. Remove yolks to a medium bowl. Arrange egg white halves on a serving platter.
- Add mayonnaise, yellow mustard, white vinegar, salt, and black pepper to the yolks. Mash with a fork until smooth and creamy. Adjust seasoning to taste.
- Spoon yolk mixture into a piping bag or zip-top bag. Snip off a corner and pipe filling into each egg white half, dividing evenly.
- Slice olives into rounds about 1/4 inch thick. Using a small sharp knife, cut tiny triangles for eyes and a jagged mouth into each olive slice to create jack-o-lantern faces.
- Place one carved olive face on each filled egg half. If using, press a tiny carrot triangle into the top of each olive for a stem. Sprinkle with smoked paprika.
- Cover and refrigerate for at least 30 minutes before serving. Serve cold.
Notes
For easier peeling, use room temperature eggs and add a teaspoon of baking soda to the boiling water. The ice bath is essential for easy peeling. Olive faces can be carved a day ahead and stored in the fridge. Remove olive faces before storing leftovers to prevent staining.
Nutrition
- Serving Size: 1 deviled egg half
- Calories: 65
- Sugar: 0.5
- Sodium: 180
- Fat: 4.5
- Saturated Fat: 1
- Carbohydrates: 1
- Protein: 5
Keywords: Halloween appetizer, deviled eggs, jack-o-lantern, easy, party food, spooky, eggs, olives



