The neighborhood fall bake-off was in twelve hours and I’d completely forgotten. Everyone else would be bringing those picture-perfect layered cakes with mirror glazes and intricate fondant decorations. I had a half-stick of butter, a can of pumpkin that had been hiding in my pantry since last October, and about forty-five minutes before I needed to be anywhere else. Honestly, I almost just grabbed a store-bought pie and called it a day. But something about the crisp autumn air coming through my kitchen window made me want to try anyway.
I rummaged through my cabinets, found some brown sugar that was still soft, and remembered a bar recipe my neighbor had scribbled on a napkin months ago. The frosting was the wild card — brown butter sounded fancy but I’d never actually made it before. I burned the first batch (let me tell you, the smoke alarm is not my friend), but the second try? Pure magic. I threw everything together, crossed my fingers, and walked into that bake-off feeling like a fraud carrying a 9×13 pan of what looked like simple bars.
The thing about pumpkin bars is they don’t look like much. They’re humble, you know? No towering layers or glossy finishes. But when people started tasting them, something shifted. I watched a guy who’d brought a three-tiered caramel apple cake come back for seconds. Then thirds. Then he asked me for the recipe. I mean, I was just as surprised as anyone. The brown butter frosting had this nutty, almost toffee-like depth that made the spiced pumpkin taste like autumn in every single bite.
That night, I drove home with a ribbon and an empty pan, still not quite believing it. Maybe you’ve been there — when the simplest thing somehow ends up being the thing everyone remembers. These pumpkin bars have become my go-to ever since. Not because they’re fancy, but because they taste like the cozy season we all crave.
Why You’ll Love This Recipe
Let me be real with you for a second. I’ve tested this recipe at least eight times across three different ovens, and I can tell you with confidence — these are the pumpkin bars you’ve been looking for. Here’s what makes them stand out from the dozens of other recipes floating around out there:
- Quick & Easy : Comes together in under an hour, including baking and cooling. Perfect for those “I need dessert now” moments that pop up during the holiday season.
- Simple Ingredients : No weird specialty items. You probably have most of this in your kitchen right now, minus maybe the pumpkin puree.
- Perfect for Fall Gatherings : Great for Thanksgiving potlucks, office parties, or just a cozy weekend baking session when the leaves are changing.
- Crowd-Pleaser : I’ve served these to kids, grandparents, and picky in-laws. The pan empties every single time without fail.
- Unbelievably Delicious : The texture is this perfect middle ground between cake and fudge — dense but tender, with a crumb that practically melts.
What makes this version different from the rest? Two things, honestly. First, the brown butter frosting isn’t an afterthought — it’s the star. Most pumpkin bar recipes slap on a cream cheese frosting that’s fine but forgettable. This one? The nutty, caramelized brown butter transforms the whole experience. Second, I figured out the exact ratio of pumpkin to flour so the bars stay moist without getting gummy. It took me three soggy batches to get there, but now I’m sharing the shortcut with you.
This recipe isn’t just good — it is the kind that makes you close your eyes after the first bite. It’s comfort food reimagined: faster than a full pumpkin cake, but with the same soul-soothing satisfaction. Perfect for impressing guests without stress, or turning a simple Tuesday evening into something memorable.
What Ingredients You Will Need
This recipe uses simple, wholesome ingredients to deliver bold flavor and satisfying texture without the fuss. Most of these are pantry staples, especially if you’re already in full fall baking mode.
For the Pumpkin Bars
- 1 ¾ cups all-purpose flour (spooned and leveled — don’t scoop directly from the bag or you’ll pack it too tight)
- 1 ½ cups granulated sugar
- 1 cup canned pumpkin puree (not pumpkin pie filling — make sure it’s 100% pure pumpkin, I prefer Libby’s for consistent texture)
- ½ cup vegetable oil (or melted coconut oil for a slightly different flavor)
- 2 large eggs, room temperature (cold eggs can make the batter seize up)
- 1 teaspoon vanilla extract
- 1 teaspoon baking powder
- ½ teaspoon baking soda
- ½ teaspoon salt
- 2 teaspoons pumpkin pie spice (or make your own: 1 tsp cinnamon, ½ tsp ginger, ¼ tsp nutmeg, ¼ tsp cloves)
- 1 teaspoon ground cinnamon (yes, in addition to the pumpkin pie spice — trust me on this)
For the Brown Butter Frosting
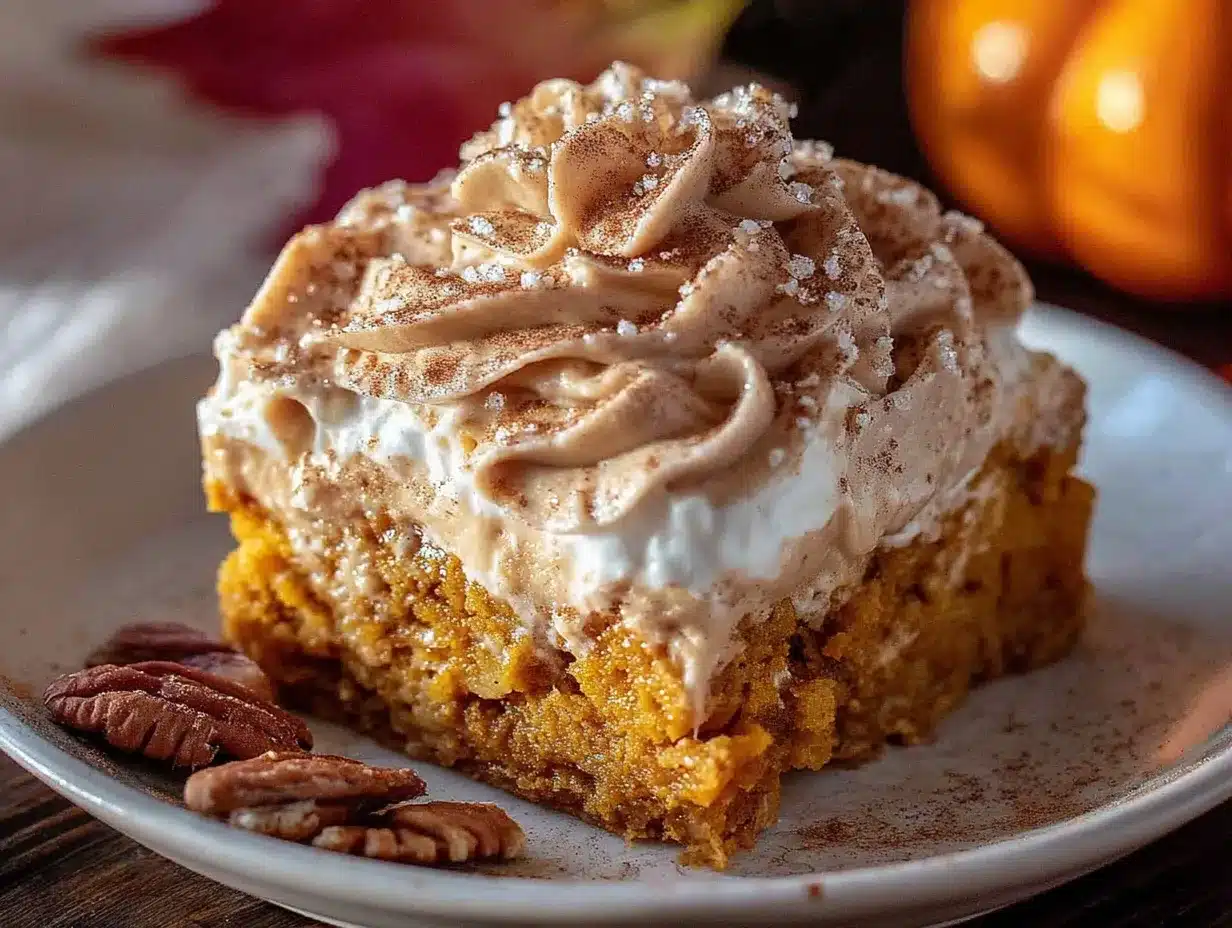
- ½ cup unsalted butter (use good quality butter here — it makes a difference since the brown butter flavor is the whole point)
- 2 cups powdered sugar, sifted (sifting prevents lumps, I learned this the hard way)
- 2-3 tablespoons milk (whole milk works best, but 2% or even oat milk will do in a pinch)
- 1 teaspoon vanilla extract
- Pinch of salt (to balance the sweetness)
Ingredient Tips and Substitutions
For a gluten-free version, swap the all-purpose flour with a 1:1 gluten-free baking blend that contains xanthan gum. I’ve had good results with Bob’s Red Mill. If you’re dairy-free, use a plant-based butter for the frosting — just know the brown butter flavor won’t be as pronounced since dairy-free butters have less milk solids to caramelize. You can also swap the vegetable oil for applesauce if you want to reduce the fat, but the bars will be slightly denser and less tender.
When choosing your pumpkin puree, look for cans that feel heavy for their size — that means more pumpkin, less water. And if you’re feeling ambitious, you can roast and puree your own sugar pumpkin, but honestly? Canned works perfectly and saves you an hour of work. I always keep a few extra cans in my pantry during fall because nothing’s worse than wanting to bake and realizing you’re out.
Equipment Needed
You don’t need a fancy kitchen to make these bars, which is part of why I love them. Here’s what you’ll need:
- 9×13 inch baking pan — metal pans work best for even browning. Glass pans can work but you’ll need to add 5-7 minutes to the baking time.
- Parchment paper — this is non-negotiable for easy removal. Let the paper hang over the edges like handles.
- Two mixing bowls (one medium, one large)
- Whisk for the dry ingredients
- Spatula or wooden spoon for mixing the batter
- Small saucepan for browning the butter (light-colored pans help you see the color change)
- Hand mixer or stand mixer — honestly, a whisk and some elbow grease works too, but the mixer makes the frosting smoother
- Cooling rack — wire rack lets air circulate so your bars don’t get soggy on the bottom
- Sifter or fine-mesh strainer for the powdered sugar
If you don’t have a cooling rack, you can use the rack from your oven (just make sure it’s clean). And if you’re using a dark-colored metal pan, reduce the oven temperature by 25 degrees to prevent over-browning. I learned that one after a particularly crispy first attempt.
Preparation Method
Alright, let’s get baking. I’ve broken this down step by step so even if you’ve never made pumpkin bars before, you’ll feel confident.
Step 1: Preheat and Prep
Preheat your oven to 350°F (175°C). Line your 9×13 pan with parchment paper, leaving a 2-inch overhang on the long sides. This creates handles so you can lift the whole block of bars out later. Lightly grease the parchment with cooking spray or a thin smear of butter.
Step 2: Mix the Dry Ingredients
In a medium bowl, whisk together the flour, baking powder, baking soda, salt, pumpkin pie spice, and cinnamon. Set this aside. Whisking aerates the flour and distributes the leavening agents evenly — no one wants a pocket of baking soda in their bar.
Step 3: Combine the Wet Ingredients
In a large bowl, whisk together the pumpkin puree, granulated sugar, vegetable oil, eggs, and vanilla extract. Whisk until smooth and well combined. The mixture should look glossy and smell like fall already. Don’t overmix here — just until everything comes together.
Step 4: Combine Wet and Dry
Pour the dry ingredients into the wet ingredients. Fold gently with a spatula until just combined. A few streaks of flour are okay — overmixing develops gluten and makes the bars tough. You want them tender, not like hockey pucks.
Step 5: Bake
Pour the batter into the prepared pan and spread it evenly. Bake at 350°F for 22-26 minutes, or until a toothpick inserted in the center comes out clean or with just a few moist crumbs. The edges should be slightly pulling away from the parchment. Let the bars cool completely in the pan on a wire rack — this takes about 45 minutes to an hour. Don’t rush this step, or your frosting will melt into a puddle.
Step 6: Make the Brown Butter Frosting
While the bars cool, make the frosting. Cut the butter into pieces and place in a small saucepan over medium heat. Melt the butter, then continue cooking, swirling the pan occasionally. The butter will foam, then the foam will subside, and you’ll see brown specks forming at the bottom. This is the milk solids toasting — that’s where the magic happens. Once the butter turns a golden-amber color and smells nutty (about 5-7 minutes), remove it from the heat immediately. Pour it into a heatproof bowl to stop the cooking process — butter can go from perfect to burnt in seconds.
Step 7: Finish the Frosting
Let the brown butter cool for about 10 minutes — it should be warm but not hot. Add the sifted powdered sugar, vanilla extract, and a pinch of salt. Beat with a hand mixer on low speed until combined, then add 2 tablespoons of milk and beat on medium-high until smooth and creamy. If the frosting is too thick, add the remaining tablespoon of milk. If it’s too thin, add a bit more powdered sugar. Spread the frosting over the completely cooled bars.
Step 8: Slice and Serve
Let the frosting set for about 15 minutes, then lift the bars out using the parchment overhang. Slice into squares — I usually get 12-16 bars depending on how generous I’m feeling. A sharp knife wiped clean between cuts gives you the cleanest edges.
Cooking Tips & Techniques
After making these pumpkin bars more times than I care to count, I’ve collected some hard-won wisdom. Here are the things I wish someone had told me:
Don’t skip the parchment paper. I know it seems like an extra step, but trust me — trying to cut bars that have stuck to the pan is a special kind of frustration. The parchment handles make everything easier.
Watch your brown butter like a hawk. The difference between perfect brown butter and burnt butter is about thirty seconds. Swirl the pan constantly and look for that amber color and nutty aroma. When you think it’s almost there, it’s probably done. Err on the side of taking it off early — you can always cook it a bit more, but you can’t un-burn it.
Room temperature eggs matter. Cold eggs can cause the batter to seize up and create a denser texture. If you forgot to take them out of the fridge, place them in a bowl of warm water for 5 minutes before using.
Let the bars cool completely. I know it’s tempting to rush, but warm bars + frosting = a melty mess. I once frosted slightly warm bars and ended up with a brown butter puddle instead of a creamy topping. Still tasted good, but it wasn’t pretty.
Use a light-colored pan for browning butter. Dark pans make it hard to see the color change, and you’re more likely to burn it. If all you have is dark, reduce the heat to medium-low and watch even more carefully.
Test for doneness at 22 minutes. Every oven runs differently, and nothing’s worse than dry pumpkin bars. Start checking early and pull them as soon as the toothpick comes out clean.
Variations & Adaptations
One of the best things about this recipe is how flexible it is. Here are some variations I’ve tried and loved:
Gluten-Free Version
Substitute the all-purpose flour with a 1:1 gluten-free baking blend. I’ve tested this with King Arthur’s Measure for Measure and it worked beautifully. The texture is slightly more delicate, so let the bars cool completely before slicing.
Vegan Adaptation
Use flax eggs (2 tablespoons ground flaxseed mixed with 6 tablespoons water, let sit for 5 minutes) instead of regular eggs, and swap the vegetable oil for melted coconut oil. For the frosting, use vegan butter — just know that the brown butter flavor will be milder since plant-based butters have fewer milk solids.
Spice It Up
Add ¼ teaspoon of black pepper or a pinch of cayenne to the dry ingredients. It sounds weird, but the heat plays beautifully with the sweet pumpkin and nutty frosting. I tried this on a whim last year and now I can’t go back.
Nutty Twist
Fold in ½ cup of toasted pecans or walnuts into the batter before baking. The crunch adds a nice contrast to the soft bars. You can also sprinkle chopped nuts on top of the frosting while it’s still soft.
Chocolate Lover’s Version
Fold in ½ cup of dark chocolate chips into the batter. The chocolate pairs surprisingly well with the pumpkin spice and brown butter. I made this for a friend who “doesn’t like pumpkin desserts” and she ate three.
Serving & Storage Suggestions
These pumpkin bars are best served at room temperature, which lets the frosting soften to that perfect creamy consistency. I like to cut them into generous squares and arrange them on a rustic wooden board or a simple white platter — the orange bars with the golden frosting look gorgeous against neutral backgrounds.
For a truly decadent experience, warm a bar in the microwave for about 10 seconds and serve with a scoop of vanilla ice cream or a dollop of whipped cream. The warm bar with cold ice cream is the kind of dessert that makes you forget about the rest of your day.
These bars also pair beautifully with a hot cup of coffee, chai tea, or a glass of cold milk. They’re equally at home on a Thanksgiving dessert table as they are with your morning coffee the next day.
Storage: Keep the bars in an airtight container at room temperature for up to 3 days. If your kitchen runs warm, store them in the refrigerator — the frosting can get a bit soft. Let refrigerated bars sit at room temperature for 15 minutes before serving to soften the frosting.
Freezing: These freeze beautifully. Freeze the unfrosted bars in a single layer on a baking sheet, then wrap tightly in plastic wrap and foil. They’ll keep for up to 3 months. When ready to serve, thaw in the refrigerator overnight, then bring to room temperature and frost. Or frost before freezing — just layer parchment between the bars so they don’t stick together.
Funny thing about these bars — they actually taste even better the next day. The spices have time to meld, and the texture settles into something almost fudge-like. So if you can resist eating them all on day one, you’re in for a treat on day two.
Nutritional Information & Benefits
Here’s the approximate nutritional breakdown per bar (based on 16 servings):
| Nutrient | Amount Per Bar |
|---|---|
| Calories | 285 |
| Total Fat | 12g |
| Saturated Fat | 5g |
| Cholesterol | 45mg |
| Sodium | 180mg |
| Total Carbohydrates | 42g |
| Dietary Fiber | 2g |
| Sugars | 30g |
| Protein | 3g |
| Vitamin A | 45% DV |
Pumpkin is packed with vitamin A, which supports eye health and immune function. It’s also a good source of fiber and potassium. The brown butter frosting adds richness, but if you’re looking to lighten things up, you can reduce the frosting amount or use a simple dusting of powdered sugar instead.
This recipe contains gluten, dairy, and eggs. For allergen-friendly options, check the variations section above.
From a personal perspective, I love that these bars feel indulgent but have a vegetable as the main ingredient. It’s not health food by any stretch, but there’s something satisfying about knowing you’re getting a decent dose of vitamin A with your dessert.
Conclusion
These easy pumpkin bars with brown butter frosting are the kind of recipe that becomes a tradition. They’re simple enough for a Tuesday baking session but special enough for Thanksgiving. The combination of tender, spiced pumpkin cake with that nutty, caramelized frosting is honestly hard to beat.
I hope you give these a try and make them your own. Maybe you’ll add extra cinnamon, or throw in some chocolate chips, or discover that your family likes them best with a sprinkle of flaky sea salt on top. That’s the beauty of a good base recipe — it leaves room for your personal touch.
If you make these, I’d love to hear how they turned out. Drop a comment below and let me know if you tried any variations, or just tell me about the look on someone’s face when they took that first bite. Happy baking, friends — may your kitchen smell like autumn and your frosting turn out perfectly golden.
Frequently Asked Questions
Can I use fresh pumpkin instead of canned?
Yes, you can use fresh pumpkin puree. Just make sure to strain it well through cheesecloth or a fine-mesh strainer to remove excess water. Fresh pumpkin has more moisture than canned, so you might need to reduce the oil by a tablespoon or two to compensate.
Why did my brown butter turn bitter?
Brown butter can turn bitter if it’s cooked too long or at too high heat. The milk solids go from toasted to burnt very quickly. Always use medium heat, swirl constantly, and remove the pan from the heat as soon as you see amber color and smell that nutty aroma. Pour it into a cool bowl immediately to stop the cooking process.
Can I make these bars ahead of time?
Absolutely. You can bake the bars a day ahead and store them unfrosted at room temperature. Make the frosting and frost them the day you plan to serve. Or freeze the unfrosted bars for up to 3 months — just thaw overnight in the fridge before frosting.
My bars turned out dry. What went wrong?
Dry pumpkin bars usually mean they were overbaked. Start checking for doneness at 22 minutes, and pull them as soon as a toothpick comes out clean. Also make sure you’re measuring your flour correctly — scooping directly from the bag packs it too tight and adds extra flour. Spoon it into your measuring cup and level it off with a knife.
Can I use pumpkin pie filling instead of pumpkin puree?
I wouldn’t recommend it. Pumpkin pie filling has added sugar and spices, which will throw off the balance of the recipe. Stick with 100% pure pumpkin puree for the best results. The difference is usually pretty clear on the label — look for “pumpkin” not “pumpkin pie mix.”
Pin This Recipe!
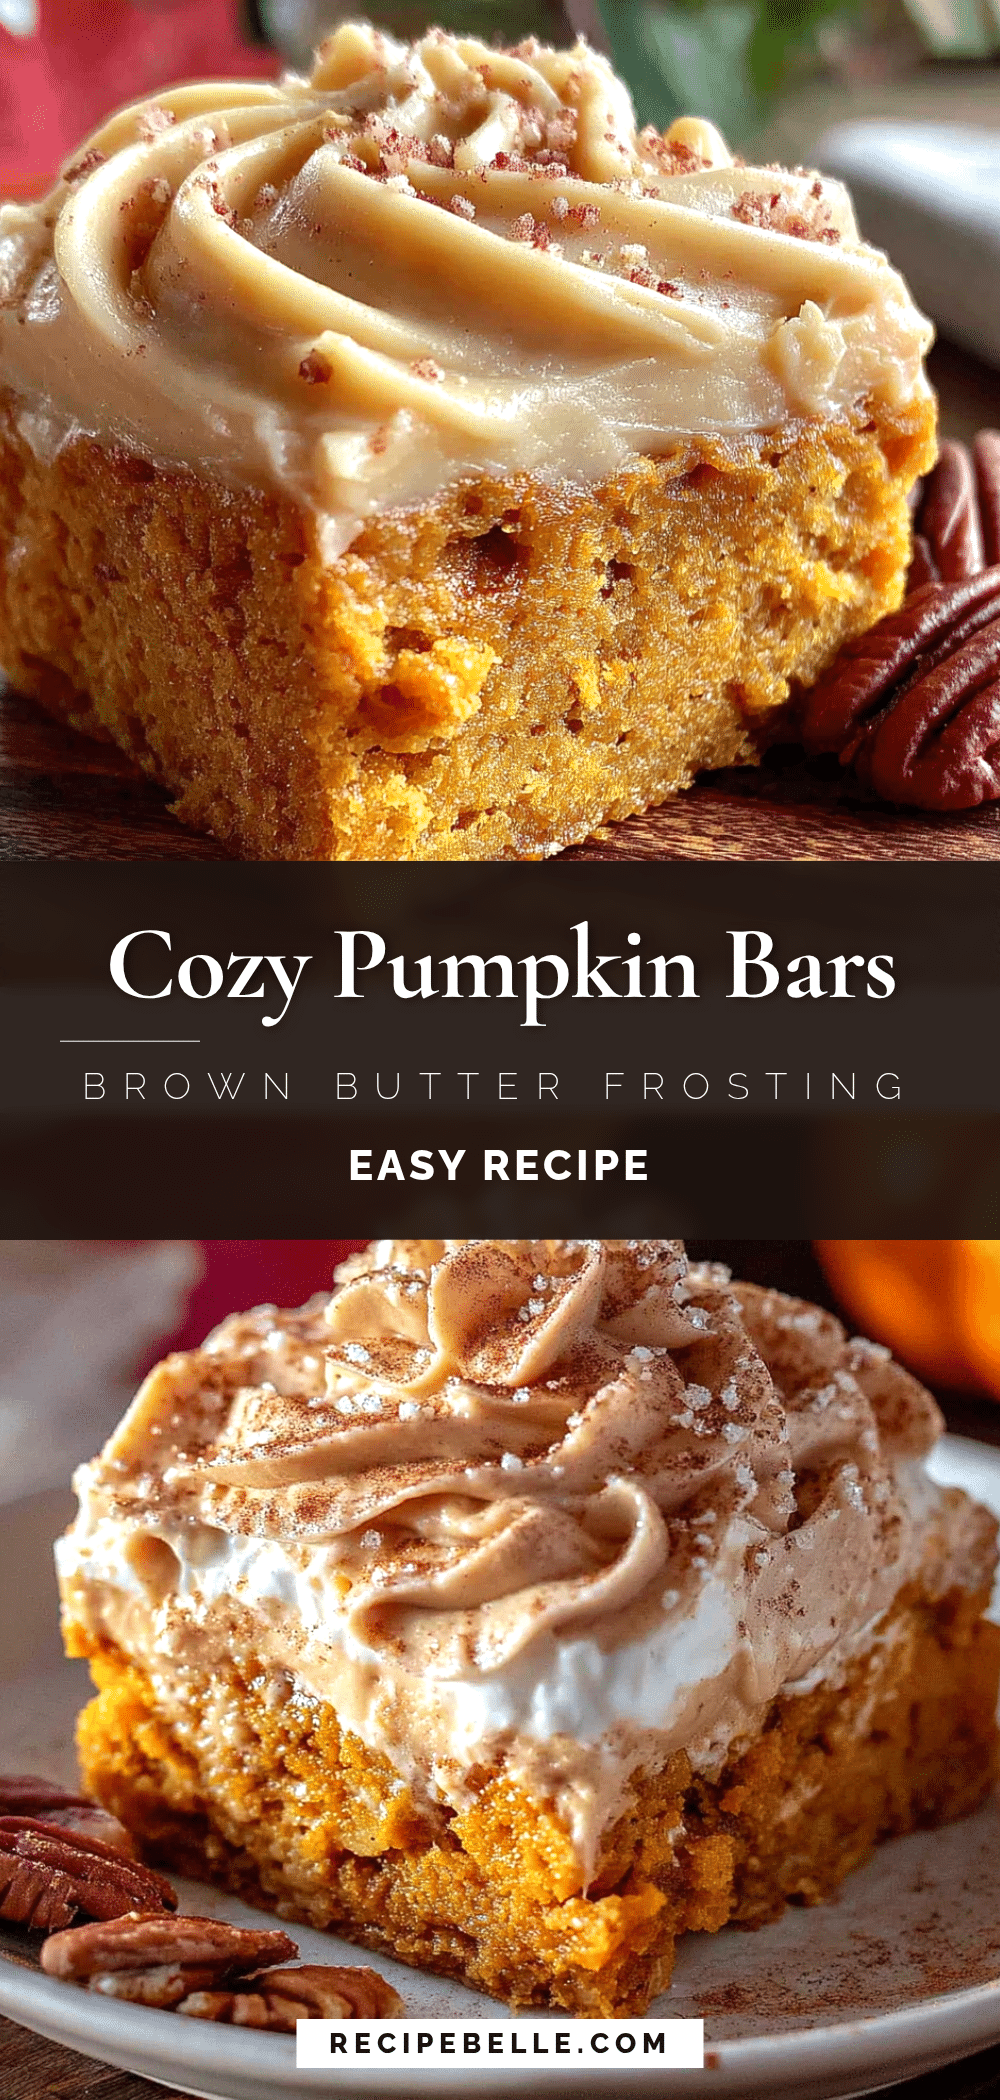
Easy Pumpkin Bars with Brown Butter Frosting
These easy pumpkin bars with brown butter frosting are the kind of recipe that becomes a tradition. They’re simple enough for a Tuesday baking session but special enough for Thanksgiving, with tender spiced pumpkin cake and nutty caramelized frosting.
- Prep Time: 15 minutes
- Cook Time: 25 minutes
- Total Time: 40 minutes (plus cooling time)
- Yield: 16 servings 1x
- Category: Dessert
- Cuisine: American
Ingredients
- 1 ¾ cups all-purpose flour (spooned and leveled)
- 1 ½ cups granulated sugar
- 1 cup canned pumpkin puree (100% pure pumpkin, not pumpkin pie filling)
- ½ cup vegetable oil (or melted coconut oil)
- 2 large eggs, room temperature
- 1 teaspoon vanilla extract
- 1 teaspoon baking powder
- ½ teaspoon baking soda
- ½ teaspoon salt
- 2 teaspoons pumpkin pie spice
- 1 teaspoon ground cinnamon
- ½ cup unsalted butter (for frosting)
- 2 cups powdered sugar, sifted (for frosting)
- 2–3 tablespoons milk (whole milk preferred, for frosting)
- 1 teaspoon vanilla extract (for frosting)
- Pinch of salt (for frosting)
Instructions
- Preheat your oven to 350°F (175°C). Line a 9×13 inch baking pan with parchment paper, leaving a 2-inch overhang on the long sides. Lightly grease the parchment with cooking spray or butter.
- In a medium bowl, whisk together the flour, baking powder, baking soda, salt, pumpkin pie spice, and cinnamon. Set aside.
- In a large bowl, whisk together the pumpkin puree, granulated sugar, vegetable oil, eggs, and vanilla extract until smooth and well combined.
- Pour the dry ingredients into the wet ingredients. Fold gently with a spatula until just combined (a few streaks of flour are okay).
- Pour the batter into the prepared pan and spread evenly. Bake at 350°F for 22-26 minutes, or until a toothpick inserted in the center comes out clean or with just a few moist crumbs. Let the bars cool completely in the pan on a wire rack (about 45 minutes to 1 hour).
- While the bars cool, make the brown butter frosting. Cut the butter into pieces and place in a small saucepan over medium heat. Melt the butter, then continue cooking, swirling occasionally, until it turns a golden-amber color and smells nutty (about 5-7 minutes). Remove from heat immediately and pour into a heatproof bowl to stop cooking.
- Let the brown butter cool for about 10 minutes (warm but not hot). Add the sifted powdered sugar, vanilla extract, and a pinch of salt. Beat with a hand mixer on low speed until combined, then add 2 tablespoons of milk and beat on medium-high until smooth and creamy. Add more milk if needed for desired consistency.
- Spread the frosting over the completely cooled bars. Let the frosting set for about 15 minutes, then lift the bars out using the parchment overhang. Slice into squares (12-16 bars) using a sharp knife wiped clean between cuts.
Notes
Don’t skip the parchment paper for easy removal. Watch brown butter carefully as it can go from perfect to burnt in seconds. Room temperature eggs are important for proper texture. Let bars cool completely before frosting to prevent melting. For gluten-free, use a 1:1 gluten-free baking blend. For vegan, use flax eggs and vegan butter (brown butter flavor will be milder). Bars taste even better the next day.
Nutrition
- Serving Size: 1 bar
- Calories: 285
- Sugar: 30
- Sodium: 180
- Fat: 12
- Saturated Fat: 5
- Carbohydrates: 42
- Fiber: 2
- Protein: 3
Keywords: pumpkin bars, brown butter frosting, fall dessert, easy pumpkin recipe, Thanksgiving dessert, pumpkin spice



