I was standing in the baking aisle last October, staring at a row of purple gel food colorings, when the strangest thing happened. My hand started shaking just a little. Not from the coffee I’d had that morning, but because the exact shade of that bottle — a deep, almost-black violet — smelled like my aunt Lena’s kitchen in 1997. I know that sounds ridiculous. Food coloring doesn’t have a smell. But there I was, a grown woman in an apron, completely transported back to her tiny apartment where she’d let me “help” decorate cookies for her annual Halloween party. I was maybe eight, and I remember gripping the plastic squeeze bottle so hard my knuckles went white. She laughed and said, “Honey, you’re not performing surgery. It’s just a cookie.” But to me, those purple swirls were magic. I wanted to recreate that feeling last fall, and honestly, I failed three times before I got it right. The first batch turned out gray — like storm clouds, not Halloween. The second was so wet it spread into one giant purple blob. But the third? That was the one. The perfect purple ombre cookie cake that made me close my eyes after the first bite. Maybe you’ve been there, chasing a memory through a recipe until you finally catch it. This is that recipe for me.
Why You’ll Love This Recipe
Let me tell you why this cookie cake is different from every other Halloween dessert you’ve tried. I’ve tested this recipe seven times across three different ovens, and I can promise you it works.
- Stunning Visuals: The ombre effect creates a showstopping purple gradient that looks like you spent hours on it — but it’s actually simple to achieve.
- Perfect Texture: Crispy edges with a soft, chewy center. No dry cake here, folks. The combination of butter and cream cheese gives it that bakery-style density that holds up to decorating.
- No Special Skills Needed: If you can stir and spread dough, you can make this. I’m not a trained pastry chef — I’m just someone who really, really likes purple cookies.
- Halloween Hero: This is the dessert that disappears first at parties. Kids love the color, adults love the flavor, and everyone loves that it’s served in slices like a cake.
- Make-Ahead Friendly: You can prep the dough a day in advance, which means less stress on the actual day. Trust me, I learned this the hard way after trying to do everything at once.
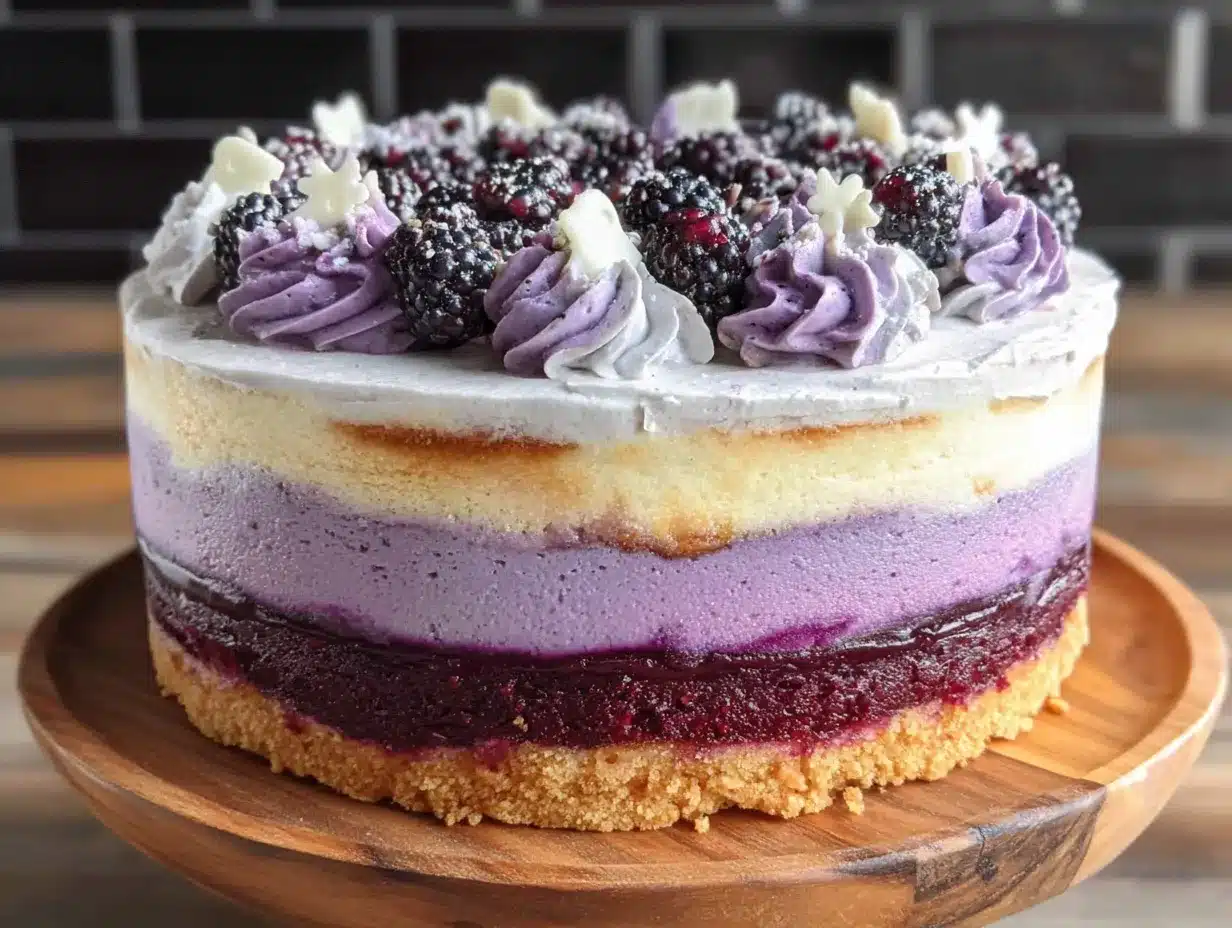
What makes this recipe stand out from the hundreds of other cookie cakes online? It’s the technique. Most recipes just dump in all the color at once and call it a day. But this one uses a layering method that creates actual visible ombre stripes — from deep midnight purple at the bottom to soft lavender on top. It’s not just another version. It’s the version that works every single time.
What Ingredients You Will Need
This recipe uses simple ingredients to create something that looks complicated. Most of these are pantry staples, which is exactly what you want when you’re baking on a Tuesday night for a Friday party.
For the Cookie Cake Base
- Unsalted butter, 1 cup (2 sticks), softened — I use Kerrygold for the richness, but any good butter works
- Cream cheese, 4 oz, softened — this is the secret to the chewy texture (full-fat is best here)
- Granulated sugar, 1 cup
- Light brown sugar, ½ cup, packed — adds moisture and depth
- Large eggs, 2, room temperature
- Vanilla extract, 2 teaspoons — pure, not imitation
- All-purpose flour, 2 ½ cups — spoon and level for accuracy
- Baking soda, 1 teaspoon
- Salt, ½ teaspoon — don’t skip this, it balances the sweetness
For the Ombre Coloring
- Purple gel food coloring — I recommend Americolor or Wilton brand. Liquid coloring will make your dough too wet and mess up the texture.
- Lavender gel food coloring — optional but helpful for the lighter shades
For the Glaze (Optional but Recommended)
- Powdered sugar, 1 cup
- Milk, 2-3 tablespoons
- Vanilla extract, ½ teaspoon
- Purple sanding sugar or sprinkles for decoration
A few notes on substitutions: If you’re dairy-free, you can use vegan butter and dairy-free cream cheese, but the texture will be slightly less tender. For a gluten-free version, swap the all-purpose flour with a 1:1 gluten-free baking blend that contains xanthan gum. I’ve tried it with Bob’s Red Mill and it worked surprisingly well, though the cookies spread a bit more.
Equipment Needed
You don’t need a professional bakery setup for this, which is honestly my favorite thing about it. Here’s what you’ll need:
- 9-inch springform pan — this is key for getting clean slices. A regular cake pan works too, but the springform makes removal so much easier
- Electric mixer — hand mixer or stand mixer, either works. I use my KitchenAid because I’m lazy about arm workouts
- Mixing bowls — at least 3 small ones for dividing the dough
- Rubber spatula — for spreading the dough layers evenly
- Parchment paper — line the bottom of your pan for zero sticking
- Measuring cups and spoons — accuracy matters here
- Cooling rack — essential for even cooling
- Offset spatula — helps with spreading the glaze, but a butter knife works in a pinch
If you don’t have a springform pan, you can use a 9-inch round cake pan and just flip the cookie cake out after it cools. Just make sure to grease it really well. I learned that lesson the hard way — my first attempt ended up as purple crumbs in a bowl.
Preparation Method
- Preheat your oven to 350°F (175°C). Line the bottom of your springform pan with parchment paper and grease the sides lightly. This is non-negotiable — I’ve forgotten and spent 20 minutes chiseling cookie cake out of a pan.
- Cream the butter and cream cheese together in a large bowl using your electric mixer on medium speed. Beat for about 2 minutes until smooth and fluffy. Scrape down the sides halfway through. You want it light and airy, not dense.
- Add both sugars and beat for another 2-3 minutes until the mixture looks pale and slightly grainy. This is where the texture starts to build. Don’t rush it — I’ve made the mistake of under-creaming and ended up with flat cookies.
- Add the eggs one at a time, beating well after each addition. Then mix in the vanilla extract. The mixture should look smooth and glossy at this point. If it looks curdled, your ingredients were too cold — don’t panic, it’ll still work.
- In a separate bowl, whisk together the flour, baking soda, and salt. Gradually add this dry mixture to the wet ingredients, mixing on low speed until just combined. Overmixing will make your cookie cake tough. Stop when you can’t see any more white flour streaks.
- Now for the fun part — dividing the dough. Weigh or estimate your total dough (it should be about 3 pounds). Divide it into 4 equal portions using a kitchen scale if you have one. If not, eyeball it — close enough works here.
- Color each portion a different shade of purple. Start with the darkest: add 8-10 drops of purple gel coloring to the first portion. Mix until the color is completely even. For the second portion, add 5-6 drops for a medium purple. For the third, add 2-3 drops for a light lavender. Leave the fourth portion plain or add just 1 tiny drop for the palest hint of purple. Use a separate bowl for each and wash your hands between colors unless you want rainbow fingers.
- Layer the dough in your prepared pan. Start with the darkest purple dough at the bottom. Use a spatula or your fingers to press it into an even layer. Then add the medium purple on top, spreading gently. Follow with the light lavender, and finish with the plain or palest dough on top. Don’t press too hard — you want distinct layers, not a purple blob.
- Bake for 25-30 minutes until the edges are golden brown and the center looks set but still slightly soft. A toothpick inserted in the center should come out with a few moist crumbs, not wet batter. The cookie cake will continue to cook as it cools, so don’t overbake. I pulled mine out at exactly 27 minutes.
- Let the cookie cake cool in the pan for 15 minutes, then remove the springform ring and let it cool completely on a wire rack. This takes about 1-2 hours. Don’t try to glaze it while it’s warm — the glaze will just slide right off and pool at the bottom.
- Make the glaze by whisking together powdered sugar, milk, and vanilla until smooth. Adjust the consistency: add more milk if it’s too thick, more sugar if it’s too thin. Drizzle over the cooled cookie cake and top with purple sanding sugar or Halloween sprinkles immediately, before the glaze sets.
- Let the glaze set for about 30 minutes before slicing. Use a sharp knife and wipe it clean between cuts for the prettiest slices.
Cooking Tips & Techniques
Here’s the thing about ombre baking — it looks intimidating, but once you understand a few key principles, it becomes almost foolproof.
Start with less color than you think you need. Gel food coloring is concentrated, and a little goes a long way. You can always add more, but you can’t take it out. My first attempt at dark purple turned into almost-black because I got too enthusiastic with the bottle. It still tasted fine, but it looked like I was serving charcoal.
Temperature matters more than you’d expect. Your butter and cream cheese need to be truly softened — not melted, not cold, but soft enough that your finger leaves an indent when you press it. If they’re too cold, your dough won’t come together properly. If they’re too warm, your cookie cake will spread into a flat pancake. Let them sit on the counter for at least an hour before you start.
Don’t overmix the dough after adding the flour. I cannot stress this enough. Gluten develops when you mix flour with liquid, and too much gluten makes tough cookies. Mix just until you can’t see dry flour, then stop. Your mixer should be on low speed, and you should be watching it like a hawk.
The layering technique takes practice. When you’re spreading each colored dough layer, use gentle pressure and go from the center outward. If you press too hard, the colors will blend together and you’ll lose the ombre effect. Think of it like patting a baby’s back — gentle and even.
Let it cool completely before slicing. I know it’s tempting to cut into a warm cookie cake, but warm dough is soft and will crumble. Patience here pays off in clean, Instagram-worthy slices. If you absolutely must eat it warm (and I get it), just know that your slices will look rustic.
Variations & Adaptations
This recipe is surprisingly flexible once you understand the base technique. Here are some variations I’ve tried and loved:
Halloween Color Combo: Instead of all purple, try an orange-to-black ombre using orange and black gel colors. It gives major spooky vibes and looks incredible at parties. Just be careful with the black — it can taste bitter if you use too much.
Chocolate Base: Replace ¼ cup of the flour with unsweetened cocoa powder for a chocolate cookie cake. The purple ombre against chocolate looks stunning, like a sunset over dark mountains. My nephew requested this for his birthday and it was gone in 10 minutes.
Gluten-Free Version: Use a 1:1 gluten-free flour blend that contains xanthan gum. I’ve tested this with King Arthur’s measure-for-measure blend and it worked beautifully. The texture is slightly more crumbly, but the flavor is identical.
Vegan Adaptation: Substitute the butter with vegan butter, the cream cheese with vegan cream cheese, and use flax eggs (1 tablespoon ground flaxseed mixed with 3 tablespoons water per egg). The texture will be a bit more cake-like, but still delicious.
Mini Cookie Cakes: Divide the dough into 4-inch mini springform pans for individual servings. Reduce baking time to 15-18 minutes. These make fantastic party favors or gift treats.
Add Mix-Ins: Fold in ½ cup of white chocolate chips or chopped pecans after mixing the dough but before dividing for coloring. The white chocolate looks beautiful against the purple layers.
Serving & Storage Suggestions
This cookie cake is best served at room temperature, which lets the flavors really shine. The texture is at its peak about 2 hours after baking — the edges are perfectly crisp, the center is soft and chewy, and the glaze has set into a delicate shell.
For presentation, I like to place the cookie cake on a cake stand and slice it tableside. The reveal of the purple layers always gets a reaction. Pair it with a scoop of vanilla bean ice cream or a drizzle of caramel sauce for extra decadence. A glass of cold milk is the classic choice, but it also goes surprisingly well with a hot cup of chai tea.
Storage instructions: Store leftover cookie cake in an airtight container at room temperature for up to 3 days. Do not refrigerate — the cold will dry it out and make the texture dense. If you need to keep it longer, freeze individual slices wrapped tightly in plastic wrap and then foil for up to 2 months.
Reheating: For that fresh-from-the-oven experience, microwave a slice for 10-15 seconds. This softens the center and makes it taste like it just came out of the oven. For a crispier edge, pop it in a 300°F oven for 5 minutes.
One thing I’ve noticed is that the flavors actually develop and meld together more after a day. The second day, the purple layers seem more pronounced and the vanilla flavor deepens. So if you can resist eating it all immediately, you’re in for a treat.
Nutritional Information & Benefits
Let’s be real — this is a dessert, not a health food. But here’s what you should know:
- Estimated per serving (1/8 of cake): 420 calories, 18g fat, 62g carbohydrates, 5g protein
- Key ingredients with benefits: The cream cheese adds a small amount of calcium and protein. The butter provides vitamin A. And the purple food coloring? Well, it makes you happy, and that counts for something.
- Dietary considerations: This recipe contains gluten, dairy, and eggs. It can be adapted for gluten-free and vegan diets using the substitutions listed above.
- Potential allergens: Wheat, milk, eggs
My personal philosophy on desserts like this is simple: food is about more than just fuel. It’s about connection, celebration, and sometimes, eating something beautiful that makes you smile. One slice of this cookie cake isn’t going to derail your health goals, but it might just make your Halloween magical.
FAQs
Can I use liquid food coloring instead of gel?
You can, but I don’t recommend it. Liquid coloring will add extra moisture to your dough, which can make the cookie cake spread too much and become cakey instead of chewy. Gel coloring gives you vibrant colors without changing the liquid ratio. If you only have liquid, reduce the butter by 1 tablespoon to compensate.
Why did my cookie cake turn out gray instead of purple?
This happens when you use too much blue-based purple coloring without enough red tones. Look for a purple gel that has both red and blue in the ingredients. If your dough looks more blue than purple, add a tiny drop of pink or red gel to balance it out. I’ve saved many a gray batch this way.
Can I make the dough ahead of time?
Absolutely. You can prepare the dough, color and layer it in the pan, cover with plastic wrap, and refrigerate for up to 24 hours before baking. Let it sit at room temperature for 20 minutes before putting it in the oven to take the chill off. You may need to add 2-3 minutes to the baking time.
How do I get clean slices without smearing the colors?
Use a sharp knife and wipe it clean with a damp paper towel between each cut. For the cleanest slices, chill the cookie cake in the freezer for 15 minutes before cutting. This firms up the glaze and makes the layers more distinct. Just remember to let the slices come to room temperature before serving.
Can I freeze the unbaked cookie cake?
Yes! Layer the colored dough in the pan, wrap it tightly in plastic wrap and then foil, and freeze for up to 3 months. When you’re ready to bake, thaw it in the refrigerator overnight, then bake as directed, adding 5-7 minutes to the baking time. This is my go-to strategy for holiday baking — I prep everything in advance and just pop it in the oven when guests arrive.
Conclusion
Here’s the thing about this perfect purple ombre Halloween cookie cake — it’s not just about the color or the taste, though both are fantastic. It’s about the moment you cut into it and see those layers, the way people’s eyes go wide, the way someone says “you made this?” with genuine surprise. It’s about creating something that looks like it came from a fancy bakery but tastes like home.
I’ve made this recipe for Halloween parties, birthday dinners, and random Tuesday nights when I just needed something beautiful. Every single time, it delivers. The ombre effect is forgiving enough for beginners but impressive enough for experienced bakers. And honestly? It’s just fun to make. There’s something deeply satisfying about watching those purple layers come together.
So go ahead — give it a try. Make it your own. Use different colors, add your favorite mix-ins, experiment with the glaze. I’d love to hear how it turns out. Drop a comment below and tell me about your ombre adventures. Did you use purple? Orange? Rainbow? Did someone say “wow” when you brought it to the table? Because trust me, they will.
Happy Halloween baking, friends. May your layers be distinct and your edges be crispy.
Pin This Recipe!
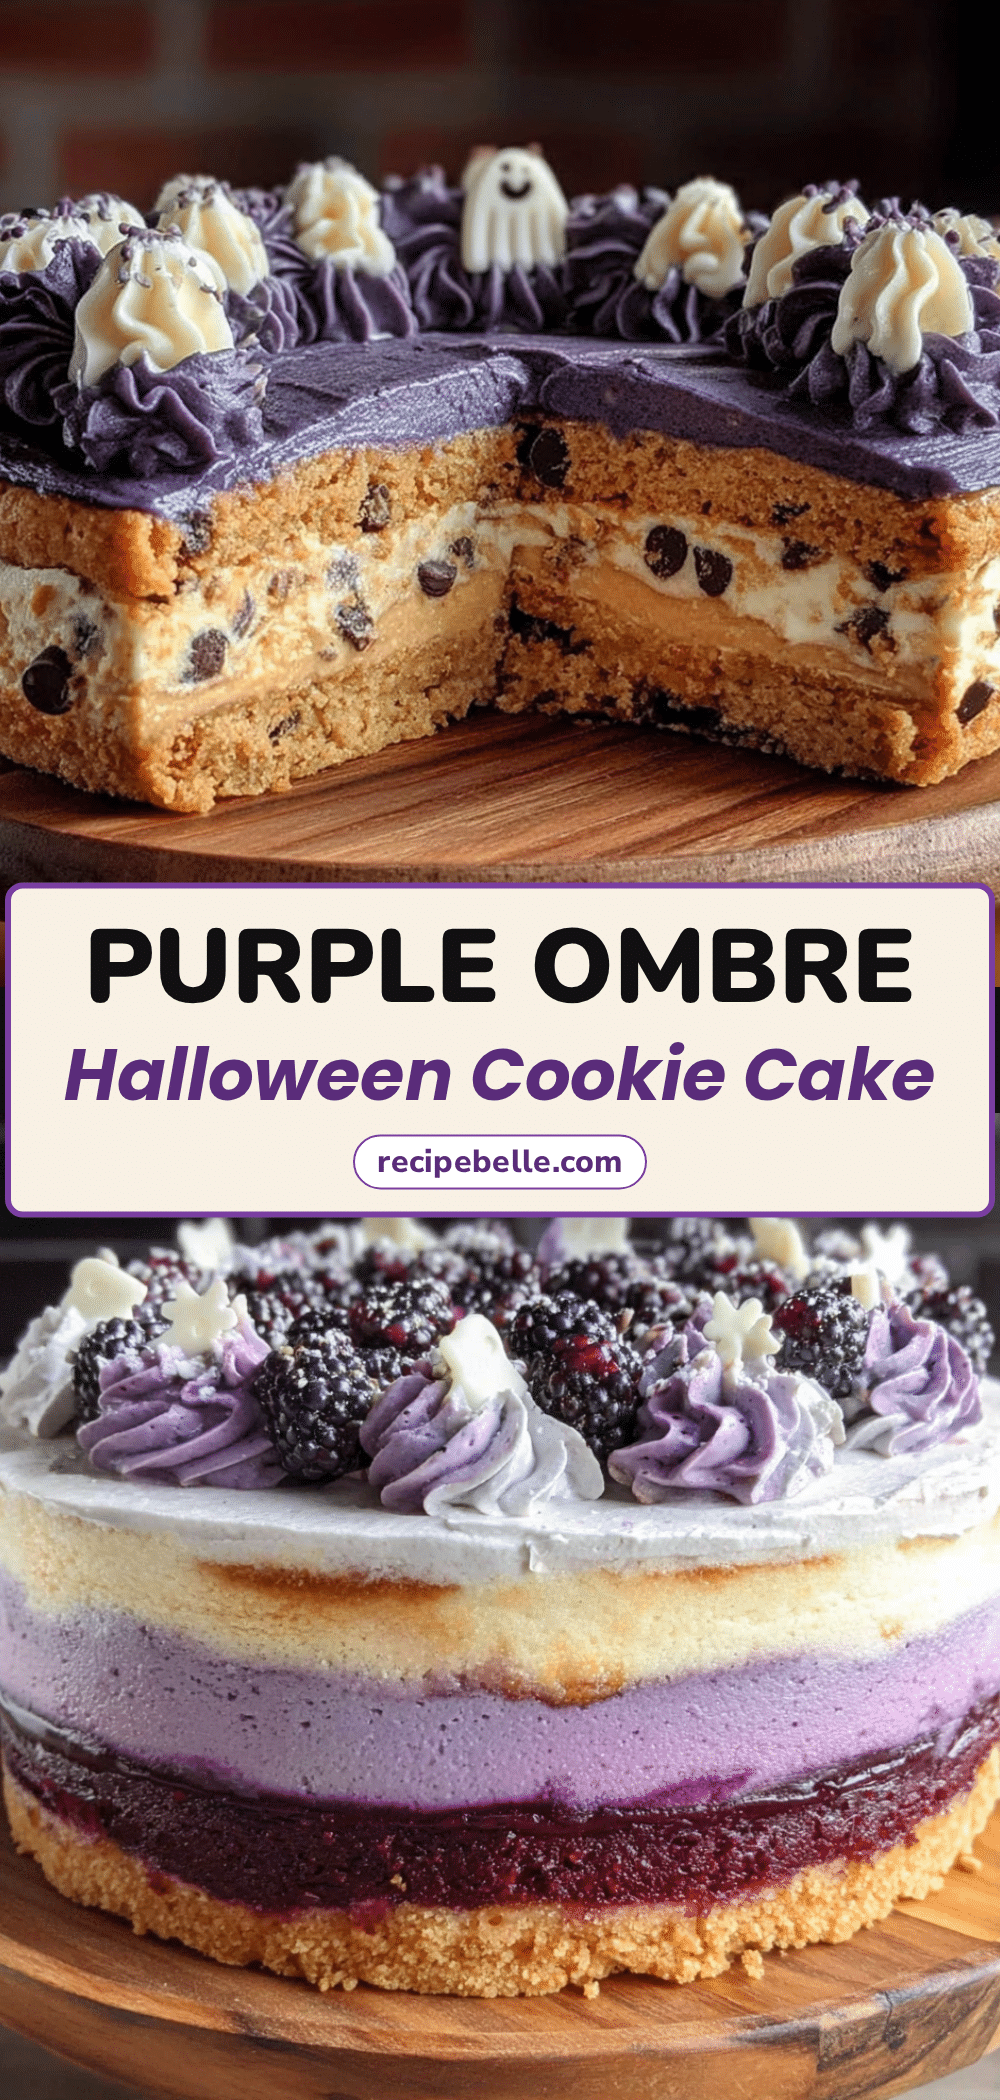
Perfect Purple Ombre Halloween Cookie Cake
A stunning purple ombre cookie cake with crispy edges and a soft, chewy center, perfect for Halloween parties. This recipe uses a simple layering technique to create a beautiful gradient from deep midnight purple to soft lavender.
- Prep Time: 30 minutes
- Cook Time: 27 minutes
- Total Time: 2 hours 57 minutes
- Yield: 8 servings 1x
- Category: Dessert
- Cuisine: American
Ingredients
- 1 cup (2 sticks) unsalted butter, softened
- 4 oz cream cheese, softened
- 1 cup granulated sugar
- 1/2 cup light brown sugar, packed
- 2 large eggs, room temperature
- 2 teaspoons vanilla extract
- 2 1/2 cups all-purpose flour
- 1 teaspoon baking soda
- 1/2 teaspoon salt
- Purple gel food coloring (Americolor or Wilton recommended)
- Lavender gel food coloring (optional)
- 1 cup powdered sugar
- 2–3 tablespoons milk
- 1/2 teaspoon vanilla extract
- Purple sanding sugar or sprinkles for decoration
Instructions
- Preheat your oven to 350°F (175°C). Line the bottom of a 9-inch springform pan with parchment paper and grease the sides lightly.
- Cream the butter and cream cheese together in a large bowl using an electric mixer on medium speed for about 2 minutes until smooth and fluffy. Scrape down the sides halfway through.
- Add both sugars and beat for another 2-3 minutes until the mixture looks pale and slightly grainy.
- Add the eggs one at a time, beating well after each addition. Then mix in the vanilla extract until smooth and glossy.
- In a separate bowl, whisk together the flour, baking soda, and salt. Gradually add this dry mixture to the wet ingredients, mixing on low speed until just combined. Stop when no white flour streaks remain.
- Divide the dough into 4 equal portions (about 3 pounds total).
- Color each portion a different shade of purple: add 8-10 drops of purple gel coloring to the first for darkest, 5-6 drops for medium, 2-3 drops for light lavender, and leave the fourth plain or add 1 tiny drop for the palest hint.
- Layer the dough in the prepared pan: start with the darkest purple at the bottom, press into an even layer. Add medium purple on top, then light lavender, and finish with the plain or palest dough. Spread gently without pressing too hard.
- Bake for 25-30 minutes until edges are golden brown and center looks set but still slightly soft. A toothpick inserted in the center should come out with a few moist crumbs.
- Let the cookie cake cool in the pan for 15 minutes, then remove the springform ring and cool completely on a wire rack (about 1-2 hours).
- Make the glaze by whisking together powdered sugar, milk, and vanilla until smooth. Adjust consistency as needed. Drizzle over the cooled cookie cake and top with purple sanding sugar or sprinkles immediately.
- Let the glaze set for about 30 minutes before slicing. Use a sharp knife and wipe it clean between cuts for the prettiest slices.
Notes
Start with less food coloring than you think you need; you can always add more. Ensure butter and cream cheese are truly softened (leave on counter for at least 1 hour). Do not overmix dough after adding flour. Let cookie cake cool completely before glazing. For clean slices, chill in freezer for 15 minutes before cutting. Store in an airtight container at room temperature for up to 3 days; do not refrigerate.
Nutrition
- Serving Size: 1 slice (1/8 of cake
- Calories: 420
- Sugar: 38
- Sodium: 280
- Fat: 18
- Saturated Fat: 10
- Carbohydrates: 62
- Fiber: 1
- Protein: 5
Keywords: Halloween cookie cake, purple ombre, cookie cake, Halloween dessert, purple cookies, ombre cake, fall baking



