Introduction
I swore I didn’t like one-pan meals. For years. They always felt like a compromise—mushy vegetables, overcooked protein, and rice that turned into something closer to paste. I had standards, you know? Then last November, on a Tuesday that felt particularly gray and wet, my neighbor Carol knocked on my door holding a cast iron skillet wrapped in a dish towel. “I made too much,” she said, shoving it into my hands before I could protest. “It’s just beef and rice. Don’t make a big deal about it.”
I ate it standing at my kitchen counter, fork in one hand, still in my coat. And honestly? I had to sit down. The rice was perfectly tender, each grain separate and glossy. The beef had this deep, savory flavor that tasted like it had simmered for hours, not the thirty minutes Carol claimed. There were little specks of something—garlic? paprika?—that made every bite slightly different from the last. I scraped the pan clean and felt genuinely annoyed that I had been so wrong for so long.
That’s the thing about this quick cozy beef and rice skillet dinner. It doesn’t look like much when you first put it together. Ground beef, some pantry spices, rice, broth. Humble ingredients that have been sitting in your cupboard for weeks. But something happens in that skillet—the rice absorbs all that beefy goodness, the edges get slightly crispy where they touch the pan, and suddenly you have a meal that makes you forget you were ever a skeptic. Maybe you’ve been there, judging a dish before it had a chance to prove itself. Let me tell you, this one earned its place in my weekly rotation, and I’m not even embarrassed about it anymore.
Why You’ll Love This Recipe
This isn’t just another ground beef recipe you’ll forget about by next Tuesday. I’ve tested this quick cozy beef and rice skillet dinner at least eight times in my own kitchen, tweaking the liquid ratio, playing with the heat levels, and even making my husband do a blind taste test against a version with canned soup. (The homemade version won, by the way, and he never notices these things.) Here’s why this one sticks:
- Ready in 30 Minutes: From the moment you turn on the burner to the second you sit down with a fork, you’re looking at about half an hour. That’s faster than takeout delivery in most neighborhoods.
- Pantry-Friendly Ingredients: You probably have everything already. Beef, rice, onion, garlic, broth, and a few spices. No special trips to the store for obscure ingredients you’ll never use again.
- Perfect for Busy Weeknights: This is the kind of dinner you make when you’ve had a long day and just want something warm and satisfying without a sink full of dishes. One skillet, minimal cleanup, maximum comfort.
- Family-Approved: I’ve served this to picky kids, hungry teenagers, and adults who claim they don’t like “casserole-type things.” Every single person went back for seconds. It’s that kind of recipe.
- Better Than the Boxed Version: Remember those boxed rice mixes from college? This tastes like the grown-up version—deeper flavor, better texture, and no mystery ingredients. You’ll never go back.
What makes this recipe different is the technique. Instead of cooking everything separately and combining at the end, the rice simmers right in the seasoned beef broth, absorbing all those savory flavors as it cooks. The edges caramelize slightly where they meet the skillet, creating these little crispy bits that are honestly the best part. It’s comfort food that doesn’t weigh you down, and it comes together in the time it takes to scroll through your phone looking for dinner inspiration.
What Ingredients You Will Need
This recipe uses simple, everyday ingredients that come together to create something genuinely satisfying. No fancy shopping list, no complicated prep—just good, honest food that works. Here’s what you’ll need:
For the Beef and Rice Base:
- 1 pound ground beef (80/20 works best—enough fat for flavor without being greasy)
- 1 medium yellow onion, diced (about 1 cup; adds sweetness and depth)
- 3 cloves garlic, minced (fresh is best, but jarred works in a pinch)
- 1 cup long-grain white rice (uncooked; jasmine or basmati also work beautifully)
- 2 cups beef broth (low-sodium so you can control the salt; I prefer Better Than Bouillon for richer flavor)
- 1 can (14.5 oz) diced tomatoes, undrained (fire-roasted adds a lovely smoky note if you can find them)
- 1 tablespoon tomato paste (this is the secret to that deep, savory flavor)
- 1 teaspoon paprika (smoked paprika takes this to another level)
- 1 teaspoon dried oregano (or Italian seasoning if that’s what you have)
- ½ teaspoon salt (plus more to taste)
- ½ teaspoon black pepper
- ¼ teaspoon red pepper flakes (optional, but I love the little warmth it adds)
- 2 tablespoons olive oil (for browning)
For Garnish (Optional but Recommended):
- Fresh parsley, chopped (adds color and freshness)
- Grated Parmesan cheese (because cheese makes everything better)
- Lemon wedges (a squeeze of lemon right before eating brightens the whole dish)
A few notes from my testing: If you’re using a leaner ground beef like 93/7, add an extra tablespoon of oil when browning to prevent dryness. The tomato paste is non-negotiable in my opinion—it adds that umami richness that makes the dish taste like it cooked all day. And if you’re gluten-free, double-check your broth and diced tomatoes labels; most are naturally gluten-free, but it’s worth verifying.
Equipment Needed
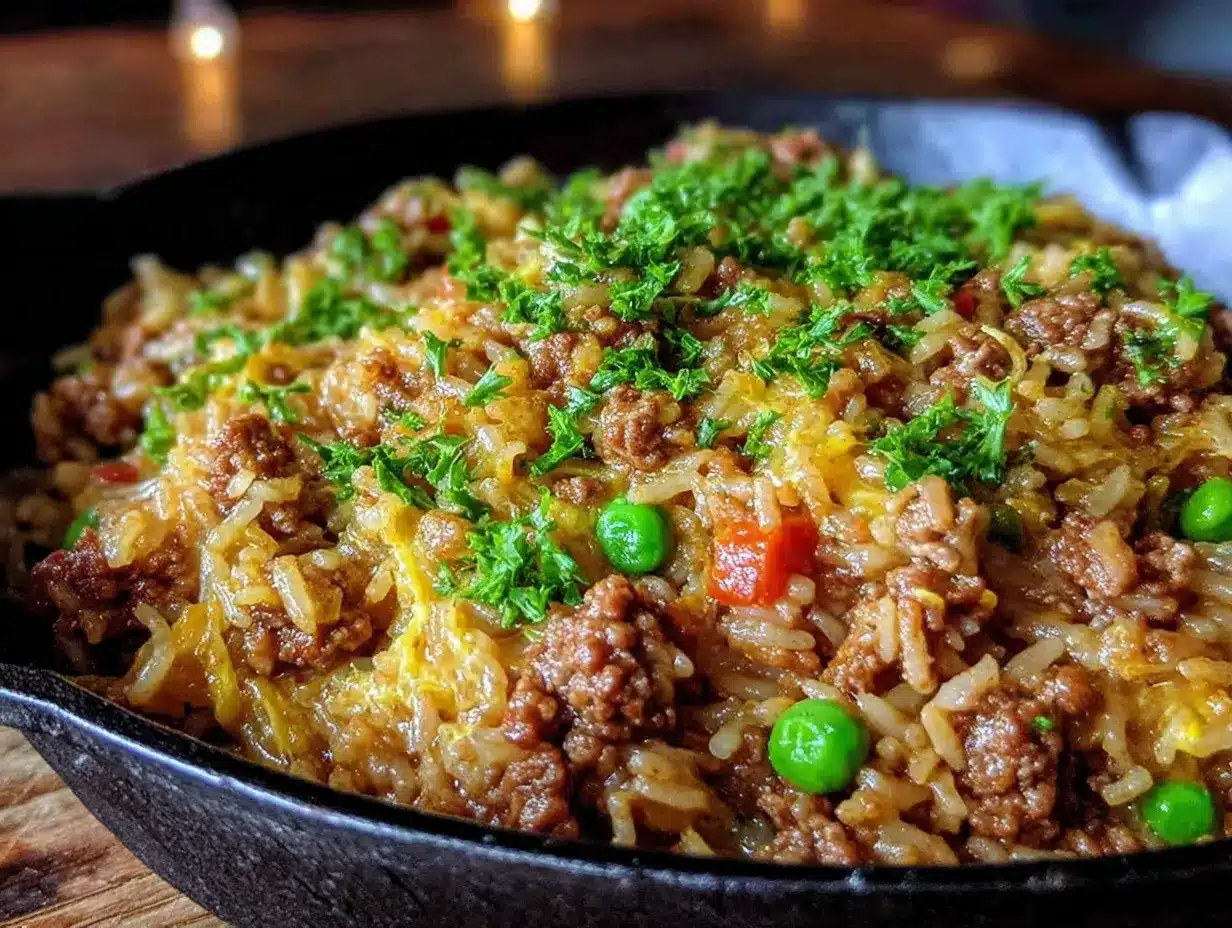
One of the best things about this recipe is how little equipment it requires. You don’t need a fancy kitchen or specialty gadgets—just a few basics you probably already own:
- Large skillet or Dutch oven (12-inch with a tight-fitting lid is ideal; cast iron or stainless steel both work great)
- Wooden spoon or spatula (for breaking up the beef and stirring)
- Sharp knife and cutting board (for dicing the onion and mincing garlic)
- Measuring cups and spoons (or just eyeball it—I won’t tell)
- Can opener (unless you’re buying the pull-tab cans)
If you don’t have a lid that fits your skillet, a sheet of aluminum foil crimped tightly around the edges works perfectly as a makeshift cover. I’ve done this more times than I care to admit, and the rice still comes out tender every time. For the best results, use a heavy-bottomed skillet that distributes heat evenly—thin pans can lead to hot spots that burn the rice before it’s fully cooked.
Preparation Method
Let me walk you through this step by step. I’ve made this quick cozy beef and rice skillet dinner so many times I could do it in my sleep, but I’ll slow down so you don’t miss any of the little details that make it work.
- Heat the skillet over medium-high heat. Add the olive oil and let it shimmer for about 30 seconds. You want it hot enough that the beef sizzles when it hits the pan, but not so hot that the oil starts smoking. If you’re using cast iron, give it an extra minute to heat through properly.
- Add the ground beef. Break it up with your wooden spoon into large chunks. Let it brown undisturbed for about 3-4 minutes—this is crucial for developing flavor. If you stir it constantly, you’ll end up with gray, steamed meat instead of beautifully browned beef. Let it sit, get crispy on one side, then break it apart and stir.
- Add the diced onion. Stir it into the beef and cook for 3-4 minutes until the onion softens and becomes translucent. The moisture from the onion will help deglaze any browned bits stuck to the bottom of the pan—those bits are pure flavor, so don’t skip this step. Scrape them up with your spoon.
- Add the minced garlic, paprika, oregano, salt, pepper, and red pepper flakes. Stir constantly for about 30 seconds until the spices are fragrant. Garlic burns quickly, so keep it moving. Your kitchen should smell amazing at this point—if it doesn’t, your pan might not be hot enough.
- Stir in the tomato paste. Cook it for about a minute, stirring constantly. This step deepens the tomato flavor and removes any raw, acidic taste. You’ll notice the paste darkens slightly and becomes more aromatic.
- Pour in the diced tomatoes with their juices and the beef broth. Stir everything together, scraping up any remaining browned bits from the bottom of the pan. Bring the mixture to a gentle boil—you should see bubbles breaking the surface but not a violent, rolling boil.
- Stir in the uncooked rice. Make sure it’s evenly distributed throughout the liquid. Give it one good stir, then let it settle. Don’t stir it again after this point—stirring releases starch and can make the rice gummy.
- Reduce the heat to low, cover the skillet with a tight-fitting lid, and let it simmer for 18-20 minutes. Resist the urge to peek! Every time you lift that lid, steam escapes and your cooking time increases. Set a timer and walk away. Wash a few dishes, set the table, pour yourself a glass of water—just leave that lid alone.
- After 18 minutes, check the rice. It should be tender and most of the liquid should be absorbed. If the rice is still crunchy and the liquid is gone, add ¼ cup more broth or water, re-cover, and cook for another 3-5 minutes. If there’s still liquid but the rice is tender, remove the lid and let it cook uncovered for 2-3 minutes to evaporate the excess.
- Remove from heat and let it rest, covered, for 5 minutes. This resting period is important—it allows the rice to finish absorbing steam and the flavors to meld together. Fluff gently with a fork before serving.
A quick note on timing: Different types of rice cook at different rates. Long-grain white rice typically takes 18-20 minutes, but if you’re using brown rice, you’ll need to increase the cooking time to about 40-45 minutes and add an extra ½ cup of broth. For jasmine or basmati, stick with the 18-20 minute timeframe and check for doneness at the 15-minute mark—they can cook faster than standard long-grain rice.
Cooking Tips & Techniques
After making this dish more times than I can count, I’ve picked up a few tricks that make the difference between good and genuinely memorable. Here’s what I’ve learned, often the hard way:
Don’t skip the browning step. I know it’s tempting to just dump everything in the pan and stir, especially when you’re tired and hungry. But that initial browning of the beef creates something called the Maillard reaction—basically, it’s what gives meat that deep, savory flavor that no amount of seasoning can replicate. Take the extra four minutes. Your taste buds will thank you.
Toast the rice if you have time. Here’s a trick I picked up from a chef friend: after removing the beef and onion from the pan, add a little butter and toast the uncooked rice for 2-3 minutes until it smells nutty and starts to turn golden. This adds another layer of flavor that makes the dish taste like it simmered all day. I don’t always have time for this step, but when I do, it’s worth it.
Watch your heat. The biggest mistake I made the first few times was cooking this on too high of a heat. The rice needs a gentle simmer, not a boil. If you see aggressive bubbling, turn the heat down. High heat will evaporate the liquid too quickly, leaving you with undercooked rice and a burnt bottom. Low and slow is the way to go.
Use a timer, not your instincts. I once tried to multitask and let the rice cook while I answered emails. Twenty minutes turned into thirty-five, and I ended up with a crusty, burnt mess that smelled like regret. Set a timer. Trust me on this one.
If the rice is still crunchy but the liquid is gone, add more liquid. This happened to me last month when I was using a slightly wider skillet than usual. The extra surface area caused the liquid to evaporate faster. I added ¼ cup of water, covered it, and let it cook for another 5 minutes. Problem solved. Don’t panic—just add more liquid and keep going.
Variations & Adaptations
One of the reasons I keep coming back to this recipe is how adaptable it is. You can change almost everything about it and still end up with something delicious. Here are a few variations I’ve tried and loved:
Cheesy Beef and Rice Skillet: After the rice is cooked and resting, sprinkle 1 cup of shredded cheddar or Monterey Jack cheese over the top. Cover for 2-3 minutes until the cheese melts, then stir it in. The cheese makes the dish creamier and even more comforting—perfect for those days when you need extra comfort.
Vegetable-Packed Version: Add a bell pepper (diced) along with the onion, and stir in a cup of frozen peas and carrots during the last 5 minutes of cooking. You’ll get extra color, texture, and nutrients without any extra effort. My kids don’t even notice the vegetables in this version—they just eat it happily.
Mexican-Inspired Twist: Swap the oregano for cumin and chili powder, use fire-roasted tomatoes, and stir in a can of drained black beans along with the rice. Top with fresh cilantro, a squeeze of lime, and a dollop of sour cream. This version is my go-to when I’m craving taco flavors but don’t want to assemble individual tacos.
Low-Carb Adaptation: Replace the rice with cauliflower rice (about 4 cups). Sauté the cauliflower rice separately for 5 minutes to remove excess moisture, then stir it into the beef mixture at the end. Cook for just 2-3 minutes until heated through—cauliflower rice doesn’t need the same simmering time. This version is lighter but still satisfying.
Spicy Kick: Add a diced jalapeño along with the onion, or stir in 2 tablespoons of chopped chipotle peppers in adobo sauce for smoky heat. My husband loves this version, though I have to admit it’s a bit much for me—I stick with just the red pepper flakes.
Serving & Storage Suggestions
This dish is incredibly forgiving when it comes to serving and storing, which is part of why I love it. Here’s how to make the most of it:
Serving: Serve the beef and rice skillet hot, straight from the pan. I like to garnish with fresh parsley and a generous sprinkle of Parmesan cheese. A squeeze of lemon juice right before eating brightens everything up and cuts through the richness. For a complete meal, serve with a simple green salad dressed with lemon vinaigrette or steamed green beans on the side. The leftovers are just as good the next day—if anything, the flavors meld together even more overnight.
Storage: Let the skillet cool completely, then transfer leftovers to an airtight container. Store in the refrigerator for up to 4 days. The rice will absorb more liquid as it sits, so it might seem a little drier the next day—that’s normal. I actually prefer the leftovers because the flavors become more concentrated.
Reheating: The best way to reheat is in a skillet over medium-low heat with a splash of broth or water. Add about 2 tablespoons of liquid per cup of leftovers, cover, and heat for 5-7 minutes, stirring occasionally. The microwave works too—just cover the bowl with a damp paper towel to add moisture and heat in 30-second intervals, stirring between each. Avoid overheating, which can make the rice mushy.
Freezing: This dish freezes beautifully. Portion it into freezer-safe containers or zip-top bags, leaving a little room for expansion. Freeze for up to 3 months. To thaw, transfer to the refrigerator overnight. Reheat using the skillet method described above. The texture of the rice might be slightly softer after freezing, but the flavor remains excellent.
Nutritional Information & Benefits
While this is definitely comfort food, it’s not without its nutritional merits. Here’s a rough breakdown per serving (based on 6 servings):
- Calories: Approximately 380-420 per serving
- Protein: 22-25 grams (thanks to the beef and rice)
- Carbohydrates: 35-40 grams (mostly from rice and tomatoes)
- Fat: 15-18 grams (depending on the beef fat content)
- Fiber: 3-4 grams (from the tomatoes and onion)
- Iron: A good source, thanks to the beef
The beef provides high-quality protein and essential iron, which is especially important for energy and healthy blood cells. The tomatoes are rich in lycopene, an antioxidant that supports heart health, and the garlic and onions offer anti-inflammatory benefits. If you use brown rice instead of white, you’ll add more fiber and B vitamins. This isn’t a health food, but it’s a balanced meal that will keep you full and satisfied without the processed ingredients found in many packaged dinners.
Dietary Considerations: This recipe is naturally gluten-free (just verify your broth and tomatoes). For a dairy-free version, skip the Parmesan garnish. For lower sodium, use low-sodium broth and reduce the added salt to ¼ teaspoon—you can always add more at the table.
Conclusion
I’m not going to pretend this quick cozy beef and rice skillet dinner changed my life. But it changed my Tuesday nights—and honestly, that’s more valuable than I expected. It’s the kind of recipe that proves you don’t need complicated techniques or exotic ingredients to make something genuinely satisfying. You just need a skillet, a little patience, and the willingness to let simple ingredients do their thing.
I hope you give this recipe a try, especially on one of those evenings when you’re tired, hungry, and tempted to order takeout. Make it once, and I think you’ll understand why I keep coming back to it. And if you tweak it—add more spice, swap in different vegetables, make it your own—I’d love to hear about it. Drop a comment below and let me know how it turned out. Did you discover a variation I haven’t tried? Did your picky eater actually ask for seconds? Tell me everything. That’s the best part of sharing recipes—watching them become part of someone else’s kitchen story.
Until next time, happy cooking. Your skillet is waiting.
Frequently Asked Questions
Can I use brown rice instead of white rice?
Yes, but you’ll need to adjust the cooking time and liquid. Brown rice takes about 40-45 minutes to cook and needs an extra ½ cup of broth. Follow the same method, but simmer covered for 40 minutes before checking for doneness. The texture will be chewier and nuttier, which some people prefer.
Can I make this recipe in advance for meal prep?
Absolutely. This dish actually tastes better the next day as the flavors meld together. Cook it completely, let it cool, and store in airtight containers in the refrigerator for up to 4 days. Reheat in a skillet with a splash of broth or in the microwave with a damp paper towel over the bowl.
Can I use ground turkey or chicken instead of beef?
Definitely. Ground turkey or chicken works well, though they’re leaner so you’ll need to add an extra tablespoon of oil to prevent dryness. The flavor will be milder, so consider adding a little extra garlic and spices. I’ve made this with ground turkey and my family didn’t notice the difference.
Why is my rice still crunchy after 20 minutes?
This usually means one of three things: your heat was too high and the liquid evaporated too quickly, your skillet was too wide (more surface area = faster evaporation), or your rice is older and needs more time. Add ¼ cup of broth or water, cover, and cook for another 5 minutes. Check again and repeat if needed.
Can I add frozen vegetables to this dish?
Yes! Frozen peas, carrots, corn, or mixed vegetables work great. Add them during the last 5 minutes of cooking—just stir them in, cover, and let them heat through. No need to thaw them first. This is an easy way to add more color and nutrients without extra prep work.
Pin This Recipe!
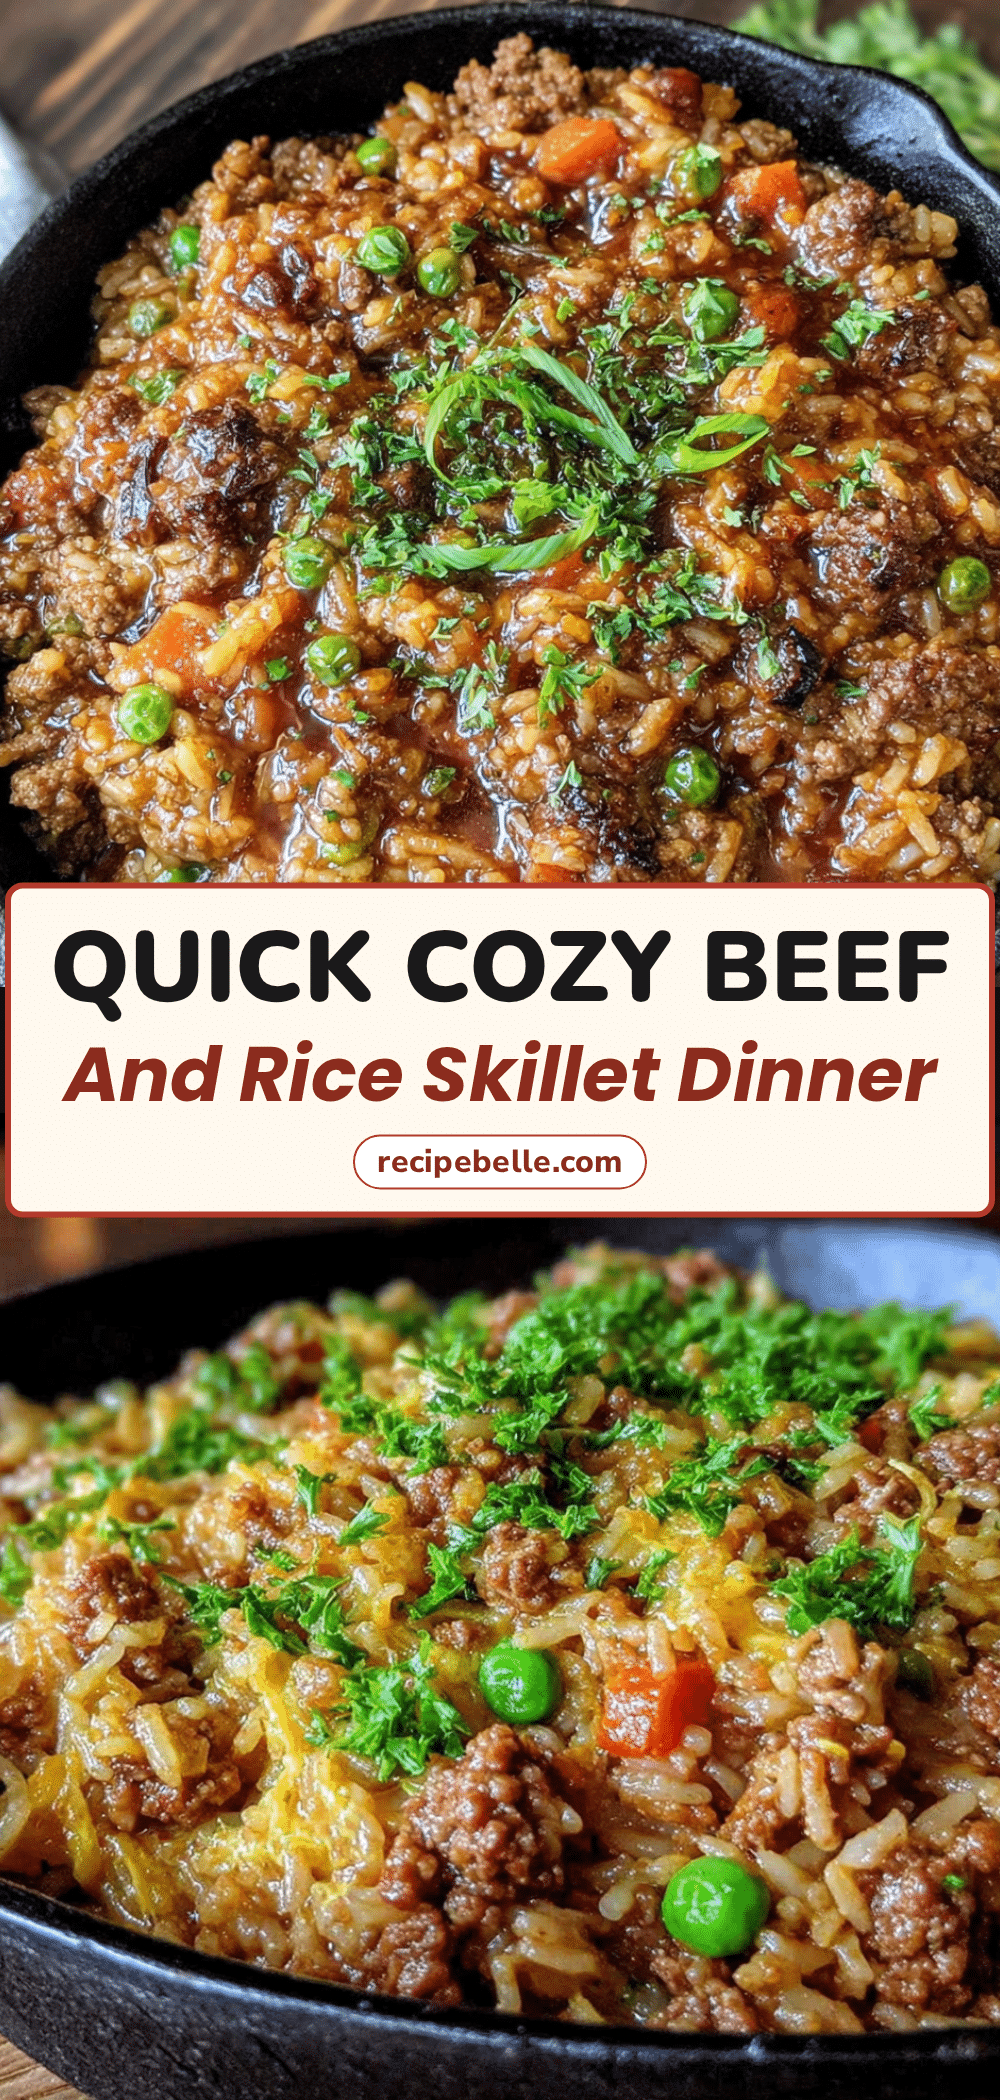
Quick Cozy Beef and Rice Skillet Dinner – Easy 30-Minute Meal

A quick and cozy one-pan beef and rice skillet dinner ready in 30 minutes. Ground beef, rice, and pantry spices simmer together in a savory broth for a comforting weeknight meal that’s better than takeout.
- Prep Time: 10 minutes
- Cook Time: 20 minutes
- Total Time: 30 minutes
- Yield: 6 servings 1x
- Category: Main Course
- Cuisine: American
Ingredients
- 1 pound ground beef (80/20 works best)
- 1 medium yellow onion, diced (about 1 cup)
- 3 cloves garlic, minced
- 1 cup long-grain white rice, uncooked
- 2 cups beef broth, low-sodium
- 1 can (14.5 oz) diced tomatoes, undrained
- 1 tablespoon tomato paste
- 1 teaspoon paprika
- 1 teaspoon dried oregano
- ½ teaspoon salt
- ½ teaspoon black pepper
- ¼ teaspoon red pepper flakes (optional)
- 2 tablespoons olive oil
- Fresh parsley, chopped (for garnish, optional)
- Grated Parmesan cheese (for garnish, optional)
- Lemon wedges (for serving, optional)
Instructions
- Heat the skillet over medium-high heat. Add the olive oil and let it shimmer for about 30 seconds.
- Add the ground beef. Break it up into large chunks and let it brown undisturbed for 3-4 minutes. Then break it apart and stir.
- Add the diced onion. Cook for 3-4 minutes until softened and translucent, scraping up any browned bits from the bottom of the pan.
- Add the minced garlic, paprika, oregano, salt, pepper, and red pepper flakes. Stir constantly for about 30 seconds until fragrant.
- Stir in the tomato paste and cook for about 1 minute, stirring constantly.
- Pour in the diced tomatoes with their juices and the beef broth. Stir everything together, scraping up any remaining browned bits. Bring to a gentle boil.
- Stir in the uncooked rice until evenly distributed. Do not stir again after this point.
- Reduce heat to low, cover with a tight-fitting lid, and simmer for 18-20 minutes. Do not lift the lid during cooking.
- After 18 minutes, check the rice. If still crunchy and liquid is gone, add ¼ cup more broth or water, re-cover, and cook for another 3-5 minutes. If tender but excess liquid remains, remove lid and cook uncovered for 2-3 minutes.
- Remove from heat and let rest, covered, for 5 minutes. Fluff gently with a fork before serving.
Notes
For best results, use a heavy-bottomed skillet. If using leaner ground beef (93/7), add an extra tablespoon of oil when browning. The tomato paste is non-negotiable for deep flavor. For brown rice, increase cooking time to 40-45 minutes and add an extra ½ cup of broth. For jasmine or basmati rice, check for doneness at 15 minutes. To toast the rice for extra flavor, after removing beef and onion, add a little butter and toast the uncooked rice for 2-3 minutes until nutty and golden before adding liquids.
Nutrition
- Serving Size: 1 serving (about 1.5
- Calories: 400
- Sugar: 5
- Sodium: 650
- Fat: 16
- Saturated Fat: 5
- Carbohydrates: 38
- Fiber: 3
- Protein: 23
Keywords: beef and rice skillet, one-pan meal, 30-minute dinner, ground beef recipe, easy weeknight dinner, comfort food, gluten-free



