The power went out halfway through my prep, leaving me standing in a dark kitchen with a half-scooped pumpkin, a bag of pretzel sticks, and absolutely no backup plan. I had promised my neighbor I’d bring something for her last-minute Halloween get-together, and I was already twenty minutes behind. The candles came out, the phone flashlight propped up on the counter, and I just started grabbing things from the pantry. I wasn’t even sure what I was making anymore. Something that looked festive. Something that didn’t need an oven. Something that wouldn’t make me cry when I dropped it on the floor—which, let me tell you, I almost did twice.
That night, I threw together two little boards on mismatched plates from her cabinet because my nice serving platter was sitting useless in my dark kitchen. I used a knife to carve a ghost shape out of cheese, broke a cracker in half by accident, and arranged everything by candlelight. Honestly, I thought it was going to look like a mess. But when I set them down on the coffee table, people actually gasped. Not because it was fancy—it wasn’t. But because it was fun, and it was for them, and it took maybe twelve minutes to throw together. That’s when I realized you don’t need a big spread or a clean kitchen to make something that feels special. You just need a few good ingredients, a little creativity, and permission to stop overthinking it.
Maybe you’ve been there—standing in front of an open fridge, wondering how you’re going to pull off something festive when you’re already exhausted. That’s exactly what these quick mini Halloween charcuterie boards for two are for. They’re the happy accident I keep coming back to, year after year. No stress, no fancy tools, just a little board that looks like you tried way harder than you actually did.
Why You’ll Love This Recipe
Let’s face it—most Halloween food ideas are either way too cute to actually eat or way too complicated to make after a long day. These quick mini Halloween charcuterie boards for two hit that sweet spot where presentation meets practicality. I’ve tested this concept at least a dozen times now, tweaking the ratios and the layout until it felt just right. Here’s why this one sticks:
- Ready in Under 15 Minutes : No cooking, no baking, no waiting. If you can arrange things on a plate, you can make this work. Perfect for that “I forgot it was Halloween” moment we’ve all had.
- Simple Ingredients You Already Have : Cheese, crackers, a few salty snacks, and whatever Halloween-themed candy is lurking in your pantry. No special grocery trip required.
- Perfect for Small Gatherings : This isn’t a party platter for twenty. It’s an intimate board for two—whether that’s you and your partner, you and your kid, or you and your best friend watching a scary movie.
- Crowd-Pleaser (Even for Picky Eaters) : Everyone builds their own bites. Kids love the hands-on aspect, and adults appreciate not having to commit to a full plate of something they might not like.
- Unbelievably Festive : With a few simple tricks—like using a cookie cutter on cheese or arranging pretzel sticks to look like spider legs—these boards look straight out of a Halloween magazine. People will think you spent an hour on them.
What makes these different from every other charcuterie board out there is the portion control and the personal touch. Each board is built for two people, which means no waste, no awkward sharing, and no fighting over the last piece of brie. I’ve also figured out exactly how to balance the sweet, salty, and savory elements so every bite feels intentional. This isn’t just another snack plate—it’s your best version of a Halloween treat that actually respects your time.
What Ingredients You Will Need
This recipe uses simple, store-bought ingredients that come together to create something that looks way more impressive than it should. Here’s what you’ll need for two mini boards:
For the Cheese
- 4 ounces cheddar cheese (block form, for cutting into shapes with a small Halloween cookie cutter)
- 2 ounces brie or soft goat cheese (adds a creamy, spreadable element)
- 2 cheese wedges wrapped in wax (like Babybel, for easy individual portions)
For the Meats (Optional but Recommended)
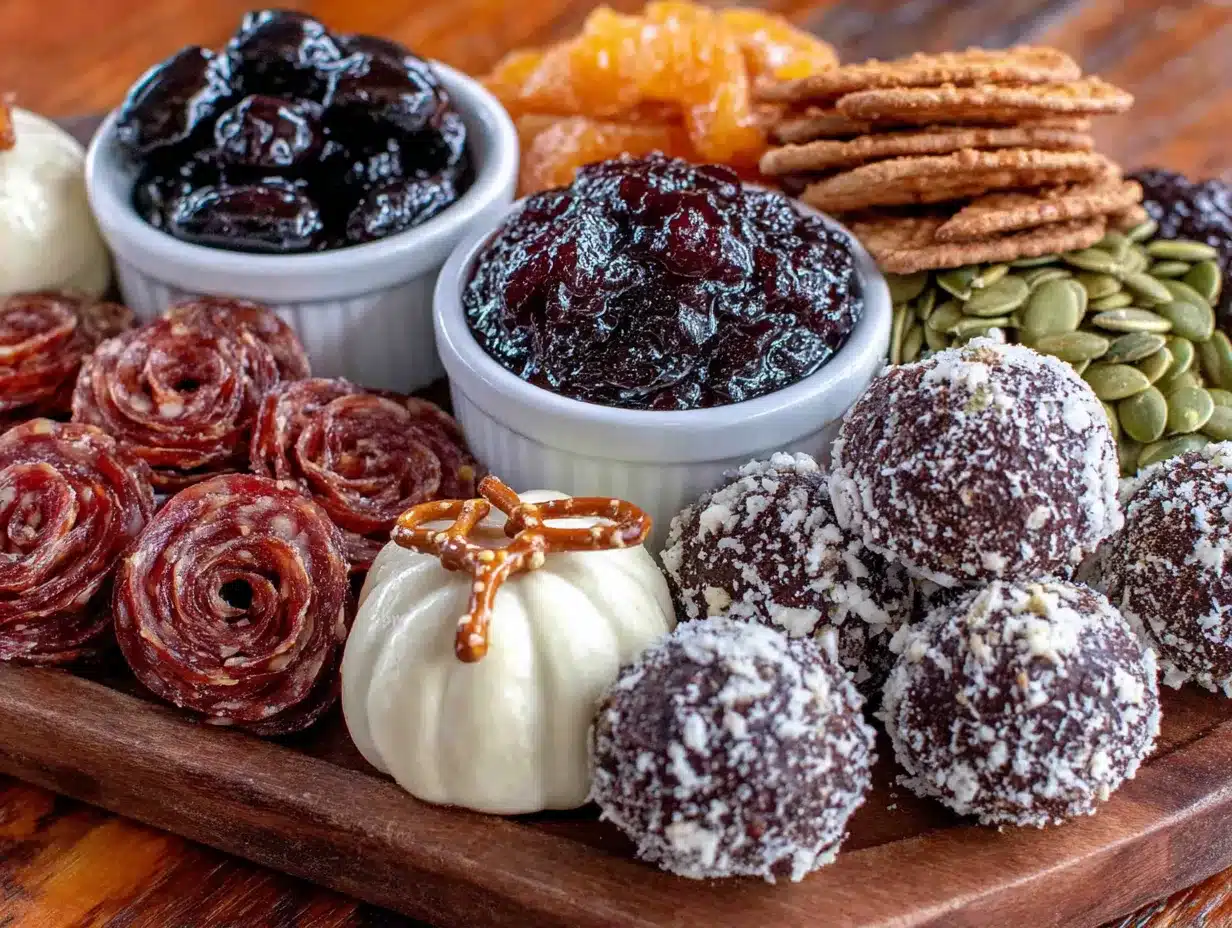
- 4 slices prosciutto or salami (ripped into smaller pieces for easy grabbing)
- 2 small pepperoni sticks (cut in half, or leave whole for a “finger” look)
For the Crunchy Elements
- 1 cup assorted crackers (I prefer a mix of buttery rounds and whole wheat squares)
- 1/2 cup pretzel sticks (these double as “spider legs” or just a salty crunch)
- 1/4 cup roasted almonds or cashews
For the Sweet & Spooky Touches
- 2-3 pieces of Halloween-themed candy (mini candy bars, candy corn, or gummy worms work great)
- 1 tablespoon dark chocolate chips or small chocolate bat shapes (if you can find them)
- 1 small handful of dried cranberries or apricots (adds color and sweetness)
For the Decorations
- 1 small clementine or mandarin orange (peeled and separated into segments—looks like little pumpkin wedges)
- 2-3 fresh rosemary sprigs (optional, for a “witch’s broom” look or just greenery)
- 1 tablespoon black sesame seeds or poppy seeds (for sprinkling on soft cheese to look like dirt or spider eggs)
I usually grab my cheese from the deli section at Trader Joe’s or Aldi—they have great block cheddar that holds its shape well with cookie cutters. For the brie, look for a small wheel that’s soft but not overly runny. If you’re feeding someone who doesn’t do dairy, swap in your favorite vegan cheese block and a dairy-free spread. The rest of the ingredients are total pantry staples that you probably already have hanging around.
Equipment Needed
You don’t need much for this, which is honestly my favorite part. Here’s what you’ll want to have on hand:
- Two Small Cutting Boards or Plates : I use small wooden boards I picked up at a home goods store for like three dollars each, but any flat plate or tray works. Even a clean cutting board does the trick.
- Small Halloween Cookie Cutters : A ghost, pumpkin, or bat shape is ideal. I found a set of three at the dollar store and they’ve lasted me years. If you don’t have these, you can just cut the cheese into cubes with a knife—still cute, just less spooky.
- Cheese Knife or Small Paring Knife : For cutting the brie and slicing anything that needs a trim.
- Small Bowls or Ramekins : Optional, but nice for holding dips, olives, or loose items like nuts and cranberries. I use the little dipping bowls that came with a sauce set I never use otherwise.
- Tweezers or Small Tongs : Not essential, but honestly, they make arranging the tiny details so much easier. I started using my eyebrow tweezers in a pinch and never looked back.
If you don’t have cookie cutters, don’t stress. You can use a paring knife to freehand a ghost shape—it doesn’t have to be perfect. In fact, the slightly wonky ones look more homemade and charming anyway. I once used a bottle cap to cut a circle out of cheese and called it a “moon.” It worked.
Preparation Method
Alright, let’s get to the fun part. This whole process should take you about 10 to 15 minutes, depending on how detailed you want to get. Here’s how I do it:
- Set Up Your Boards (1 minute) : Place your two small boards or plates on the counter. Give them a quick wipe if needed. This is your canvas, so take a second to imagine where you want things to go. I usually put the cheese in the center or slightly off to one side.
- Cut the Cheddar into Shapes (3 minutes) : Take your block of cheddar and slice it into slabs about 1/4-inch thick. Press your Halloween cookie cutter firmly into the cheese and wiggle it gently to release. You should get about 2-3 shapes per slab. Repeat until you have around 6-8 shapes total. If the cheese starts to stick, dip the cutter in a little warm water. Place 3-4 shapes on each board. Don’t throw away the scraps—just cube them up and scatter them around. No one will know.
- Portion the Soft Cheese (1 minute) : If using brie, slice it into small wedges or just place a whole mini wheel on each board. For goat cheese, roll it into small balls with your hands. Place one portion on each board. Sprinkle a tiny pinch of black sesame seeds on top of the soft cheese to make it look like “dirt” or “spider eggs.”
- Arrange the Meats (2 minutes) : Tear the prosciutto slices into two or three pieces each and drape them loosely on the board. Fold the salami slices into quarters or roll them into little cones. If using pepperoni sticks, cut them in half lengthwise and arrange them like little “fingers.” Place these near the cheese so people can pair them.
- Add the Crackers and Pretzels (2 minutes) : Fan the crackers out in small clusters. I like to put them on opposite sides of the board so it’s easy to reach. Arrange the pretzel sticks in a small pile, but leave a few out to use as “spider legs” later if you want to get creative.
- Scatter the Nuts and Dried Fruit (1 minute) : Sprinkle the almonds or cashews around the board in small gaps. Add the dried cranberries in little clusters. This fills in the empty spaces and adds color contrast.
- Add the Sweet Elements (1 minute) : Place the Halloween candy in a small pile or tuck it between the cheese and crackers. If you’re using chocolate chips, scatter a few around. This is the surprise element that makes people smile.
- Decorate with Fruit and Herbs (2 minutes) : Arrange the clementine segments in a small fan or pile—they look like little pumpkin wedges and add a fresh pop of color. Tuck the rosemary sprigs in between items to look like greenery or witch’s brooms. This step makes the board look intentional and polished.
- Build the Spider (Optional, 2 minutes) : Take one of the cheese wedges (like a Babybel) and place it on the board. Stick 6-8 pretzel sticks into the cheese at angles to look like spider legs. Use two small dots of mustard or a dab of soft cheese to attach two black sesame seeds as eyes. This is my favorite detail—it always gets a laugh.
- Final Adjustments (1 minute) : Step back and look at your boards. Are there any big empty spots? Add a few extra nuts or a cracker. Is everything balanced? Shift things around until it feels right. The goal is a full board with no bare patches, but not so crowded that things are falling off the edges.
Your boards should look full, festive, and completely doable. The best part? You didn’t turn on the oven, you didn’t dirty a single pot, and you’re done in under fifteen minutes. Now pour yourself a drink and get ready to impress someone.
Cooking Tips & Techniques
I’ve made these boards more times than I can count, and I’ve definitely made my share of mistakes along the way. Here’s what I’ve learned so you don’t have to learn the hard way:
Don’t overthink the cheese shapes. The first time I tried this, I spent ten minutes trying to get a perfect ghost shape and ended up with a pile of sad cheese crumbs. Just press firmly and wiggle gently. If the cutter sticks, dip it in warm water between cuts. And honestly, if the shape breaks, just call it a “mummy” and move on. No one’s judging your cheese.
Balance is everything. I used to just throw everything on the board randomly, and it always looked like a sad lunchable. Now I think about color and texture. The bright orange of the clementine, the deep red of the dried cranberries, the white of the brie—these contrasts make the board visually exciting. Don’t put all the brown things together. Spread them out.
Prep in stages if you’re short on time. I’ve started cutting the cheese shapes the night before and storing them in a container in the fridge. Same with peeling the clementine and washing the rosemary. Then assembly takes about five minutes. This is a game-changer for weeknights when you’re already running on fumes.
One thing I messed up badly: I once used a really soft, spreadable cheese for the spider body. The pretzel legs just sank right into it and it looked like a sad, melted monster. Use a firmer cheese like a Babybel or a thick wedge of cheddar for the spider. It holds its shape and the legs stay put.
Let the cheese sit out for ten minutes before serving. Cold cheese doesn’t have as much flavor. If you have time, pull the cheese out of the fridge while you’re setting up the rest of the board. It makes a noticeable difference in taste and texture.
Variations & Adaptations
One of the best things about this recipe is how flexible it is. Here are some ways to switch it up depending on what you have or who you’re feeding:
For a Sweet Tooth Twist : Skip the meats entirely and double up on the sweet elements. Add chocolate-covered pretzels, caramel popcorn, and a few marshmallow ghosts (just draw little faces on marshmallows with a food-safe marker). This version is a huge hit with kids and anyone who prefers dessert over savory.
For a Dairy-Free Option : Use vegan cheese blocks that are firm enough to cut with cookie cutters. Miyoko’s and Violife both hold up well. Swap the brie for a dairy-free cream cheese or hummus. The rest of the ingredients are naturally dairy-free, so you’re good to go. I tested this for a friend with a dairy allergy and she said it was the first Halloween board she could fully enjoy.
For a Spicy Kick : Add a few slices of jalapeño pepper jack cheese, swap the almonds for spicy chili-lime peanuts, and include a small dish of hot honey for drizzling. This is my personal favorite for a grown-up Halloween movie night. The heat pairs surprisingly well with the sweetness of the clementine segments.
For a No-Cheese Board : If you’re not a cheese person (I know, I know, but you exist), build the board around dips instead. Use small bowls for hummus, guacamole, and a black bean dip. Arrange veggie sticks, pita chips, and pretzels around them. Add the candy and fruit for the Halloween touch. It’s still festive, still quick, and totally satisfying.
For a Breakfast Version : I tried this once for a Halloween morning before school and it was a surprise hit. Swap the meats for mini pancakes or waffle sticks, use cream cheese as the “cheese,” and add berries and apple slices. Use a small cookie cutter to make ghost-shaped pancakes. The kids thought it was the best thing ever, and I was out the door in under twenty minutes.
Serving & Storage Suggestions
These boards are best served immediately, but I’ve learned a few tricks for keeping them fresh if you need to prep ahead or store leftovers.
Serving Temperature : Serve the boards at room temperature for the best flavor. If you’ve been storing the cheese in the fridge, let it sit out for about 10-15 minutes before serving. The crackers and pretzels stay crunchy, and the cheese softens just enough to be spreadable. Don’t leave the boards out for more than two hours if they contain meat or soft cheese—standard food safety rules apply.
What to Serve Alongside : A small bowl of olive oil and balsamic vinegar for dipping is a nice touch if you have it. For drinks, a crisp apple cider or a dry rosé pairs beautifully with the salty and sweet elements. If you’re doing a Halloween movie night, a warm mug of spiced hot chocolate on the side is never a bad idea.
Storage Instructions : If you have leftovers (which is rare in my house, but it happens), separate the components into airtight containers. The cheese goes in one container, the crackers in another (so they don’t get soggy), and the fruit and candy in a third. Store the cheese and meat in the fridge for up to three days. The crackers and nuts can stay at room temperature.
Reheating Tips : There’s nothing to reheat here, but if the cheese has been in the fridge, let it come to room temperature before serving leftovers. The crackers might lose some crunch, so you can refresh them in a 300°F oven for about three minutes if you’re particular about texture.
How Flavors Develop : Honestly, these boards are best the day you make them. The crackers stay crisp, the fruit is fresh, and the cheese hasn’t dried out. But I’ve found that the dried cranberries and nuts actually taste better the next day—they absorb a little moisture and get chewier. The candy, of course, is always perfect.
Nutritional Information & Benefits
I’m not a nutritionist, but I’ve done my best to estimate the values for one mini board (half of the total recipe). Keep in mind that this varies based on the exact ingredients and portions you use:
| Nutrient | Amount Per Board (Approx.) |
|---|---|
| Calories | 380-450 |
| Protein | 14-18g |
| Carbohydrates | 28-35g |
| Fat | 22-28g |
| Fiber | 3-5g |
| Sugar | 12-16g |
The cheese provides a good amount of calcium and protein, while the nuts and seeds add healthy fats and a little fiber. The fruit—both fresh and dried—offers natural sweetness and a dose of vitamins. If you’re watching your sodium, go easy on the pretzels and cured meats, or swap them for unsalted nuts and low-sodium crackers. This board is naturally gluten-free if you choose gluten-free crackers and pretzels. The main allergens to watch for are dairy (cheese) and tree nuts (almonds). It’s easy to customize around those needs, as I mentioned in the variations section.
I personally love that this board feels indulgent without being over-the-top. You get the satisfaction of a treat without the heavy feeling that comes from a full meal of processed snacks. It’s balanced enough to enjoy as a light dinner or a hearty snack.
Conclusion
These quick mini Halloween charcuterie boards for two have become my go-to for every spooky season gathering, and I honestly think they’ll become yours too. They’re fast, flexible, and somehow always look like you put in way more effort than you actually did. That’s the kind of cooking I live for—the kind that makes you look good without making you stressed.
Don’t be afraid to play around with the ingredients based on what you have or what you love. Swap the cheddar for gouda, trade the almonds for pecans, use whatever candy you’ve got stashed in the pantry. The magic isn’t in the exact ingredients—it’s in the way you arrange them and the little details that make someone feel special. A spider made of cheese and pretzels. A ghost cut from a block of cheddar. A few clementine segments that look like tiny pumpkins. Those little touches are what make this more than just a snack.
I’d love to hear how yours turn out! Drop a comment below and tell me what you put on your boards—especially if you came up with a spooky detail I haven’t thought of. Share this with a friend who loves Halloween as much as you do, and save it for next year when you need a last-minute idea. Until then, happy haunting and happy snacking!
Frequently Asked Questions
Can I make these boards ahead of time?
Yes, you can prep most of the components a day ahead. Cut the cheese shapes, wash and dry the fruit, and portion out the nuts and candy. Store everything in separate containers in the fridge. Assemble the boards just before serving to keep the crackers crunchy and the cheese fresh.
What if I don’t have Halloween cookie cutters?
No problem at all. You can cut the cheese into simple cubes or triangles with a knife. Use a small paring knife to freehand a ghost or bat shape—it doesn’t have to be perfect. You can also use a small bottle cap to cut circles and arrange them to look like a moon or a spider web.
How do I keep the pretzel spider legs from falling off?
Use a firm cheese like a Babybel or a thick slice of cheddar for the spider body. Press the pretzel sticks in gently but firmly. If they still feel loose, you can use a tiny dab of cream cheese or mustard as “glue” to hold them in place. It works like a charm.
Can I make this vegetarian or vegan?
Absolutely. For a vegetarian version, just skip the meats and add extra cheese and nuts. For a vegan version, use firm vegan cheese blocks, a dairy-free spread, and skip the honey if you’re using it. Load up on fruits, veggies, and plant-based crackers. It’s super easy to adapt.
How many people does this recipe serve?
This recipe is designed for two people as a snack or light meal. If you’re serving it as an appetizer before a bigger meal, it could stretch to three or four people. For a party, just double or triple the ingredients and build more boards. Each board is meant to be personal and intimate.
Pin This Recipe!
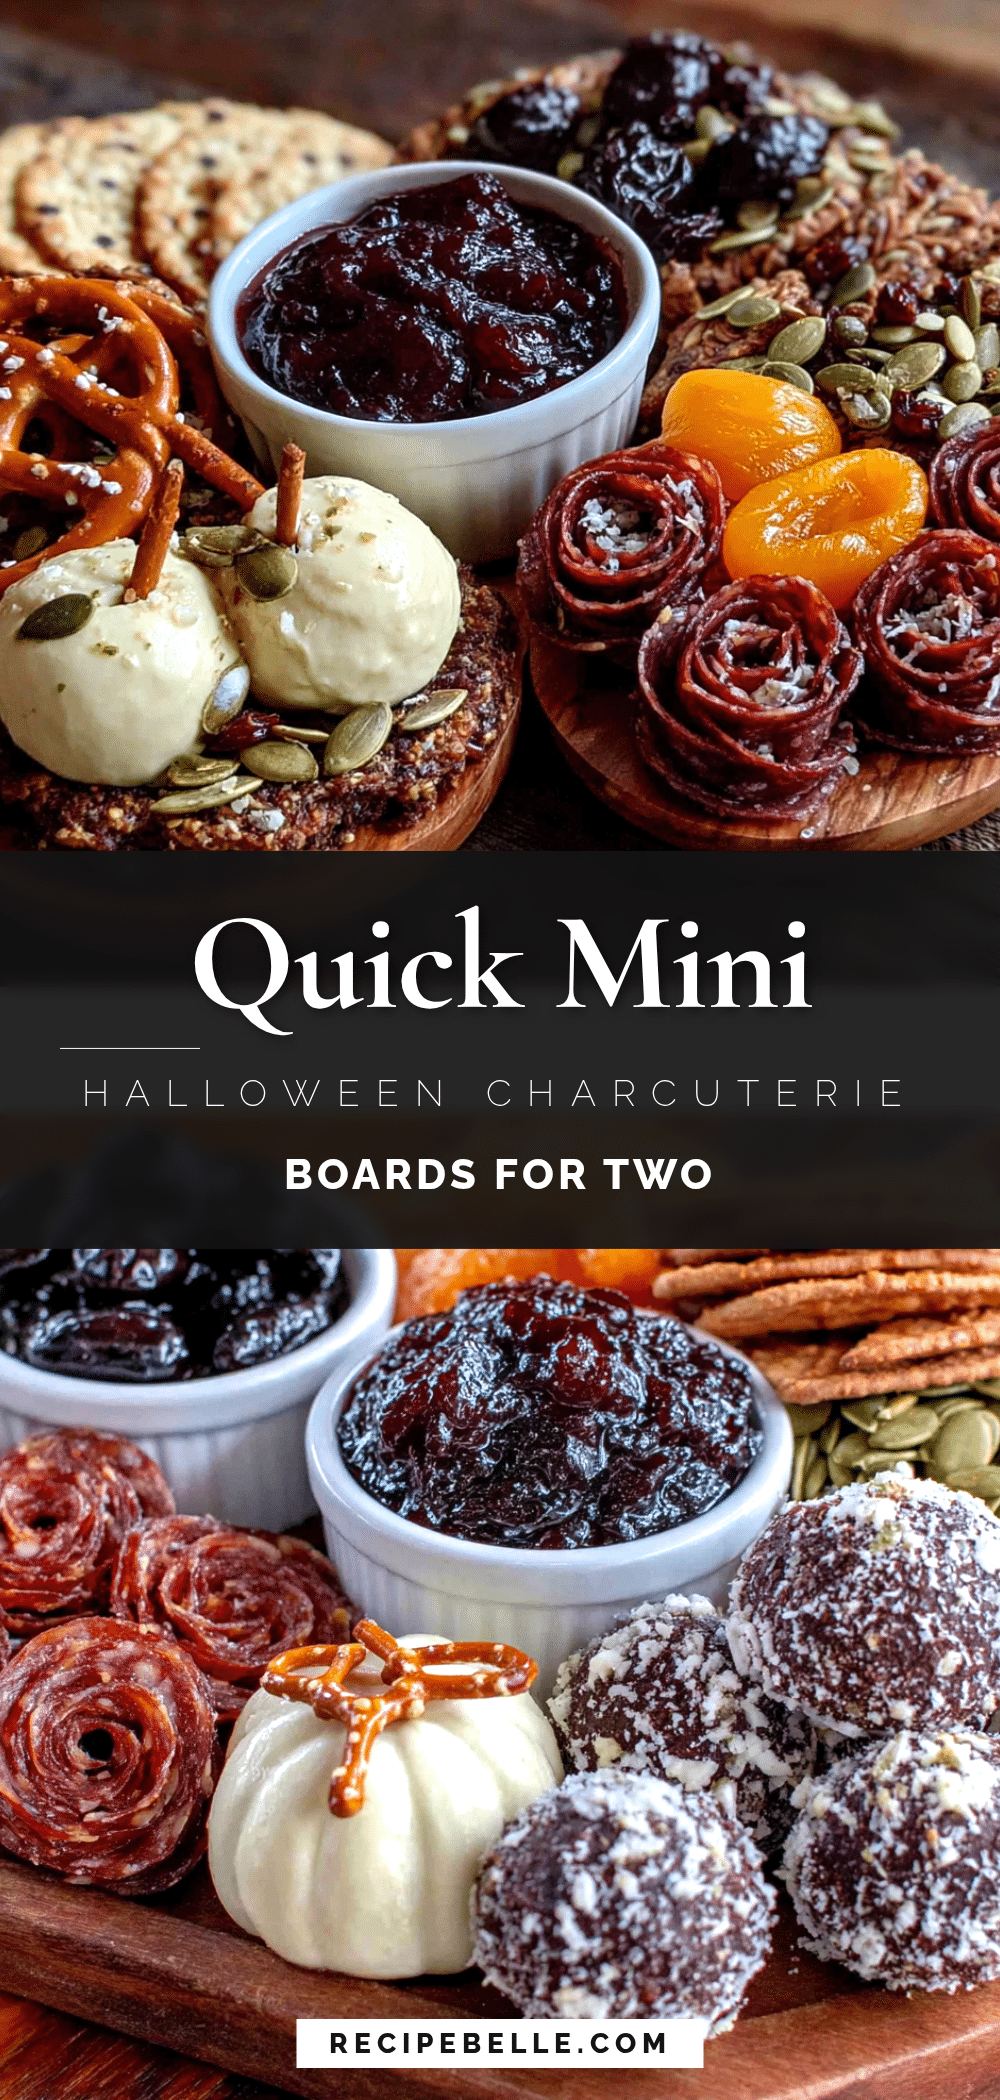
Quick Mini Halloween Charcuterie Boards for Two
These quick mini Halloween charcuterie boards for two are the perfect last-minute festive snack. Ready in under 15 minutes with simple ingredients, they look impressive without the stress.
- Prep Time: 12 minutes
- Cook Time: 0 minutes
- Total Time: 12 minutes
- Yield: 2 servings 1x
- Category: Appetizer
- Cuisine: American
Ingredients
- 4 ounces cheddar cheese (block form)
- 2 ounces brie or soft goat cheese
- 2 cheese wedges wrapped in wax (like Babybel)
- 4 slices prosciutto or salami
- 2 small pepperoni sticks
- 1 cup assorted crackers
- 1/2 cup pretzel sticks
- 1/4 cup roasted almonds or cashews
- 2–3 pieces Halloween-themed candy (mini candy bars, candy corn, or gummy worms)
- 1 tablespoon dark chocolate chips or small chocolate bat shapes
- 1 small handful dried cranberries or apricots
- 1 small clementine or mandarin orange
- 2–3 fresh rosemary sprigs (optional)
- 1 tablespoon black sesame seeds or poppy seeds
Instructions
- Set up your boards: Place two small boards or plates on the counter. Give them a quick wipe if needed.
- Cut the cheddar into shapes: Slice the cheddar into 1/4-inch thick slabs. Press Halloween cookie cutters firmly into the cheese and wiggle gently to release. Repeat until you have 6-8 shapes total. Place 3-4 shapes on each board. Cube any scraps and scatter them around.
- Portion the soft cheese: Slice brie into small wedges or place a whole mini wheel on each board. For goat cheese, roll into small balls. Place one portion on each board. Sprinkle a tiny pinch of black sesame seeds on top.
- Arrange the meats: Tear prosciutto into 2-3 pieces and drape loosely on the board. Fold salami into quarters or roll into cones. Cut pepperoni sticks in half lengthwise and arrange like ‘fingers.’ Place near the cheese.
- Add the crackers and pretzels: Fan crackers in small clusters on opposite sides of the board. Arrange pretzel sticks in a small pile, leaving a few out for spider legs if desired.
- Scatter the nuts and dried fruit: Sprinkle almonds or cashews around the board in small gaps. Add dried cranberries in little clusters to fill empty spaces.
- Add the sweet elements: Place Halloween candy in a small pile or tuck between cheese and crackers. Scatter chocolate chips around.
- Decorate with fruit and herbs: Arrange clementine segments in a small fan or pile. Tuck rosemary sprigs between items for greenery.
- Build the spider (optional): Place a cheese wedge (like Babybel) on the board. Stick 6-8 pretzel sticks into the cheese at angles for legs. Use two small dots of mustard or soft cheese to attach black sesame seeds as eyes.
- Final adjustments: Step back and look at the boards. Fill any empty spots with extra nuts or crackers. Ensure balance without overcrowding.
Notes
Don’t overthink the cheese shapes. If the cutter sticks, dip in warm water. Balance colors and textures. Prep cheese shapes and fruit the night before for quicker assembly. Let cheese sit out for 10 minutes before serving for better flavor. Use a firm cheese like Babybel for the spider to prevent legs from sinking.
Nutrition
- Serving Size: 1 mini board
- Calories: 380450
- Sugar: 1216
- Sodium: 500700
- Fat: 2228
- Saturated Fat: 1014
- Carbohydrates: 2835
- Fiber: 35
- Protein: 1418
Keywords: Halloween charcuterie board, mini charcuterie board, Halloween snack, quick appetizer, no-cook recipe, party food, spooky snack



