My sister-in-law wasn’t trying to impress anyone. I’d stopped by her place on a random Tuesday in October to drop off a container I’d borrowed, and something strange caught my nose before I even got through the door. It wasn’t the usual smell of her house—no candles, no cookies baking. It was something savory, something familiar but twisted. She was standing at her kitchen counter, a tray of deviled eggs in front of her, and she was carefully placing black olive halves on top of them. “Oh, these?” she said when she caught me staring. “Just something stupid for the kids’ Halloween party.” She shrugged like it was nothing. But those eggs weren’t nothing. They were little spiders. Tiny, creepy, perfect little spiders made from eggs and olives. I mean, honestly, I stood there for a solid minute just looking at them. She had used chives for the legs. Chives! Who thinks of that while also managing a toddler and a sink full of dishes? Maybe you’ve been there—watching someone do something ridiculously clever without breaking a sweat. That moment stuck with me. I asked her for the details, tweaked a few things in my own kitchen later that week, and now these Spooky Spider Deviled Eggs have become my go-to Halloween appetizer. They’re easy, they’re creepy-cute, and they start conversations every single time.
Why You’ll Love This Recipe
Let me tell you why these Spooky Spider Deviled Eggs are worth every minute you spend in the kitchen. I’ve tested this recipe about four times now—once with regular olives, once with jumbo olives, once where I accidentally over-boiled the eggs (that was a sad day), and once where I got the filling just right. So trust me when I say this version works.
- Quick & Easy: These come together in about 25 minutes, which is perfect when you’re juggling Halloween costumes and last-minute candy runs.
- Simple Ingredients: You probably have everything already—eggs, mayonnaise, mustard, olives, and chives. No fancy grocery trips needed.
- Perfect for Halloween Parties: Whether it’s a school event, a work potluck, or your own spooky gathering, these eggs fit right in.
- Crowd-Pleaser: Kids love the creepy factor, and adults love how good they taste. I’ve seen a platter of these disappear in under ten minutes.
- Unbelievably Delicious: The creamy yolk filling with that briny olive on top? It’s a flavor combo that just works. Seriously, close-your-eyes-after-the-first-bite good.
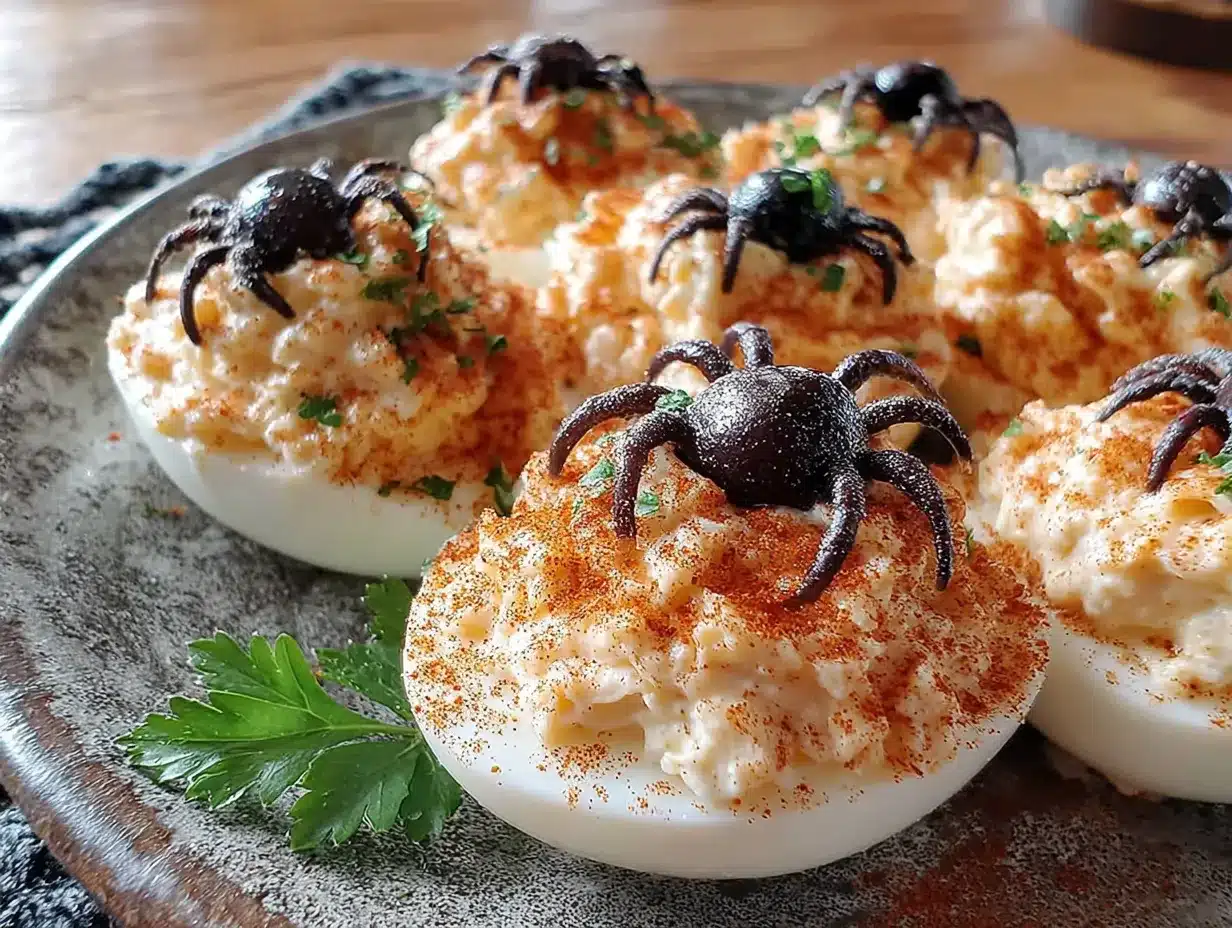
What makes these different from regular deviled eggs is the presentation. It’s not just another appetizer—it’s a conversation starter. The black olive spiders sitting on that golden filling? Pure Halloween magic. And honestly, they’re easier to make than they look. You don’t need any special tools or artistic skills. Just a steady hand and a little patience.
What Ingredients You Will Need
This recipe uses simple, everyday ingredients to create something that looks way more complicated than it actually is. Most of these are pantry staples, which means you can whip up a batch of Spooky Spider Deviled Eggs whenever the Halloween mood strikes.
- Large eggs, 6 to 12 depending on how many you need. Go for fresh eggs if you can—they peel easier after boiling. I’ve used store-brand eggs and organic eggs, and both work fine.
- Mayonnaise, 3 tablespoons for 6 eggs. I prefer Hellmann’s or Duke’s for that tangy, creamy texture. If you’re dairy-free, vegan mayo works surprisingly well here.
- Yellow mustard, 1 teaspoon. This adds a subtle tang and that classic deviled egg color. You can use Dijon if you want a sharper flavor.
- White vinegar, 1 teaspoon. Don’t skip this—it brightens up the filling and cuts through the richness of the yolks.
- Salt, ¼ teaspoon, or to taste. I use fine sea salt for even distribution.
- Black pepper, a pinch. Freshly ground is always better, but pre-ground works in a pinch.
- Paprika, for dusting. Smoked paprika adds a nice depth, but regular works just fine.
- Black olives, 6 to 12 whole olives. You’ll need one olive per egg half. Get the large, pitted ones—they’re easier to slice into spider shapes.
- Fresh chives, about 12 to 24 pieces. These become the spider legs. You can also use thin strips of green onion if chives aren’t available.
For the filling, I recommend tasting as you go. Some people like their deviled eggs more tangy, some prefer them creamier. Adjust the mayo and mustard to your liking. And here’s a tip I learned the hard way: let your boiled eggs cool completely before peeling. Running them under cold water helps, but giving them a full ice bath is even better.
If you’re making these for a crowd, you can easily double or triple the recipe. Just remember to boil extra eggs—someone always ends up eating one or two before you get to the decorating part.
Equipment Needed
You don’t need much to make Spooky Spider Deviled Eggs. Here’s what I use every time:
- A medium saucepan for boiling the eggs. Any pot works, but one with a tight-fitting lid helps the eggs cook evenly.
- A mixing bowl for the yolk filling. I use a small glass bowl, but any bowl will do.
- A fork or potato masher for mashing the yolks. A fork is easier to clean, honestly.
- A piping bag or zip-top bag for filling the egg whites. If you don’t have a piping bag, a sandwich bag with the corner snipped off works perfectly.
- A sharp knife for slicing olives and chives. A paring knife is ideal for precision.
- A cutting board for prep work.
- A serving platter to display your creepy creations.
If you don’t have a piping bag, don’t stress. I’ve used a spoon to fill the eggs before, and while it’s not as pretty, it still tastes the same. For the olive spiders, a small paring knife gives you the most control, but a regular chef’s knife works too—just be careful with those tiny olive pieces.
Preparation Method
- Boil the eggs. Place your eggs in a single layer in a saucepan and cover them with cold water by about an inch. Bring the water to a rolling boil over high heat. Once it’s boiling, turn off the heat, cover the pot, and let the eggs sit for exactly 10 minutes. This gives you hard-boiled eggs with firm, crumbly yolks—perfect for deviled eggs.
- Ice bath time. While the eggs are sitting, fill a bowl with ice and cold water. After 10 minutes, transfer the eggs to the ice bath using a slotted spoon. Let them cool for at least 5 minutes. This stops the cooking process and makes peeling way easier.
- Peel the eggs. Gently tap each egg on the counter to crack the shell, then roll it between your palms to loosen the shell. Start peeling from the wider end where the air pocket is. I’ve found that peeling under running cold water helps remove stubborn shell pieces.
- Slice and scoop. Using a sharp knife, slice each egg in half lengthwise. Carefully pop out the yolks into a mixing bowl. Arrange the egg white halves on your serving platter, cut side up.
- Make the filling. Mash the yolks with a fork until they’re crumbly with no large chunks. Add the mayonnaise, mustard, vinegar, salt, and pepper. Mix until smooth and creamy. Taste it—does it need more salt? More tang? Adjust now.
- Fill the eggs. Spoon the yolk mixture into a piping bag or a zip-top bag with a small corner snipped off. Pipe the filling into each egg white half, mounding it slightly. You want enough filling to support the olive spider on top.
- Create the spiders. Take your black olives and slice each one in half lengthwise. Set aside the olive halves that will become the spider bodies. For the legs, cut the chives into 1-inch pieces. You’ll need 8 legs per spider—so 8 chive pieces per egg half.
- Assemble the spiders. Gently press 4 chive legs into the filling on each side of where the olive body will sit. Then place the olive half on top, cut side down, covering where the chives meet. The chives should stick out like spider legs. Repeat for each egg half.
- Add the finishing touches. Lightly dust the eggs with paprika using a fine-mesh sieve. This adds color and a tiny bit of smoky flavor. For extra creepiness, you can add a tiny dot of mustard or mayo on the olive for “eyes.”
- Chill and serve. Refrigerate the platter for at least 15 minutes before serving. This helps the filling set and makes the spiders easier to handle. Serve cold or at room temperature.
A few things I’ve learned: if your eggs are too fresh, they’ll be harder to peel. Eggs that are a week or two old peel much more easily. Also, don’t overmix the filling—you want it creamy, not gluey. And if a chive leg breaks off, just press another one in. No one will notice, I promise.
Cooking Tips & Techniques
I’ve made these Spooky Spider Deviled Eggs about a dozen times now, and I’ve definitely had my share of failures. One time, I boiled the eggs for too long and ended up with grayish yolks that tasted fine but looked sad. Another time, I tried using toothpicks for the spider legs instead of chives. Don’t do that. Nobody wants to bite into a toothpick.
Here are the tips that actually matter:
Perfect hard-boiled eggs every time. The 10-minute sit method I mentioned above is foolproof. No green rings, no undercooked centers. If you’re at high altitude, add an extra minute to the sit time.
Make the filling ahead of time. You can boil and peel the eggs, make the filling, and store them separately in the fridge for up to 24 hours. Just pipe the filling and add the spiders right before serving. This is a lifesaver for party prep.
Keep the chives fresh. Cut the chives right before you assemble the spiders. If they sit too long, they’ll wilt and look sad instead of creepy. Same goes for the olives—slice them fresh for the best texture.
Multitask like a pro. While the eggs are boiling, slice your olives and cut your chives. While the eggs are cooling, make the filling. This whole recipe comes together in about 25 minutes if you keep moving.
Don’t overfill. It’s tempting to pile on the filling, but too much will make the spiders slide off. Aim for a nice mound that’s about half an inch above the egg white.
Variations & Adaptations
One of the best things about Spooky Spider Deviled Eggs is how easy they are to customize. Here are a few variations I’ve tried and loved:
Dietary adaptations: For a dairy-free version, use vegan mayonnaise. I’ve tried it with Follow Your Heart’s Vegenaise, and honestly, I couldn’t tell the difference. For a lower-fat option, swap half the mayo with plain Greek yogurt. It adds a nice tang too.
Flavor twists: Add a pinch of cayenne pepper or a dash of hot sauce to the filling for a spicy kick. I did this for a Halloween party last year, and people kept asking what made them “extra good.” You can also mix in some finely chopped pickles or relish for a tangy crunch.
Different spiders: If you’re not a fan of black olives, try using pimento-stuffed green olives instead. The red pimento looks like a creepy eye! Or use small slices of roasted red pepper for a different color spider body.
Seasonal variations: For a fall-themed version, add a pinch of pumpkin pie spice to the filling. It sounds weird, but the warm spices pair surprisingly well with the creamy yolk. For a spring version, use fresh dill instead of chives for the legs—it gives a lighter, fresher flavor.
Allergen substitutions: If you’re allergic to eggs (which, let’s face it, makes this recipe tricky), you can try using silken tofu for the filling and hollowed-out boiled potato halves for the whites. It’s not the same, but it’s a decent alternative for those with dietary restrictions.
I once tried making these with smoked paprika mixed into the filling instead of just dusted on top. It was good, but the smokiness was a bit overwhelming. Stick with the dusting method—it’s more balanced.
Serving & Storage Suggestions
These Spooky Spider Deviled Eggs are best served cold or at room temperature. I usually take them out of the fridge about 10 minutes before serving to take the chill off. They look amazing on a dark platter—the contrast makes the spider legs really pop.
For a Halloween spread, pair them with other spooky snacks like mummy hot dogs, ghost-shaped cheese crackers, or a bowl of “witches’ brew” punch. They also go great with a simple green salad if you’re looking for something lighter to balance out all the Halloween candy.
Storage: Leftover deviled eggs can be stored in an airtight container in the refrigerator for up to 2 days. But here’s the thing—the chives will start to wilt after a few hours, so these really are best eaten the same day you make them. If you need to store them, keep the spiders separate and assemble just before serving.
Reheating: Don’t. Seriously, deviled eggs are meant to be served cold. If you want them at room temperature, just let them sit out for 10 to 15 minutes. Microwaving them will turn the filling into a sad, watery mess.
Flavor-wise, these eggs actually get better after a few hours in the fridge. The flavors meld together, and the filling becomes even creamier. Just don’t expect the chives to stay perky overnight.
Nutritional Information & Benefits
Here’s the nutritional breakdown for one Spooky Spider Deviled Egg (based on a recipe using 6 eggs, divided into 12 halves):
| Nutrient | Amount per serving |
|---|---|
| Calories | 65 |
| Protein | 4g |
| Fat | 5g |
| Saturated Fat | 1.5g |
| Carbohydrates | 1g |
| Fiber | 0g |
| Sugar | 0.5g |
| Sodium | 180mg |
Eggs are a fantastic source of high-quality protein and contain important nutrients like vitamin D, vitamin B12, and choline, which supports brain health. The olives add healthy monounsaturated fats and a dose of antioxidants. And the chives? They’re packed with vitamin K and have antibacterial properties.
If you’re watching your sodium intake, you can use low-sodium olives or reduce the salt in the filling. For a lower-cholesterol option, use only the egg whites for the filling and skip the yolks—though honestly, the yolks are where all the flavor is.
These deviled eggs are naturally gluten-free, low-carb, and keto-friendly. They’re also a great option for anyone following a paleo diet, as long as you use a paleo-approved mayonnaise.
Conclusion
These Spooky Spider Deviled Eggs are the kind of recipe that makes you look like a Halloween hero without spending hours in the kitchen. They’re creepy, they’re cute, and they taste amazing. I still think about that Tuesday afternoon at my sister-in-law’s house, watching her casually create something so clever. Now every time I make these eggs, I feel like I’m carrying on a little tradition—one that started with a shrug and a tray of olives.
I’d love to hear how yours turn out. Did you add your own twist? Did the kids love them? Did you accidentally make them too spicy like I did that one time? Drop a comment below and let me know. And if you’re looking for more Halloween appetizers, check out our mummy hot dogs or this creamy pumpkin dip that’s perfect for dipping pretzels.
Happy Halloween, and happy cooking!
Frequently Asked Questions
Can I make these Spooky Spider Deviled Eggs a day ahead?
Yes, you can boil the eggs and make the filling up to 24 hours in advance. Store the egg whites and filling separately in the fridge. Assemble the spiders and add the chive legs right before serving for the best presentation.
What can I use instead of chives for the spider legs?
Thin strips of green onion work great. You can also use thin slices of bell pepper or even cooked spaghetti if you’re feeling creative. Just make sure whatever you use is edible and firm enough to hold its shape.
How do I keep the olive spiders from falling off?
Make sure your filling is thick enough to support the olive. If it’s too runny, add a bit more mayo or an extra yolk. Also, gently press the olive into the filling so it has a solid base. A little bit of filling on the bottom of the olive helps it stick too.
Can I use a different type of olive?
Absolutely. Green olives with pimentos give a fun pop of color, and kalamata olives add a richer, more briny flavor. Just make sure they’re pitted and large enough to slice into spider bodies.
How long do these deviled eggs last in the fridge?
They’ll keep for up to 2 days in an airtight container. But the chives will start to wilt after a few hours, so they look best the same day you make them. If you’re storing leftovers, you can remove the chive legs and add fresh ones before serving again.
Pin This Recipe!
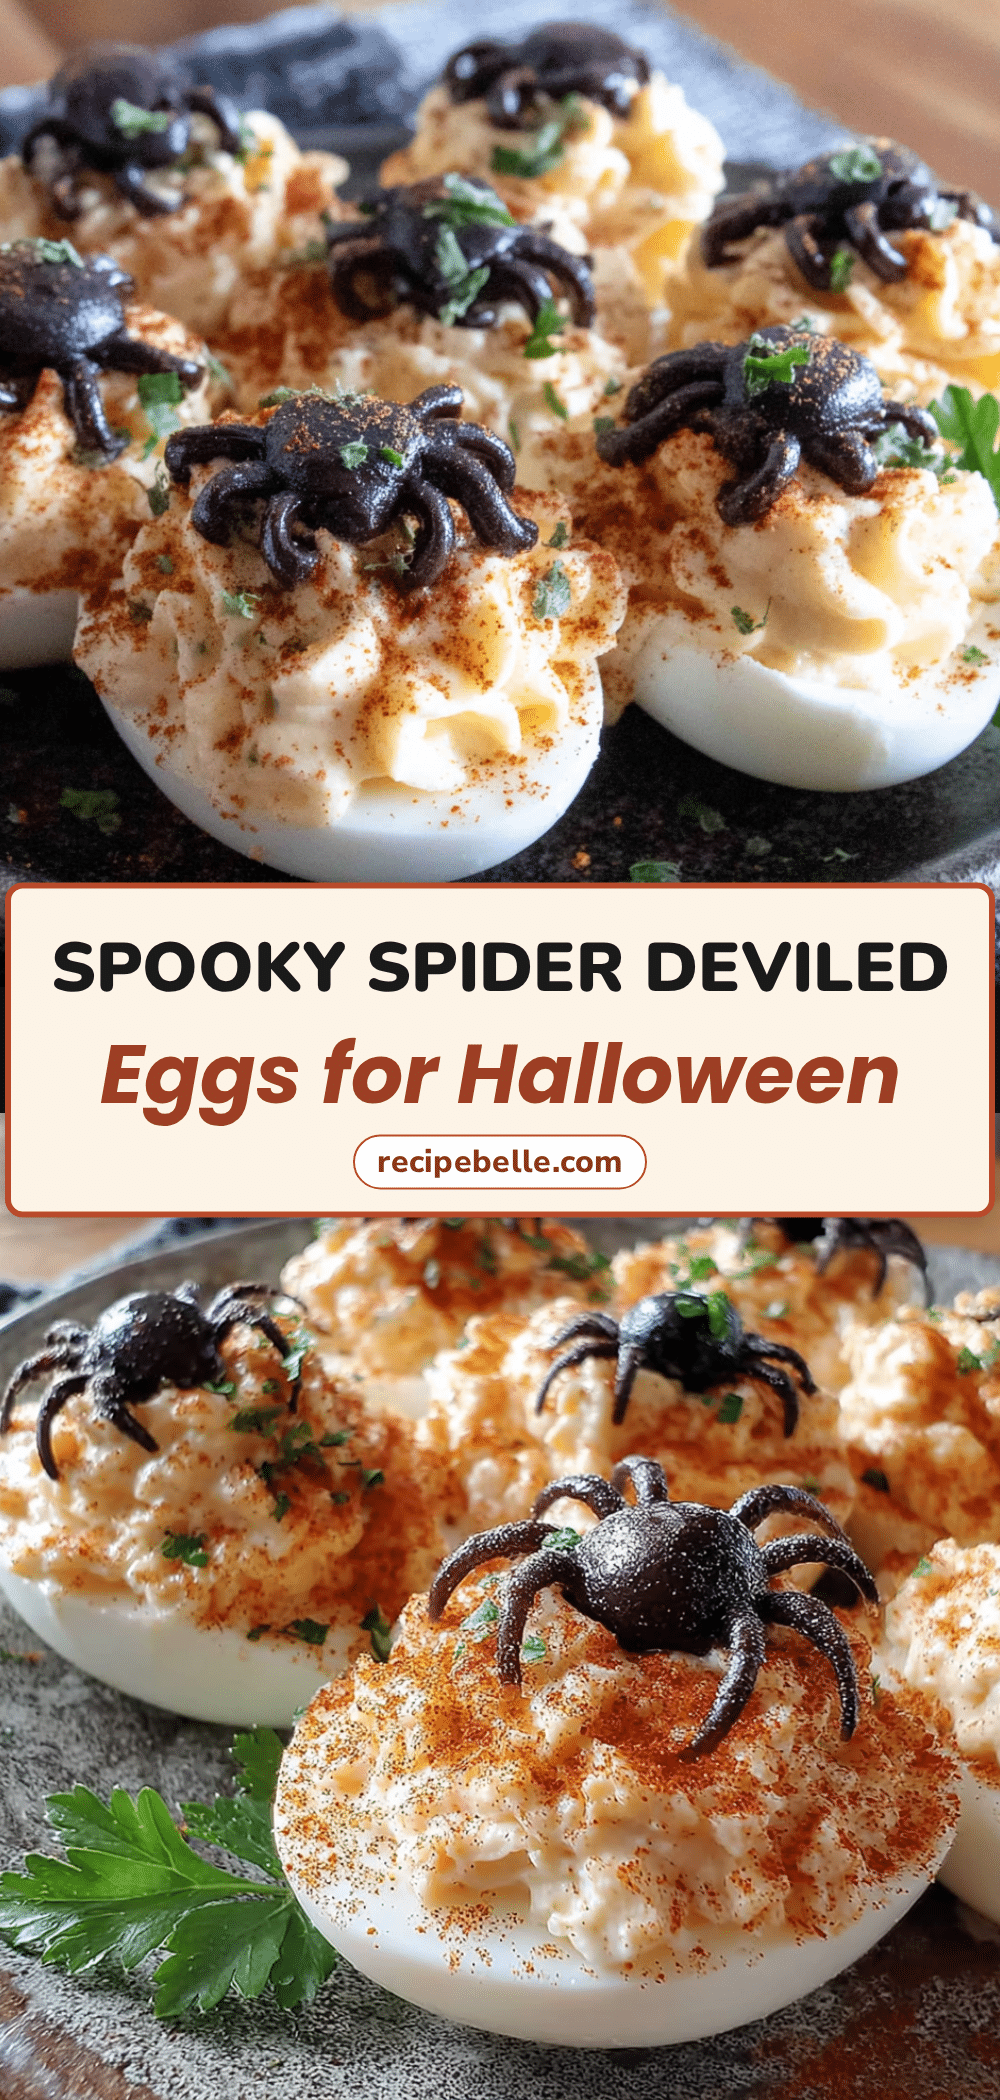
Spooky Spider Deviled Eggs: Easy Halloween Appetizer Recipe
These Spooky Spider Deviled Eggs are a creepy-cute Halloween appetizer made with hard-boiled eggs, a creamy yolk filling, and black olive spiders with chive legs. They’re quick, easy, and perfect for parties.
- Prep Time: 15 minutes
- Cook Time: 10 minutes
- Total Time: 25 minutes
- Yield: 12 deviled eggs (6 servings of 2 eggs each) 1x
- Category: Appetizer
- Cuisine: American
Ingredients
- 6 large eggs
- 3 tablespoons mayonnaise
- 1 teaspoon yellow mustard
- 1 teaspoon white vinegar
- ¼ teaspoon salt
- 1 pinch black pepper
- 1 pinch paprika (for dusting)
- 6 whole black olives (pitted, large)
- 12–24 fresh chives (cut into 1-inch pieces)
Instructions
- Place eggs in a single layer in a saucepan and cover with cold water by about an inch. Bring to a rolling boil over high heat, then turn off heat, cover, and let sit for exactly 10 minutes.
- While eggs sit, prepare an ice bath with ice and cold water. Transfer eggs to ice bath using a slotted spoon and let cool for at least 5 minutes.
- Peel eggs under running cold water. Slice each egg in half lengthwise and pop out yolks into a mixing bowl. Arrange egg white halves on a serving platter, cut side up.
- Mash yolks with a fork until crumbly. Add mayonnaise, mustard, vinegar, salt, and pepper. Mix until smooth and creamy. Adjust seasoning to taste.
- Spoon yolk mixture into a piping bag or zip-top bag with a small corner snipped off. Pipe filling into each egg white half, mounding slightly.
- Slice black olives in half lengthwise. Cut chives into 1-inch pieces (8 per spider).
- Gently press 4 chive legs into the filling on each side of where the olive body will sit. Place olive half on top, cut side down, covering the chive ends.
- Lightly dust eggs with paprika using a fine-mesh sieve. Optionally add a tiny dot of mustard or mayo on the olive for ‘eyes’.
- Refrigerate platter for at least 15 minutes before serving. Serve cold or at room temperature.
Notes
For easier peeling, use eggs that are a week or two old. Cut chives and olives fresh just before assembling. If filling is too runny, add more mayo or an extra yolk. Store leftovers in an airtight container for up to 2 days, but chives will wilt; best served same day.
Nutrition
- Serving Size: 2 deviled eggs
- Calories: 130
- Sugar: 1
- Sodium: 360
- Fat: 10
- Saturated Fat: 3
- Carbohydrates: 2
- Protein: 8
Keywords: Halloween deviled eggs, spider deviled eggs, easy Halloween appetizer, spooky deviled eggs, deviled eggs with olives



