The woman at the community garden plot next to mine watched me struggle with a bag of overripe bananas for a good minute before she finally spoke. “You’re going to throw those away, aren’t you?” she asked, not unkindly. I nodded, embarrassed. It was a Tuesday in late August, and I’d let a whole bunch of bananas get speckled and soft in the heat. She just shook her head, wiped her hands on her jeans, and said, “Wait right here.” She came back with a loaf pan and a handwritten recipe card so worn the ink was barely legible. That was how I learned to make banana bread the way it was meant to be made—simple, honest, and with walnuts.
Honestly, I’d tried banana bread before. But my versions were always dry or dense, or they disappeared in a day without leaving much of an impression. This recipe was different from the start. It came from someone who had been making it for decades, who didn’t measure with cups but with her hands. She told me the secret wasn’t in any fancy ingredient—it was in patience. Let the bananas get really, truly ripe. Let the batter rest for a few minutes. Let the loaf cool completely before slicing. Maybe you’ve been there, too, with a kitchen full of fruit that’s past its prime, wondering what to do. This is the answer.
What I love about this wholesome classic banana bread with walnuts is that it doesn’t pretend to be anything other than what it is. It’s not trying to be a health food, though it uses ingredients you can feel good about. It’s not trying to be a fancy bakery loaf, though it certainly looks the part when it comes out of the oven, all golden and cracked on top. It’s just good, honest bread made from things you probably already have in your pantry. The walnuts add this wonderful crunch that plays off the soft, tender crumb, and the flavor gets even better the next day. I keep making it because it reminds me that the best recipes often come from the most unexpected places—a garden, a kind stranger, and a bag of bananas I almost threw away.
Why You’ll Love This Recipe
This isn’t just another banana bread recipe floating around the internet. After testing this version at least a dozen times—tweaking the flour ratio, adjusting the sweetness, and experimenting with different types of walnuts—I can tell you with confidence that this one works. Every. Single. Time. Here’s why you’ll fall for it too:
- Quick & Easy: From start to finish, you’re looking at about an hour. The active prep time is maybe 15 minutes. This is the kind of recipe you can throw together while the coffee brews or after dinner when you want something baking in the oven.
- Simple Ingredients: No need for a special trip to the store. Flour, sugar, eggs, butter, bananas, walnuts, and a few pantry staples. That’s it. You probably have everything right now.
- Perfect for Using Up Overripe Bananas: You know those bananas that sit on the counter looking sad and spotty? This is their glorious destiny. The riper they are, the better your bread will taste.
- Crowd-Pleaser: I’ve brought this to brunches, potlucks, and casual get-togethers, and it never lasts long. Kids love it, adults love it, and people always ask for the recipe.
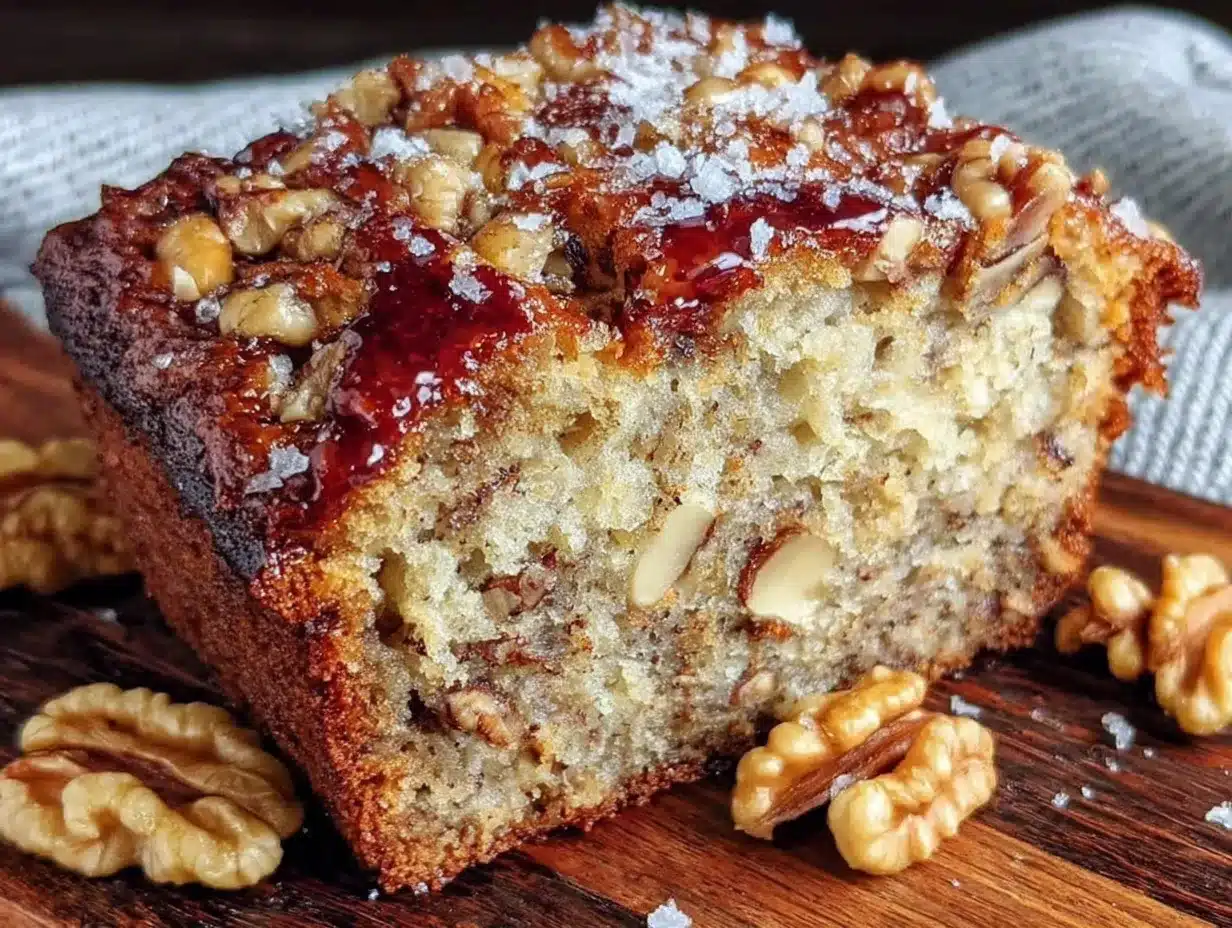
- Unbelievably Delicious: The texture is what gets me every time. The crust is slightly crisp and caramelized, while the inside stays incredibly moist and tender. The walnuts add that satisfying crunch that makes each bite interesting.
What sets this recipe apart is the technique of mashing the bananas by hand rather than using a mixer. It might seem like a small thing, but it makes a real difference. You get these lovely little pockets of banana throughout the bread instead of it being completely homogenized. Plus, the walnuts are toasted before they go in, which brings out their nutty flavor and keeps them from turning soft during baking. It’s those little details that turn a good banana bread into a great one.
This is the kind of recipe that makes you feel like you’ve got your act together, even on a chaotic Tuesday. It’s comfort food that doesn’t require a lot of fuss, and it fills your kitchen with a smell that just makes everything feel right. Honestly, if I could bottle that aroma, I would.
What Ingredients You Will Need
This recipe relies on simple, wholesome ingredients that work together to create something truly special. The bananas do the heavy lifting for sweetness and moisture, while the walnuts add texture and a subtle earthy flavor. Here’s everything you’ll need:
For the Banana Bread
- 3 large ripe bananas, mashed (about 1 ½ cups or 340g) — The riper, the better. Look for bananas with plenty of brown spots on the peel. They should be soft to the touch and smell sweet. If your bananas aren’t ripe enough, you can speed things up by baking them at 300°F (150°C) for 15-20 minutes until the skins turn black.
- ⅓ cup (75g) unsalted butter, melted — I use salted butter sometimes and just reduce the added salt slightly. Both work fine. Let the butter cool slightly before mixing it with the eggs so you don’t accidentally scramble them.
- ¾ cup (150g) granulated sugar — You can reduce this to ½ cup (100g) if your bananas are extremely ripe and sweet. I’ve also made this with coconut sugar, and it works beautifully, though the color ends up a bit darker.
- 1 large egg, at room temperature — Cold eggs can cause the butter to seize up. Take it out of the fridge about 30 minutes before you start, or place it in a bowl of warm water for 5 minutes.
- 1 teaspoon vanilla extract — Pure vanilla extract makes a difference here. Imitation vanilla works in a pinch, but the flavor won’t be as rich.
- 1 ½ cups (190g) all-purpose flour — Spoon and level your flour rather than scooping directly from the bag. Scooping packs the flour down and can result in dry bread. For a whole wheat version, swap half the flour for whole wheat pastry flour.
- 1 teaspoon baking soda — Make sure your baking soda is fresh. To test, drop a little into vinegar—if it fizzes vigorously, it’s good to go.
- ¼ teaspoon salt — I prefer fine sea salt for baking. If you’re using kosher salt, increase to ½ teaspoon.
- ½ cup (60g) walnuts, roughly chopped and toasted — Toasting is optional but highly recommended. It takes about 5 minutes in a dry pan over medium heat and makes the walnuts taste infinitely better. I usually toast a little extra to sprinkle on top.
Optional Add-Ins
- ½ cup (90g) dark chocolate chips — If you want to make this a little more indulgent, fold in some chocolate chips along with the walnuts. The combination of banana, walnut, and chocolate is hard to beat.
- 1 tablespoon ground flaxseed — A sneaky way to add some fiber and omega-3s without changing the flavor.
- ½ teaspoon cinnamon — Adds warmth and pairs beautifully with both banana and walnuts. I sometimes add this in the fall.
One thing I’ve learned through trial and error is that ingredient temperature matters more than you might think. Room temperature eggs and slightly cooled melted butter emulsify better, giving you a smoother, more consistent batter. It’s one of those small things that makes a big difference in the final texture.
Equipment Needed
You don’t need a lot of fancy equipment for this recipe, which is part of its charm. Here’s what you’ll need:
- 9×5-inch loaf pan — This is the standard size for banana bread. If you only have an 8×4-inch pan, that works too, but you’ll need to increase the baking time by 5-10 minutes. Glass or metal both work, but metal gives you a nicer crust.
- Large mixing bowl — Any bowl will do. I use a ceramic one because it feels nice, but glass or stainless steel is fine.
- Fork or potato masher — For mashing the bananas. A fork works perfectly and gives you that slightly chunky texture I mentioned earlier. A potato masher is faster if you’re in a hurry.
- Whisk — For combining the wet ingredients. A wooden spoon also works if you don’t have a whisk.
- Rubber spatula — For folding everything together and scraping the bowl clean. This is my most-used kitchen tool, honestly.
- Parchment paper — Not strictly necessary, but it makes removing the bread from the pan so much easier. I leave an overhang on two sides to create handles.
- Cooling rack — Essential for letting the bread cool evenly. If you leave it in the pan, the bottom can get soggy.
- Small skillet — For toasting the walnuts. A dry pan over medium heat works perfectly.
If you don’t have a loaf pan, you can bake this in an 8×8-inch square pan, though the baking time will be shorter—start checking at 35 minutes. I’ve even made these as muffins before, and they bake in about 18-20 minutes at the same temperature. The recipe is forgiving like that.
Preparation Method
Let me walk you through this step by step. I’ve made this bread so many times that I could do it in my sleep, but I still follow these steps every time. They work.
- Preheat your oven to 350°F (175°C). Position the rack in the center of the oven. While it’s heating, grease your loaf pan with butter or non-stick spray, then line it with parchment paper, leaving an overhang on the long sides. This makes lifting the bread out so much easier later.
- Toast the walnuts. Place the chopped walnuts in a small, dry skillet over medium heat. Shake the pan occasionally and keep a close eye on them—they can go from perfectly toasted to burnt in seconds. You’ll know they’re done when they smell nutty and have darkened slightly, about 4-5 minutes. Pour them onto a plate to cool while you prepare the batter.
- Mash the bananas. In a large mixing bowl, add your three ripe bananas. Mash them with a fork until they’re mostly smooth but still have some small lumps. You want a few chunks remaining—they’ll melt into the bread as it bakes and create those lovely pockets of banana flavor. Don’t over-mash them into a liquid; you want some texture.
- Combine the wet ingredients. Add the melted butter, granulated sugar, egg, and vanilla extract to the mashed bananas. Whisk everything together until it’s well combined and smooth. The mixture will look a bit loose and shiny—that’s exactly right. Take a moment to scrape down the sides of the bowl with your spatula.
- Mix the dry ingredients. In a separate small bowl, whisk together the all-purpose flour, baking soda, and salt. This ensures the baking soda is evenly distributed so your bread rises properly. I learned this the hard way after biting into a piece of banana bread that had a pocket of baking soda in it—not pleasant.
- Combine wet and dry. Add the dry ingredients to the wet ingredients. Here’s the important part: use a rubber spatula to fold everything together gently. Stir only until you no longer see streaks of flour. A few lumps are fine. Over-mixing develops the gluten and makes your banana bread tough and dense. We want tender, not tough.
- Fold in the walnuts. Add the toasted walnuts (reserving a small handful for the top if you want) and fold them in with just a few strokes. The batter will be thick and slightly lumpy. Don’t worry if it doesn’t look perfectly smooth—that’s the texture you’re after.
- Pour the batter into the prepared pan. Use your spatula to scrape every last bit of batter into the pan. Spread it evenly, then tap the pan on the counter a couple of times to release any air bubbles. If you reserved some walnuts, sprinkle them on top now, pressing them gently into the batter so they stick.
- Bake for 55-65 minutes. Place the pan in the center of the oven and bake until a toothpick inserted into the center comes out clean or with just a few moist crumbs. The top should be golden brown and cracked. If the top is browning too quickly (around the 40-minute mark), tent the pan loosely with aluminum foil.
- Cool in the pan for 10 minutes. Place the loaf pan on a cooling rack and let it sit for exactly 10 minutes. Don’t skip this step—the bread needs time to set up, and trying to remove it too early can cause it to fall apart.
- Remove from the pan and cool completely. Use the parchment paper handles to lift the bread out of the pan and transfer it to the cooling rack. Let it cool completely before slicing, about 1 hour. I know it’s tempting to cut into it while it’s still warm, but the texture improves significantly as it cools. The crumb sets, the flavors meld, and you get much cleaner slices.
One thing I always do is rotate the pan halfway through baking. Ovens can have hot spots, and rotating ensures even browning. Just be quick about it so the oven doesn’t lose too much heat.
Cooking Tips & Techniques
After making this bread more times than I can count, I’ve picked up a few tricks that make a real difference. Here are the ones I swear by:
Don’t over-mix the batter. This is probably the most common mistake people make with quick breads. Mix just until the flour disappears. A few streaks are fine. Over-mixing develops gluten, which gives you a rubbery, dense loaf instead of a tender, moist one. I speak from experience—I ruined my first few batches this way.
Toast your walnuts. I mentioned this before, but it’s worth repeating. Raw walnuts can taste slightly bitter and have a soft, almost mealy texture. Toasting them transforms them completely. They become crunchy, nutty, and infinitely more flavorful. I toast mine in a dry skillet while the oven preheats, and it takes maybe 5 minutes. Don’t skip this step.
Use the ripeness test. The best bananas for banana bread are so ripe they look almost black. They should be soft to the touch and smell intensely sweet. If you press them and they feel firm, they’re not ready. I’ve made the mistake of using slightly underripe bananas, and the bread was noticeably less sweet and not as moist. Trust the process—let them get ugly.
Let it cool completely. I know, I know. The smell is intoxicating, and you want to dig in immediately. But cutting into warm banana bread is a recipe for gummy, crumbly slices. The bread continues to set as it cools, and the flavors develop. If you can wait, wrap it in plastic wrap once it’s completely cool and let it sit overnight. The texture improves dramatically, and the flavor deepens.
Check for doneness properly. A toothpick inserted into the center should come out clean or with just a few moist crumbs attached. If it comes out wet with batter, it needs more time. If it comes out completely dry and the edges are pulling away from the pan, you’ve over-baked it. Start checking at the 50-minute mark to be safe.
Use room temperature ingredients. This is one of those tips that seems fussy but actually matters. Room temperature eggs and melted butter that’s cooled slightly emulsify better, giving you a smoother batter and a more even crumb. Cold ingredients can cause the batter to separate or result in a denser loaf.
Variations & Adaptations
One of the best things about this recipe is how adaptable it is. I’ve tried quite a few variations over the years, and here are my favorites:
Gluten-Free Version: Swap the all-purpose flour for a good 1:1 gluten-free baking flour blend. I’ve had great results with both Cup4Cup and King Arthur’s gluten-free measure-for-measure flour. Add an extra tablespoon of flour to account for the fact that gluten-free flours tend to absorb more moisture. The texture will be slightly more crumbly, but the flavor is still spot on.
Vegan Adaptation: Replace the egg with a flax egg (1 tablespoon ground flaxseed mixed with 3 tablespoons water, let sit for 5 minutes) and use melted coconut oil or vegan butter instead of dairy butter. The bread will be a bit denser, but it’s still delicious. I’ve made this for vegan friends, and it disappeared just as fast as the original.
Lower Sugar Option: Reduce the sugar to ½ cup (100g) and add an extra very ripe banana. The natural sweetness of the bananas will compensate for the reduced sugar. You can also use coconut sugar or a blend of granulated sweetener and sugar. The texture will be slightly different, but the taste is still wonderful.
Chocolate Walnut Banana Bread: Fold in ½ cup (90g) of dark chocolate chips along with the walnuts. The combination of banana, chocolate, and walnut is honestly one of the best flavor combinations out there. I make this version when I want something a little more indulgent.
Spiced Banana Bread: Add 1 teaspoon of cinnamon, ½ teaspoon of nutmeg, and ¼ teaspoon of ground ginger to the dry ingredients. This gives the bread a warm, cozy flavor that’s perfect for fall and winter. I sometimes add a pinch of cardamom too, which is unexpected but lovely.
Nut-Free Option: Simply omit the walnuts or replace them with an equal amount of sunflower seeds or pumpkin seeds. The seeds add a similar crunch without the allergens. Toasted sunflower seeds work particularly well here.
I’ve also tried making this as a loaf with a streusel topping—combine ¼ cup flour, ¼ cup brown sugar, 2 tablespoons cold butter, and a handful of walnuts, then sprinkle it over the batter before baking. It adds a lovely crunchy crust that’s absolutely divine.
Serving & Storage Suggestions
This banana bread is wonderful in so many ways. Here’s how I like to serve and store it:
Serving Temperature: I prefer this bread at room temperature, but it’s also delicious warm. If you want to serve it warm, pop individual slices in the microwave for 10-15 seconds or in a 300°F (150°C) oven for about 5 minutes. A slice with a pat of butter melting into it is pure comfort.
Presentation Ideas: For a simple breakfast, serve slices with a smear of salted butter and a cup of coffee. For dessert, top with a dollop of whipped cream or a drizzle of honey. If you’re feeling fancy, toast a slice, spread it with cream cheese, and add a few fresh banana slices on top. It’s also wonderful with a scoop of vanilla ice cream.
Complementary Dishes: This banana bread pairs beautifully with a hot cup of tea or coffee. For brunch, serve it alongside a fruit salad or yogurt parfait. It’s also great with a glass of cold milk—honestly, it’s perfect for dunking.
Storage Instructions: Store leftover banana bread wrapped tightly in plastic wrap or in an airtight container at room temperature for up to 4 days. The flavors actually improve after the first day, so don’t be afraid to make it ahead. If you live in a humid climate, keep it in the refrigerator to prevent mold, but let slices come to room temperature before eating for the best texture.
Freezing Instructions: This bread freezes beautifully. Wrap the completely cooled loaf (or individual slices) tightly in plastic wrap, then in aluminum foil, and place in a freezer bag. It will keep for up to 3 months. To thaw, leave it at room temperature for a few hours or pop individual slices in the toaster. I always keep a loaf in the freezer for unexpected guests or lazy Sunday mornings.
How Flavors Develop: Something magical happens overnight. The moisture from the bananas distributes more evenly throughout the bread, the walnut flavor mellows and integrates, and the crumb becomes more tender. I honestly think day-old banana bread is better than fresh. So if you can plan ahead, make it the day before you need it.
Nutritional Information & Benefits
While I wouldn’t call banana bread a health food, this version uses wholesome ingredients that offer some real nutritional benefits. Here’s a rough estimate per slice (based on 10 slices):
- Calories: Approximately 280-320 calories per slice
- Fat: 12-14g (mostly from walnuts and butter)
- Carbohydrates: 38-42g
- Fiber: 2-3g
- Protein: 4-5g
- Sugar: 18-22g
Health Benefits: Bananas are packed with potassium, which supports heart health and muscle function. They also contain vitamin B6 and vitamin C. Walnuts are an excellent source of omega-3 fatty acids, which are great for brain health and reducing inflammation. The walnuts also add protein and fiber, which help keep you full and satisfied.
Dietary Considerations: This recipe can be adapted to be gluten-free, vegan, and nut-free (see variations above). It’s naturally vegetarian. If you’re watching your sugar intake, you can reduce the sugar as suggested. For a lower-fat option, you can substitute half the butter with unsweetened applesauce, though the texture will be slightly more cake-like.
Potential Allergens: This recipe contains wheat (gluten), dairy, eggs, and tree nuts (walnuts). If you’re serving this to others, always check for allergies. I’ve made nut-free versions for school events, and they’re always well-received.
My personal take on this is that food should nourish both body and soul. This banana bread does that. It’s made with real ingredients, it fills your home with a comforting aroma, and it brings people together. That’s a kind of wellness that goes beyond calories and macros.
Conclusion
This wholesome classic banana bread with walnuts is more than just a recipe—it’s a reminder that the best things in life are often the simplest. It came to me from a stranger in a community garden, and it’s become a staple in my kitchen ever since. Every time I make it, I think about that Tuesday afternoon and the kindness of someone who saw me struggling and chose to help.
What I love most about this bread is how forgiving it is. You can tweak the sugar, swap the flour, add chocolate or spices, and it still turns out beautifully. It’s a recipe that invites you to make it your own. So go ahead—use those spotty bananas on your counter, toast some walnuts, and fill your kitchen with that incredible smell. And when you take that first bite, close your eyes. That’s what comfort tastes like.
I’d love to hear how yours turns out. Did you add chocolate chips? Try it with whole wheat flour? Give it a spicy twist? Drop a comment below and let me know what variations you tried. And if you loved this recipe as much as I do, share it with someone who needs a little comfort today. Happy baking!
Frequently Asked Questions
Can I use frozen bananas for this banana bread?
Absolutely! Frozen bananas actually work great for banana bread. Thaw them completely first, then drain off any excess liquid before mashing. The freezing process breaks down the cell walls and makes them even sweeter and more flavorful. I often freeze my overripe bananas specifically for baking.
Why did my banana bread turn out dry?
Dry banana bread usually means one of three things: you used too much flour, you over-baked it, or your bananas weren’t ripe enough. Make sure to spoon and level your flour rather than scooping, check for doneness starting at the 50-minute mark, and use bananas that are very ripe with plenty of brown spots.
Can I make this banana bread without walnuts?
Yes, absolutely. Simply omit the walnuts or replace them with an equal amount of chocolate chips, dried fruit, or seeds. The bread will still be delicious. If you’re omitting them entirely, you don’t need to adjust any other ingredients.
How do I know when my banana bread is fully baked?
Insert a toothpick or thin knife into the center of the loaf. If it comes out clean or with just a few moist crumbs attached, it’s done. If it comes out wet with batter, it needs more time. The top should also be golden brown and cracked, and the edges should be pulling slightly away from the pan.
Can I double this recipe?
Yes, this recipe doubles beautifully. You can bake it in two loaf pans at the same time, or make one larger loaf in a 10×5-inch pan (increase baking time by 10-15 minutes). If you’re baking two loaves, rotate the pans halfway through baking and check for doneness individually, as oven hot spots can cause uneven baking.
Pin This Recipe!
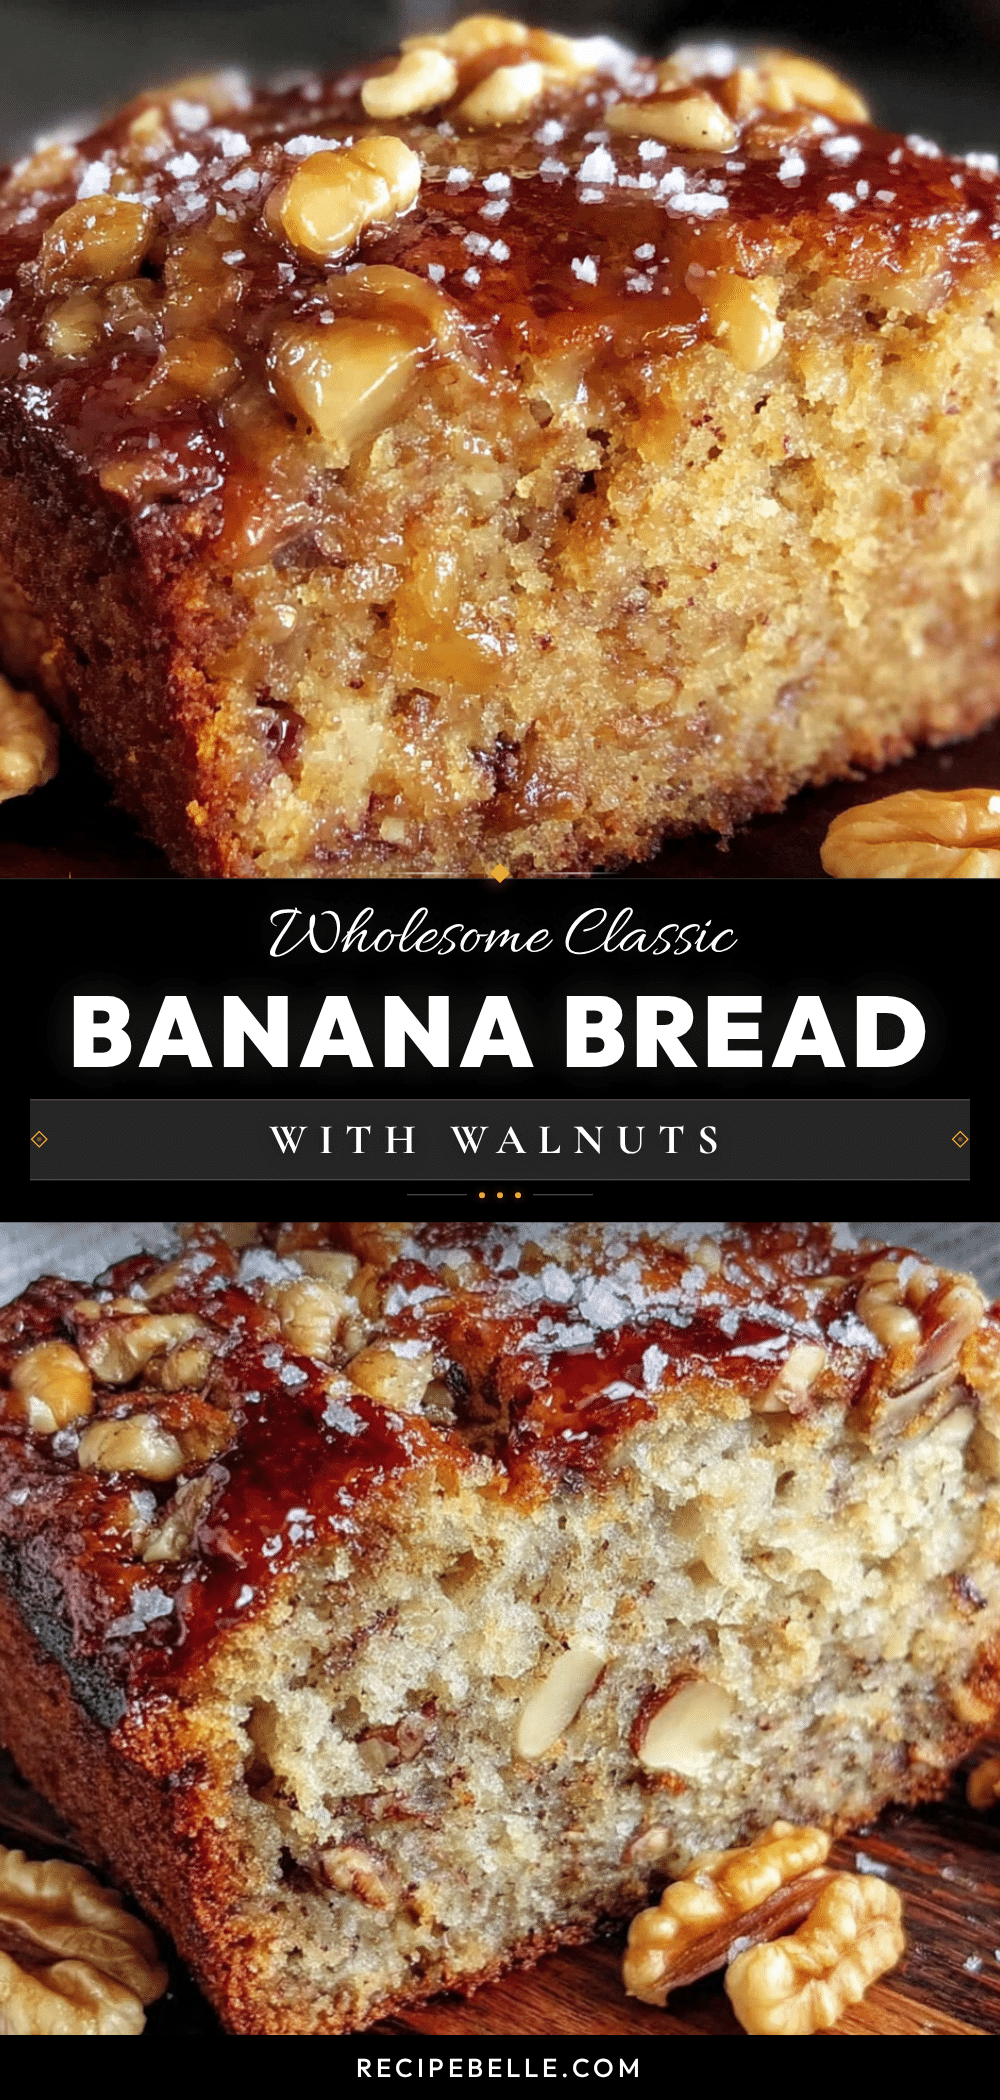
Wholesome Classic Banana Bread with Walnuts
A simple, honest banana bread recipe with toasted walnuts that yields a moist, tender crumb and a slightly crisp crust. Perfect for using up overripe bananas, this crowd-pleasing bread is easy to make with pantry staples.
- Prep Time: 15 minutes
- Cook Time: 55-65 minutes
- Total Time: 1 hour 10 minutes to 1 hour 20 minutes
- Yield: 10 servings 1x
- Category: Dessert
- Cuisine: American
Ingredients
- 3 large ripe bananas, mashed (about 1 ½ cups or 340g)
- ⅓ cup (75g) unsalted butter, melted
- ¾ cup (150g) granulated sugar
- 1 large egg, at room temperature
- 1 teaspoon vanilla extract
- 1 ½ cups (190g) all-purpose flour
- 1 teaspoon baking soda
- ¼ teaspoon fine sea salt
- ½ cup (60g) walnuts, roughly chopped and toasted
- Optional: ½ cup (90g) dark chocolate chips
- Optional: 1 tablespoon ground flaxseed
- Optional: ½ teaspoon cinnamon
Instructions
- Preheat your oven to 350°F (175°C). Grease a 9×5-inch loaf pan with butter or non-stick spray, then line with parchment paper, leaving an overhang on the long sides.
- Toast the walnuts in a small, dry skillet over medium heat for 4-5 minutes until fragrant and slightly darkened. Pour onto a plate to cool.
- In a large mixing bowl, mash the bananas with a fork until mostly smooth with some small lumps remaining.
- Add the melted butter, granulated sugar, egg, and vanilla extract to the mashed bananas. Whisk until well combined and smooth.
- In a separate small bowl, whisk together the all-purpose flour, baking soda, and salt.
- Add the dry ingredients to the wet ingredients. Fold gently with a rubber spatula until just combined—a few lumps are fine. Do not over-mix.
- Fold in the toasted walnuts (reserving a small handful for the top if desired) with a few strokes.
- Pour the batter into the prepared pan and spread evenly. Tap the pan on the counter a couple of times to release air bubbles. Sprinkle reserved walnuts on top if using.
- Bake for 55-65 minutes, until a toothpick inserted into the center comes out clean or with a few moist crumbs. If the top browns too quickly, tent with foil at the 40-minute mark.
- Cool in the pan on a wire rack for 10 minutes. Then lift the bread out using the parchment handles and cool completely on the rack, about 1 hour, before slicing.
Notes
For best results, use very ripe bananas with brown spots. Toast walnuts to enhance flavor and crunch. Let the bread cool completely before slicing for cleaner cuts and better texture. The flavor improves overnight. To check baking soda freshness, drop a little into vinegar—it should fizz vigorously.
Nutrition
- Serving Size: 1 slice
- Calories: 300
- Sugar: 20
- Sodium: 200
- Fat: 13
- Saturated Fat: 5
- Carbohydrates: 40
- Fiber: 2.5
- Protein: 4.5
Keywords: banana bread, walnut banana bread, easy banana bread, homemade banana bread, classic banana bread, moist banana bread, overripe bananas, quick bread



