This was supposed to be a batch of savory, salty, “grown-up” pumpkin seeds. You know the kind—tossed in olive oil, dusted with smoked paprika and garlic powder, the sort of snack you nibble on with a glass of wine while the kids are finally asleep. I had the pumpkin carved, the seeds rinsed and dried, the air fryer preheated. Then my four-year-old wandered into the kitchen, still wearing his Batman pajamas at four in the afternoon, and asked if he could “help” with the seasoning.
I handed him the smoked paprika, thinking, what’s the worst that could happen? He grabbed the cinnamon instead. Then the maple syrup. Then, before I could stop him, a generous pour of vanilla extract that was meant for pancakes. I stood there, staring at the sticky, sweet-smelling mess in the bowl, already mentally preparing my apology to my husband for ruining a perfectly good batch of post-Halloween snacks. The seeds were coated in what looked like a dessert disaster, and I was this close to tossing the whole thing in the trash.
But I figured, hey, the air fryer’s already hot. Let’s see what happens. I mean, honestly, what did we have to lose? I dumped them in, set the timer, and walked away to scrub pumpkin guts off the counter. Fifteen minutes later, the kitchen smelled like a fall candle factory had exploded. The seeds came out golden, crunchy, and absolutely nothing like the savory snack I had planned. They were better. Way better. My son ate half the batch before I could even get a photo, and my husband, who claims he “doesn’t do sweet snacks,” finished the rest while pretending to watch the game. That’s when I knew this accidental recipe was a keeper.
Why You Will Love This Recipe
Let me tell you, I have made a lot of pumpkin seeds over the years. Salty ones, spicy ones, even a disastrous batch with curry powder that my family still brings up at Thanksgiving. But this version? This is the one that gets requested every single time we carve a pumpkin. And the best part? You do not need to wait for Halloween to make them. You can buy raw pumpkin seeds at the grocery store year-round, which means this snack is always within reach.
Here is why this recipe works for busy families:
- Crazy Fast: The air fryer does its magic in under 15 minutes. No babysitting the oven, no stirring every five minutes. You set it and forget it.
- Pantry Ingredients: You probably already have maple syrup, cinnamon, and a little salt in your kitchen. No special trips to the store for fancy ingredients.
- Kid-Approved (Obviously): My kids went from “ew, what’s that?” to “can I have more?” in one bite. The sweetness tames the earthy pumpkin seed flavor, making it a total crowd-pleaser.
- Budget-Friendly: A bag of raw pumpkin seeds costs next to nothing, and this recipe stretches them into a snack that feels special. Perfect for families watching their grocery bill.
- Crunchy and Addictive: The texture is spot on—crispy on the outside, with a little snap when you bite down. No chewy or burnt bits here.
What makes this recipe different from all the other pumpkin seed recipes out there? It is the balance. Most sweet versions are either too sugary or too bland. This one uses just enough maple syrup to coat the seeds without making them sticky, and the cinnamon adds warmth without overpowering. Plus, the air fryer method gives you that perfect crunch without the risk of burning that comes with an oven. I have tested this recipe at least a dozen times, tweaking the temperature and the syrup ratio, and this is the version that works every single time. It is the kind of snack that makes you close your eyes after the first bite, honestly. Comfort food, but healthier and faster.
What Ingredients You Will Need
This recipe uses simple, wholesome ingredients to deliver that sweet, crunchy, addictive flavor without any fuss. You likely have most of these in your pantry right now, which is exactly how I like to cook—especially when the kids are hungry and patience is running thin.
- Raw pumpkin seeds (pepitas), 1 cup (120g): You can use seeds straight from a pumpkin, but make sure you rinse and dry them thoroughly first. Store-bought raw pepitas work great too and save you the cleanup. Look for seeds that are greenish and flat, not roasted or salted.
- Maple syrup, 2 tablespoons (30ml): Pure maple syrup is best here. The flavor is richer and less artificial than pancake syrup. If you only have the fake stuff, it will still work, but the taste won’t be as deep. I recommend Grade A dark amber for a more robust maple flavor.
- Cinnamon, 1 teaspoon: This is where the warmth comes from. I use Ceylon cinnamon when I have it, but regular cassia cinnamon is perfectly fine. Fresh cinnamon matters here—if your jar has been sitting in the cabinet for two years, it is time to replace it.
- Coconut oil (or melted butter), 1 tablespoon (15ml): This helps the seeds crisp up and keeps the maple syrup from making them too sticky. Coconut oil adds a subtle sweetness, while butter gives a richer, toastier flavor. Both work beautifully.
- Salt, ½ teaspoon: Do not skip this. Salt balances the sweetness and brings out the nutty flavor of the seeds. I use fine sea salt, but kosher salt works too—just adjust the amount slightly.
- Vanilla extract, ½ teaspoon (optional but recommended): This was my son’s accidental addition, and honestly, it makes the seeds taste like a warm fall dessert. It rounds out the maple and cinnamon beautifully. If you have it, use it.
- Brown sugar, 1 tablespoon (optional for extra crunch): If you want a slightly crispier, caramelized coating, add a tablespoon of brown sugar to the mix. It creates little crunchy clusters on the seeds. Totally optional, but highly recommended if you like texture.
Ingredient Tips from My Kitchen: If you are using fresh pumpkin seeds, do not skip the step of boiling them in salted water for 10 minutes before drying. It sounds fussy, but it helps the shells crisp up rather than turning chewy. I learned this the hard way after a batch of sad, rubbery seeds a few years ago. Also, if your maple syrup is thick and cold, warm it up for a few seconds in the microwave so it mixes evenly with the oil. Cold syrup just clumps up and refuses to coat anything properly.
Equipment Needed
You do not need a lot of fancy tools for this recipe, which is exactly how I like it. Here is what you will need:
- Air fryer: Any model works. I have a standard 5.8-quart basket-style air fryer, and it handles this batch perfectly. If yours is smaller, just cook in two batches so the seeds have room to crisp evenly.
- Mixing bowl: A medium-sized bowl is all you need. Nothing fancy.
- Measuring spoons: For the maple syrup, oil, and spices. Eyeballing works for some things, but for this recipe, the ratios matter.
- Spatula or spoon: For stirring the seeds around. A silicone spatula is nice because it scrapes every bit of the coating onto the seeds.
- Paper towels or a clean kitchen towel: For drying the seeds if you are using fresh pumpkin seeds. Wet seeds do not crisp up, so this step is non-negotiable.
- Parchment paper (optional): Some air fryer baskets are sticky, and the maple syrup can make a mess. A parchment liner makes cleanup a breeze. Just make sure it is weighed down by the seeds so it does not fly around.
If you do not have an air fryer, you can absolutely make these in the oven. Spread the coated seeds on a baking sheet lined with parchment paper and bake at 325°F (163°C) for 20-25 minutes, stirring halfway through. The texture will be slightly different—a bit less crunchy—but still delicious. I have done it both ways, and honestly, the air fryer wins for speed and texture, but the oven is a solid backup.
Preparation Method
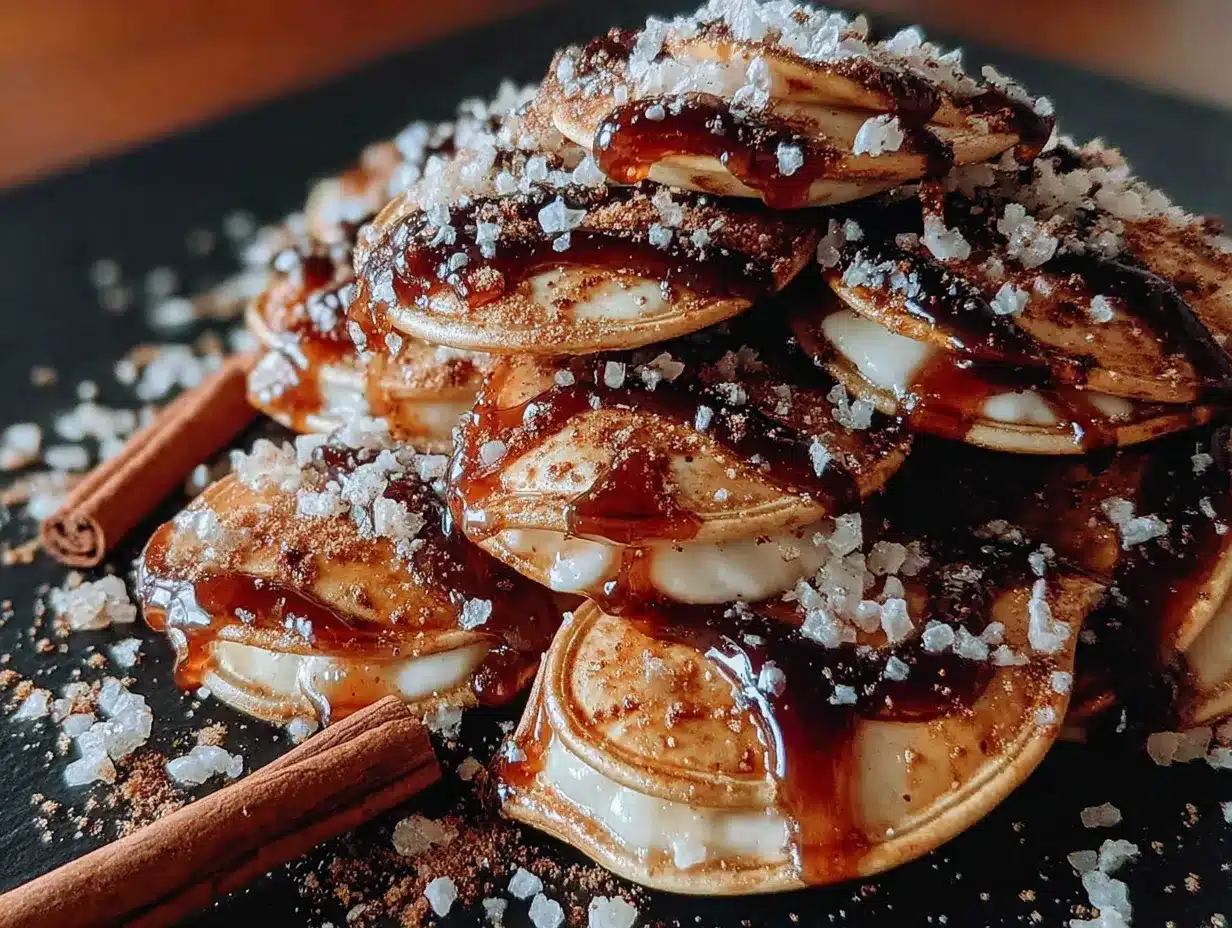
Alright, let us get to the good part. Here is how to make these little crunchy, sweet, addictive seeds. I have tested this method more times than I care to admit, so trust me on the details.
- Prep the seeds: If you are using fresh pumpkin seeds, rinse them thoroughly in a colander to remove any stringy pumpkin guts. Then, bring a small pot of salted water to a boil and add the seeds. Boil for 10 minutes. This step softens the shells so they crisp up beautifully in the air fryer. Drain the seeds and pat them completely dry with a clean kitchen towel or paper towels. Any leftover moisture will steam the seeds instead of crisping them, so take your time here. If you are using store-bought raw pepitas, skip the boiling step and just give them a quick rinse and dry.
- Mix the coating: In a medium mixing bowl, combine the maple syrup, melted coconut oil (or butter), cinnamon, salt, vanilla extract, and brown sugar if using. Whisk until smooth. The mixture should look like a thin, glossy syrup. If it seems too thick, add a tiny splash of warm water—just a teaspoon—to loosen it up.
- Coat the seeds: Add the dried pumpkin seeds to the bowl with the syrup mixture. Use a spatula to stir until every seed is evenly coated. Do not rush this step. You want each seed to have a thin, even layer of the sweet coating. If you see clumps of syrup, break them up with your fingers or the spatula.
- Preheat the air fryer: Set your air fryer to 300°F (150°C) and let it preheat for 3 minutes. This ensures the seeds start cooking immediately, which helps them crisp up faster.
- Arrange the seeds: Spread the coated seeds in a single layer in the air fryer basket. Do not overcrowd them. If they are piled on top of each other, they will steam rather than crisp. Work in batches if needed. I usually do two batches for 1 cup of seeds.
- Cook the seeds: Air fry at 300°F (150°C) for 10 minutes. After 10 minutes, open the basket and shake it gently to redistribute the seeds. Cook for another 3-5 minutes, watching closely. The seeds are done when they are golden brown and smell deeply toasty. They will still feel slightly soft when hot, but they will crisp up as they cool. Do not overcook them—burnt maple syrup tastes bitter and acrid.
- Cool completely: Transfer the seeds to a plate or a baking sheet in a single layer. Let them cool for at least 15 minutes without touching them. This is the hardest part, honestly, because the kitchen smells amazing. But the crunch happens during cooling, so be patient. If you eat them warm, they will be chewy, not crispy.
- Break apart any clumps: Once cooled, use your fingers to break apart any seeds that stuck together during cooking. They should separate easily into individual crunchy seeds.
My Personal Efficiency Tip: While the seeds are boiling, I set up my air fryer and measure out all the other ingredients. That way, by the time the seeds are dry, everything is ready to go. It saves about 10 minutes of scrambling around the kitchen, which is precious when you have kids asking for snacks every 30 seconds.
Cooking Tips & Techniques
I have made plenty of mistakes with pumpkin seeds over the years, so you do not have to. Here are the things I wish someone had told me when I started:
Do not skip the drying step. I know it feels tedious, but wet seeds are the enemy of crunch. I once rushed through drying because my toddler was having a meltdown, and the seeds came out chewy and sad. Pat them dry like your life depends on it. Lay them out on a towel and let them air dry for an extra 10 minutes if you have the time.
Watch the temperature. Air fryers run hot, and maple syrup burns fast. I learned this the hard way when I tried cooking these at 350°F (177°C) because I was in a hurry. The seeds were black on the outside and still soft on the inside. Stick to 300°F (150°C). It takes a few extra minutes, but the results are worth it.
Shake the basket halfway through. This is not optional. The seeds on the edges cook faster than the ones in the middle. A quick shake redistributes them and ensures even cooking. I set a timer on my phone so I do not forget, because once I get distracted by laundry, the seeds are toast—literally.
Let them cool completely. I cannot stress this enough. The seeds will feel soft and almost oily when they come out of the air fryer. Do not panic. That is normal. As they cool, the coating hardens and the seeds become crunchy. If you eat them warm, you will think you failed. Wait the full 15 minutes, then taste one. You will see what I mean.
Double the batch if you can. These disappear fast. I learned to make a double batch because the first one never makes it to the storage container. My kids eat them straight off the cooling tray, and honestly, I do not blame them. They are that good.
Variations & Adaptations
One of the best things about this recipe is how easy it is to tweak. Here are some variations I have tried and loved:
Spicy Maple Pumpkin Seeds: Add ¼ teaspoon of cayenne pepper or chili powder to the syrup mixture. The heat sneaks up on you after the sweetness, and it is absolutely addictive. My husband loves this version, though the kids are not fans. It is a nice grown-up option for when you want something with a kick.
Pumpkin Pie Spice Version: Swap the cinnamon for 1 teaspoon of pumpkin pie spice. It adds that classic fall flavor with notes of nutmeg, ginger, and cloves. This is my go-to for Thanksgiving snacking. It tastes like pie, but without all the work.
Chocolate Drizzle: Once the seeds are completely cool, melt a few tablespoons of dark chocolate chips and drizzle it over the seeds. Let the chocolate set before breaking the seeds apart. This turns them into a dessert that feels fancy but takes almost no effort. I did this for a holiday party last year, and people asked for the recipe all night.
Savory-Sweet Hybrid: Reduce the maple syrup to 1 tablespoon and add ½ teaspoon of smoked paprika and a pinch of garlic powder. The result is a snack that hits both sweet and savory notes. It is weirdly good, and it pairs perfectly with a cold beer.
Nut-Free Note: This recipe is naturally nut-free, which makes it a great option for school snacks or lunchboxes. Just make sure your cinnamon and maple syrup are processed in a nut-free facility if allergies are a concern.
Serving & Storage Suggestions
These seeds are incredibly versatile, and I love finding new ways to use them. Here is how I serve and store them:
Serving Ideas: Eat them straight out of the bowl as a snack—this is how my family consumes 90% of any batch. They are also fantastic sprinkled over a bowl of vanilla ice cream or yogurt for a crunchy topping. I have even crushed them up and used them as a crust for baked chicken or pork chops. The sweet and savory combo is unexpected and delicious. For a fun lunchbox treat, pack a small container of these seeds alongside apple slices and cheese sticks. My kids go crazy for this combination.
Storage Instructions: Store the cooled seeds in an airtight container at room temperature. They will stay crunchy for up to two weeks—if they last that long. Do not refrigerate them, as the moisture in the fridge will make them soft. If you live in a humid climate (I feel your pain), add a silica gel packet to the container to absorb excess moisture. It sounds weird, but it works.
Freezing: You can freeze these seeds for up to three months. Place them in a freezer-safe bag or container, squeeze out as much air as possible, and freeze. To refresh them, spread the frozen seeds on a baking sheet and warm them in a 300°F (150°C) oven for 5 minutes. They will crisp right back up.
Flavor Development: Honestly, these seeds taste even better the next day. The flavors meld together overnight, and the crunch somehow gets even better. I have no idea why this happens, but I have tested it multiple times. So if you can resist eating them all on day one, you are in for a treat on day two.
Nutritional Information & Benefits
I am not a nutritionist, but I have done enough research to know that pumpkin seeds are a powerhouse snack. Here is a rough estimate per serving (about ¼ cup of finished seeds):
- Calories: 180-200
- Protein: 8g
- Fat: 14g (mostly healthy unsaturated fats)
- Carbohydrates: 10g
- Fiber: 2g
- Sugar: 6g (from maple syrup)
Health Benefits: Pumpkin seeds are packed with magnesium, zinc, and iron. Magnesium is great for sleep and muscle recovery, zinc supports the immune system, and iron helps with energy levels. For kids, these are all important nutrients that can be tricky to get into their diets. The maple syrup adds a little sugar, but it is a far cry from the processed junk in most store-bought snack bars.
Dietary Considerations: This recipe is naturally gluten-free, dairy-free (if you use coconut oil instead of butter), and nut-free. It is also vegetarian and can be made vegan by sticking with coconut oil. The only potential allergen is the coconut oil, but you can swap it for avocado oil if needed.
From my personal perspective, I feel good about giving these to my kids because I know exactly what is in them. No preservatives, no artificial flavors, just real ingredients that happen to taste amazing. That is a win in my book.
Conclusion
So there you have it—a recipe that started as a complete kitchen disaster and turned into one of my family’s most-requested snacks. These air fryer maple cinnamon pumpkin seeds are proof that sometimes the best things happen when you let go of the plan and let a four-year-old grab the cinnamon. They are quick, affordable, and so easy that you will find yourself making them even when there is no pumpkin in sight.
I honestly love this recipe because it feels like a little secret weapon in my snack rotation. When my kids are cranky and the afternoon slump hits, I can whip up a batch in under 20 minutes and watch their moods turn around. It is simple, it is satisfying, and it makes the whole kitchen smell like autumn. What more could you ask for?
Now I want to hear from you. Have you ever had a happy accident in the kitchen that turned into a new favorite recipe? Or maybe you tried these seeds and added your own twist? Drop a comment below and let me know—I read every single one, and I love hearing how you make these recipes your own. And if you share a photo on Pinterest or Instagram, tag me so I can see your crunchy, golden creations. Happy snacking, friends!
Frequently Asked Questions
Can I use salted pumpkin seeds for this recipe?
You can, but I recommend using raw unsalted seeds. The salt content in pre-salted seeds can make the final snack too salty, especially since we are adding salt to the coating. If salted seeds are all you have, reduce or skip the added salt in the recipe.
Why are my pumpkin seeds chewy instead of crunchy?
This usually happens for one of three reasons: the seeds were not dried thoroughly before cooking, the air fryer was overcrowded, or they did not cool completely before eating. Make sure to pat the seeds dry, spread them in a single layer, and let them cool for at least 15 minutes after cooking.
Can I make this recipe without an air fryer?
Absolutely. Spread the coated seeds on a parchment-lined baking sheet and bake at 325°F (163°C) for 20-25 minutes, stirring halfway through. The texture will be slightly different—a bit less crunchy—but still delicious. Keep a close eye on them toward the end to prevent burning.
How do I prevent the seeds from sticking to the air fryer basket?
Use a parchment paper liner designed for air fryers, or lightly spray the basket with cooking oil before adding the seeds. The maple syrup can get sticky, so a liner makes cleanup much easier. Just make sure the parchment is weighed down so it does not fly around.
Can I use honey instead of maple syrup?
Yes, honey works as a substitute, but it will change the flavor slightly. Honey is sweeter and has a more floral taste, while maple syrup has that warm, woodsy note. If you use honey, reduce the amount to 1½ tablespoons to avoid overly sweet seeds. The cooking time remains the same.
Pin This Recipe!
Easy Air Fryer Maple Cinnamon Pumpkin Seeds

A happy accident turned into a family favorite! These air fryer maple cinnamon pumpkin seeds are sweet, crunchy, and incredibly addictive. Made with simple pantry ingredients, they come together in under 20 minutes for the perfect fall snack.
- Prep Time: 10 minutes
- Cook Time: 13-15 minutes
- Total Time: 25 minutes
- Yield: 4 servings 1x
- Category: Snack
- Cuisine: American
Ingredients
- 1 cup (120g) raw pumpkin seeds (pepitas)
- 2 tablespoons (30ml) pure maple syrup
- 1 teaspoon cinnamon
- 1 tablespoon (15ml) coconut oil or melted butter
- ½ teaspoon fine sea salt
- ½ teaspoon vanilla extract (optional but recommended)
- 1 tablespoon brown sugar (optional for extra crunch)
Instructions
- Prep the seeds: If using fresh pumpkin seeds, rinse thoroughly and boil in salted water for 10 minutes. Drain and pat completely dry. If using store-bought raw pepitas, rinse and dry.
- Mix the coating: In a medium bowl, combine maple syrup, melted coconut oil (or butter), cinnamon, salt, vanilla extract, and brown sugar (if using). Whisk until smooth.
- Coat the seeds: Add dried pumpkin seeds to the bowl and stir until every seed is evenly coated.
- Preheat the air fryer to 300°F (150°C) for 3 minutes.
- Arrange the seeds in a single layer in the air fryer basket. Do not overcrowd; work in batches if needed.
- Air fry at 300°F (150°C) for 10 minutes. Shake the basket gently, then cook for another 3-5 minutes until golden brown and fragrant.
- Cool completely on a plate or baking sheet for at least 15 minutes. The seeds will crisp up as they cool.
- Break apart any clumps with your fingers once cooled.
Notes
Do not skip drying the seeds thoroughly—wet seeds lead to chewy results. Watch the temperature closely; maple syrup burns easily. Let seeds cool completely for maximum crunch. Seeds taste even better the next day as flavors meld.
Nutrition
- Serving Size: ¼ cup
- Calories: 180200
- Sugar: 6
- Sodium: 150
- Fat: 14
- Saturated Fat: 3
- Carbohydrates: 10
- Fiber: 2
- Protein: 8
Keywords: air fryer pumpkin seeds, maple cinnamon pumpkin seeds, easy pumpkin seeds, fall snack, healthy snack, kid-friendly snack



