I was standing in the checkout line at the grocery store last October, my cart overflowing with candy corn and bags of apples, when the woman behind me leaned over and pointed at my kids. They were, let me tell you, at peak Halloween insanity—bouncing off the cart, arguing about which plastic pumpkin bucket was better. She just smiled and said, “You know what saves my sanity every year? Dirt cups.” I laughed, thinking she meant actual gardening. But she went on, explaining how she makes these little pudding cups with crushed cookies and gummy worms for her grandkids, and how they go absolutely quiet for a solid fifteen minutes while eating them. Honestly, that sold me right there.
I scribbled her method on the back of a receipt, and that night, I made my first batch of Halloween dirt cups. They were a mess—the pudding was too runny, the cookies turned into a weird sludge, and I forgot to chill them long enough. But my kids? They didn’t care. They sat at the kitchen counter, spoons in hand, grinning at those little cups of “dirt” with gummy worms poking out. That moment, right there, became a tradition. And maybe you’ve been there too—scrambling for a Halloween treat that doesn’t require a pastry degree or a second mortgage on your house. These dirt cups are that recipe.
Over the years, I’ve tweaked and tested this recipe more times than I can count. I’ve learned the hard way that patience with chilling time is non-negotiable, and that crushed Oreos beat chocolate graham crackers every single time. The result is a dessert that feels like a jackpot for kids and a total win for parents. It’s silly, it’s spooky, and it’s ridiculously easy. Let me show you how to make these dirt cups your own Halloween hero.
Why You’ll Love This Recipe
Listen, I have tested a lot of Halloween desserts over the years. Some of them were Pinterest fails of epic proportions. But this one? It has earned a permanent spot in our October rotation. Here is why I keep coming back to it, and why I think you will too.
- Quick & Easy: This recipe comes together in about 20 minutes of active time. The hardest part is waiting for the pudding to chill. Perfect for those after-school Halloween party panic moments.
- Simple Ingredients: You probably have most of these in your pantry right now. Instant pudding mix, cold milk, Cool Whip, and Oreos. No fancy trips to a specialty baking store required.
- Perfect for Halloween Parties: These little cups are the star of any classroom celebration, neighborhood gathering, or spooky movie night. They look impressive without any real effort.
- Crowd-Pleaser: I have yet to meet a kid who turns down a cup of chocolate pudding with crushed cookies and gummy worms. It is basically kid kryptonite. Adults sneak them too, trust me.
- Unbelievably Delicious: The combination of silky chocolate pudding, crunchy Oreo “dirt,” and chewy gummy worms is next-level comfort food. It hits every texture note your mouth craves.
What makes this recipe different from the dozens of other dirt cup recipes out there? It is the technique. I use a specific ratio of milk to pudding mix that gives you a perfectly thick, almost mousse-like texture—not soupy, not gluey. And I have a little trick for crushing the Oreos that gives you the perfect mix of fine “dirt” and chunky “rocks.” It is not just another version. It is the best version.
This dessert is the kind that makes you close your eyes after the first bite. It is silly and nostalgic and somehow still deeply satisfying. Perfect for making little faces light up without making you sweat in the kitchen.
What Ingredients You Will Need
This recipe uses simple, everyday ingredients to create something that feels like a Halloween miracle. Most of these are pantry staples, which is exactly what you want when the sugar rush is calling. Here is everything you need, with a few notes from my own kitchen trials.
- Instant Chocolate Pudding Mix (two 3.9-ounce boxes): This is your base. I have tried cook-and-serve pudding, and honestly, it is not worth the extra time or the risk of lumps. Instant is the way to go. I personally prefer Jell-O brand for the smoothest texture, but store brands work fine too.
- Cold Whole Milk (4 cups): Whole milk gives you the richest, creamiest pudding. I have made this with 2% milk, and it works, but the texture is slightly thinner. Avoid skim milk—it gets watery. For a dairy-free version, unsweetened oat milk is my go-to because it has a similar thickness.
- Frozen Whipped Topping (one 8-ounce tub, thawed): Cool Whip is the classic choice here. It makes the pudding lighter and fluffier, almost like a mousse. You can use homemade whipped cream if you prefer, but it deflates faster, so the texture changes after a day in the fridge.
- Oreo Cookies (one 14.3-ounce package): This is non-negotiable for me. The chocolate cookie with the cream filling crumbles into the perfect “dirt” texture. I have tried chocolate graham crackers and chocolate wafer cookies, and they just do not hit the same. The cream filling helps the crumbs stick together just enough to look like real soil.
- Gummy Worms (one 5-ounce bag): These are the star of the show for the kids. Look for the sour or regular kind—both work great. I like to buy the extra-long ones because they look hilarious sticking out of the cups. If you have a peanut allergy concern in your house, check the label, as some gummy candies are processed in facilities that handle nuts.
- Optional Garnishes: You can get creative here. I sometimes add a few candy pumpkins on top for extra color, or a sprinkle of orange and black sprinkles. A little plastic spider ring on the side of the cup is always a hit with my kids.
That is it. Seven ingredients, most of which you probably already have. The beauty of this recipe is its simplicity. You do not need to hunt down any weird Halloween specialty items. Just good old-fashioned grocery store staples.
Equipment Needed
You do not need a fancy kitchen to make these dirt cups. In fact, the simpler, the better. Here is what you will need.
- Large Mixing Bowl: For whisking the pudding. A standard 4-quart bowl works perfectly.
- Whisk: A good whisk helps get the pudding smooth without lumps. A hand mixer also works if you want to speed things up.
- Measuring Cups: For the milk. A liquid measuring cup with a spout is easiest to pour.
- Small Cups or Jars (8 to 10, 6-ounce size): Clear plastic cups are traditional because you can see the layers. I use small mason jars or even repurposed yogurt cups. The visual effect is part of the fun.
- Ziploc Bag or Food Processor: For crushing the Oreos. A Ziploc bag and a rolling pin is the budget-friendly option. A food processor gives you a more consistent crumb. I have used both, and honestly, the bag method is more satisfying—great for letting kids help with some aggression.
- Rubber Spatula: For folding in the Cool Whip and scraping every last bit of pudding into the cups.
- Refrigerator: Patience is a tool here. You need at least 2 hours of chill time, so plan ahead.
That is the whole list. No stand mixer, no piping bags, no special molds. If you have a bowl and a whisk, you are ready to go.
Preparation Method
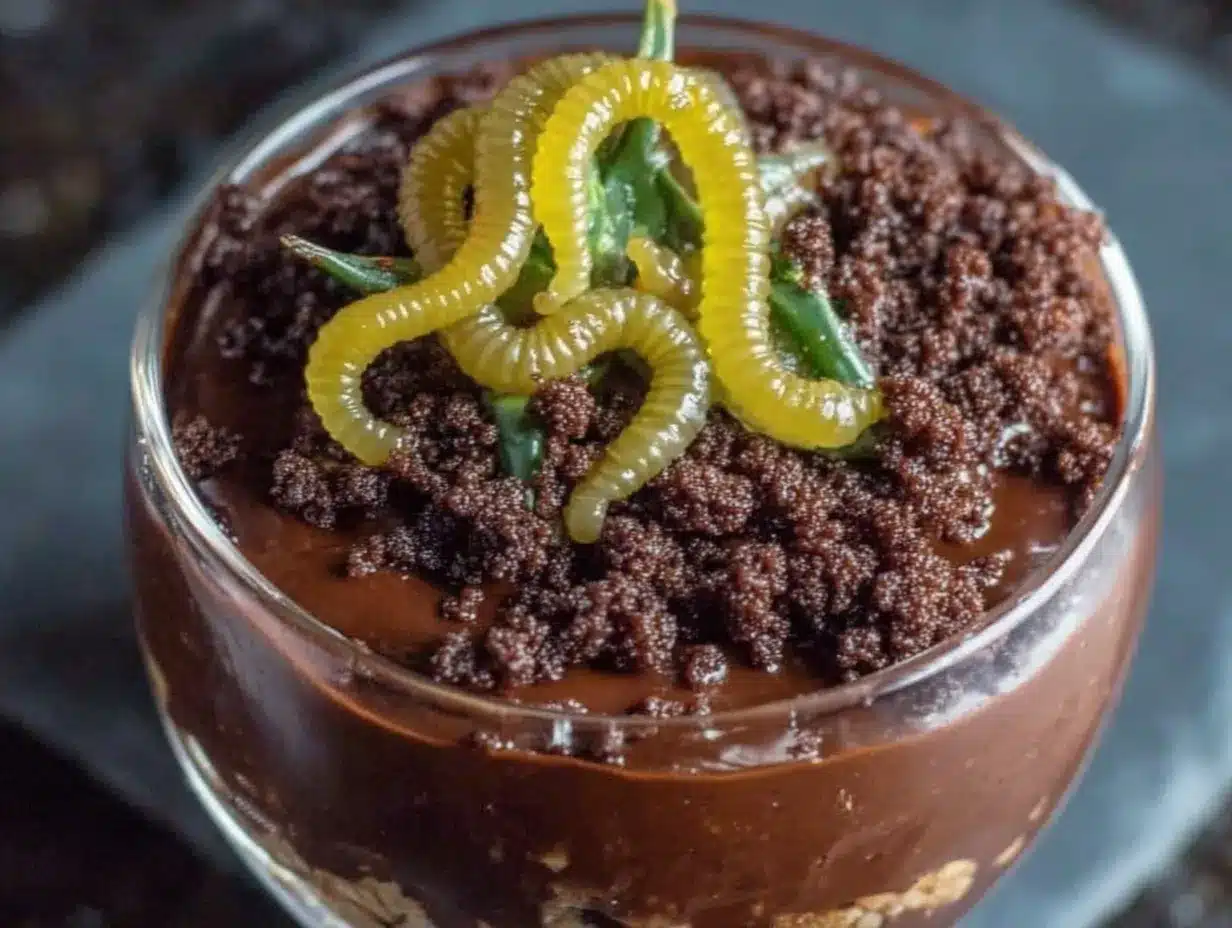
Alright, let us get our hands dirty—literally. This process is straightforward, but I have learned a few tricks along the way that make a real difference. Follow these steps, and you will have perfect dirt cups every time.
- Make the Pudding Base (5 minutes): In your large mixing bowl, whisk together the two boxes of instant chocolate pudding mix and the 4 cups of cold whole milk. Whisk vigorously for about 2 minutes until the mixture thickens slightly. It will still be thin at this point—do not worry, that is normal. Let it sit for 5 minutes to set up. Pro tip: Use the coldest milk you have. Warm milk will not thicken properly.
- Fold in the Whipped Topping (3 minutes): Take your thawed Cool Whip and give it a quick stir to loosen it up. Then, gently fold it into the pudding mixture using your rubber spatula. Fold until no white streaks remain. The mixture will become light, airy, and almost mousse-like. Do not overmix, or you will deflate all that air. You want it fluffy.
- Crush the Oreos (5 minutes): This is the fun part. Place all the Oreos (cream filling included) into a large Ziploc bag. Seal it, and then go to town with a rolling pin. I like to leave some larger chunks—about pea-sized—along with the fine crumbs. It gives the “dirt” a more realistic texture. If you are using a food processor, pulse in short bursts so you do not turn everything into dust. You want a mix of textures.
- Layer the Cups (10 minutes): Take your clear cups or jars. Spoon about 2 tablespoons of the crushed Oreos into the bottom of each cup. This creates the first layer of “dirt.” Then, spoon or pipe the pudding mixture on top, filling each cup about three-quarters full. Tap the cups gently on the counter to settle the pudding and remove any air bubbles. Finally, top each cup with another generous layer of crushed Oreos, covering the pudding completely. You want it to look like a little pot of soil.
- Add the Gummy Worms (2 minutes): Here is where the magic happens. Gently poke 2 to 3 gummy worms into the top of each cup, positioning them so they look like they are wriggling out of the dirt. Some should be half-buried, some fully visible. Get creative with it. I like to have one worm dangling over the rim of the cup for maximum effect.
- Chill, Patience, Chill (2 hours minimum): This is the most important step. Place the assembled cups in the refrigerator for at least 2 hours, but overnight is even better. The chilling time allows the pudding to fully set and the Oreo crumbs to soften slightly, creating that perfect “dirt” texture. I know it is tempting to eat them right away, but trust me on this. The texture change is worth the wait.
- Garnish and Serve (2 minutes): Right before serving, you can add any extra garnishes—a candy pumpkin, a sprinkle of orange sugar, or a plastic spider on the rim. Serve them cold, straight from the fridge. Watch the kids’ faces light up.
A few sensory cues for you: When you fold in the Cool Whip, the mixture should feel light and billowy, like a cloud. When you crush the Oreos, you want to hear that satisfying crackle. And when you finally take a bite, the pudding should be silky and cold, the Oreos should have a slight crunch that gives way to softness, and the gummy worms should be chewy and bright. That is the perfect bite.
Cooking Tips & Techniques
I have made this recipe approximately forty-seven times. Some batches were glorious. Others were, well, learning experiences. Here are the lessons I learned the hard way so you do not have to.
The Biggest Mistake: Rushing the Chill Time. I cannot stress this enough. If you serve these dirt cups immediately, the pudding will be runny and the Oreos will be crunchy in a bad way. The magic happens in the fridge. The pudding sets, the flavors meld, and the Oreo crumbs absorb just a little moisture from the pudding, creating that soft, earthy texture. Two hours is the absolute minimum. Overnight is ideal. Plan ahead.
The Second Biggest Mistake: Overmixing the Pudding. Instant pudding is forgiving, but if you whisk it for too long, it can become grainy or develop a weird texture. Whisk for exactly 2 minutes, then let it sit. That is all it needs. Same goes for folding in the Cool Whip—gentle strokes, no aggressive mixing.
My Favorite Efficiency Trick: Make the pudding and crush the Oreos while the kids are at school or asleep. Then, assembly becomes a quick 10-minute activity they can help with. I let my kids layer their own cups, and the mess is totally worth the joy on their faces. Just be prepared for some gummy worm theft.
How to Get Clean Layers: If you want that perfect Instagram-worthy look with distinct layers of dirt and pudding, use a piping bag or a Ziploc bag with the corner snipped off to pipe the pudding into the cups. It keeps the sides clean. If you do not care about looks (and honestly, the kids do not), just spoon it in. It all tastes the same.
My Personal Failure: One year, I tried to use homemade chocolate pudding from scratch. It was a disaster. It was too thin, it never set properly, and the whole batch turned into a chocolate soup. Instant pudding is not cheating—it is the right tool for this job. Learn from my hubris.
Variations & Adaptations
This recipe is a wonderful blank canvas. Over the years, I have tried several variations, and some of them have become new favorites. Here are a few ways to make it your own.
Dietary Adaptations: Need a gluten-free version? Use gluten-free chocolate sandwich cookies. There are several brands on the market now that taste remarkably similar to Oreos. For a dairy-free version, use a plant-based milk like oat or soy, and swap the Cool Whip for a dairy-free whipped topping. The texture will be slightly different, but still delicious. I have made this for a friend’s dairy-free kid, and she devoured it.
Seasonal Twists: This recipe is not just for Halloween. At Christmas, use crushed peppermint Oreos and add a candy cane sticking out. For Easter, swap the gummy worms for gummy bunnies and use pastel-colored sprinkles. In the summer, add a layer of fresh berries between the pudding and the Oreos for a fruity pop. The basic formula—pudding, cookie crumbs, fun gummies—works for any holiday.
Flavor Variations: Chocolate pudding is classic, but you can use vanilla, butterscotch, or even banana pudding for a different flavor profile. I once made a batch with white chocolate pudding and crushed golden Oreos, and topped it with gummy spiders. It looked like a sandy Halloween scene. My kids called it “mummy dirt.”
Personal Variation I Love: I sometimes add a layer of chocolate mousse in the middle instead of pudding. It is richer and feels more decadent. To make it, I just fold melted dark chocolate into the pudding mixture before layering. It is a small change, but it takes the dessert from kid-friendly to adult-approved in one bite.
Serving & Storage Suggestions
These dirt cups are best served cold, straight from the refrigerator. The contrast between the cold, creamy pudding and the slightly softened Oreo crumbs is the whole point. I like to serve them in their clear cups so everyone can see the layers. It is half the fun.
Presentation Ideas: For a Halloween party, arrange the cups on a large platter and scatter a few extra gummy worms and candy eyeballs around the base. You can also add a small plastic shovel or a spade for scooping—kids find this hilarious. For a more grown-up presentation, serve them in small glass tumblers with a mint leaf on top. It sounds silly, but it works.
What to Serve With Them: These dirt cups are rich, so I like to balance them with something light. A plate of fresh apple slices or a bowl of popcorn is a good counterpoint. For a full Halloween menu, pair them with hot dogs wrapped like mummies, or a bowl of pumpkin soup. They also go perfectly with a cup of hot apple cider.
Storage Instructions: These cups store beautifully in the refrigerator for up to 3 days. Keep them covered with plastic wrap or a lid to prevent the Oreo crumbs from drying out or absorbing fridge odors. I do not recommend freezing them—the texture of the pudding and the gummy worms will suffer.
Reheating: You do not reheat these. They are meant to be eaten cold. If you have leftovers (unlikely, but possible), just keep them chilled and eat them within a couple of days.
How Flavors Develop: Here is a secret: these dirt cups actually taste better on the second day. The flavors meld together, the Oreo crumbs soften into something almost cake-like, and the whole thing becomes more cohesive. So if you can, make them a day ahead. Your future self will thank you.
Nutritional Information & Benefits
Let us be honest: this is a treat, not a health food. But that does not mean it cannot fit into a balanced life. Here is the estimated nutritional breakdown per serving (based on 8 servings).
| Nutrient | Amount per Serving |
|---|---|
| Calories | 385 |
| Total Fat | 16g |
| Saturated Fat | 9g |
| Cholesterol | 15mg |
| Sodium | 420mg |
| Total Carbohydrates | 56g |
| Dietary Fiber | 2g |
| Sugars | 40g |
| Protein | 6g |
Health Benefits of Key Ingredients: Believe it or not, there are a few redeeming qualities. The milk provides calcium and vitamin D, which are good for bone health. The cocoa in the pudding and Oreos contains antioxidants called flavonoids. And the gummy worms? Well, they have no nutritional value, but they make kids smile, and that counts for something in my book.
Dietary Considerations: This recipe contains dairy and gluten. It can be made dairy-free and gluten-free with the substitutions mentioned in the variations section. It is not suitable for vegans in its current form, but with plant-based swaps, it can be. Always check labels for potential allergens if you are serving a crowd.
My Personal Perspective: I believe in balance. We eat vegetables and whole grains all week, and on Halloween, we eat dirt cups with gummy worms. Life is short. Let the kids have their fun. One dessert will not undo a week of healthy eating. And honestly, the joy on their faces is worth every calorie.
FAQs
Can I make these dirt cups ahead of time? Yes, absolutely. In fact, I recommend it. You can assemble them up to 2 days in advance and keep them covered in the refrigerator. The flavors actually get better with time.
Can I use sugar-free pudding mix? Yes, you can. Sugar-free instant pudding works exactly the same way. Just be aware that the texture might be slightly different—sometimes it sets a little firmer. It is a great option if you are watching sugar intake.
My pudding is too runny. What did I do wrong? This usually happens for one of two reasons: you did not let the pudding set long enough before adding the Cool Whip, or you used a milk with lower fat content. Let the pudding sit for the full 5 minutes after whisking. If it is still runny, pop it in the fridge for 10 minutes before folding in the Cool Whip.
Can I use homemade whipped cream instead of Cool Whip? Yes, but with a caveat. Homemade whipped cream is less stable than Cool Whip, so the texture will be lighter and more airy. It also deflates faster, so the cups will not hold their shape as well after a day or two. If you are serving them immediately, go for it. For make-ahead, stick with Cool Whip.
How do I keep the Oreo crumbs from getting soggy? A little sogginess is actually the goal—it mimics real dirt. But if you want a crunchier texture, add the top layer of Oreo crumbs right before serving instead of during assembly. Just keep the cups chilled and add the final “dirt” layer at the last minute.
Conclusion
These Halloween dirt cups with gummy worms are more than just a dessert. They are a tradition, a moment of joy, and a reminder that the best things in life are often the simplest. I have made them for classroom parties, neighborhood gatherings, and quiet nights at home with my own kids, and they never fail to bring smiles. There is something magical about watching a child’s eyes widen when they see gummy worms wriggling out of a cup of “dirt.” It is pure, uncomplicated happiness.
I encourage you to make this recipe your own. Swap the gummy worms for gummy spiders. Use vanilla pudding. Add a layer of crushed candy corn. The formula is forgiving, and the results are always delicious. And if your kids end up with chocolate smeared across their faces and crumbs in their hair, well, that is just part of the Halloween magic.
I would love to hear how your dirt cups turn out. Drop a comment below and tell me about your favorite Halloween traditions, or share a photo of your spooky creations. Do your kids love gummy worms as much as mine do? Let me know. And until next time, happy Halloween cooking. May your pudding be creamy and your dirt be delicious.
Pin This Recipe!
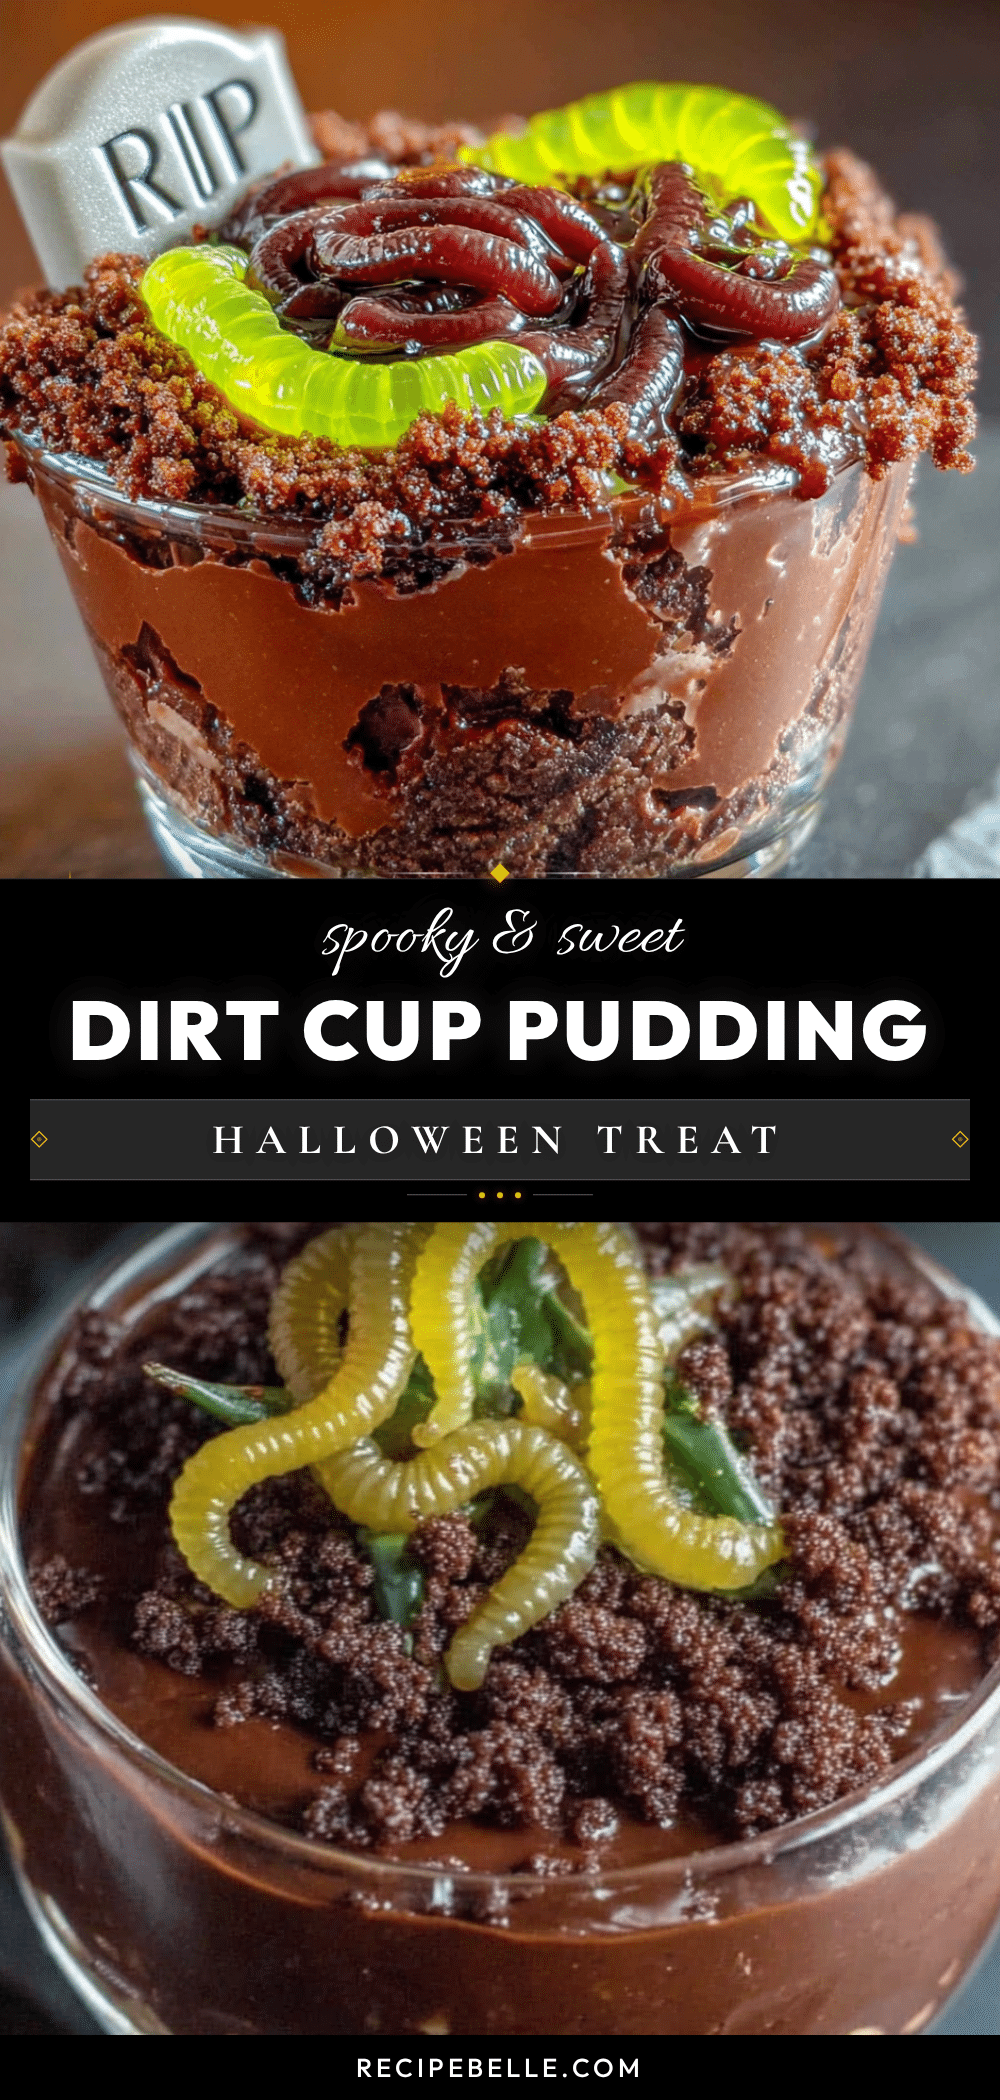
Easy Halloween Dirt Cups with Gummy Worms
These no-bake Halloween dirt cups feature layers of creamy chocolate pudding, crushed Oreo ‘dirt,’ and gummy worms peeking out. They’re quick, easy, and a guaranteed hit at any spooky celebration.
- Prep Time: 20 minutes
- Cook Time: 0 minutes
- Total Time: 2 hours 20 minutes (includes chilling)
- Yield: 8 servings 1x
- Category: Dessert
- Cuisine: American
Ingredients
- 2 (3.9-ounce) boxes instant chocolate pudding mix
- 4 cups cold whole milk
- 1 (8-ounce) tub frozen whipped topping (thawed)
- 1 (14.3-ounce) package Oreo cookies
- 1 (5-ounce) bag gummy worms
- Optional: candy pumpkins, orange and black sprinkles, plastic spider rings for garnish
Instructions
- In a large mixing bowl, whisk together the pudding mix and cold milk for 2 minutes until slightly thickened. Let sit for 5 minutes to set.
- Gently fold the thawed whipped topping into the pudding until no white streaks remain. The mixture should be light and fluffy.
- Place Oreos in a large Ziploc bag and crush with a rolling pin until you have a mix of fine crumbs and pea-sized chunks. Alternatively, pulse in a food processor.
- Spoon about 2 tablespoons of crushed Oreos into the bottom of each clear cup or jar.
- Spoon or pipe the pudding mixture on top, filling each cup about three-quarters full. Tap gently to settle.
- Top each cup with another generous layer of crushed Oreos, covering the pudding completely.
- Gently poke 2–3 gummy worms into the top of each cup so they appear to be wriggling out of the dirt.
- Refrigerate for at least 2 hours, or overnight, to allow the pudding to set and the Oreo crumbs to soften.
- Garnish with optional candy pumpkins, sprinkles, or plastic spiders just before serving. Serve cold.
Notes
For best results, use cold whole milk and let the pudding set fully before folding in the whipped topping. Chilling overnight yields the best texture. For a dairy-free version, use plant-based milk and dairy-free whipped topping. For gluten-free, use gluten-free chocolate sandwich cookies.
Nutrition
- Serving Size: 1 cup
- Calories: 385
- Sugar: 40
- Sodium: 420
- Fat: 16
- Saturated Fat: 9
- Carbohydrates: 56
- Fiber: 2
- Protein: 6
Keywords: Halloween dirt cups, gummy worms, chocolate pudding, Oreo dirt, no-bake dessert, easy Halloween treat, kids dessert



